I have an infinite love for nature, birdwatching and especially for capturing photos of birds. One morning, while watching birds at my backyard feeder, I came up with an idea… What if I can get closer to them without them knowing I am there?
Usually, bird photographers (including myself) use large telephoto lenses to take pictures of birds from a distance. But with this technique, I can photograph tiny birds with nearly any standard lens and get incredible detail in my images from just a few feet away. Best of all, the technique I use to get much closer to small birds can easily be achieved by anyone, and the materials are easily accessible.
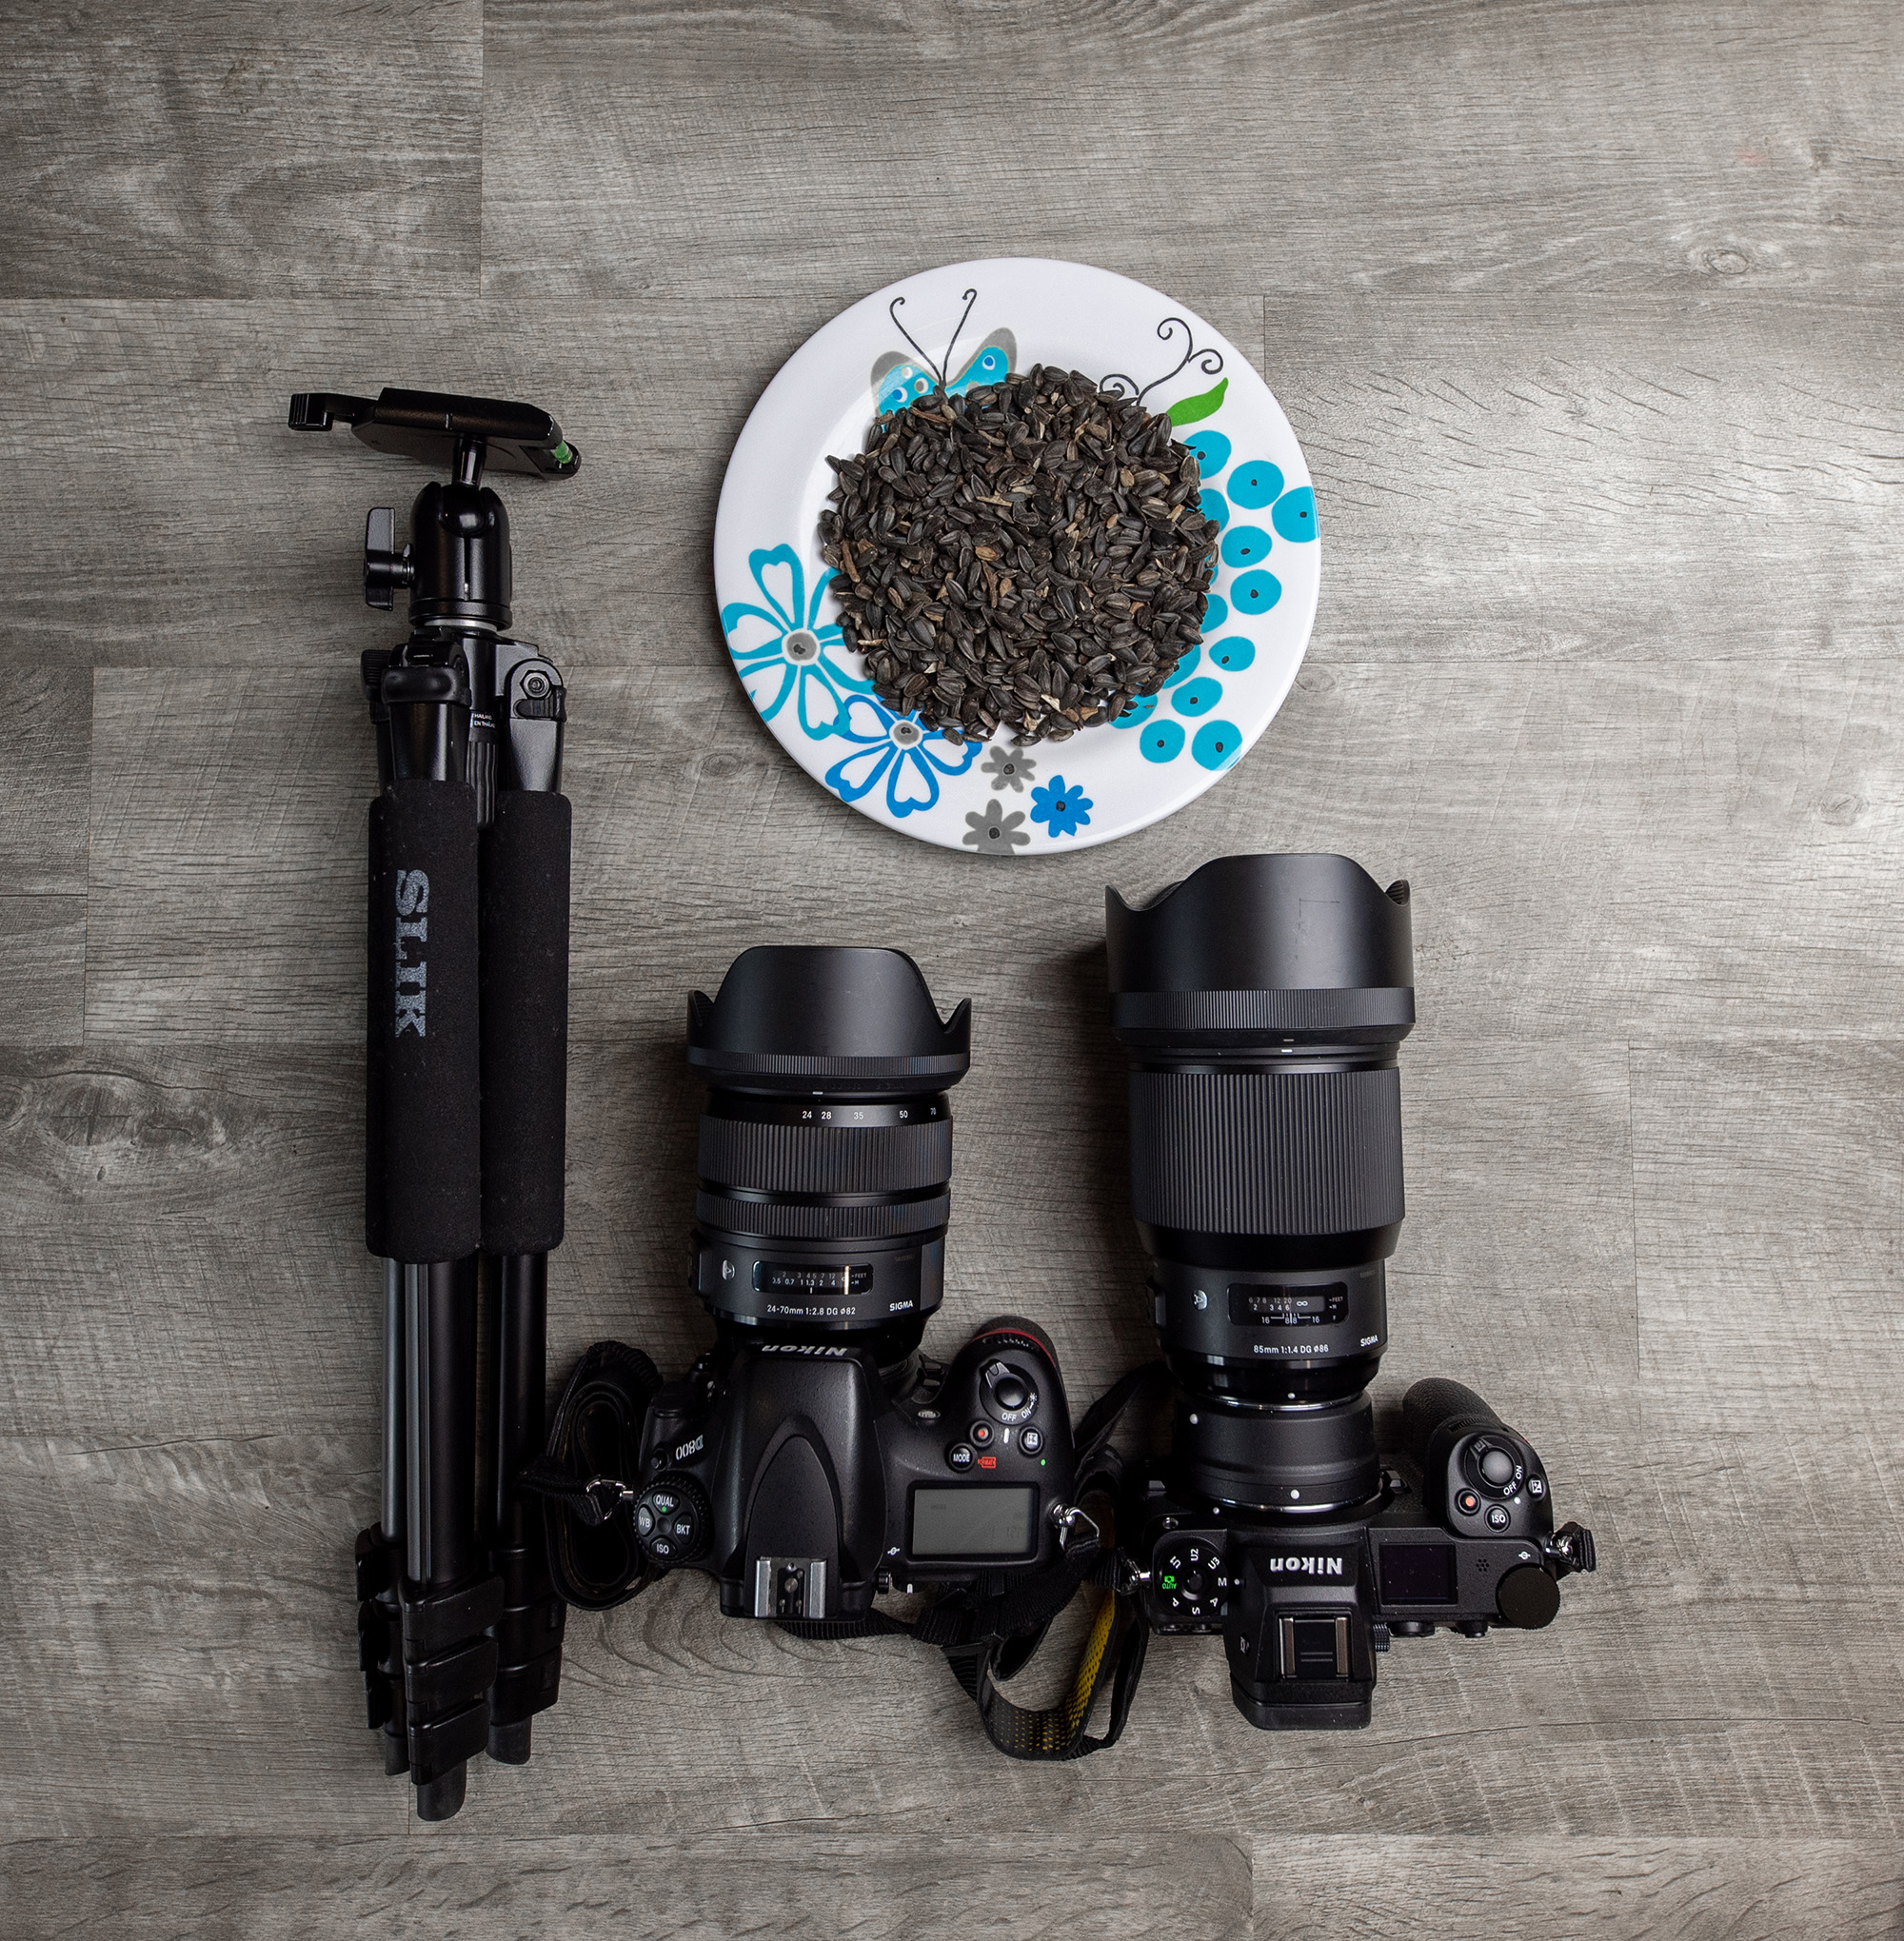
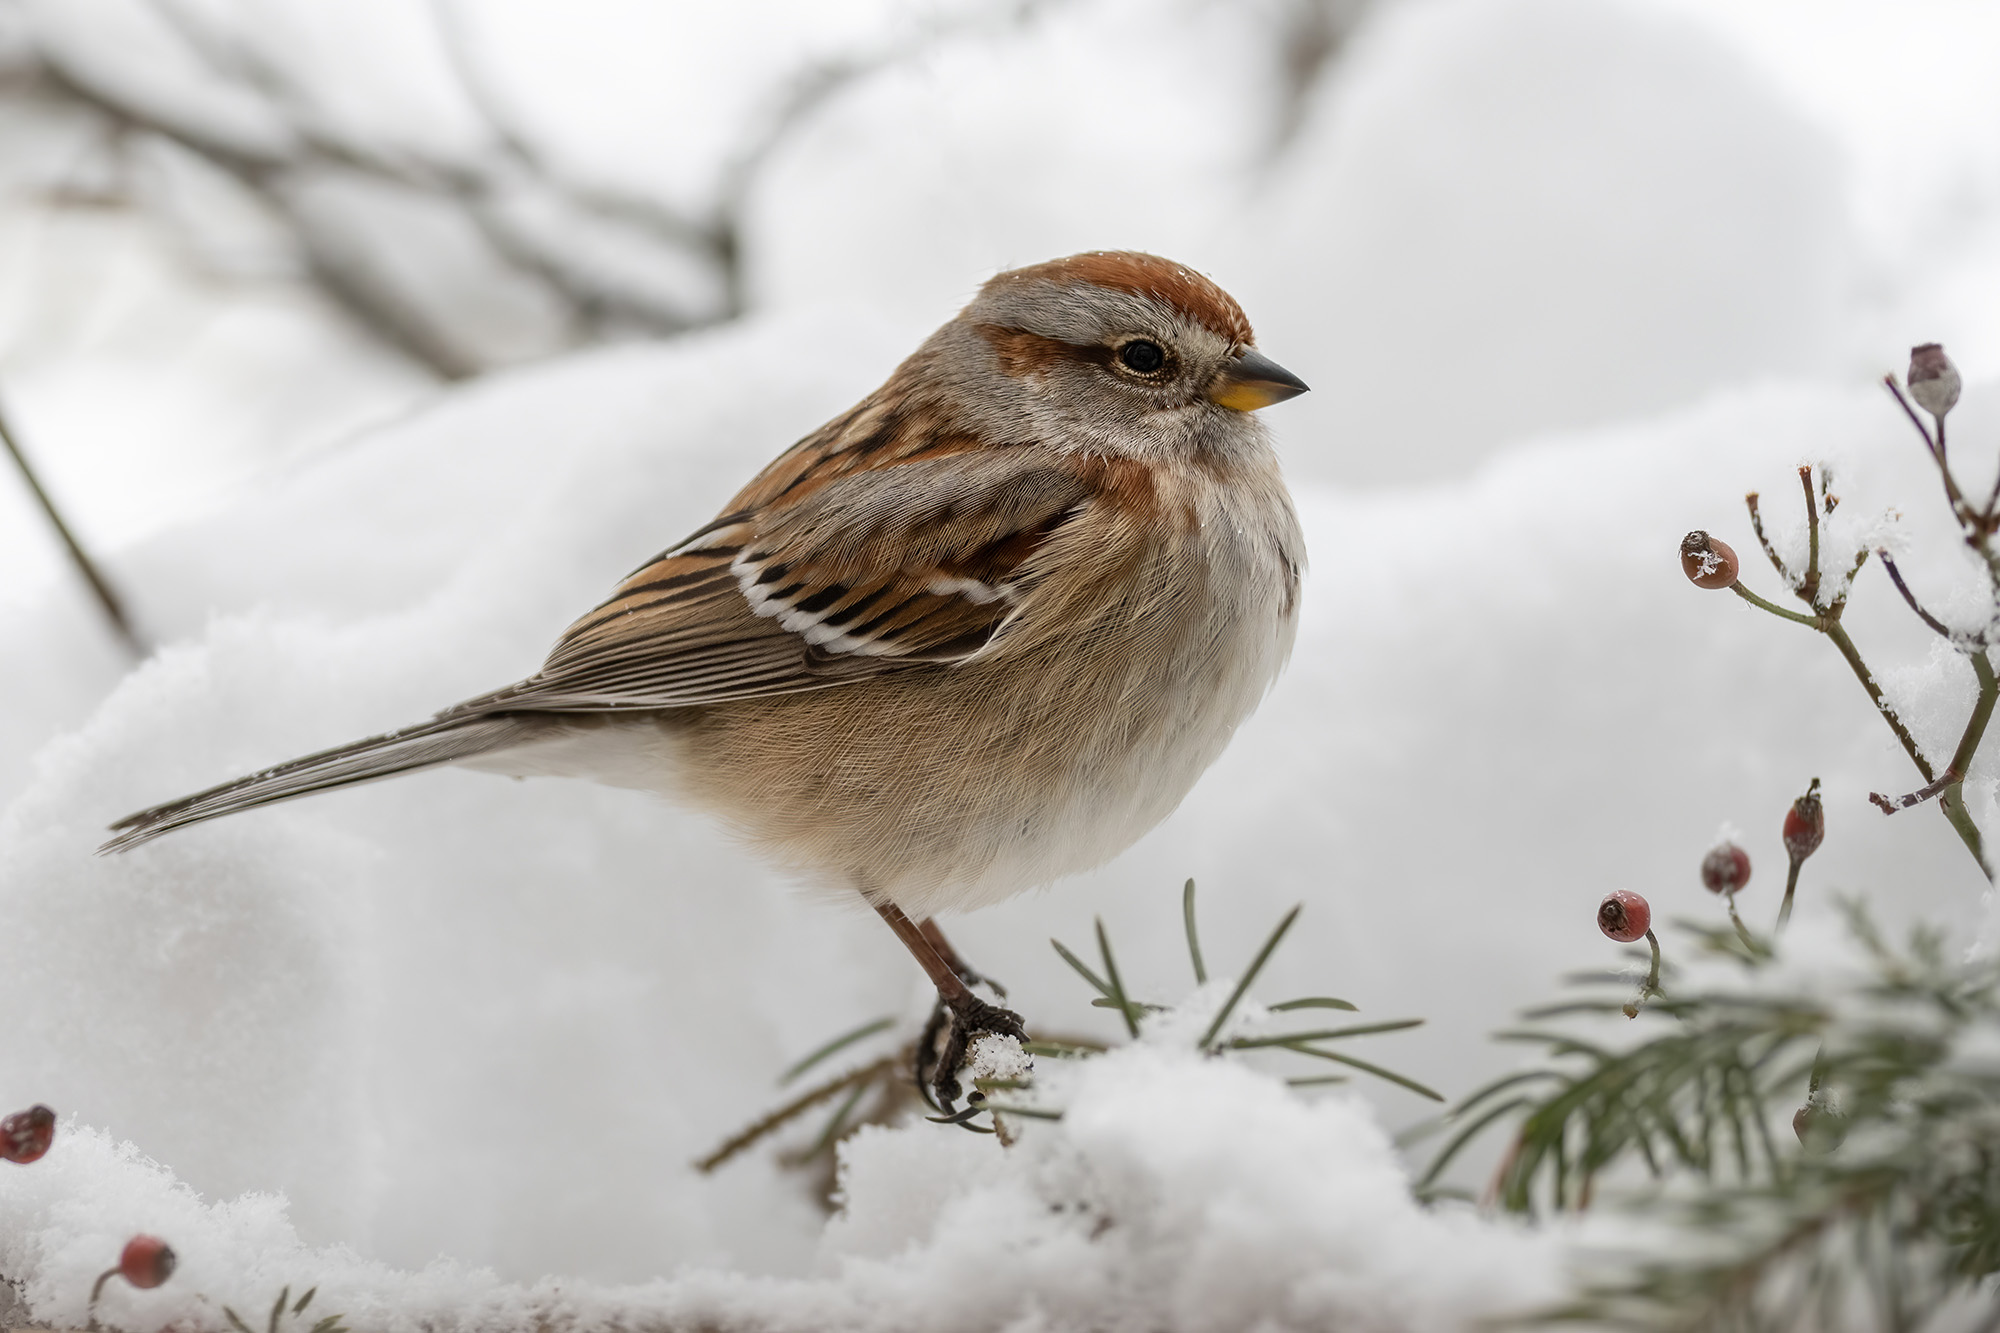
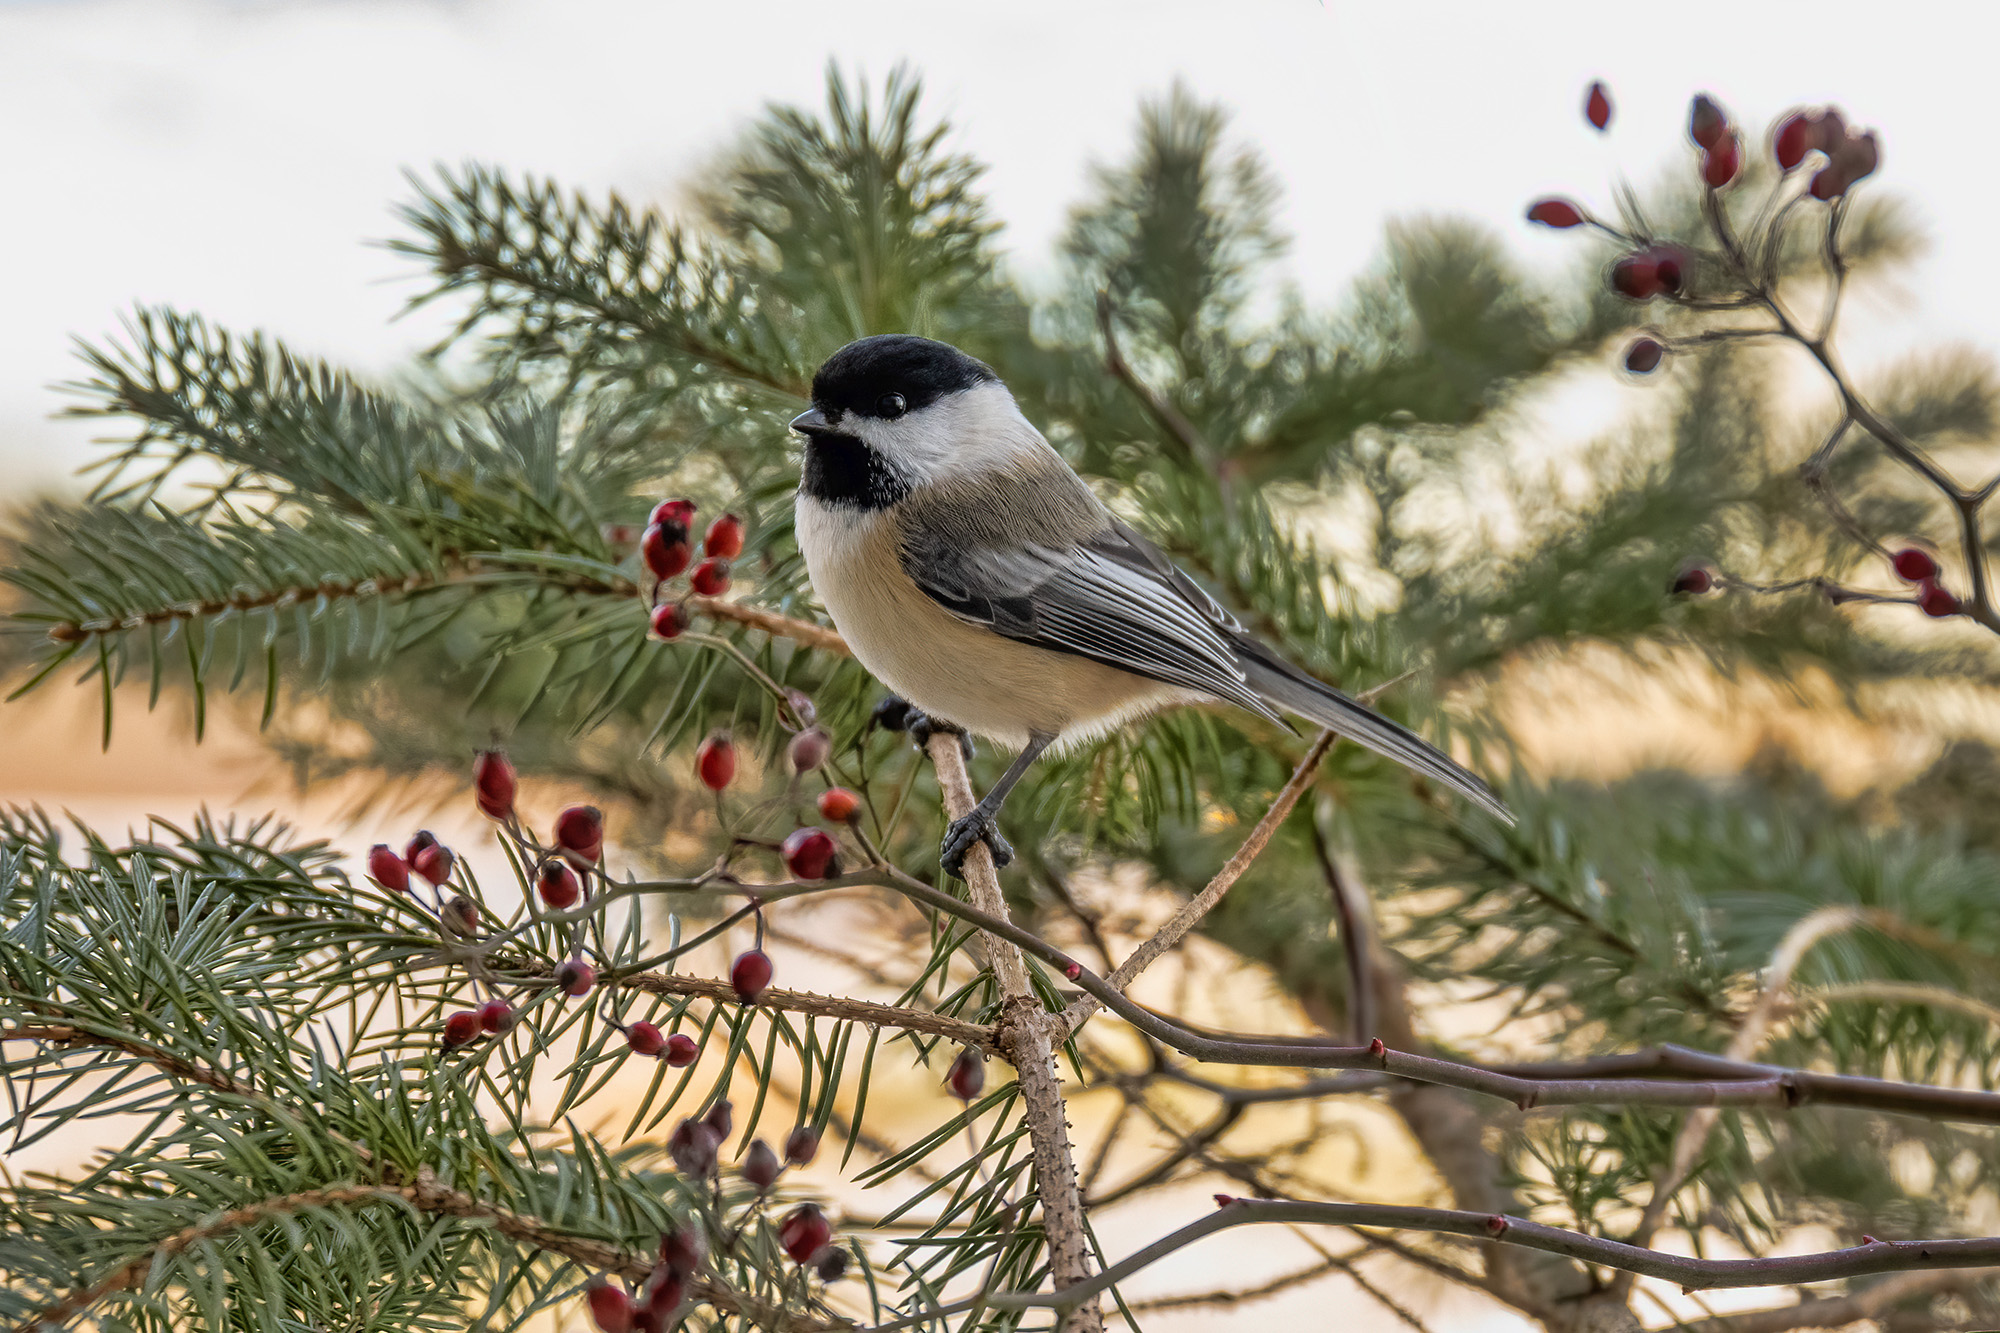
SIGMA 85mm F1.4 DG HSM | Art lens on Nikon Z7 II w/ FTZ Adapter
SIGMA 24-70mm DG OS HSM | Art lens on Nikon Z7 II w/ FTZ Adapter
Setting Up a Backyard Bird “Studio” from the Comfort of Home
My method for getting close to backyard birds is relatively simple, but it does take a bit of DIY skill and a few important items:
- An in-window bird feeder (or create a simple plywood box that fits in your window)
- Various branches of all thicknesses (or set up near a bush or tree)
- A piece of acrylic 2-way security glass (easy to find on Amazon)
- A hole saw or jig saw with a fine-tooth blade for cutting a hole in the security glass
- Black oil sunflower seed (a favorite for a wide range of bird species)
I decided to set up my bird station in my second-story window, off my office space. This way I can photograph the birds from the comfort of my own home!

First, you’ll need a place for the birds to land and eat. I purchased an in-window bird feeder and modified it to my needs, although you can certainly create a simple feeder box using plywood. Keep in mind you will need to access the inside of the box from time to time, so make sure the top can be removed.
Next, you will need a pane of two-way acrylic glass to stay out of sight. These are readily available on Amazon. Make sure it is mirrored… the idea is that you can see the birds, but they can NOT see you!
Of course, you will also need to cut a hole in the pane for your lens. I used a hole saw to cut mine. It can be a bit tricky, but if you are patient, apply even pressure and let the saw do the cutting, you will avoid cracking or damaging the pane. Don’t forget to save the piece that gets cut out as you can use this to cover the hole when not in use. I cover up the hole with this circle of acrylic and a strip of shipping tape in between shoots.
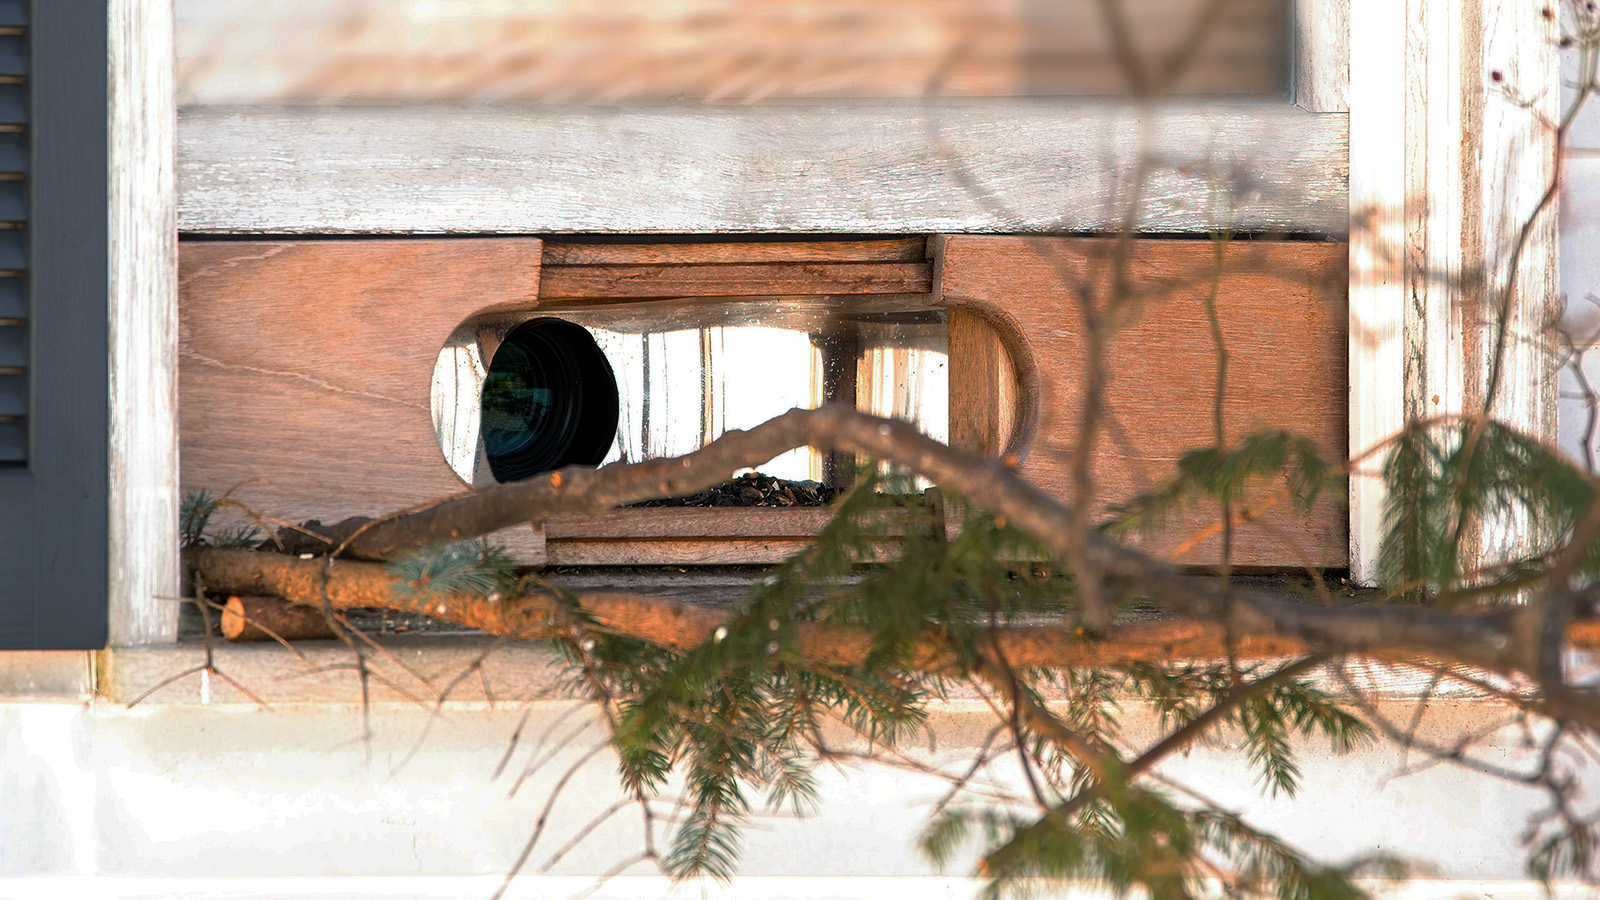
I attached the feeding station in a window that is sheltered from the strongest winds and high off the ground. This way it is not easily accessible to predators and is a safe haven for small birds. I then chose different varieties of branches that appeal to me, which I found in my yard. I personally like wild rose branches as they have thorns and red berries, pine branches to add greenery, and maple tree branches, all with varying thicknesses. I arrange the branches and overlap them until they are aesthetically pleasing to me. The bigger branches were screwed into the feeding station’s base easily with a drill gun, for support. The lighter ones draped over the top. The branches give a natural feel to the images, as well as making the birds feel right at home at the feeder.

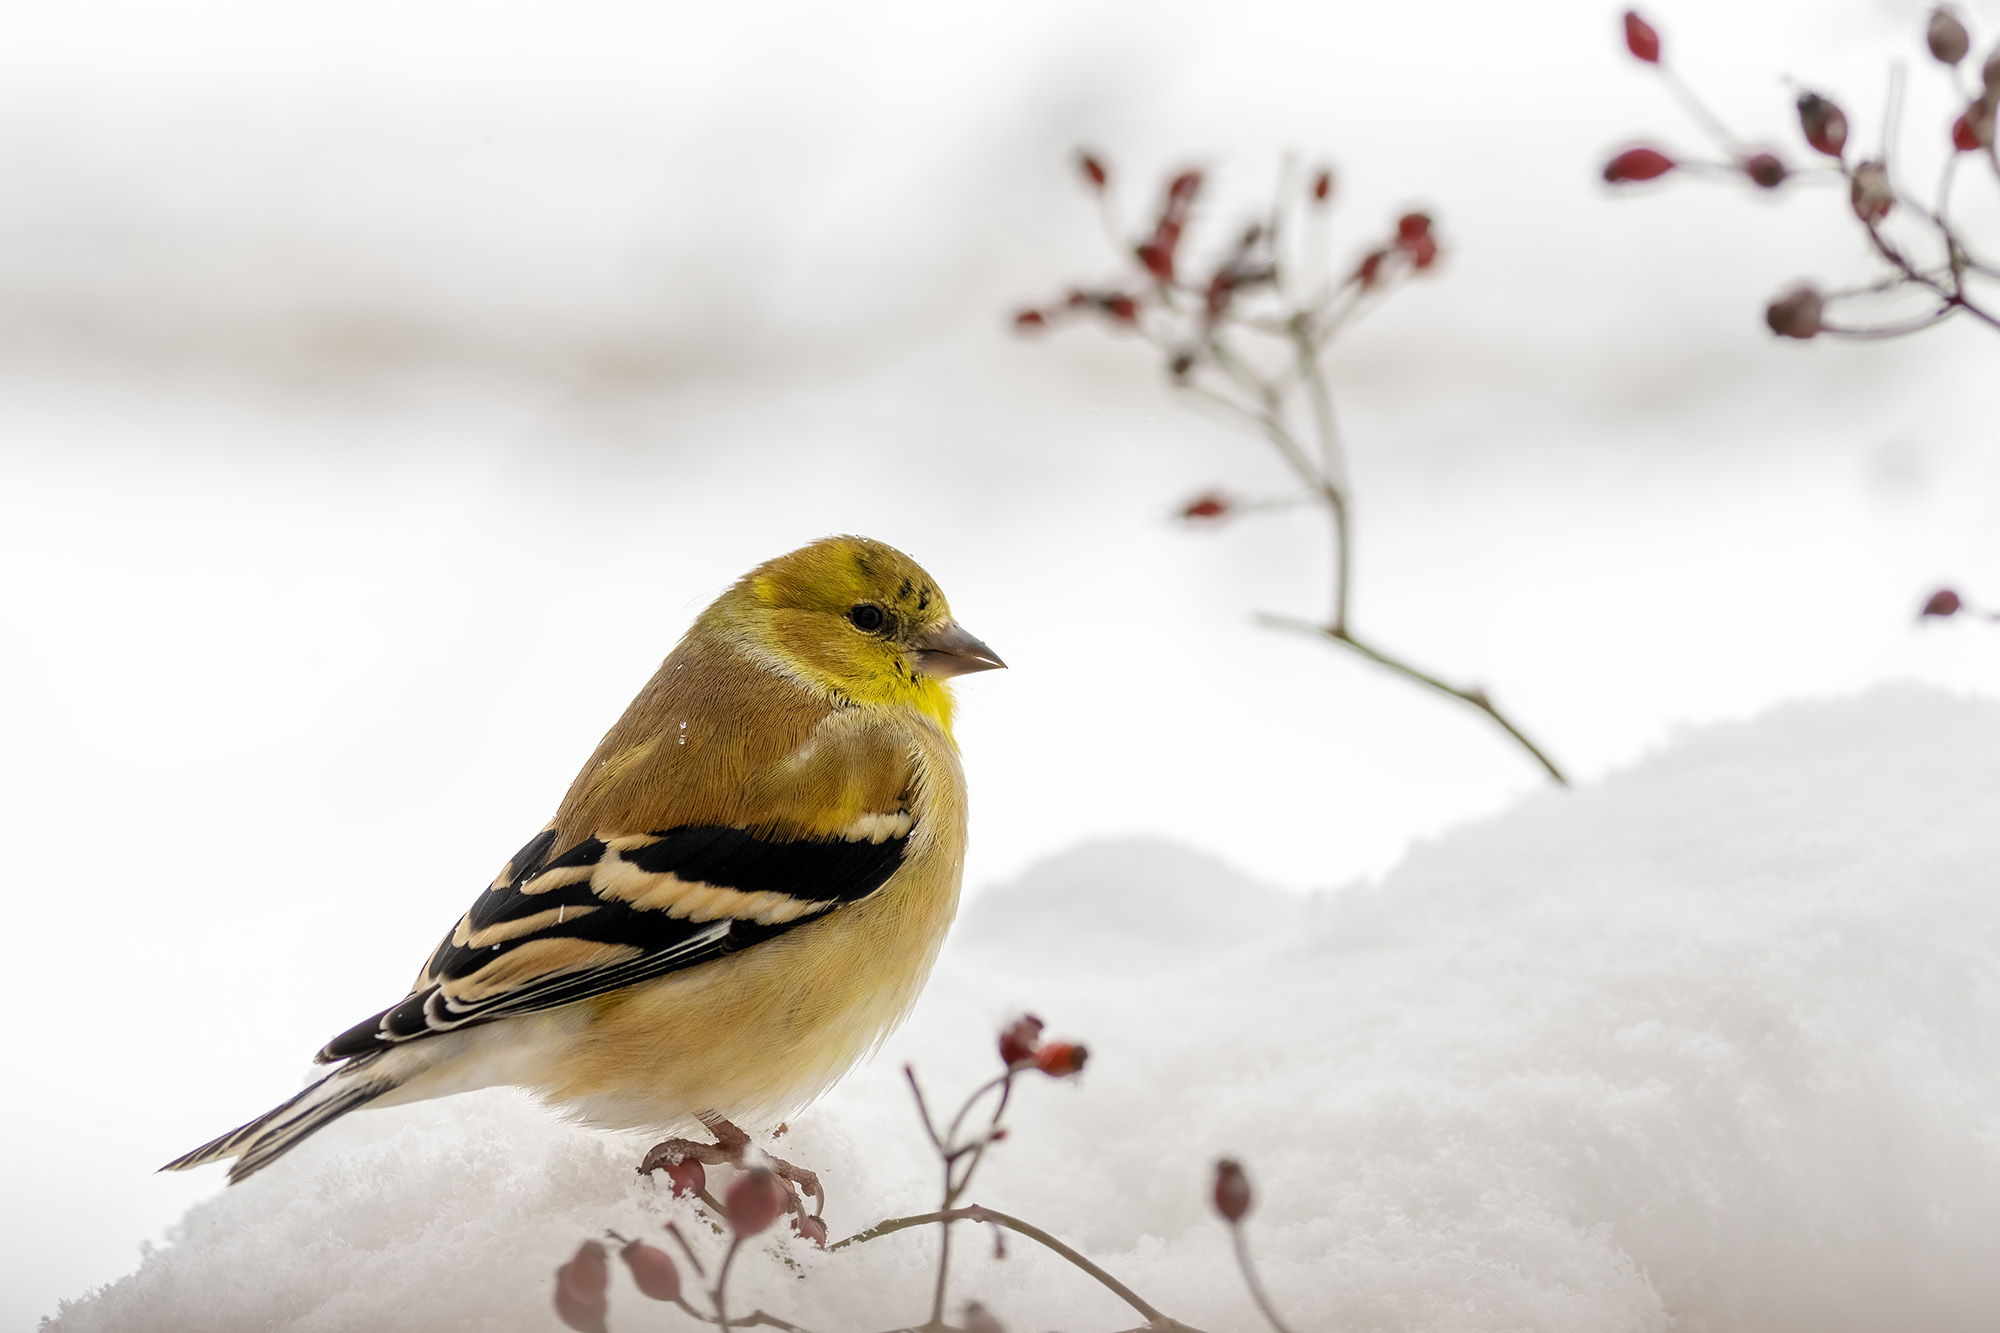
SIGMA 85mm F1.4 DG HSM | Art lens on Nikon Z7 II w/ FTZ Adapter
Choosing the Right Equipment for Close-Up Bird Photography
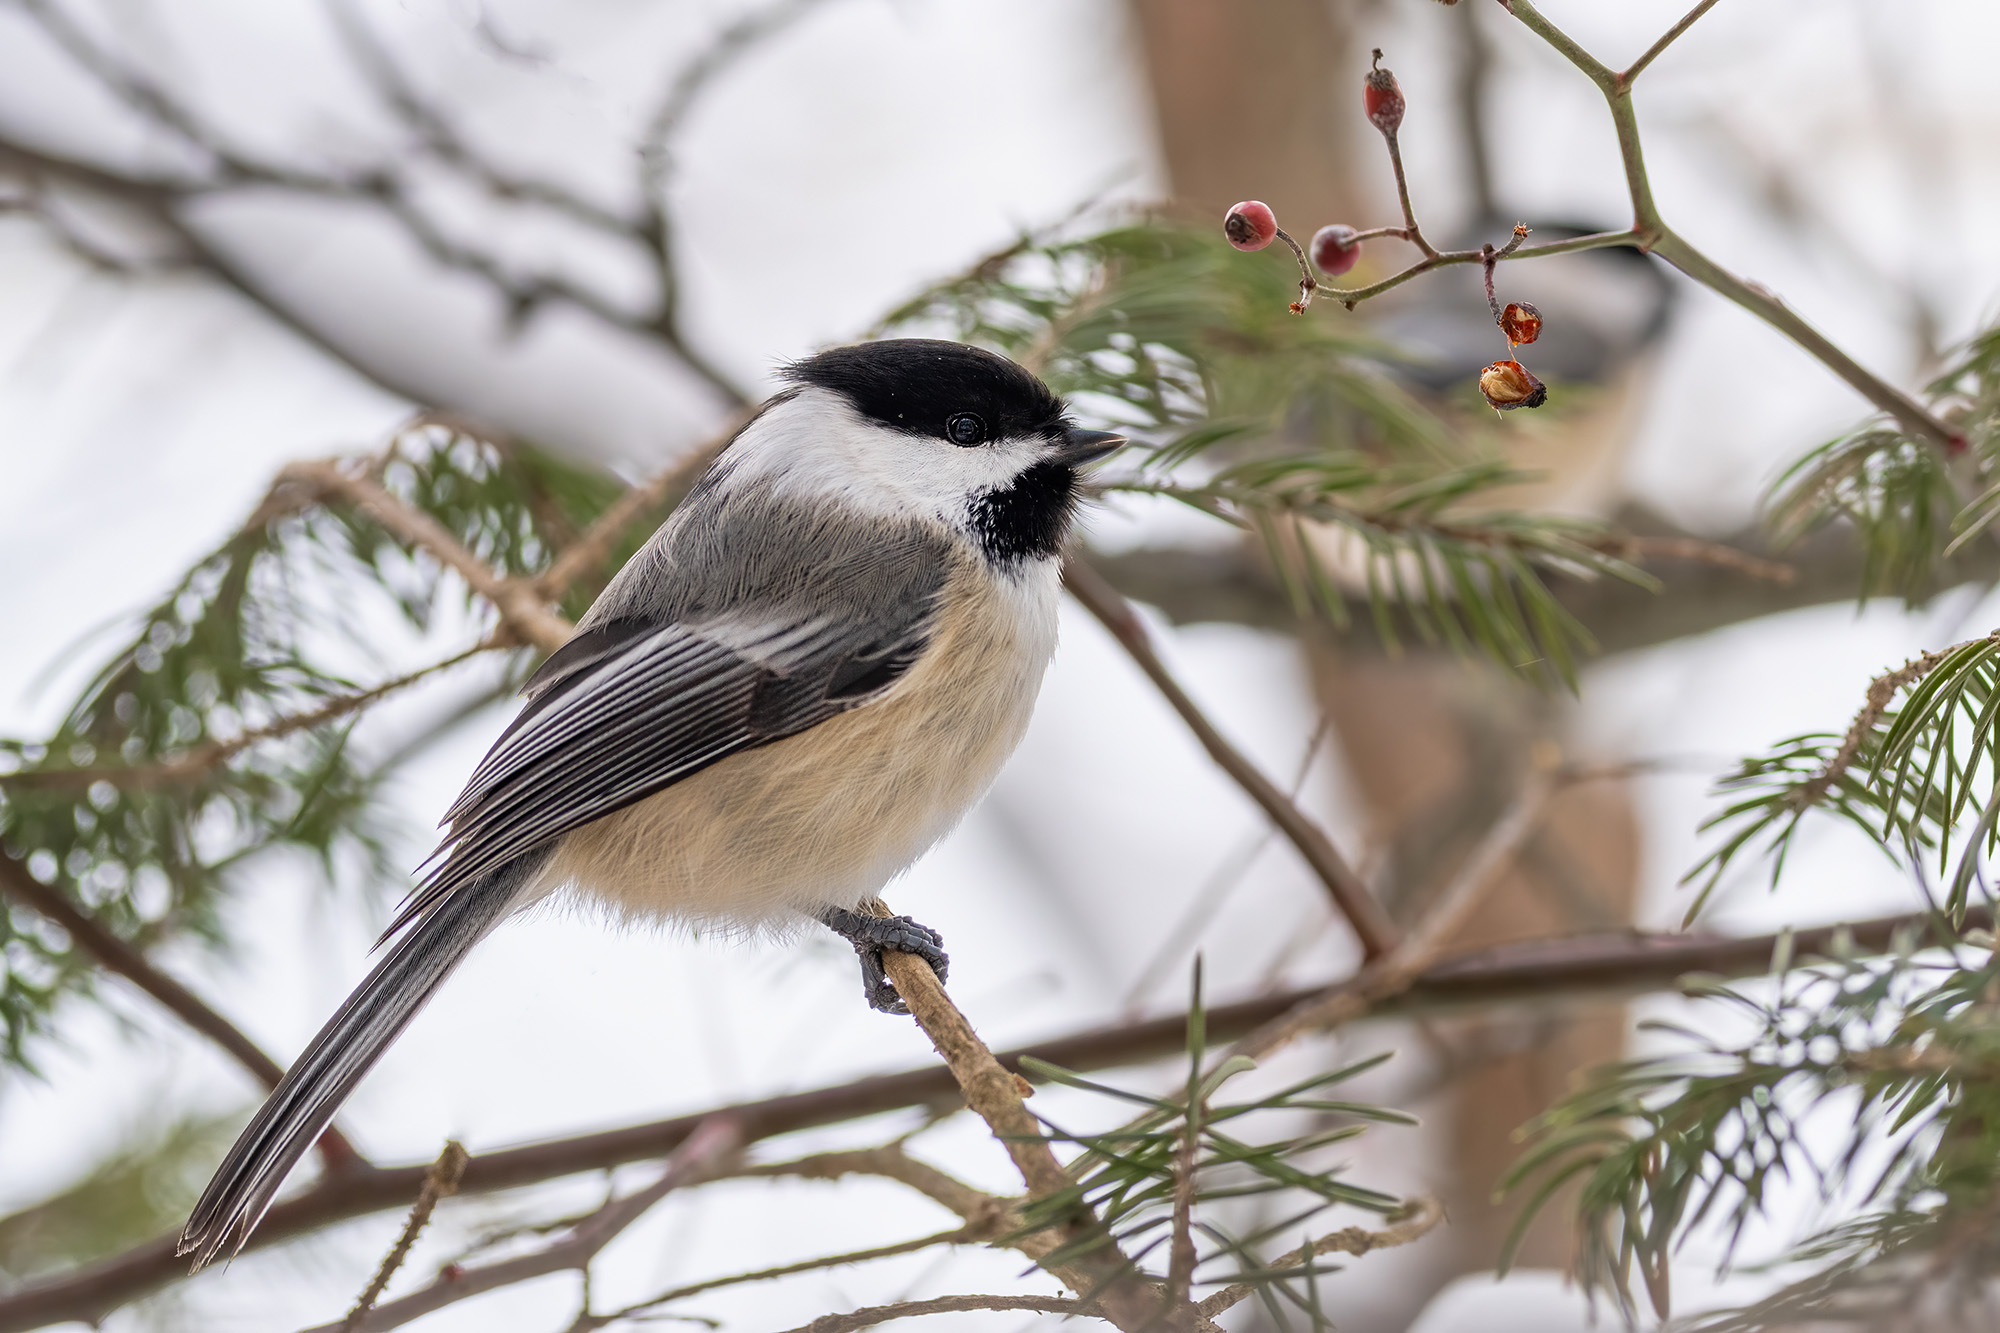
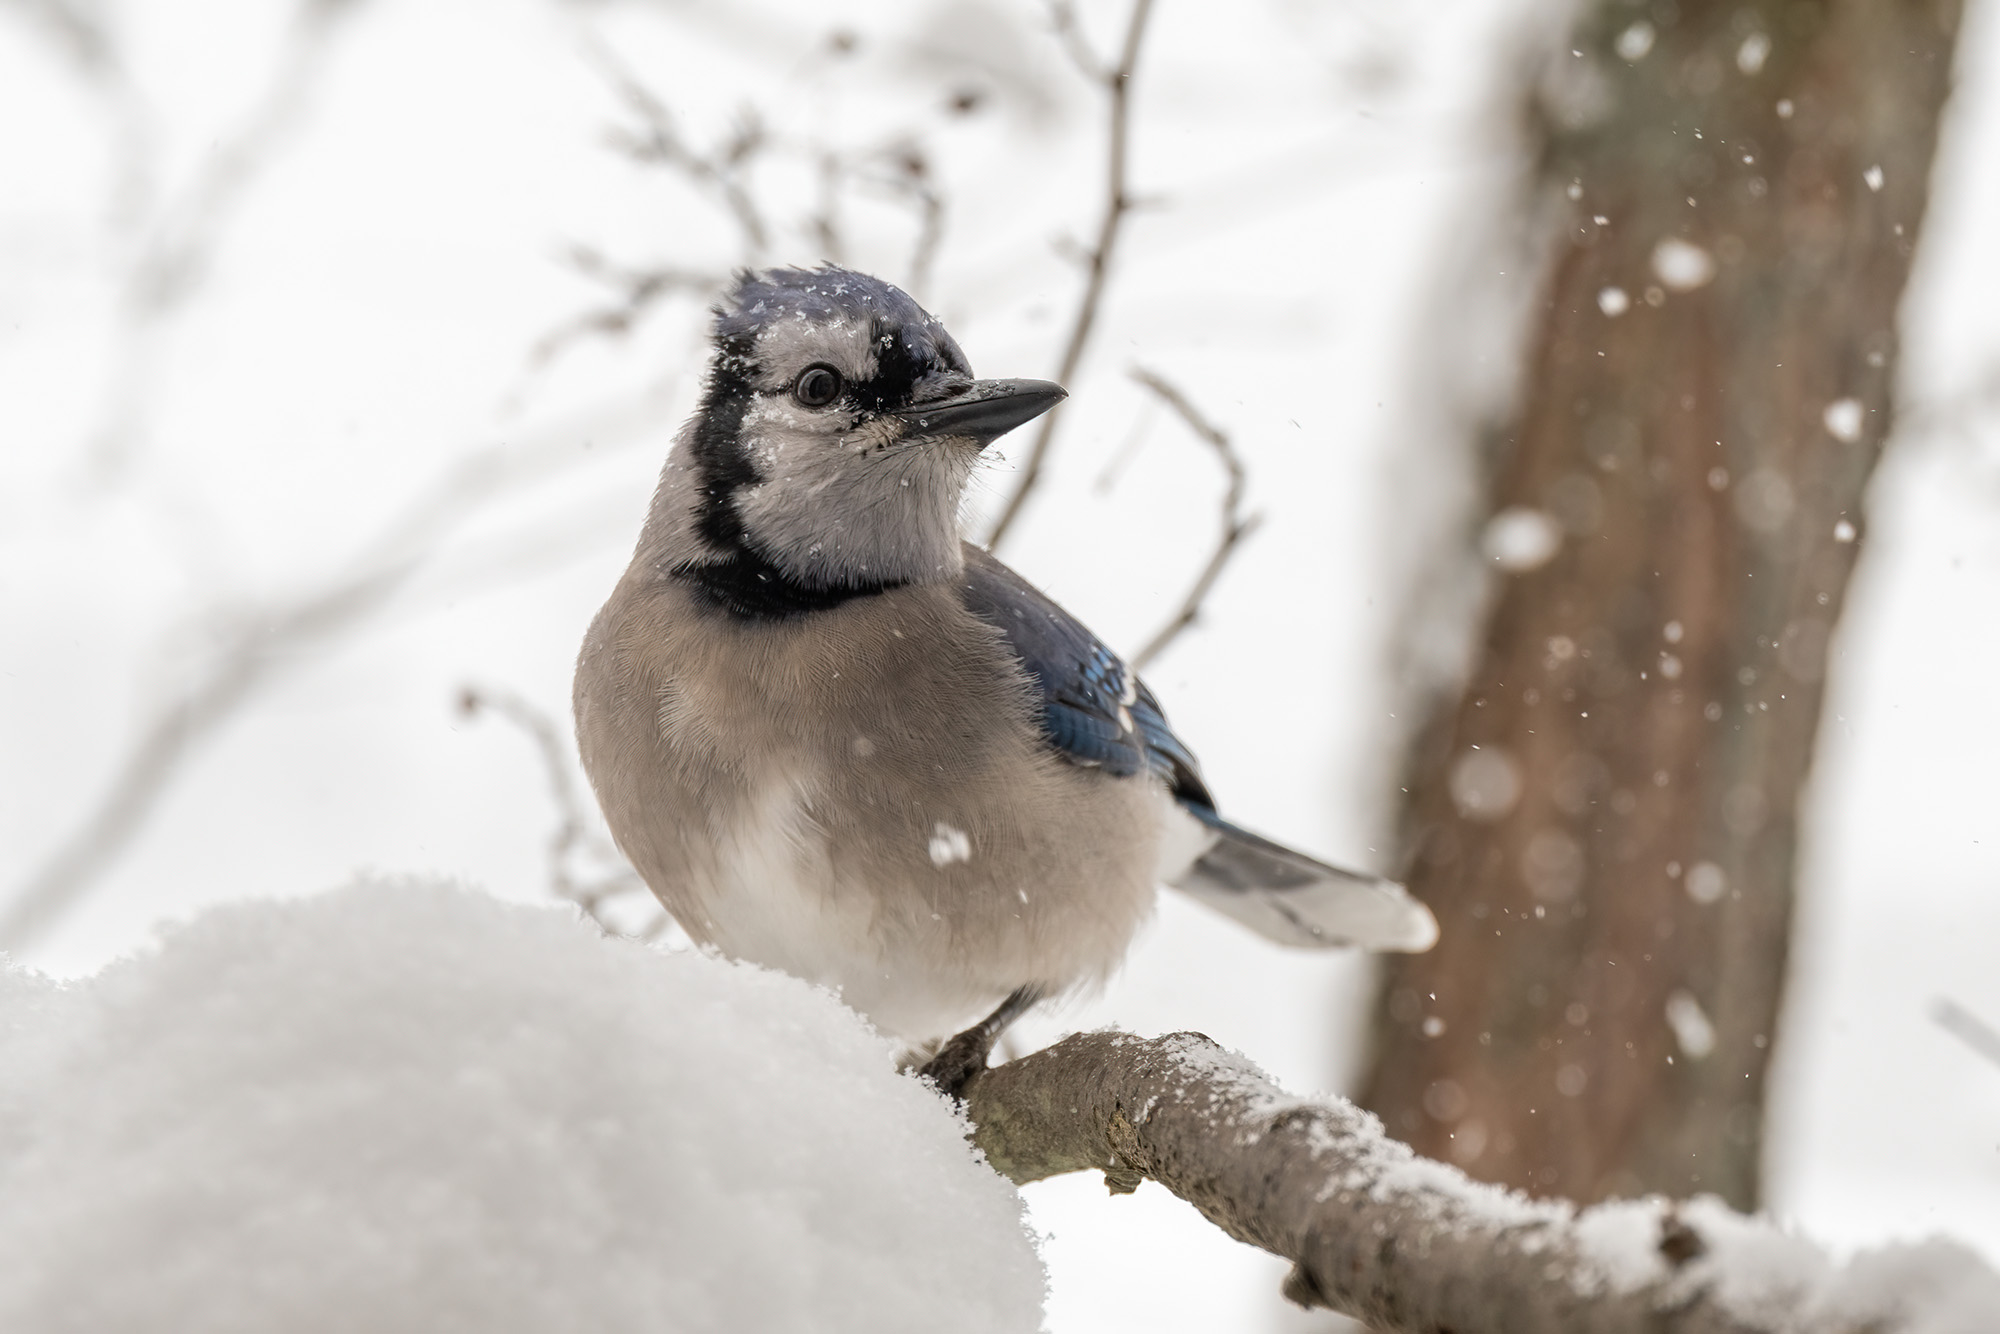
The next thing you’ll need is a camera and a suitable lens. I usually shoot with a Nikon D800 or a Nikon Z7 II (with the FTZ adapter for my F-mount lenses). My favorite SIGMA lenses for up-close bird portraits are the 85mm F1.4 DG HSM | Art and the 24-70mm F2.8 DG OS HSM | Art.
SIGMA 85mm F1.4 DG HSM | Art lens on Nikon Z7 II w/ FTZ Adapter
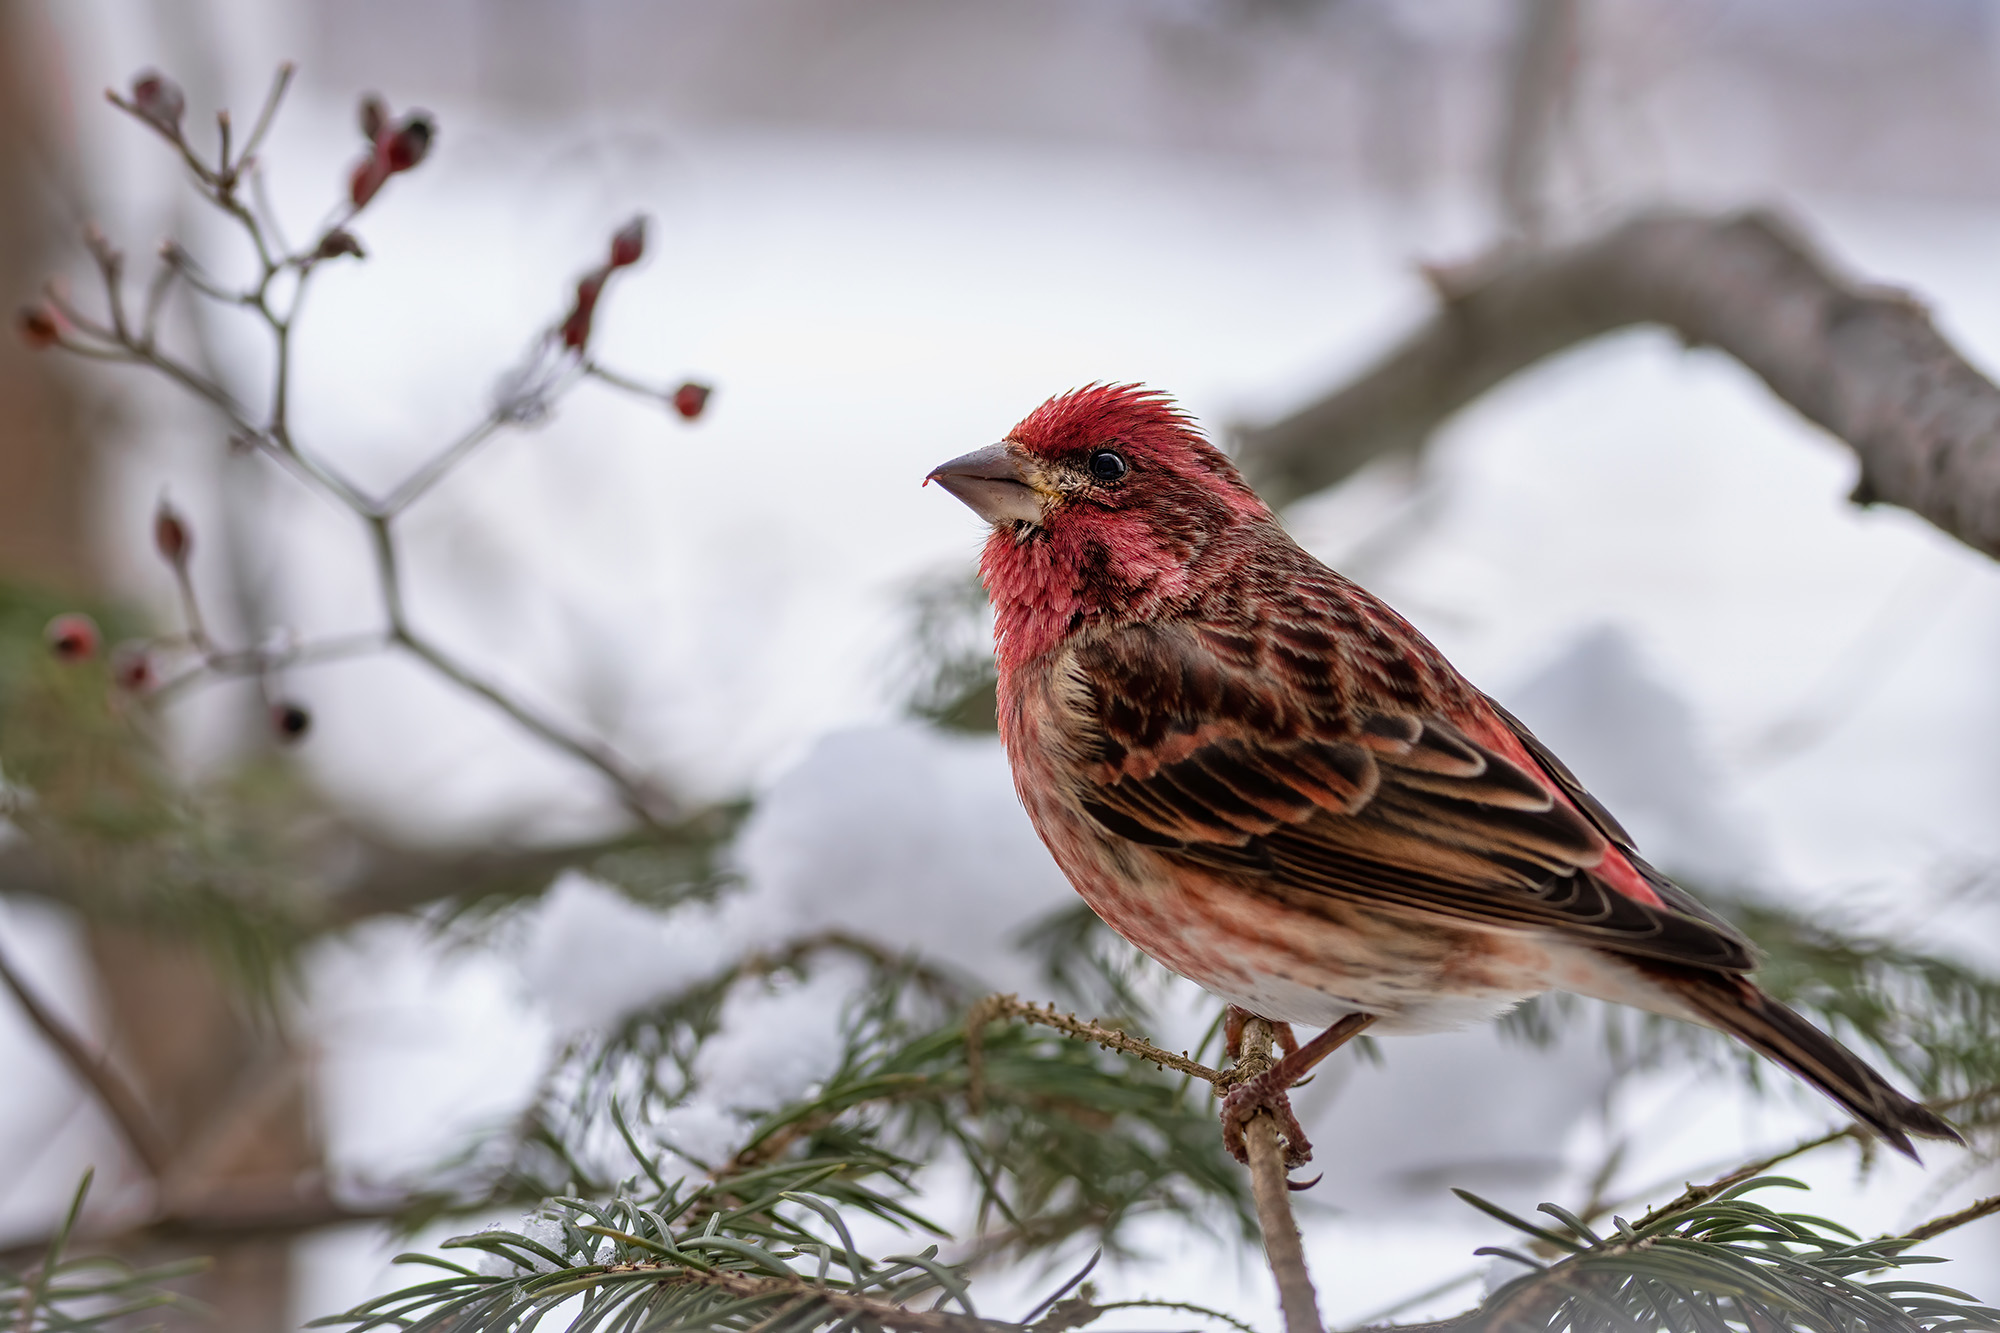
I love the large aperture of the 85mm F1.4 Art, and the short telephoto focal length on a full-frame camera gives me great separation of birds from the background. The 24-70mm F2.8 Art, on the other hand, gives me a wider angle which lets me capture the birds as they land or take off, capturing their entire wingspan. Both lenses provide a fast aperture that allows me to shoot at fast shutter speeds even on cloudy, wintery days, without issue.

SIGMA 24-70mm DG OS HSM | Art lens on Nikon Z7 II w/ FTZ Adapter
The other necessary piece of photography equipment is a tripod. Handholding a camera while waiting for birds can become very tiresome, and any movement from such a close distance will scare the birds away, and it will take some time for them to feel safe enough to return.
Shooting Great Bird Photos from Inches Away
Once my box is all set up, my camera is mounted on my tripod and the front of my lens is resting securely in the hole of the feeder, then comes the hardest part… waiting. Thankfully, it doesn’t take long as birds absolutely LOVE sunflower seeds!
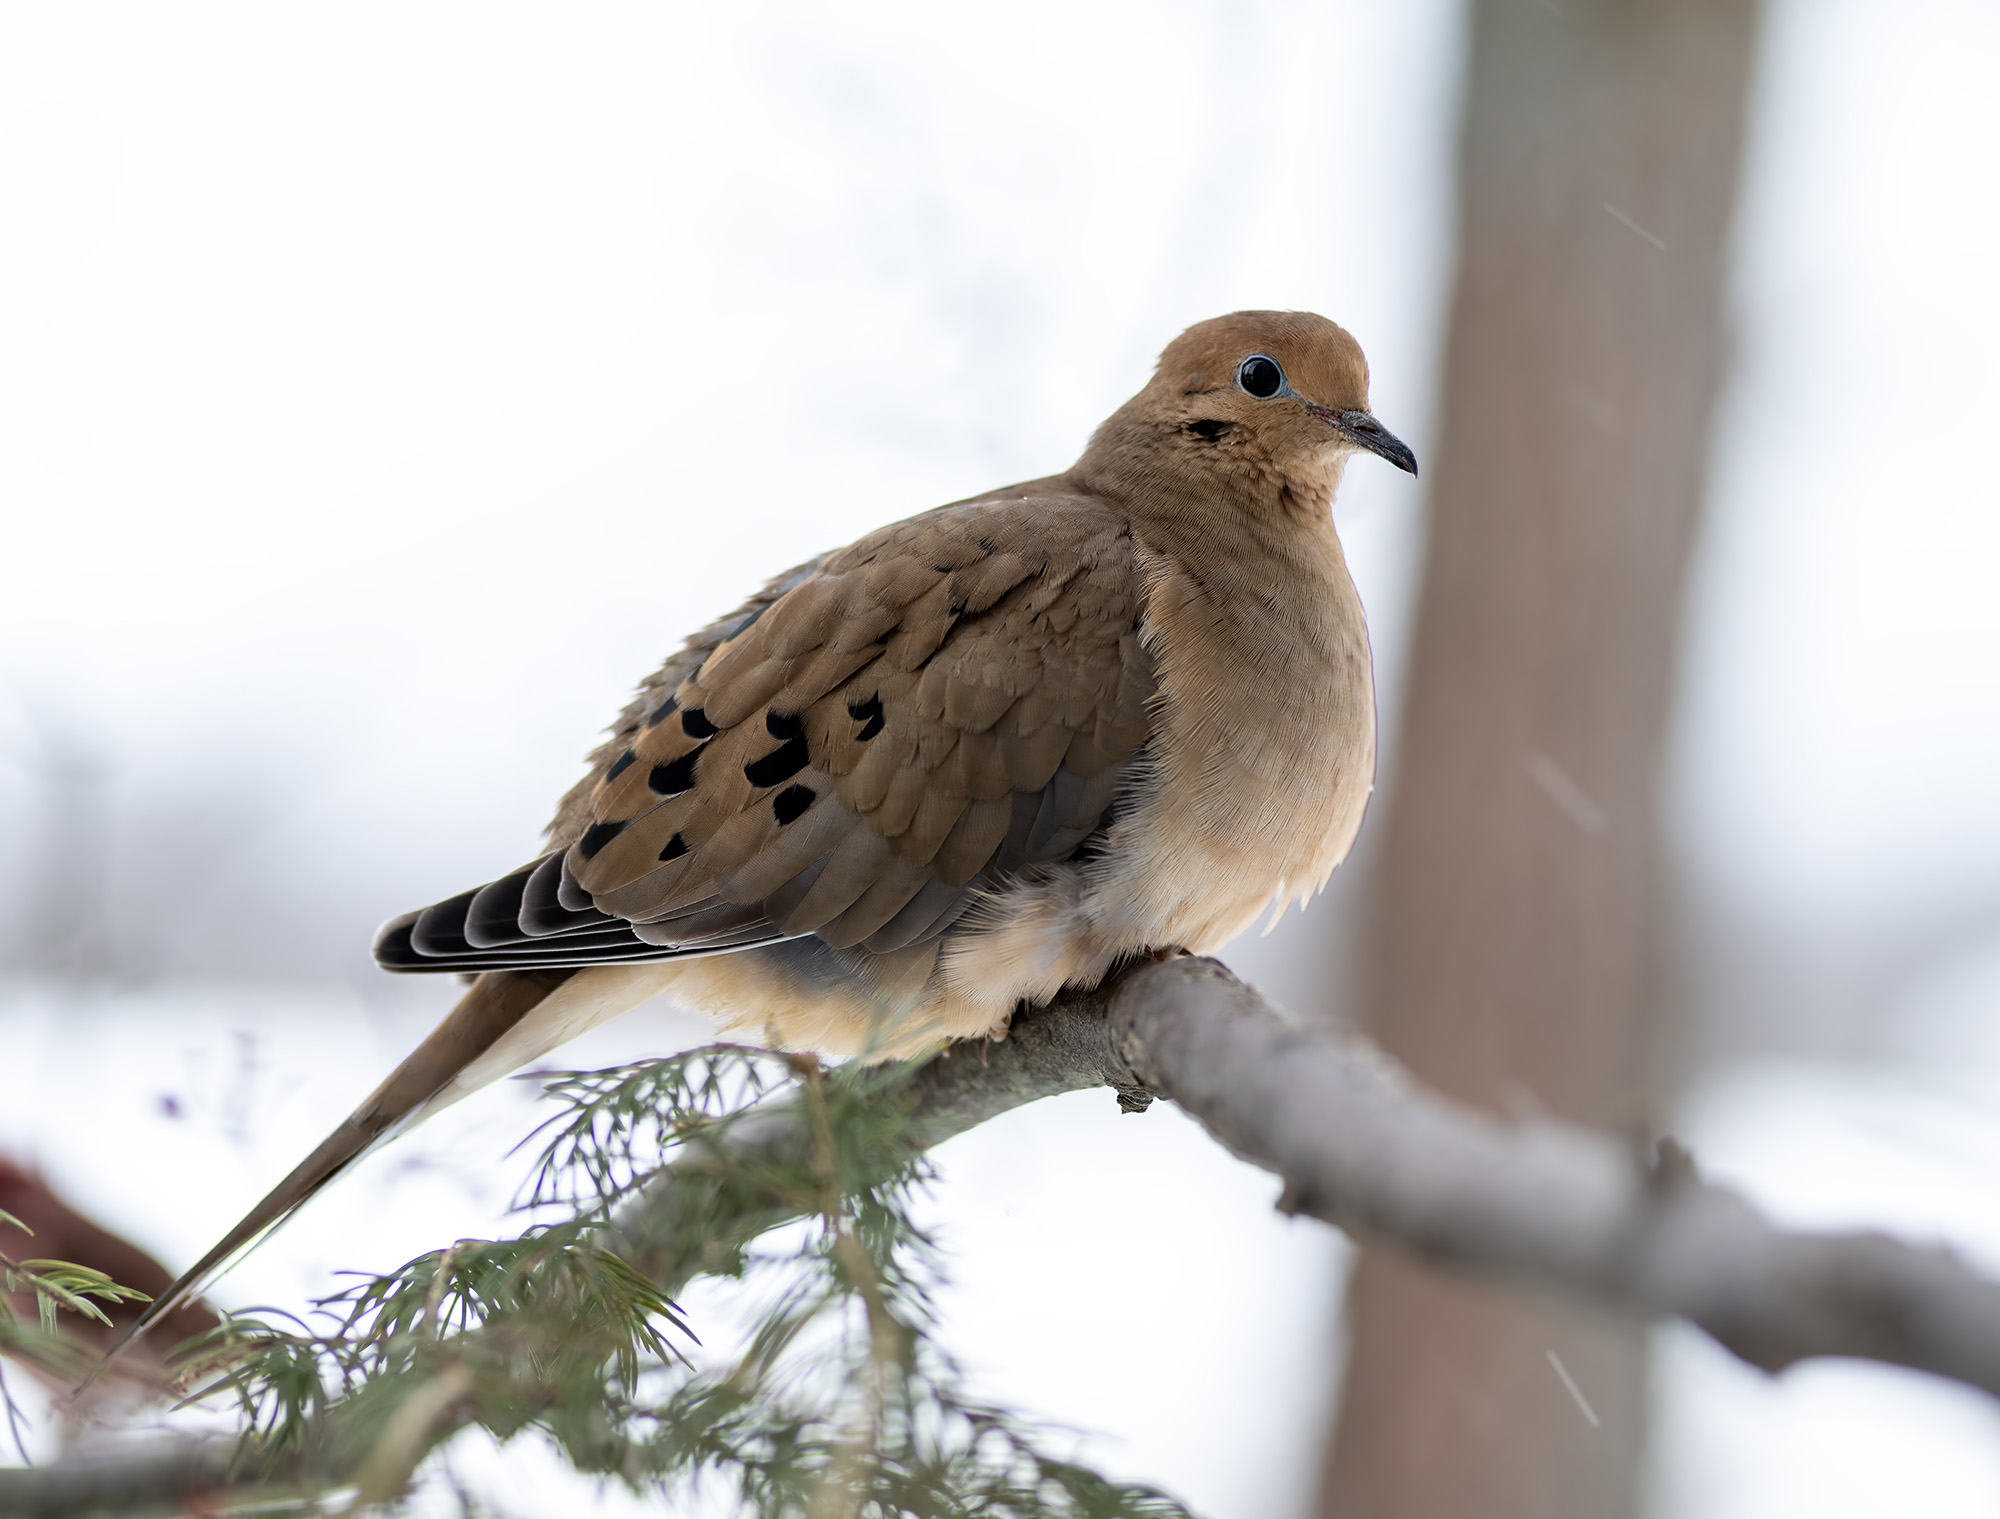
I prefer to use black oil sunflower seed specifically as it attracts the greatest variety of birds and deters the less favorable ones. Black oil sunflower seed also has a much greater nutritional value for the birds than cheaper mixed seed. It is high in protein, fiber, calcium, vital vitamins and minerals, which are especially important during the winter months. And in turn will have birds seeking out the feeder. This all sounds expensive, right? Nope! You can buy a HUGE 50-pound bag of black oil sunflower seed for around 20 bucks!
Most backyard birds are active year round in the morning and late afternoon. However, during the winter months, food is scarce, so they visit the feeder all day! Small birds tend to travel in groups and arrive at the feeder together, which provides the opportunity to photograph many different varieties of birds.
SIGMA 85mm F1.4 DG HSM | Art lens on Nikon Z7 II w/ FTZ Adapter
It’s also important to think about how lighting will affect your photos. The lighting will constantly change from dawn until dusk, so consider where the sun will be positioned when installing your feeder and when deciding what time of day to shoot.
SIGMA 85mm F1.4 DG HSM | Art lens on Nikon Z7 II w/ FTZ Adapter
So how about settings? Your aperture, shutter speed and ISO are especially important when photographing such fidgety subjects. Small birds tend to dart about and take off in the blink of an eye. Considering how fast they move and scarce sunlight during prime feeding hours, your camera settings are especially important in capturing quality images of your feathered friends.
The SIGMA lenses I mentioned before — the 85mm F1.4 DG HSM | Art and the 24-70mm F2.8 DG OS HSM | Art — allow me to achieve my preferred settings, and the stellar image quality of the Art line glass brings out every last detail. For the best, sharpest images, and to keep the separation between my subject and the background, I usually work with the following settings:
Aperture
For bird photos, my favorite apertures are from F2.8 to F5.6. Even though a large aperture like F1.4 can be tempting, if you shoot wide open on a bird at close range, you will probably find that your bird’s beak or eye will be in sharp focus, while the rest of its body will be blurred due to the shallow depth of field. Play around with your aperture, but a good rule of thumb for small birds at a close distance is to stay within the F2.8-F5.6 window.

SIGMA 85mm F1.4 DG HSM | Art lens on Nikon Z7 II w/ FTZ Adapter
ISO
Setting your ISO can be somewhat tricky as light begins to fade or clouds start rolling in… you might find yourself bumping it up! With some cameras, higher ISOs are not a huge deal, but image noise can really ruin the fine detail of those tiny feathers, so be careful. Depending on light available, my preferred range is ISO 200 to ISO 1000, but I tend to stay right around ISO 400 for birds in general.
SIGMA 85mm F1.4 DG HSM | Art lens on Nikon Z7 II w/ FTZ Adapter
Shutter Speed
In general, I would say the faster the better, especially if you want to capture full wingspans as they prepare to land or take off! However, small birds taking flight are incredibly difficult to capture this close up. They literally jump and are gone in a flash! With a very fast shutter speed around 1/1600, you may be able to capture these split-second moments.
In general, I shoot around 1/500 second, which ensures that I get sharp images of these fast-moving creatures, but still let in enough light to expose the image properly.
Speaking of shutters, a silent shutter option is a great way to avoid scaring birds away, especially if you plan on shooting continuous bursts of photos. If your camera has this feature, take advantage of it!

SIGMA 24-70mm DG OS HSM | Art lens on Nikon Z7 II w/ FTZ Adapter
Remember, there is no one special recipe that works for capturing all birds. The above settings are my general rules of thumb, but you will need to fine-tune your aperture, shutter speed and ISO depending on your camera, lens, personal preferences and unique conditions.
A True Challenge With Rewarding Results
The reason I love bird photography in particular is due to the ever changing movement of the subject, lighting and conditions in front of me. I love a good challenge, and it doesn’t get much more challenging than birds! It forces me to delve into my camera’s settings and figure out which formula I want to use to freeze their movements, while obtaining a great composition and lighting. It forces me to think FAST, sometimes with seconds, how to grab an image and do so accurately. It is beyond rewarding when I look at the series of shots I captured and I have the exact images I needed and wanted. The elation I feel is beyond words. I encapsulated a beautiful moment in nature that I am able to share with the world.
With a little ingenuity, the right gear, a bit of knowledge and a whole lot of patience, you too can achieve epic bird images that you will be proud to showcase!
SIGMA 24-70mm DG OS HSM | Art lens on Nikon Z7 II w/ FTZ Adapter