If the number of articles popping up in my daily news feed about the upcoming solar eclipse are any indication, this is going to be the most watched AND most photographed event of the year. The experience of watching the eclipse hit totality and the sky darken is something you will never forget. It’s also something you won’t see again in the United States for another 20 years. And personally, the photographs I have taken of this phenomenon will be something I will always cherish.
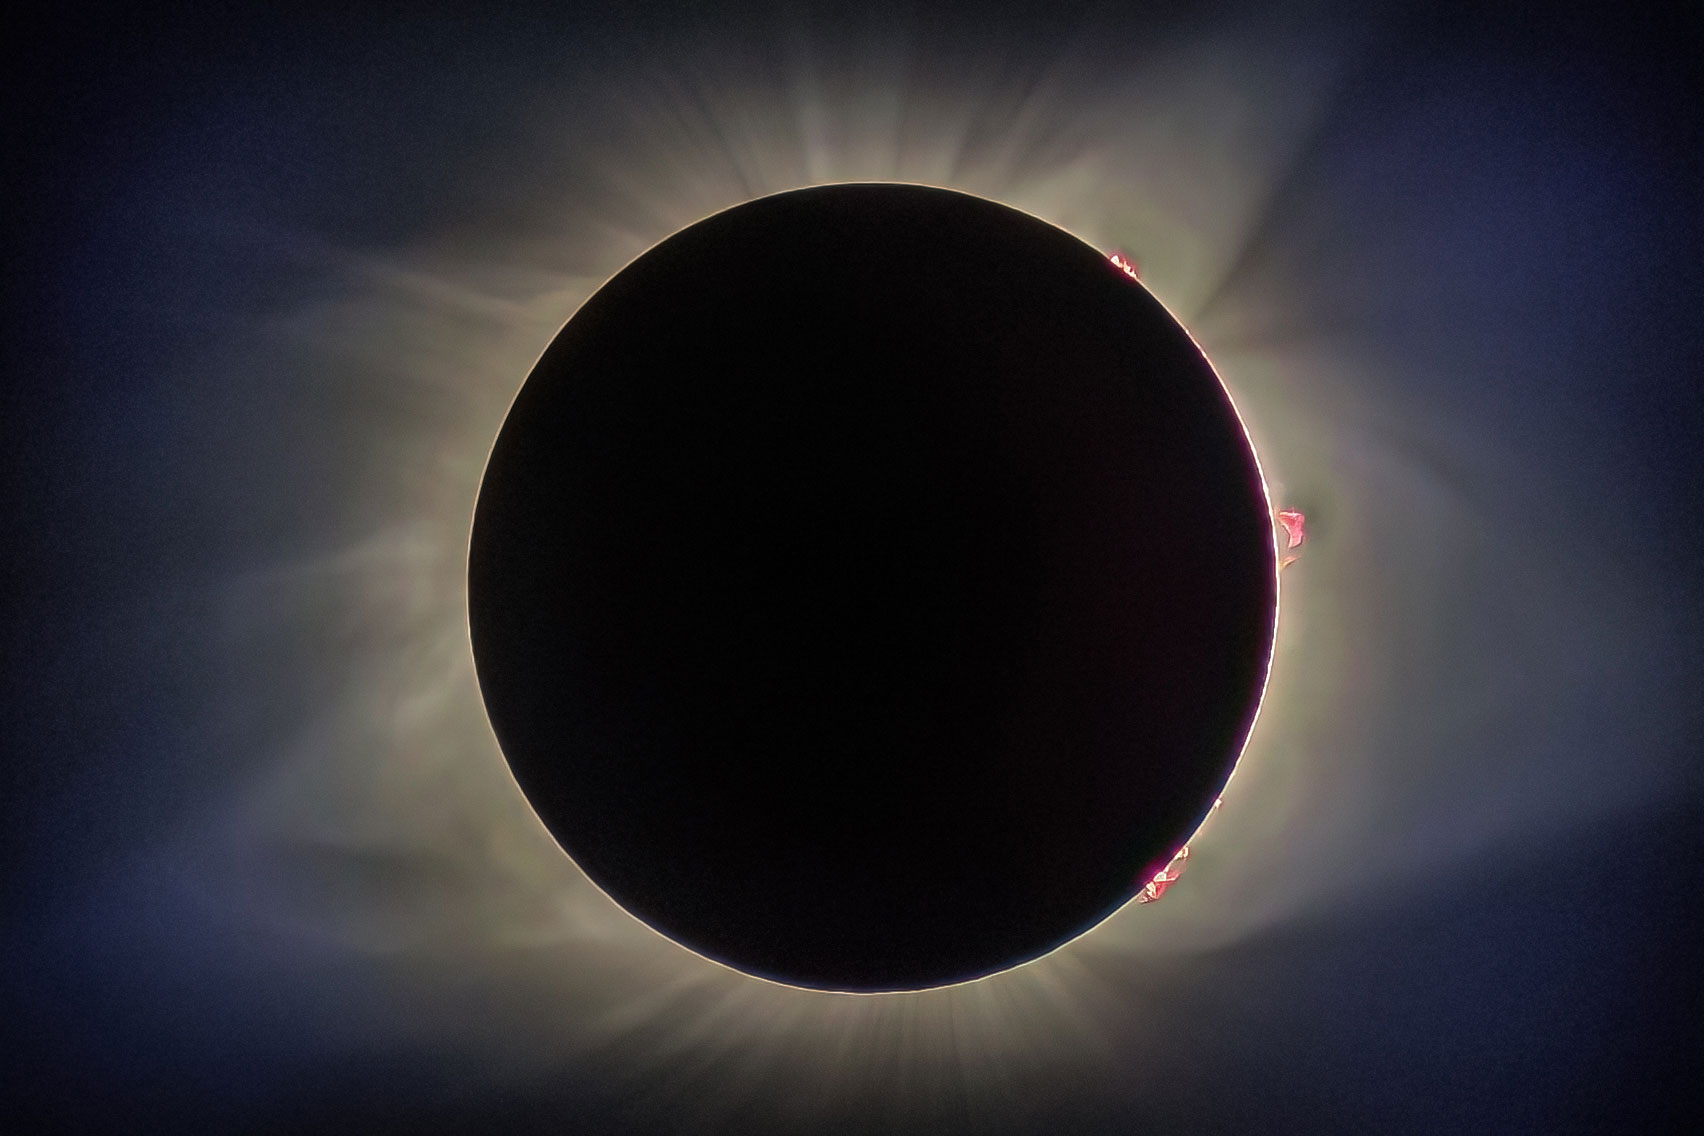
I was fortunate enough to photograph the last total solar eclipse on August 21, 2017, and my photographs bring back an unbelievable experience every time I look at them. So, with the experience I learned photographing the eclipse back in 2017, let me share with you my plans for the April 8, 2024 eclipse.
Essential Equipment for Photographing a Solar Eclipse
Perhaps the most important aspect of photographing a solar eclipse is preparation, and that starts with getting your equipment ready.
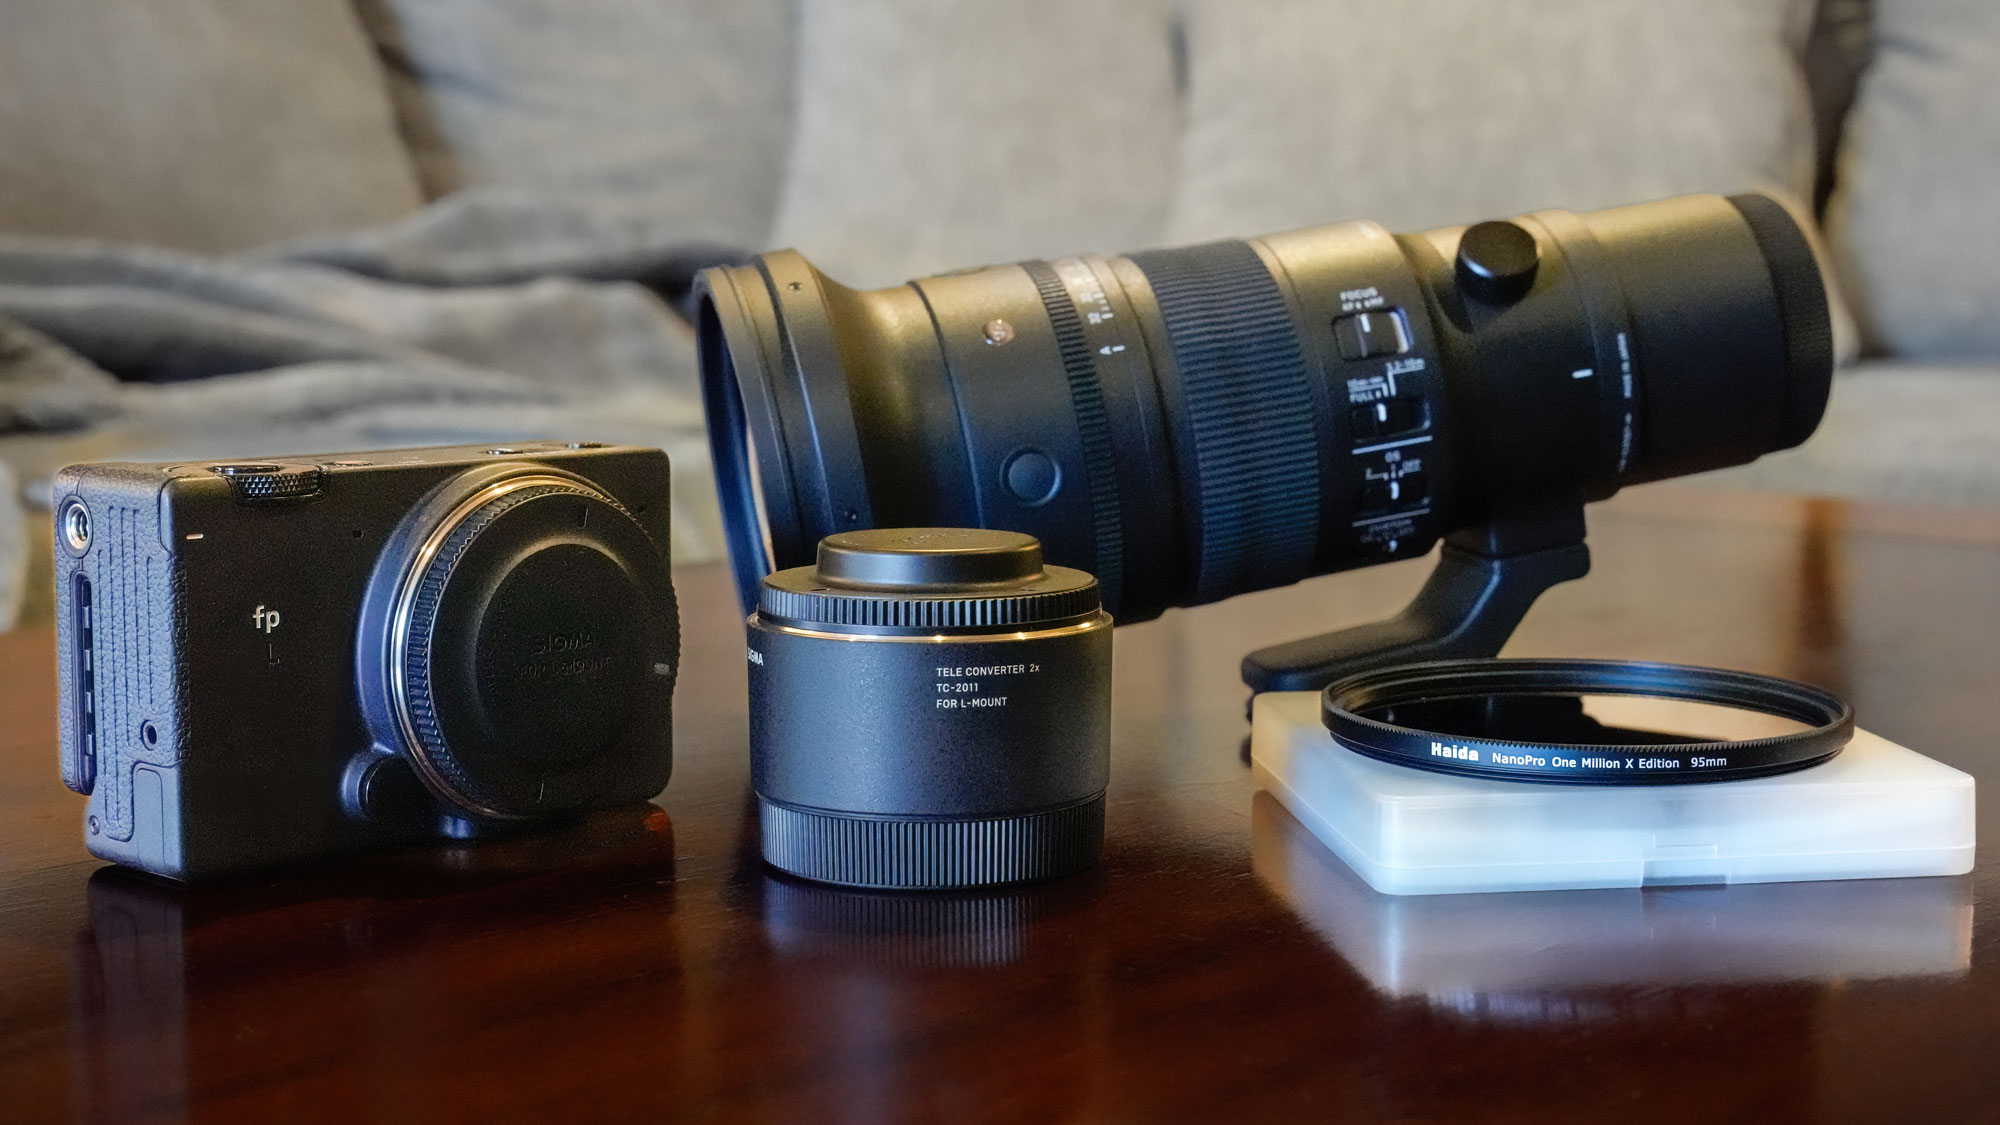
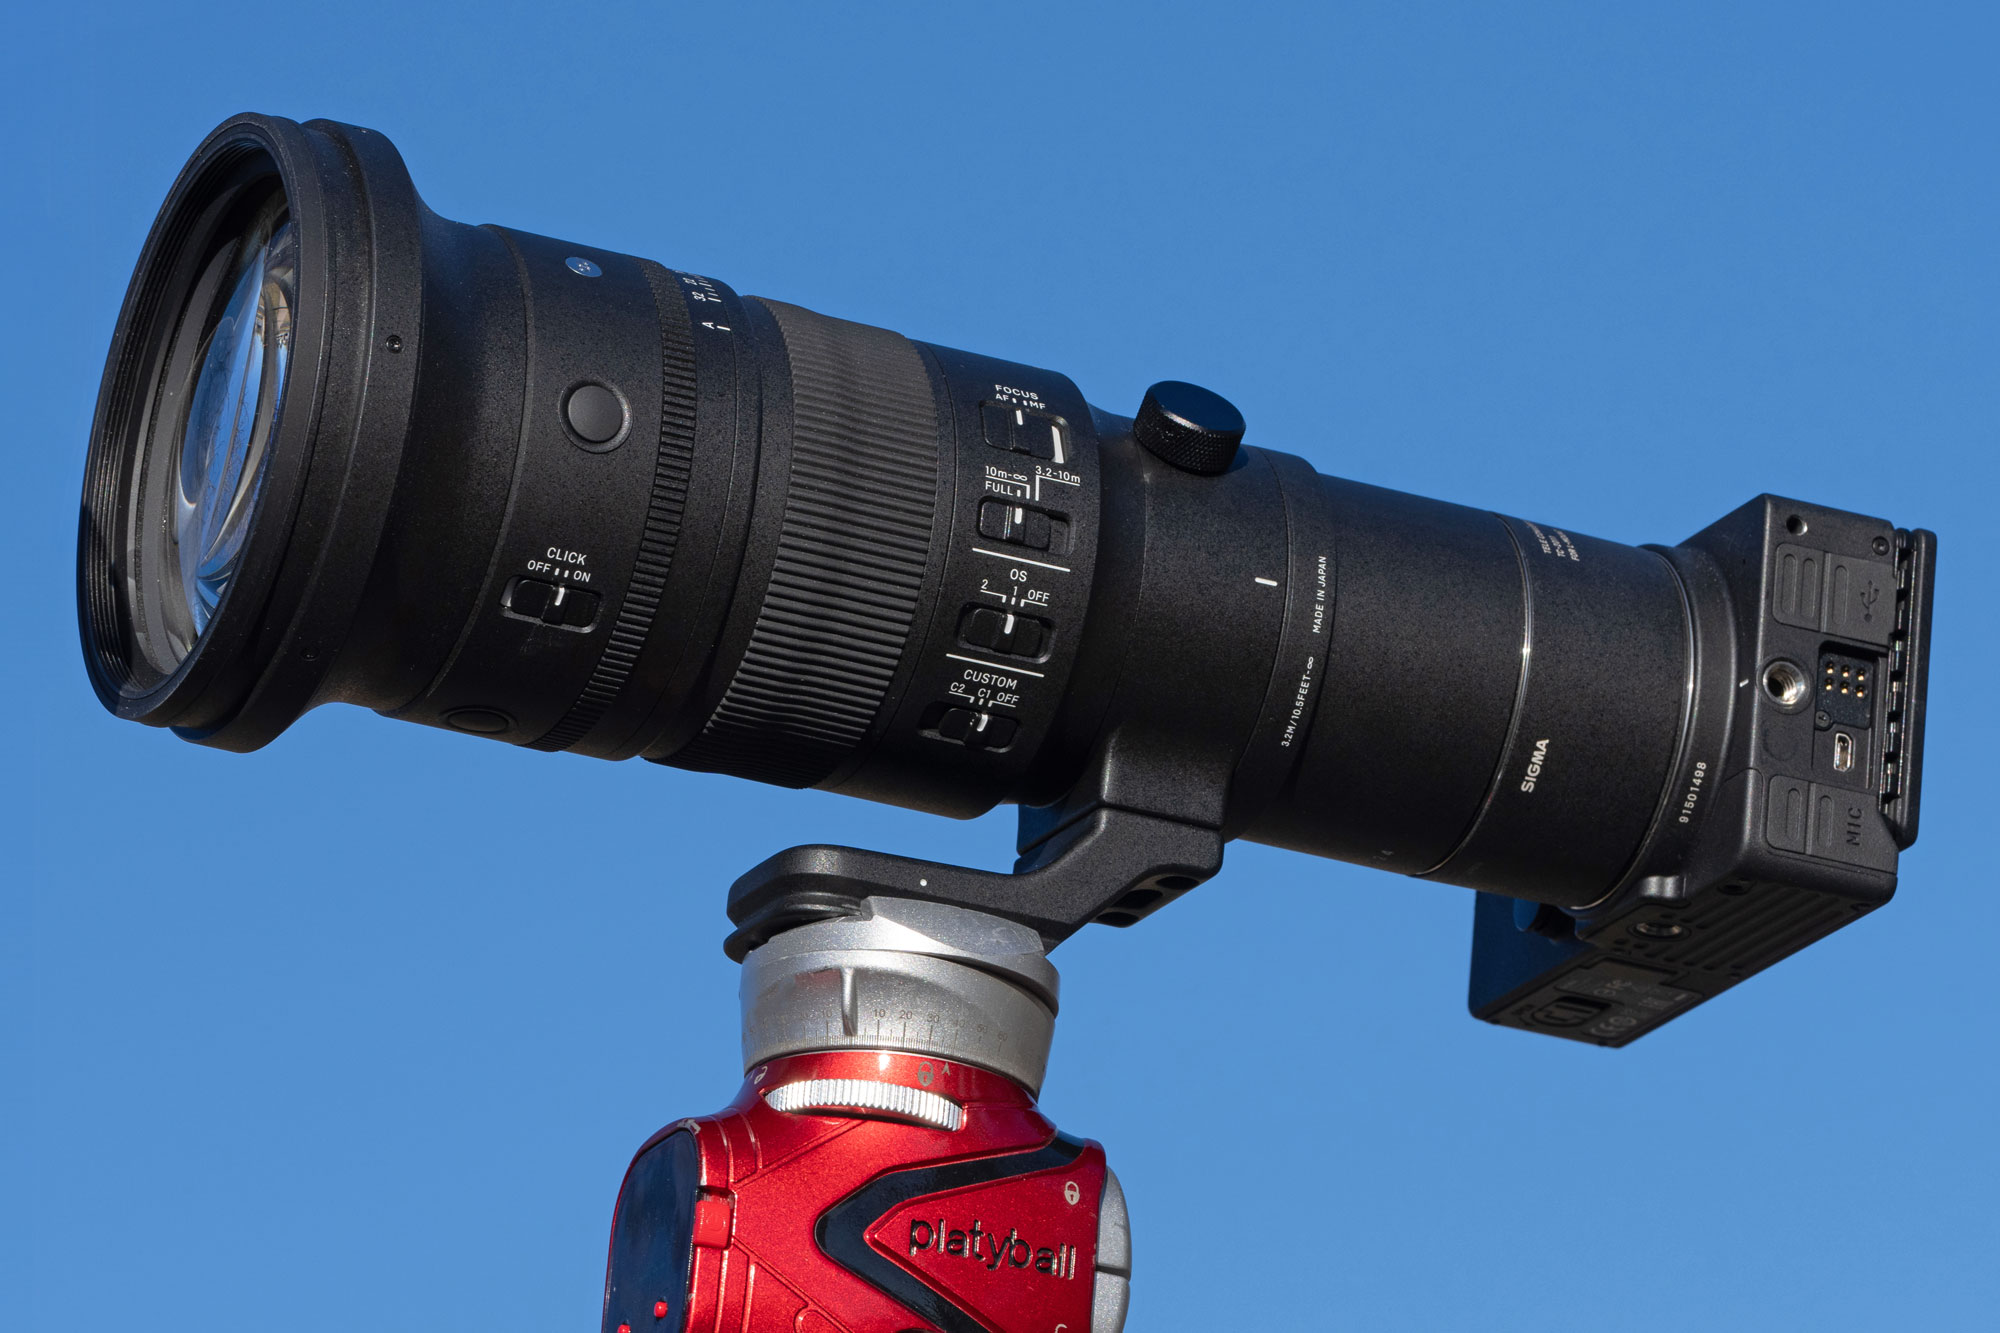
My plan is to use two cameras with long telephoto lenses. I know my SIGMA 60-600mm F4.5-6.3 DG DN OS | Sports lens will capture great photos on a 61-megapixel Sony A7R V, but I’m also thinking the “dream setup” is going to be the new 500mm F5.6 DG DN OS | Sports lens in L-Mount on a SIGMA fp L camera. Because I’m choosing this combination in L-Mount, I’m able to take advantage of the TC-2011 2x Teleconverter (which is only available for L-Mount). That gives me 1000mm on a 61-megapixel camera for an incredible amount of detail.
As a backup camera for feature photos of others photographing the eclipse (as well as the possibility of a wide-angle time-lapse of the eclipse), I’m also taking along a SIGMA 24-70mm F2.8 DG DN | Art lens and a 70-200mm F2.8 DG DN OS | Sports lens along with a Sony A1 camera.
Other great options for lenses include the 150-600mm F5-6.3 DG DN OS | Sports lens (for Sony and L-Mount), the 150-600mm DG OS HSM | Contemporary (for Canon and Nikon), and the 60-600mm F4.5-6.3 DG OS HSM | Sports (for Canon and Nikon). If your goal is to frame up a detailed close-up at the moment of totality, any one of these telephoto zooms is sure to get the job done.
And, if you are using a crop-sensor camera, consider the SIGMA 100-400mm F5-6.3 DG DN OS | Contemporary lens a great alternative for Sony and L-Mount cameras, because it will give you an effective focal range of 150-600mm. Likewise, the 100-400mm F5-6.3 DG OS HSM | Contemporary will give you the same reach for APS-C format Canon and Nikon cameras.
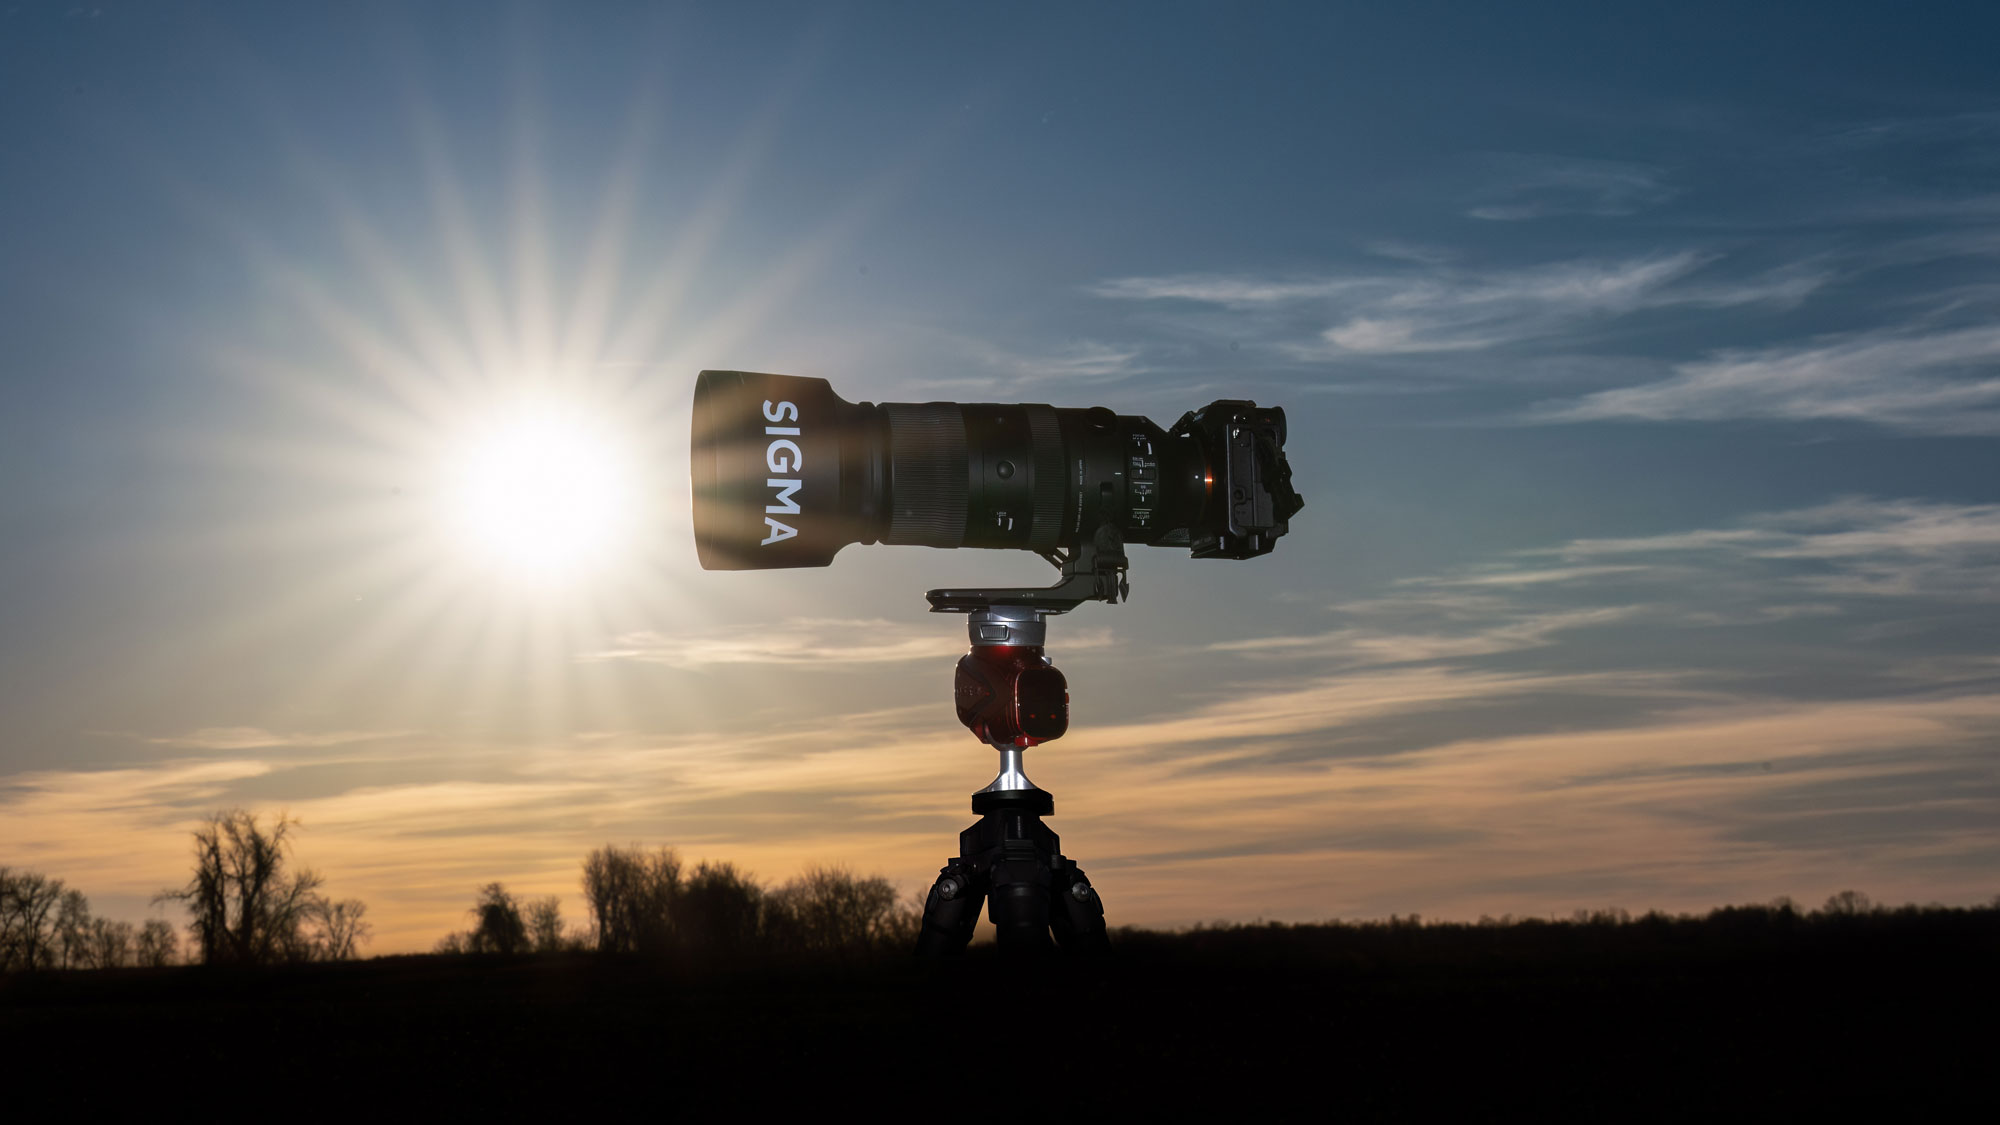
When it’s time to get set up, each camera will be on a sturdy tripod and have a remote trigger option (a physical cable or smartphone connection) so I can photograph with both cameras at the same time.
One thing to keep in mind is that while the tripods will keep my cameras pointed in the right general direction during the eclipse, the sun will be moving so I will be manually repositioning each camera every minute or so.
Solar Filters are a MUST
Let’s not forget one of the most important items when photographing the eclipse… solar filters for each lens so you don’t damage your camera sensor.
Back in 2017, I bought solar filter sheet material and glued it to the correct diameter skylight filter for the lenses I was using. While that worked, I have a better solutions in 2024.
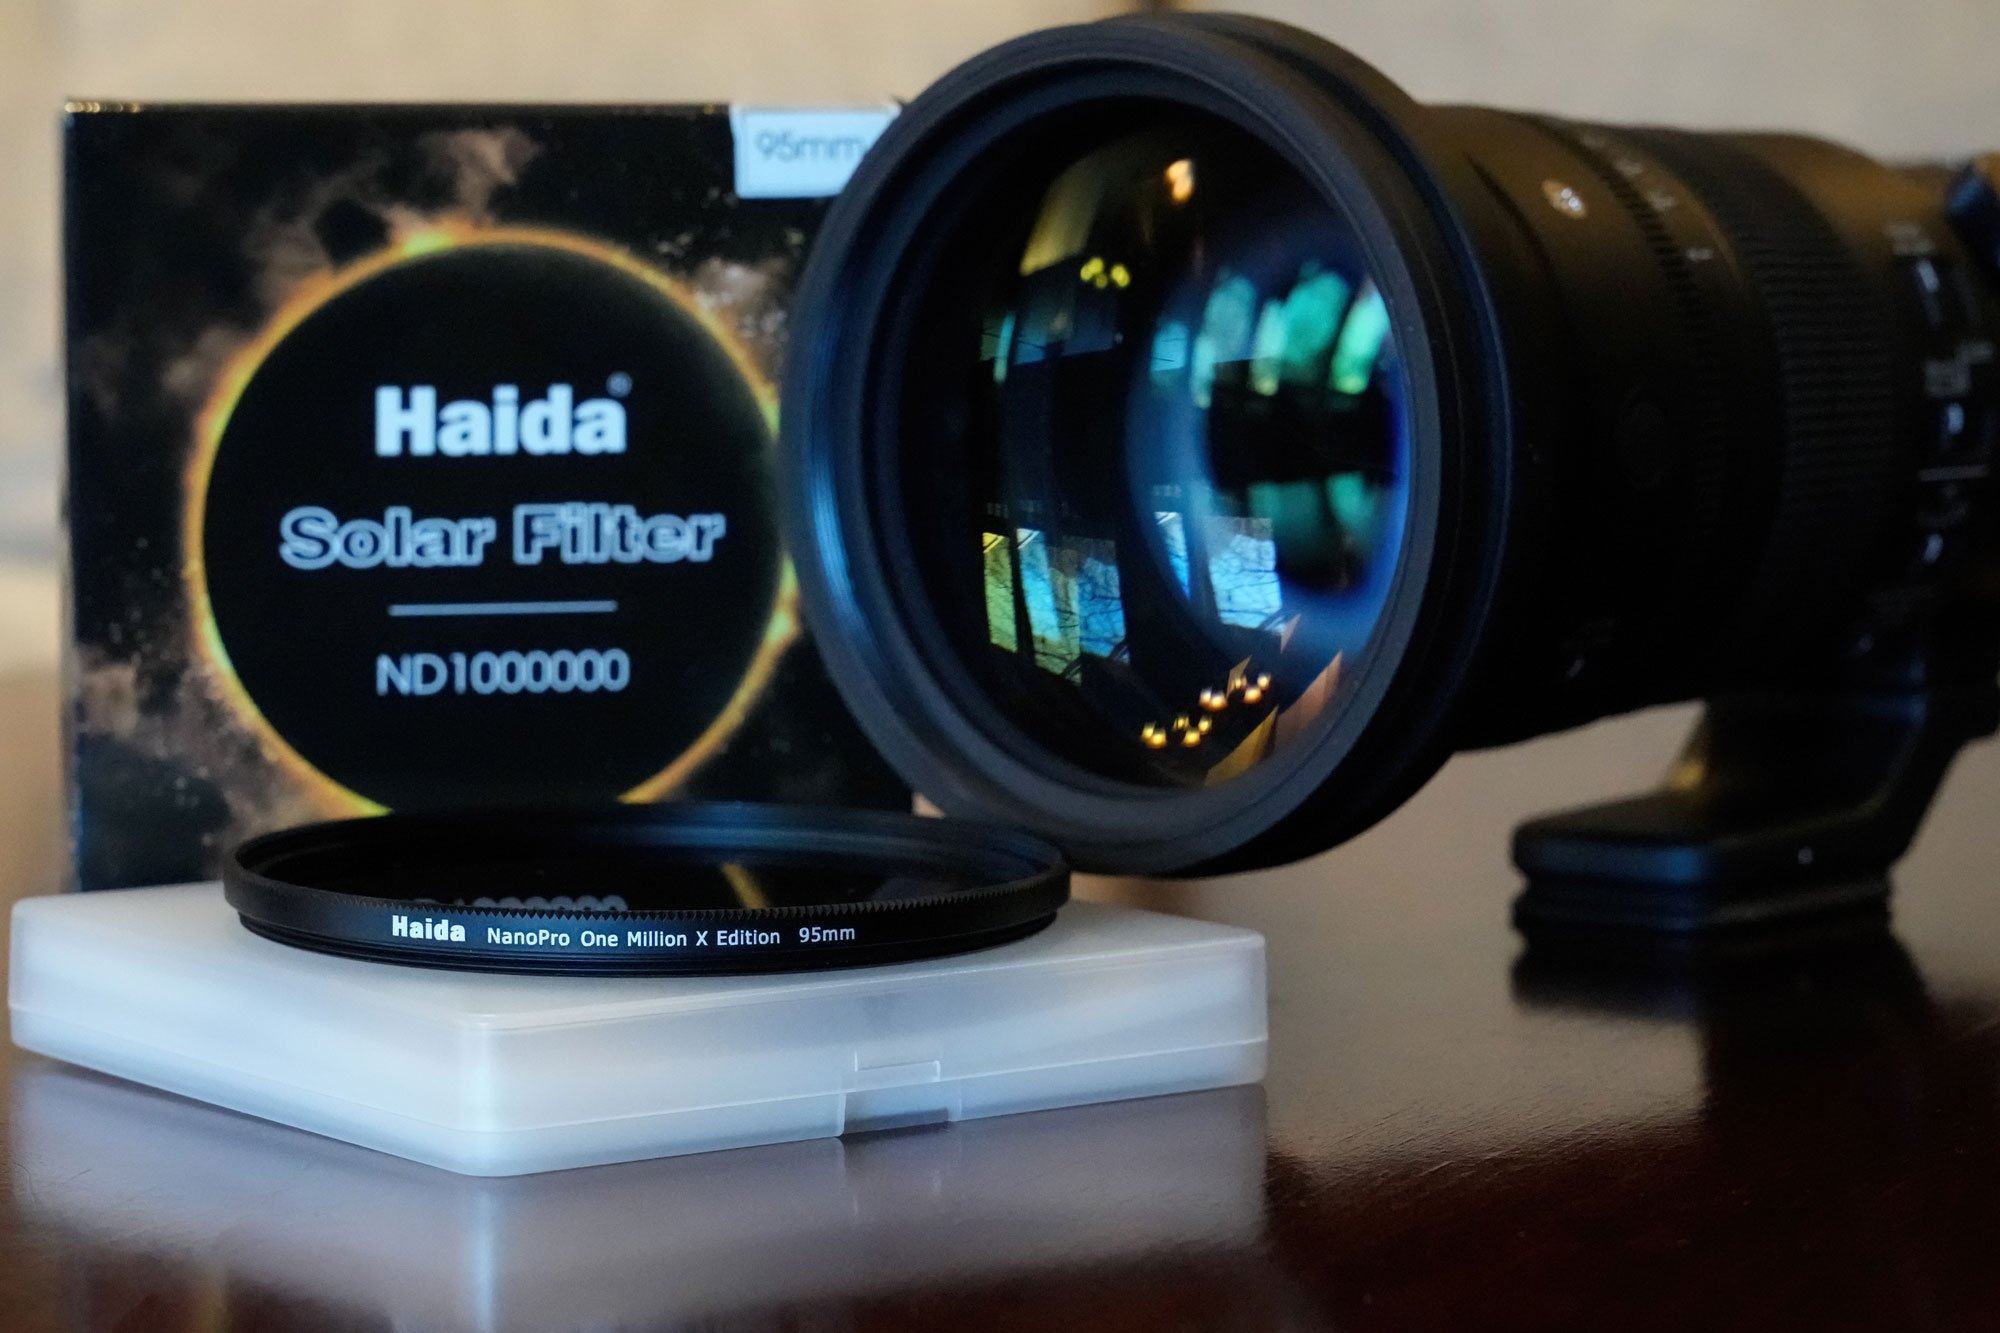
Haida makes high-quality solar filters in thread sizes from 67mm to 95mm. My new SIGMA 500mm DG DN OS | Sports lens has a 95mm front filter size, so I’ll be using the Haida Solar Filter ND1000000 on that lens.

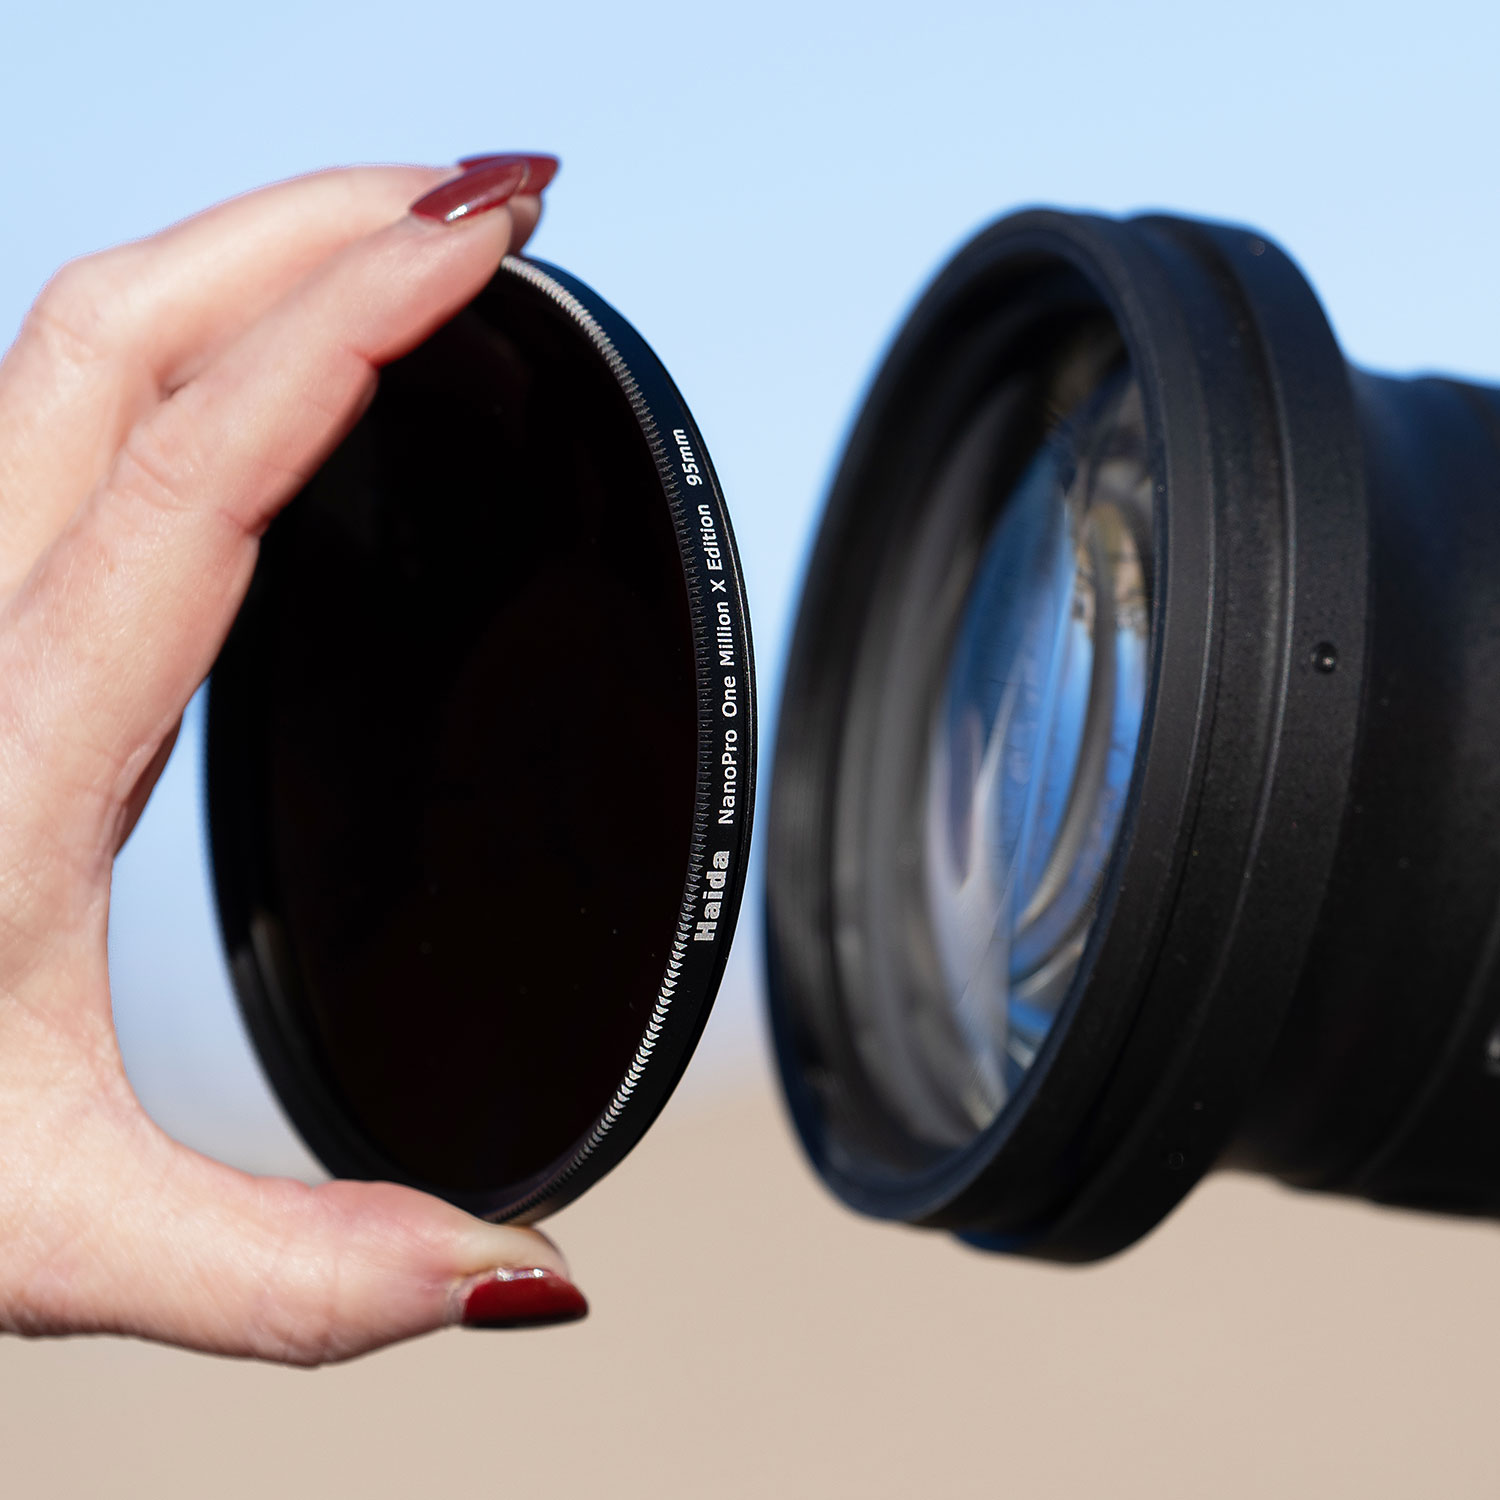
My SIGMA 60-600mm lens uses a 105mm filter, so I will have to use my handmade 105mm filter covered in solar filter material.
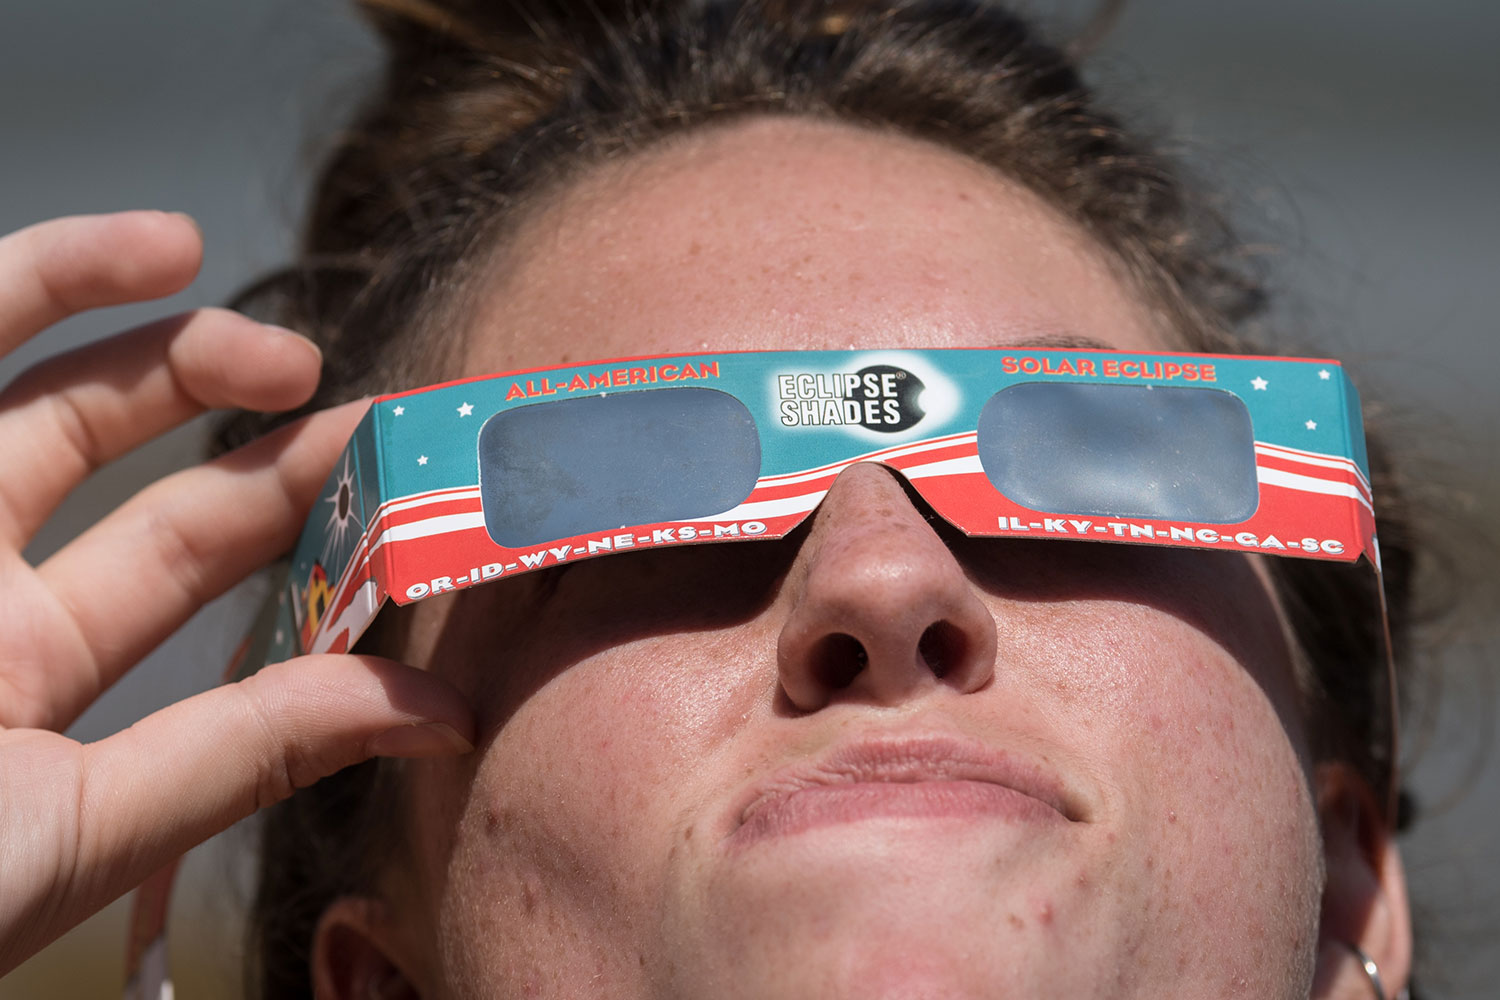
And let’s not forget the photographer when it comes to solar filters… as in “eclipse glasses”. Even when working between two cameras at the height of the total eclipse, there are still those moments when you want to just look up and take it all in, and solar viewing glasses are absolutely necessary to protect your eyes.
Settings and Shooting
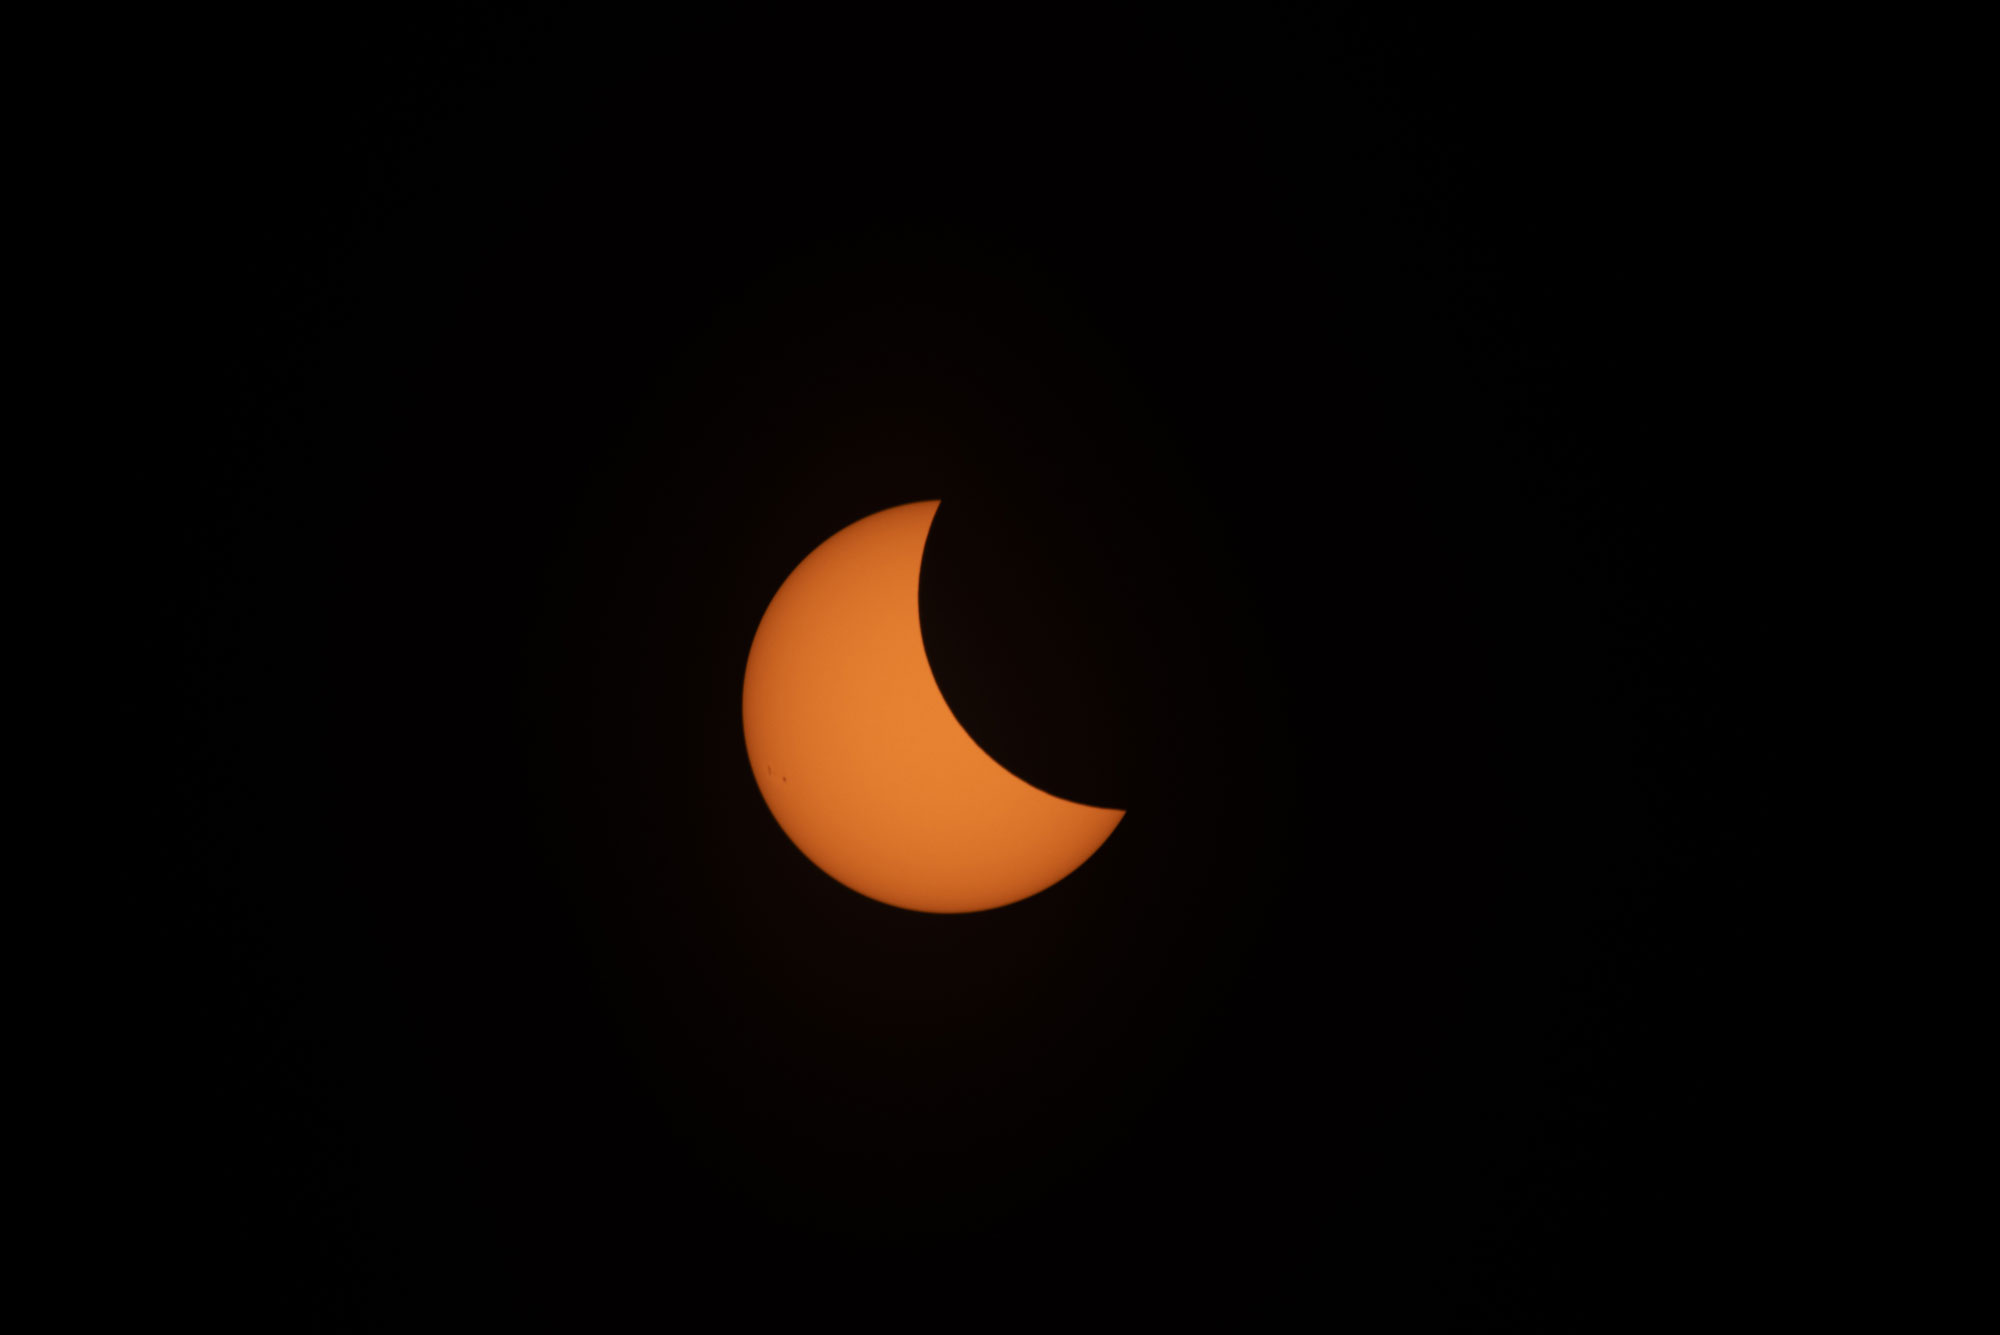
Getting the correct exposure for the eclipse is pretty easy just by looking at the LCD on the back of the camera, but it doesn’t hurt to have a plan before the moment arrives. Looking at my metadata from my 2017 photos provides a good starting point:
- ISO in the 100-400 range. I’m giving myself some flexibility here to compensate for the loss of brightness as the eclipse progresses, but generally, a low ISO is preferable to keep noise to a minimum.
- F-stop from F6.3 to F9. Generally lenses are sharpest in the middle f-stops, so I may start around F8 and allow changes as the brightness diminishes. One tip is not to go to F22 or F32 (or your minimum f-stop) because lens diffraction may soften your images. There’s no need for an expansive depth of field, so use the aperture that you find the sharpest overall.
- The best way to adjust exposure in a situation like this is by changing shutter speeds. My metadata from 2017 puts my shutter speed in the 1/500 second for a good starting point.
- RAW image format to allow the most adjustment in post production.
- Manual exposure mode on the camera to give the most accurate (and consistent from shot to shot) exposure control.
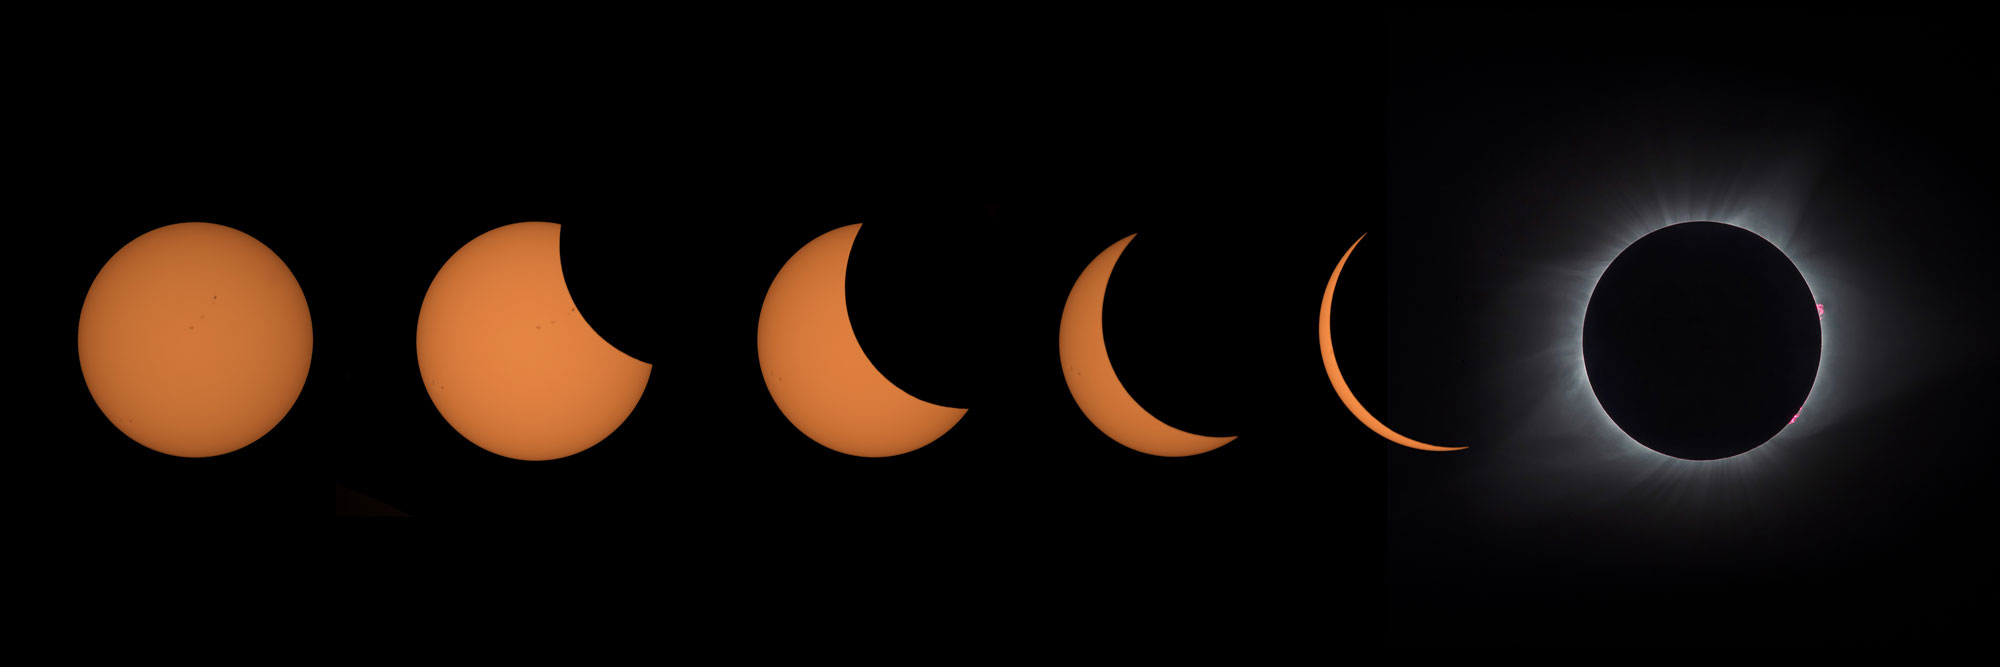
- Once the eclipse has entered totality, the solar filter can come off (temporarily) and exposure adjustments need to be made to make up for the loss of brightness. An interesting note from the Mr. Eclipse website is that “The corona has a surface brightness a million times fainter than the photosphere,” so make changes accordingly, and quickly.
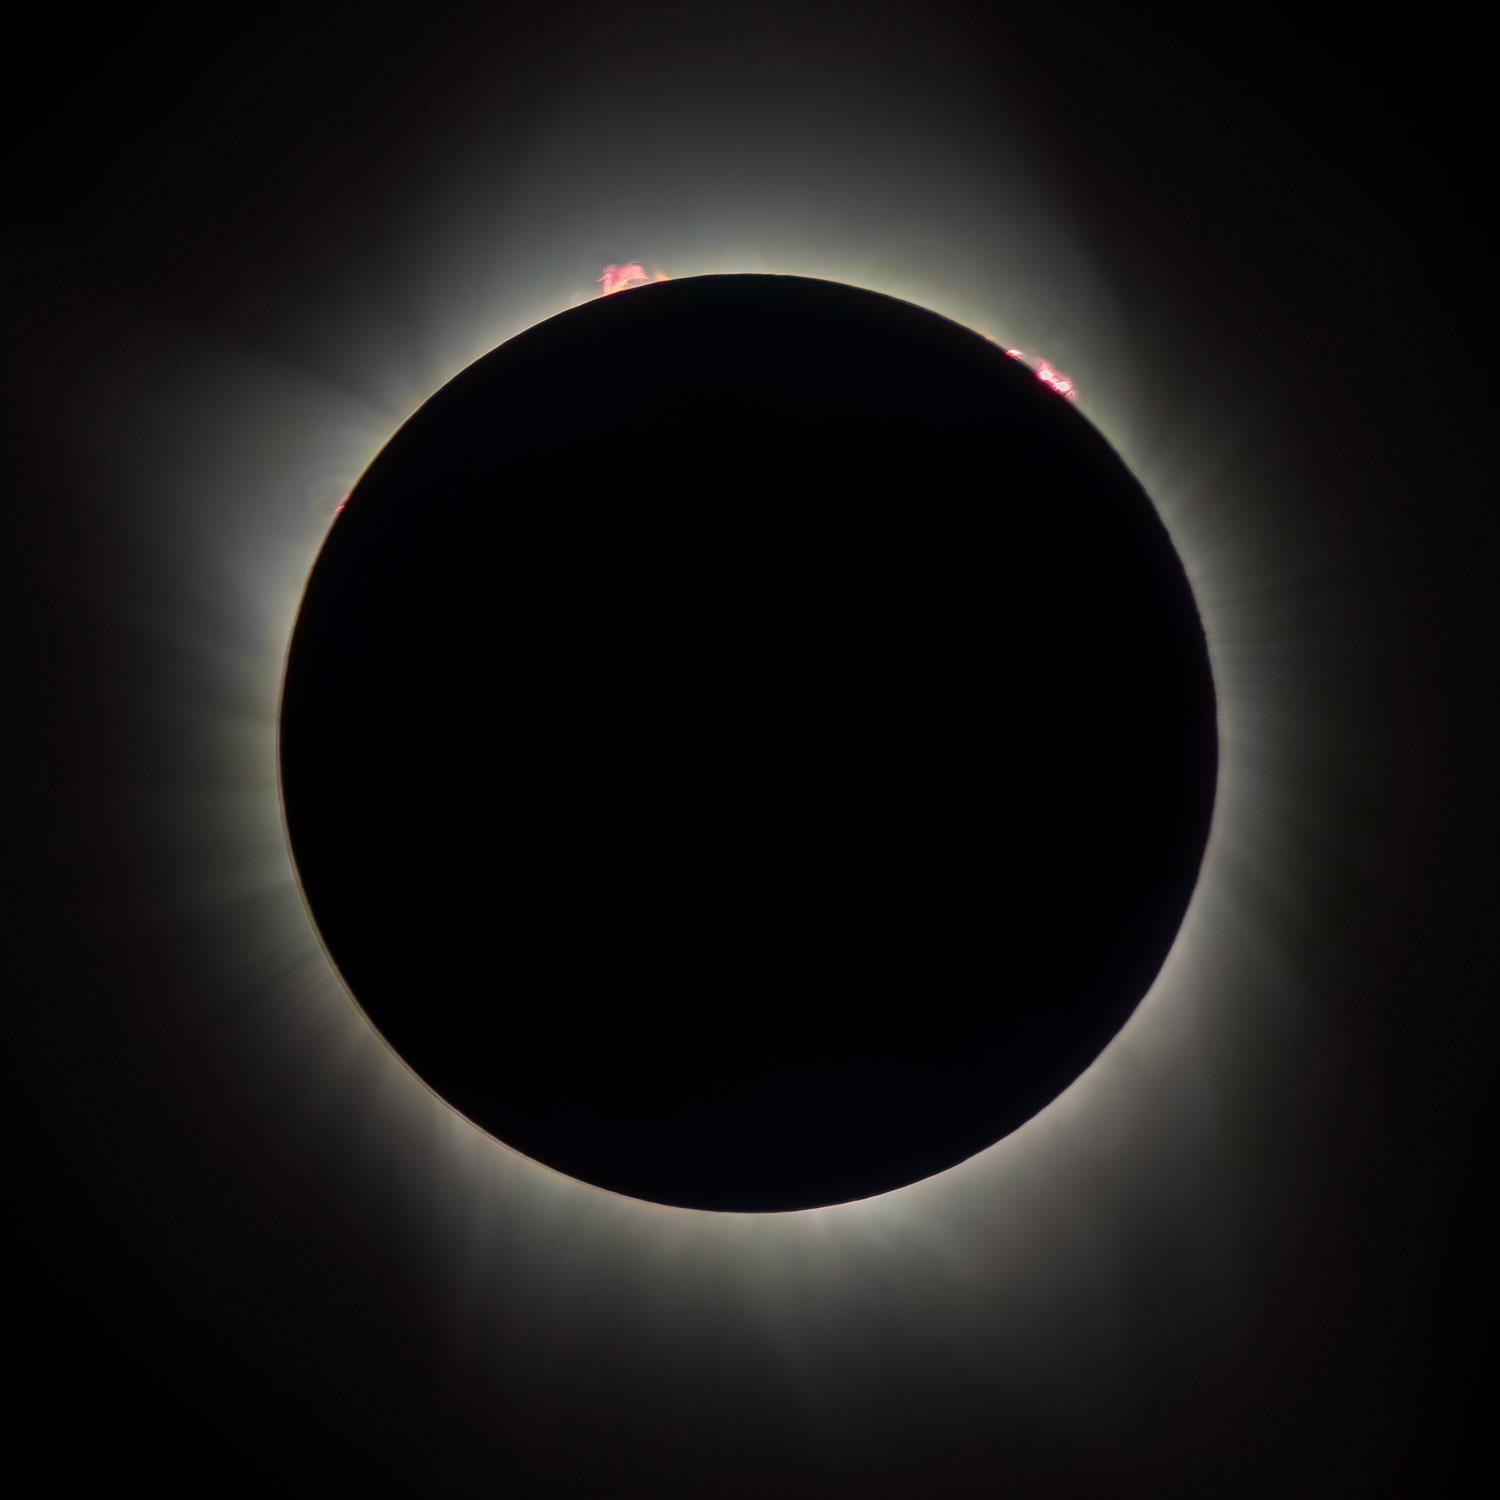
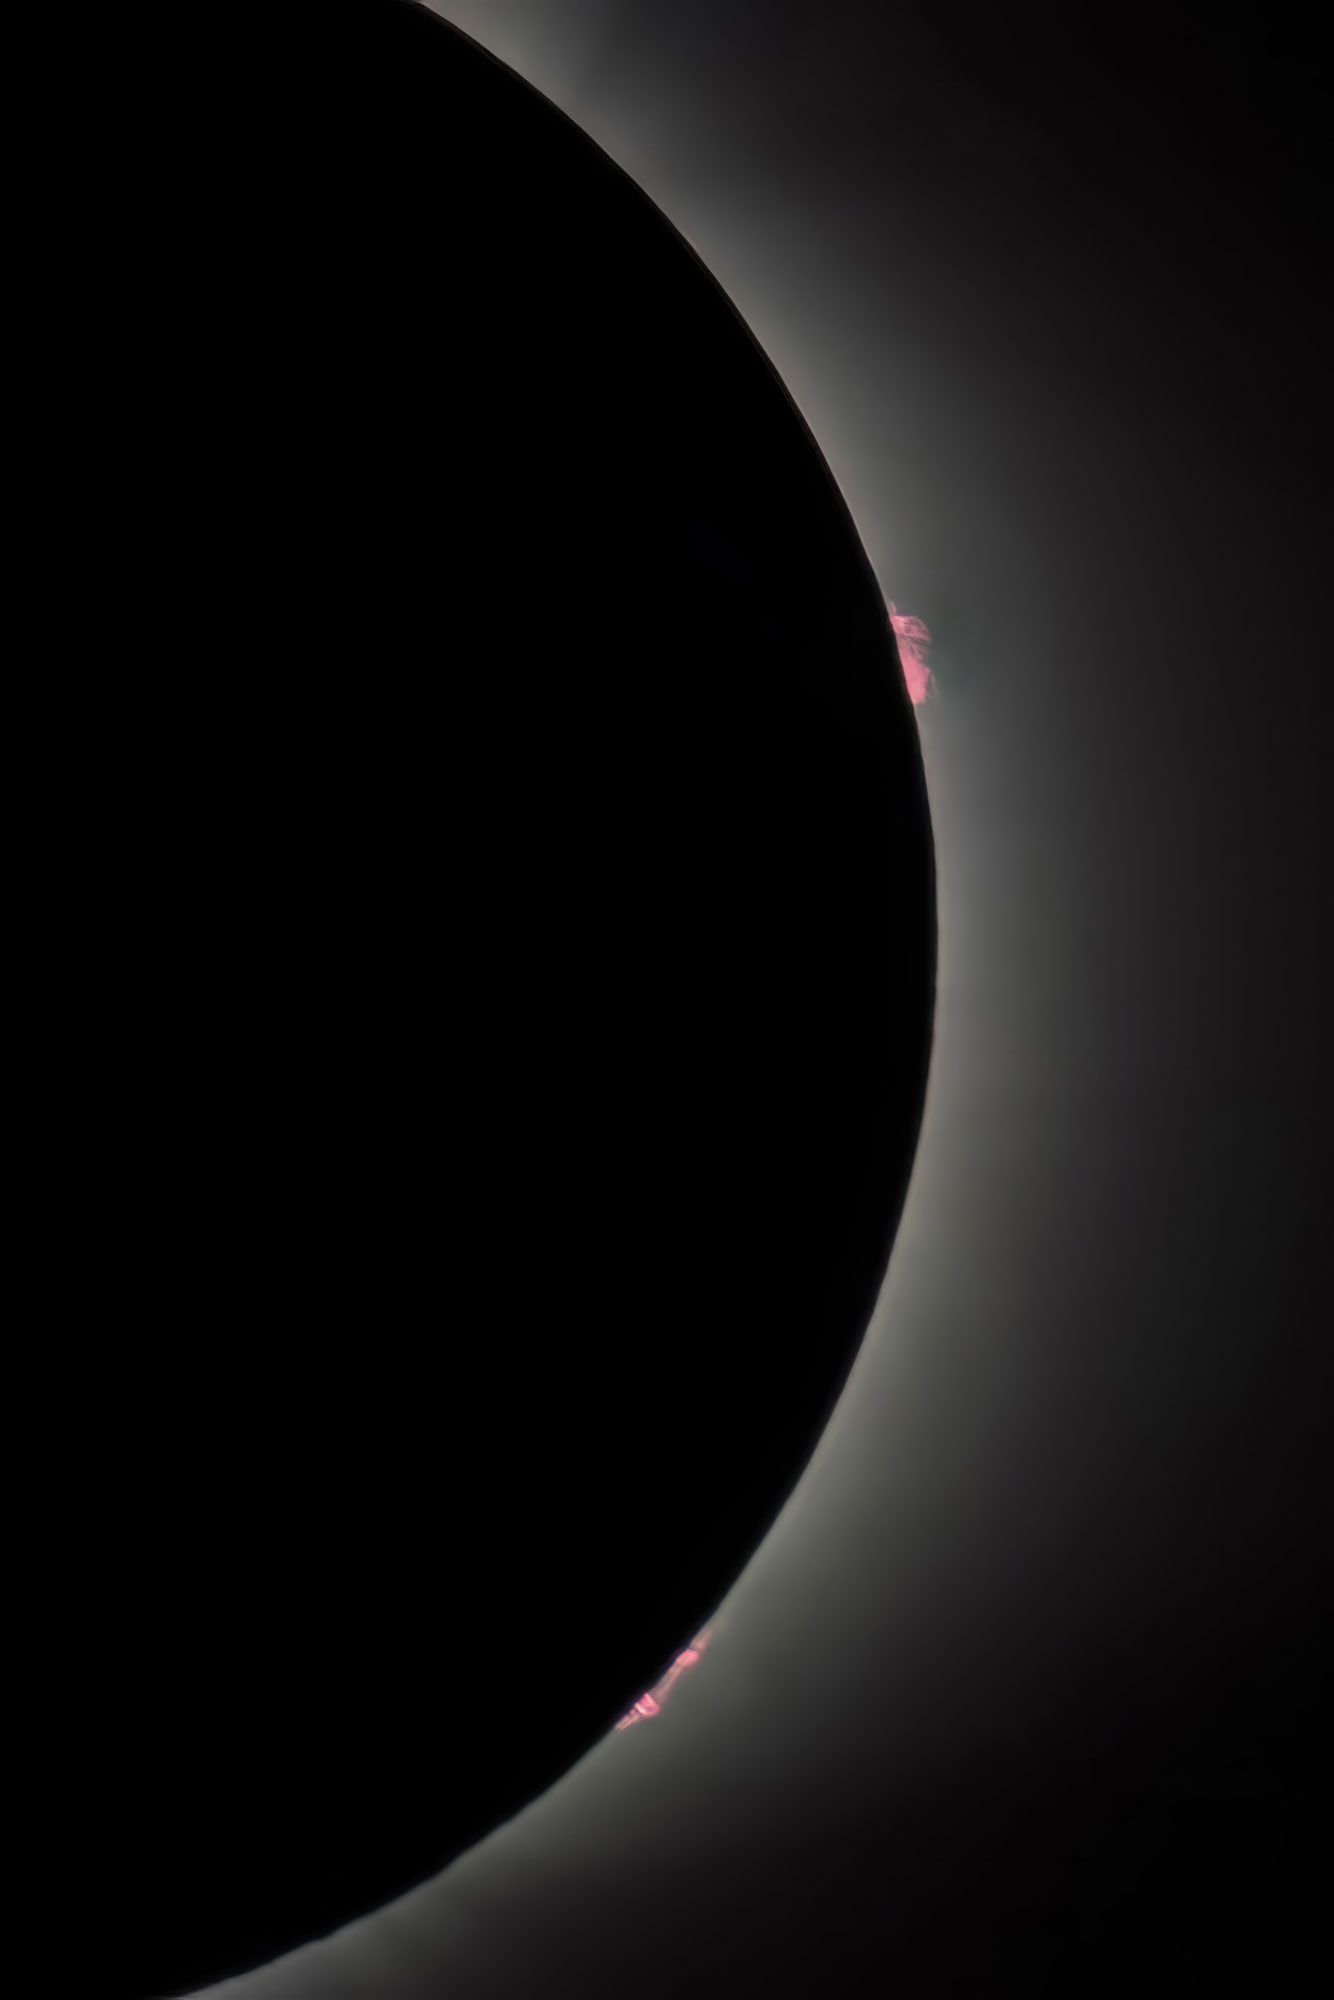
When at full totality, I’m going to bracket my shutter speed a bit more than I did in 2017. Since you have a pretty dark image with just the corona, it’s easy to want to overexpose. The downside of that is losing detail in the corona when you zoom in during post processing. Bracketing will give you more options.
The Most Difficult Part(s)
Now for the hard part… watching the weather for the days preceding the eclipse and figuring out exactly where to go to photograph it.
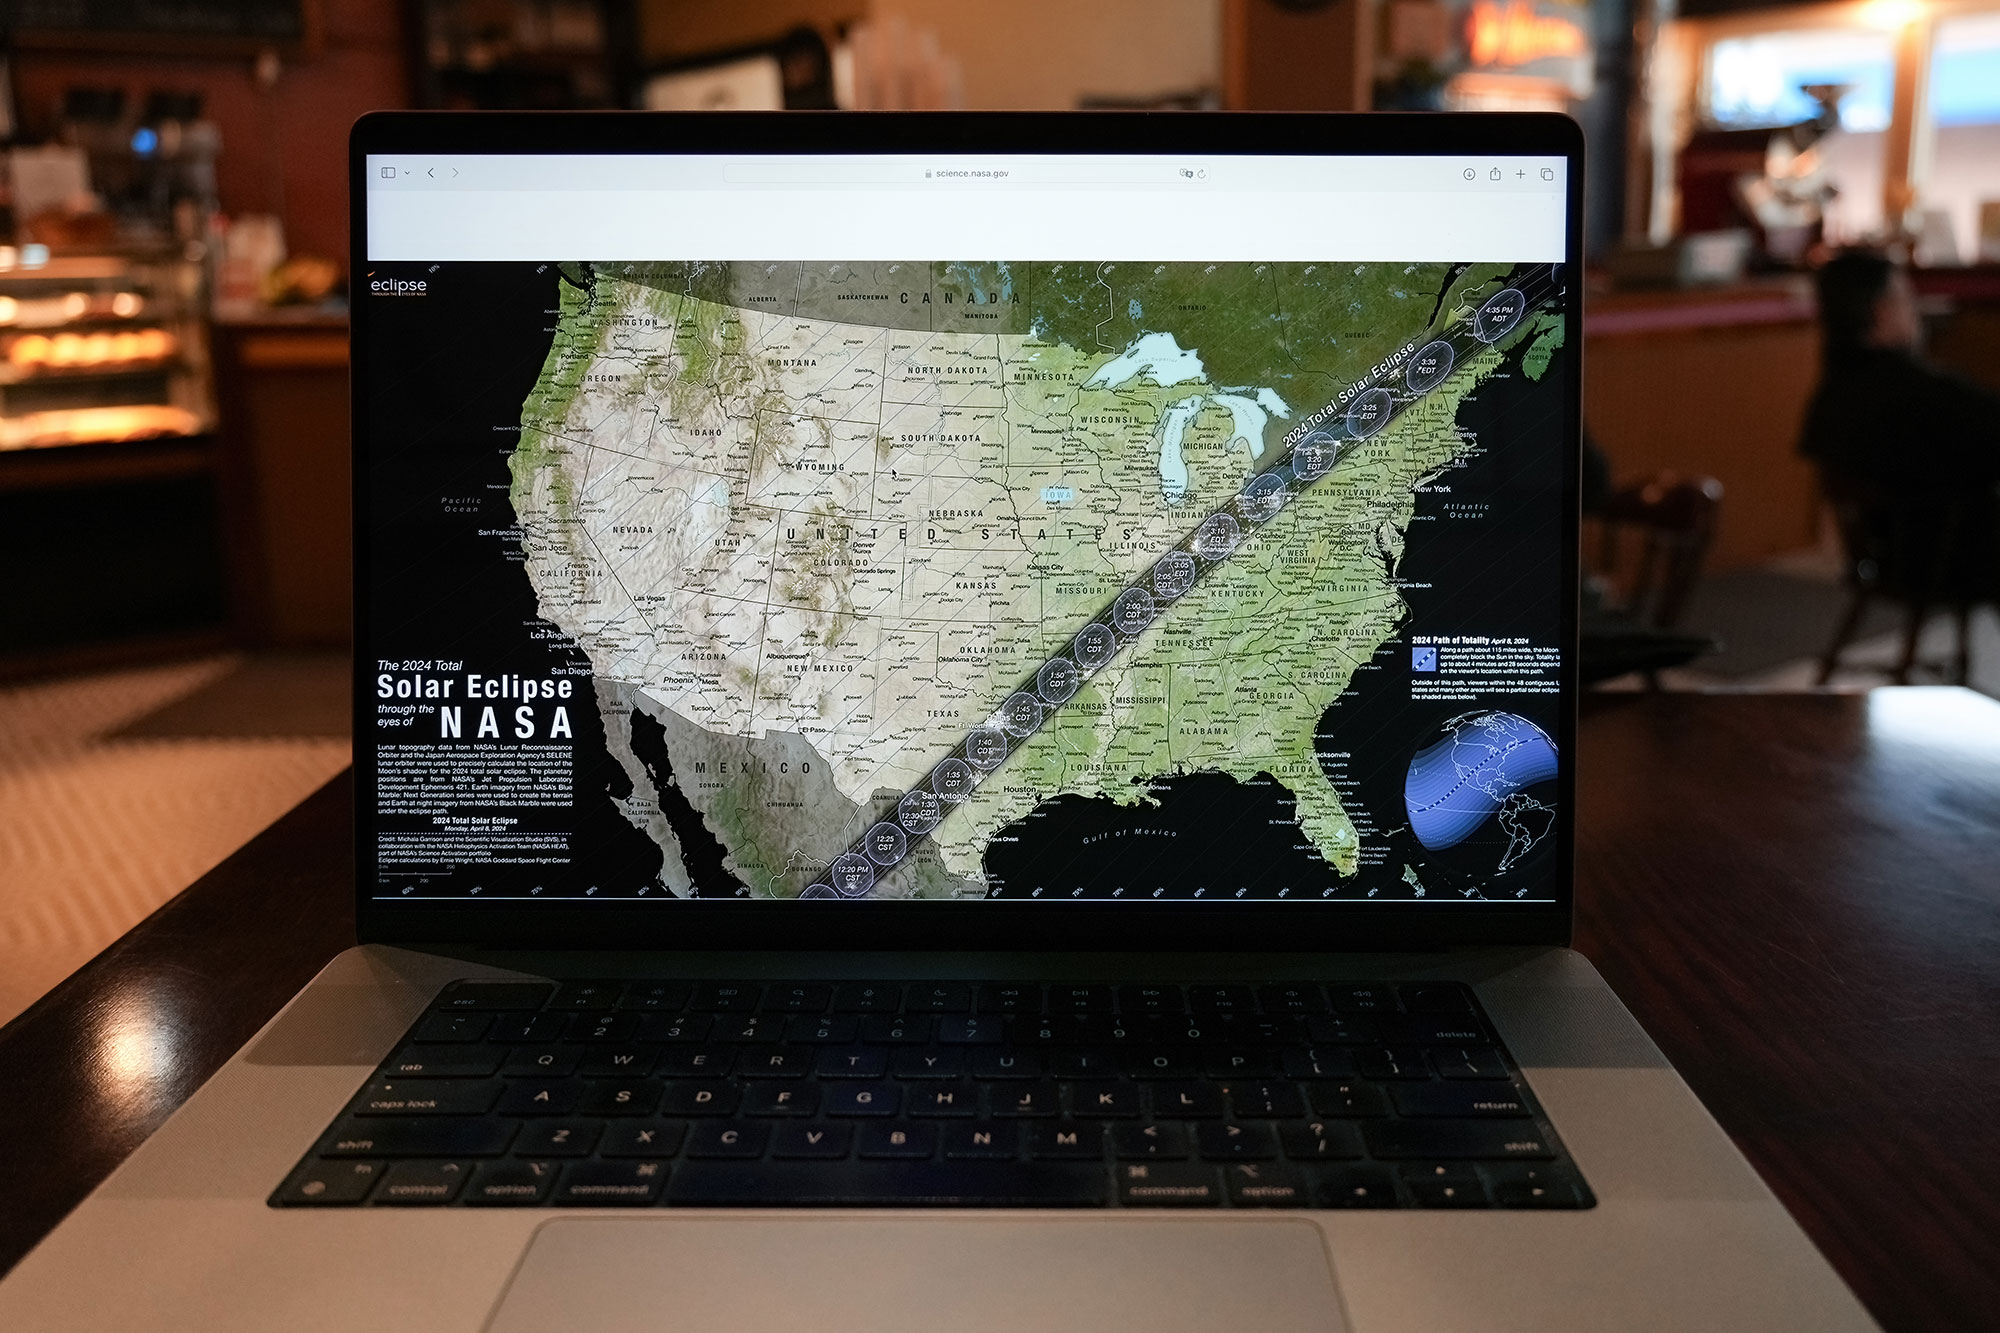
In 2017, I did a somewhat short road trip from Oshkosh, WI to the Shawnee National Forest near Carbondale, IL. This year my plan is going to be similar, with options to Iowa or Missouri if weather is better to the west, or to Indiana if weather is better to the east. There is a lot of talk about the odds for clear skies being better in Texas, but that’s a bit farther than I want to travel.
I can’t give advice on where you should go, but it only takes a quick internet search to find maps on the path of the total eclipse across the United States and figure out what might work for you.
I also downloaded The Eclipse App for my iPhone that gives detailed info for each state the path of the eclipse passes through.
And the other hard part…
Getting home.
Here’s the biggest thing I learned from the 2017 eclipse experience – getting to a good spot is pretty easy. Watching the eclipse is something you will never forget. But getting home is going to be the big challenge. The Interstate going north to Wisconsin was jammed with traffic for hours after the last eclipse. Even pulling off for a long break didn’t result in traffic getting any better. So my plan this year is to stay put and edit my images right after the eclipse. Kick back for a few hours and let traffic start clearing. Then I’ll start the trip back home as sunset approaches. I’m hoping by then a lot of the traffic will have been alleviated. I’ll also look for smaller roads as I work my way north.
And, as a final backup, I have an air mattress in the back of the Bronco and I’ll just sleep a few hours and head back the next day. Sometimes, a once-in-a-generation event calls for a little adventure.
Final Eclipse Tips
- Gas or charge up often on the way to your destination so you always have plenty of range (and heat for a chilly night sleeping in the car).
- Bring plenty of water and food for the trip just in case things don’t go exactly as planned.
- Make sure you have charging capability in the car for camera batteries, your laptop, your phone, or other electronic essentials.
And most importantly, there’s this question: Why go through all of this when your photos will look like everyone else’s photos?
Simple… because they are YOUR photos.
It is an experience unlike anything else you have ever photographed. At some point, between adjusting exposure and triggering both cameras, I will stop and just look at what is happening. Look at how dark the sky has become. Look in awe at the dark sun with the corona. And wonder what people thought of this hundreds of years ago. It’s an experience you will never forget.

Get the gear you need to capture the next solar eclipse!