I’ve been on an extended test-drive with the Sigma 150-500mm F5-6.3 this year, paired with my trusty Nikon D7100. The great thing about this match is since the D7100 has a cropped sensor with a 1.5x factor, the 500mm reach effectively becomes 750mm. Using the in-camera 1.3 crop for added photo burst rate I end up with nearly 900mm of reach at the long end! That really comes in handy with wildlife photography. I have had a ton of fun with the lens and have to say I will have a very hard time ever giving it back. Besides being light enough to carry all day, the lens performs extremely well for wildlife, action sports, and big-orb sunsets, both on land, and on board boats in the waters off Long Island. And more recently, it’s been my go-to lens for New York whale watching.
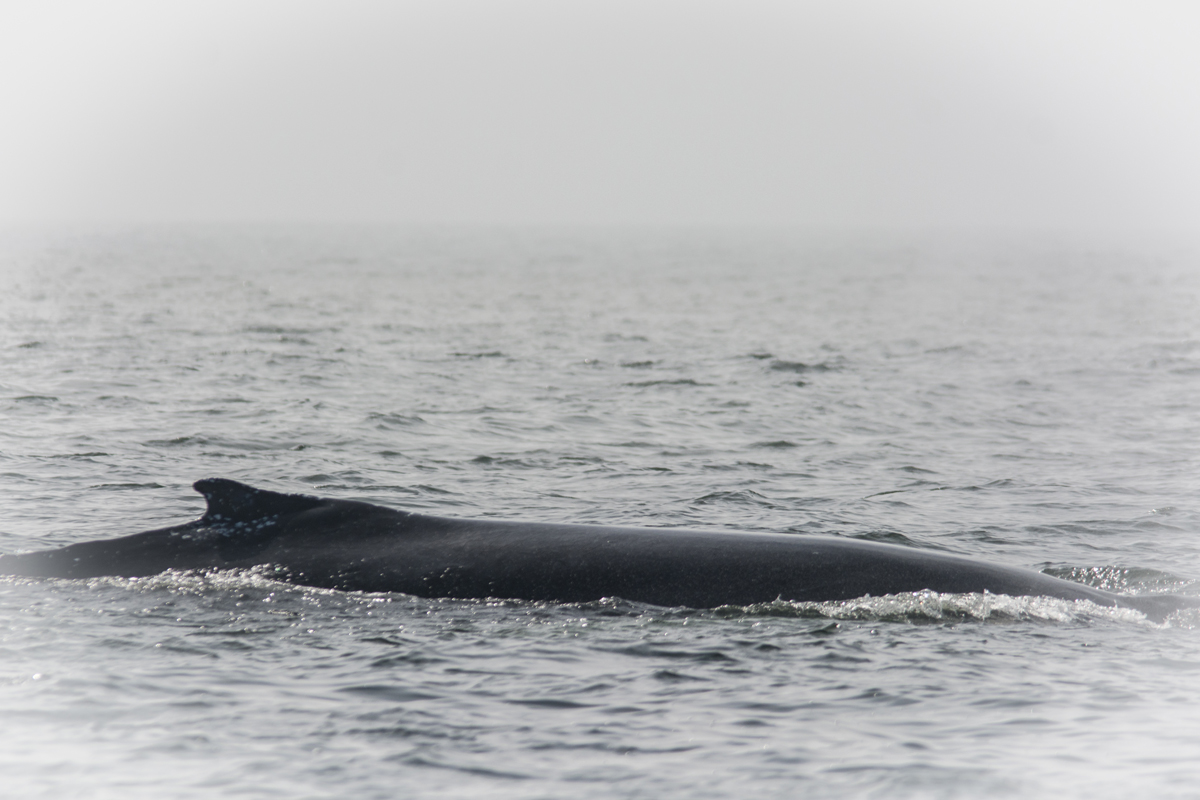
Having now made several whale watching voyages, I have had had no problem getting sharp shots from a moving boat. The harder part was getting the whales to cooperate by doing anything other than slowly swimming and surfacing briefly! This all changed when my friend Artie Raslich recently invited me on his 26 foot boat named Ship of Fools to follow a pod of whales that had been feeding actively close to shore within sight of New York City off Long Beach and East Rockaway New York. After passing through Deb’s inlet and breaking through a fog bank we found our first whale that we ended up following for several hours. One of my first shots was a fairly young Humpback gliding out of the fog. Artie knows his Whales and quickly identified this one as NYC0015. Apparently this one and his Mother have been in the area all year feeding on the abundant bunker in the area.
The greatest thing about interchangeable camera lenses is the variety of optical designs, from ultrawide to supertelephoto and everything in between, that offer an incredible amount of variety for visual expression, creativity, and optical performance optimized for different photographic situations. And while it may be sometimes completely and totally obvious what types of photography a certain lens excels at—for example, everyone knows that Macros are designed to capture close-up details; telephoto lenses are great for long-reach wildlife and sports from the sidelines—many styles of camera lenses have lesser-known secret superpowers that can be called upon to make a photo. Let’s take a look!
Supertelephoto Lenses
Long lenses, like the Sigma 150-500mm F5.6.3, or 300-800 F5.6 to name two, are known to be great for making sports and wildlife images. Wide open, these lenses can isolate the subject from the background to really make the images pop. And of course, the wide apertures which give very shallow depth of field feel also yield the fastest shutter speeds, which are necessary to freeze a bird in flight, or an athlete on the move.
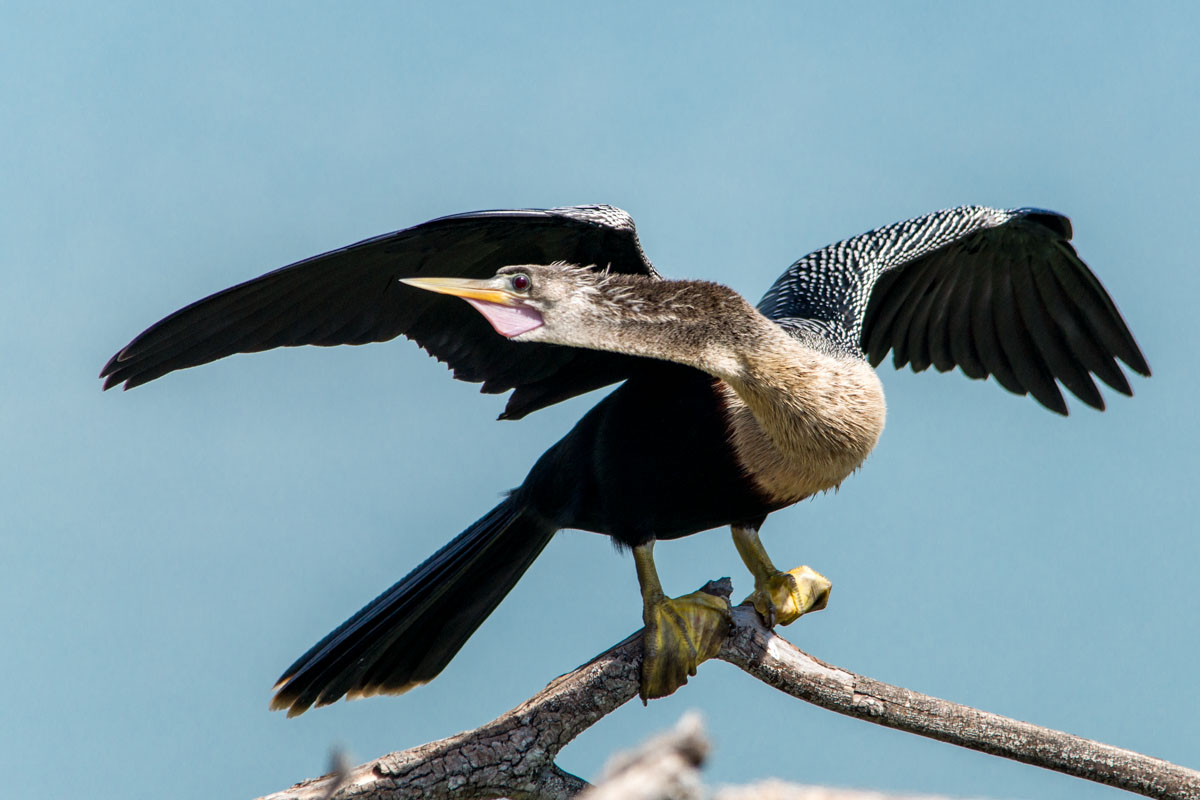
Everyone knows supertelephoto zoom lenses are great for long-reach photography at widest apertures for freezing active subjects, like wild birds, with fast shutter speeds. Here, the Sigma 150-500mm is trained on an American Anhinga, at 500mm, wide open at F6.3.
And Landscape, or should we say sky-scape, photographers also know that longer focal lengths also can make for huge suns and moons, the effect of which is amplified when the celestial orb is near earthbound features in the frame. Continue reading Somewhat Secret Superpowers of Camera lenses
Our new video quicktips series offers advice for photographers who are looking to understand more about the techniques and technologies that can help them make better pictures. Each episode is just a few minutes long and looks to explain and offer advice in an easy-to-grasp way. Check back on this posting all month long as we continue to add new episodes to this series.
Our First Episode demonstrates how to Hold a Big Camera Lens:
And here we explain How, When, and Why to Use Optical Stabilization:
Got a topic you’d like us to tackle? Leave a comment for consideration!
Learning how and when to use different settings and options for image capture is one of the most important parts of becoming a stronger photographer. There’s no setting or camera function that’s going to be perfect for all situations, while is exactly why there are so many options. For example, every DSLR offers a couple variations on Autofocus for either a Single-shot or Continuously tracking autofocus.
Each has it strengths and purposes, and even with that, there’s still times when switching the lens to manual focus is the best way to ensure that your chosen subject and focal point is sharp in the image. In this piece, we’re going to look at three photos of seagulls to briefly explore and explain the reasons why to choose one type of AF or manual focus over the others.
Single-Shot Autofocus
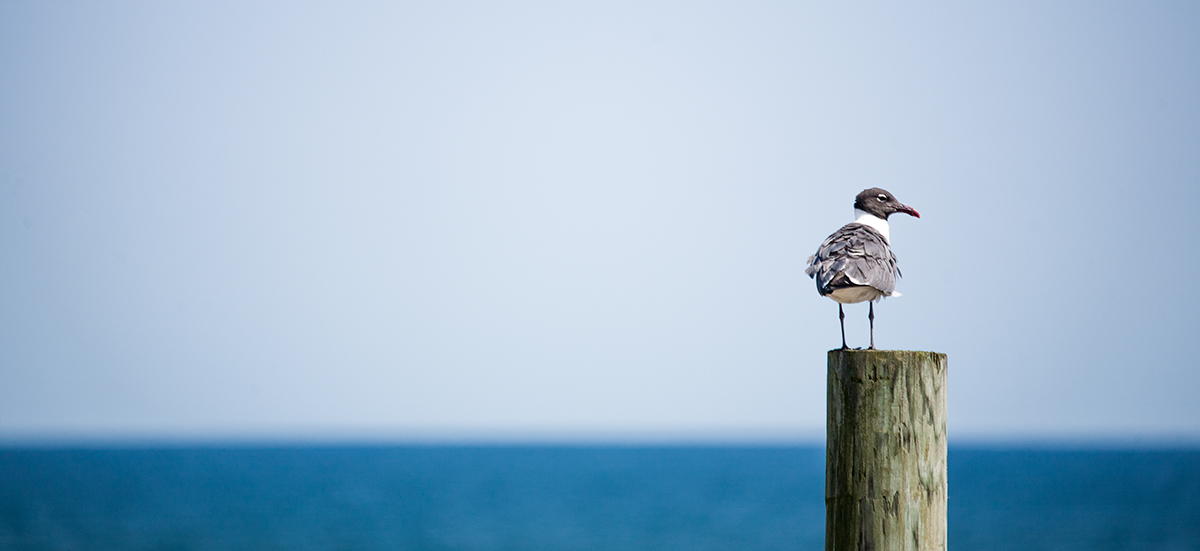
This laughing gull was perched on a telephone pole for several minutes. I set my camera to Single-shot AF so that once it locked onto the bird, I could fire off a few frames. I choose single-shot for stationary and effectively stationary subjects, such as this.
In a nutshell, here’s how single-shot autofocus works: You aim your lens at the subject and press the shutter button to engage autofocus. Once the AF algorithms determine that there is something in focus at the selected AF points, autofocus stops, and the lens stays at the focal distance until either the shutter is fired or the autofocus is reengaged by letting go of the shutter button to restart AF. This mode of Autofocus is best suited for stationary subjects, such as a family sitting on a bench for a posed portrait, a child napping in a crib, a posed shot of a child in their team uniform, a non-sentient subject such as a statue, or as shown here, a laughing gull sitting atop a telephone pole at water’s edge.
Continuous Autofocus
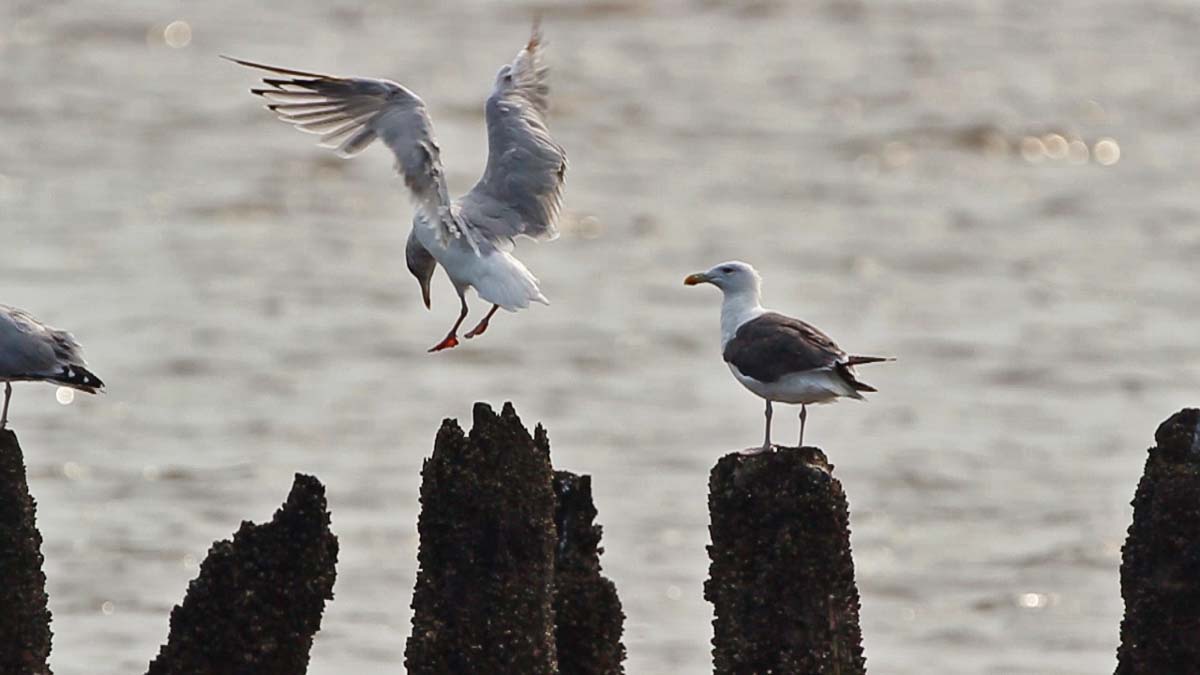
Here, again, we’ve got a gull, but this time, it’s in flight. Continuous AF keeps adjusting focus to ensure whatever is in-frame at the given focus point is sharp in the captured image, perfect for tracking a bird in the air.
Continuous Autofocus strives constantly to keep whatever is in the active AF point perfectly sharp. So long as the shutter button is held halfway down, the camera and lens keep working to ensure that whatever is in that AF zone is sharp when the shutter is fired. This is handy for moving subjects, such as runners approaching a finish line, horses trotting across a meadow, a child riding a trike down the lane, or a herring gull in flight over a bay. Tracking subjects in motion is trickier than capturing still subjects, and depending on the camera, lens, and subject contrast, it is likely that some shots will be missed. But remember, at the end of the day, it’s not about what you miss, but the shots you do succeed in capturing that truly count!
Skipping Autofocus and Opting for Manual Focus
Here is an example of when I’ll skip autofocus and switch into manual focus. I was waiting for gulls to alight on these old pilings, and I want to camera to snap the exposure the second a bird enters the frame, without searching for something to lock onto–since I’ve already locked onto where I anticipate the action to take place!
Despite the artificial intelligence of camera’s AF algorithms, there are times when good old human intuition should be employed to override the camera’s processors. And that’s why every camera and lens still offers a manual focusing ring. Continuing with our gull theme, one very good reason to switch to manual focus is when you can anticipate where the focal point is going to be, even if the subject hasn’t yet arrived there. So, for example, in this photo, we focused on the empty piling, then switched to manual focus, so that when one of the gulls in the area decided it was time to come if for a landing, we’d be ready instantly to snap the frame–without the camera engaging autofocus and searching out to the horizon and potentially missing the moment.
Another very good illustrative example of when and why to consider manual focus is the “stealing second base” scenario in baseball. There are times when it is very likely that the runner on first is going to make a break for second, and that’s where you’ll want to be focused, even if there’s nothing happening there at the moment. There’s only the bag to pre-focus on before the pitch, and you don’t necessarily want the base directly in center of the frame. But you can manually focus on the bag and recompose the frame so the bag in focus is lower in the frame and wait for the pitch. Then, once the pitch is away, and the runner sprints from first, you’re ready to fire off a series of frames as he enters the frame from the right and slides in while the 2nd Baseman enters the frame from the left and tries to make the catch and tag-out. There’s no AF search and confusion with the two moving subjects as the lens is in manual focus.
In short, this explains how, when, and why I choose a certain focus for a given photo situation. There are times when I might break these rules for various reasons, but more often than not, a photo situation can be mapped to one of these three gull-based scenarios.
If it is standing still, I choose single-shot.
If it is flying, I choose continuous.
If I am anticipating a takeoff or landing at a given point, I choose manual focus.
Welcome to the newest section of our blog, No Fear Photography! We’re here to help beginning photographers learn to make the most of their cameras, to take creative control, to explore, and capture amazing images all along the way.
It’s never been a better time to make the jump from a camera phone or point and shoot to an interchangeable lens camera–today’s entry level cameras in both the DSLR and compact interchangeable lens categories offer feature sets for both still and video that outclass pro cameras from a decade ago costing several thousand dollars.
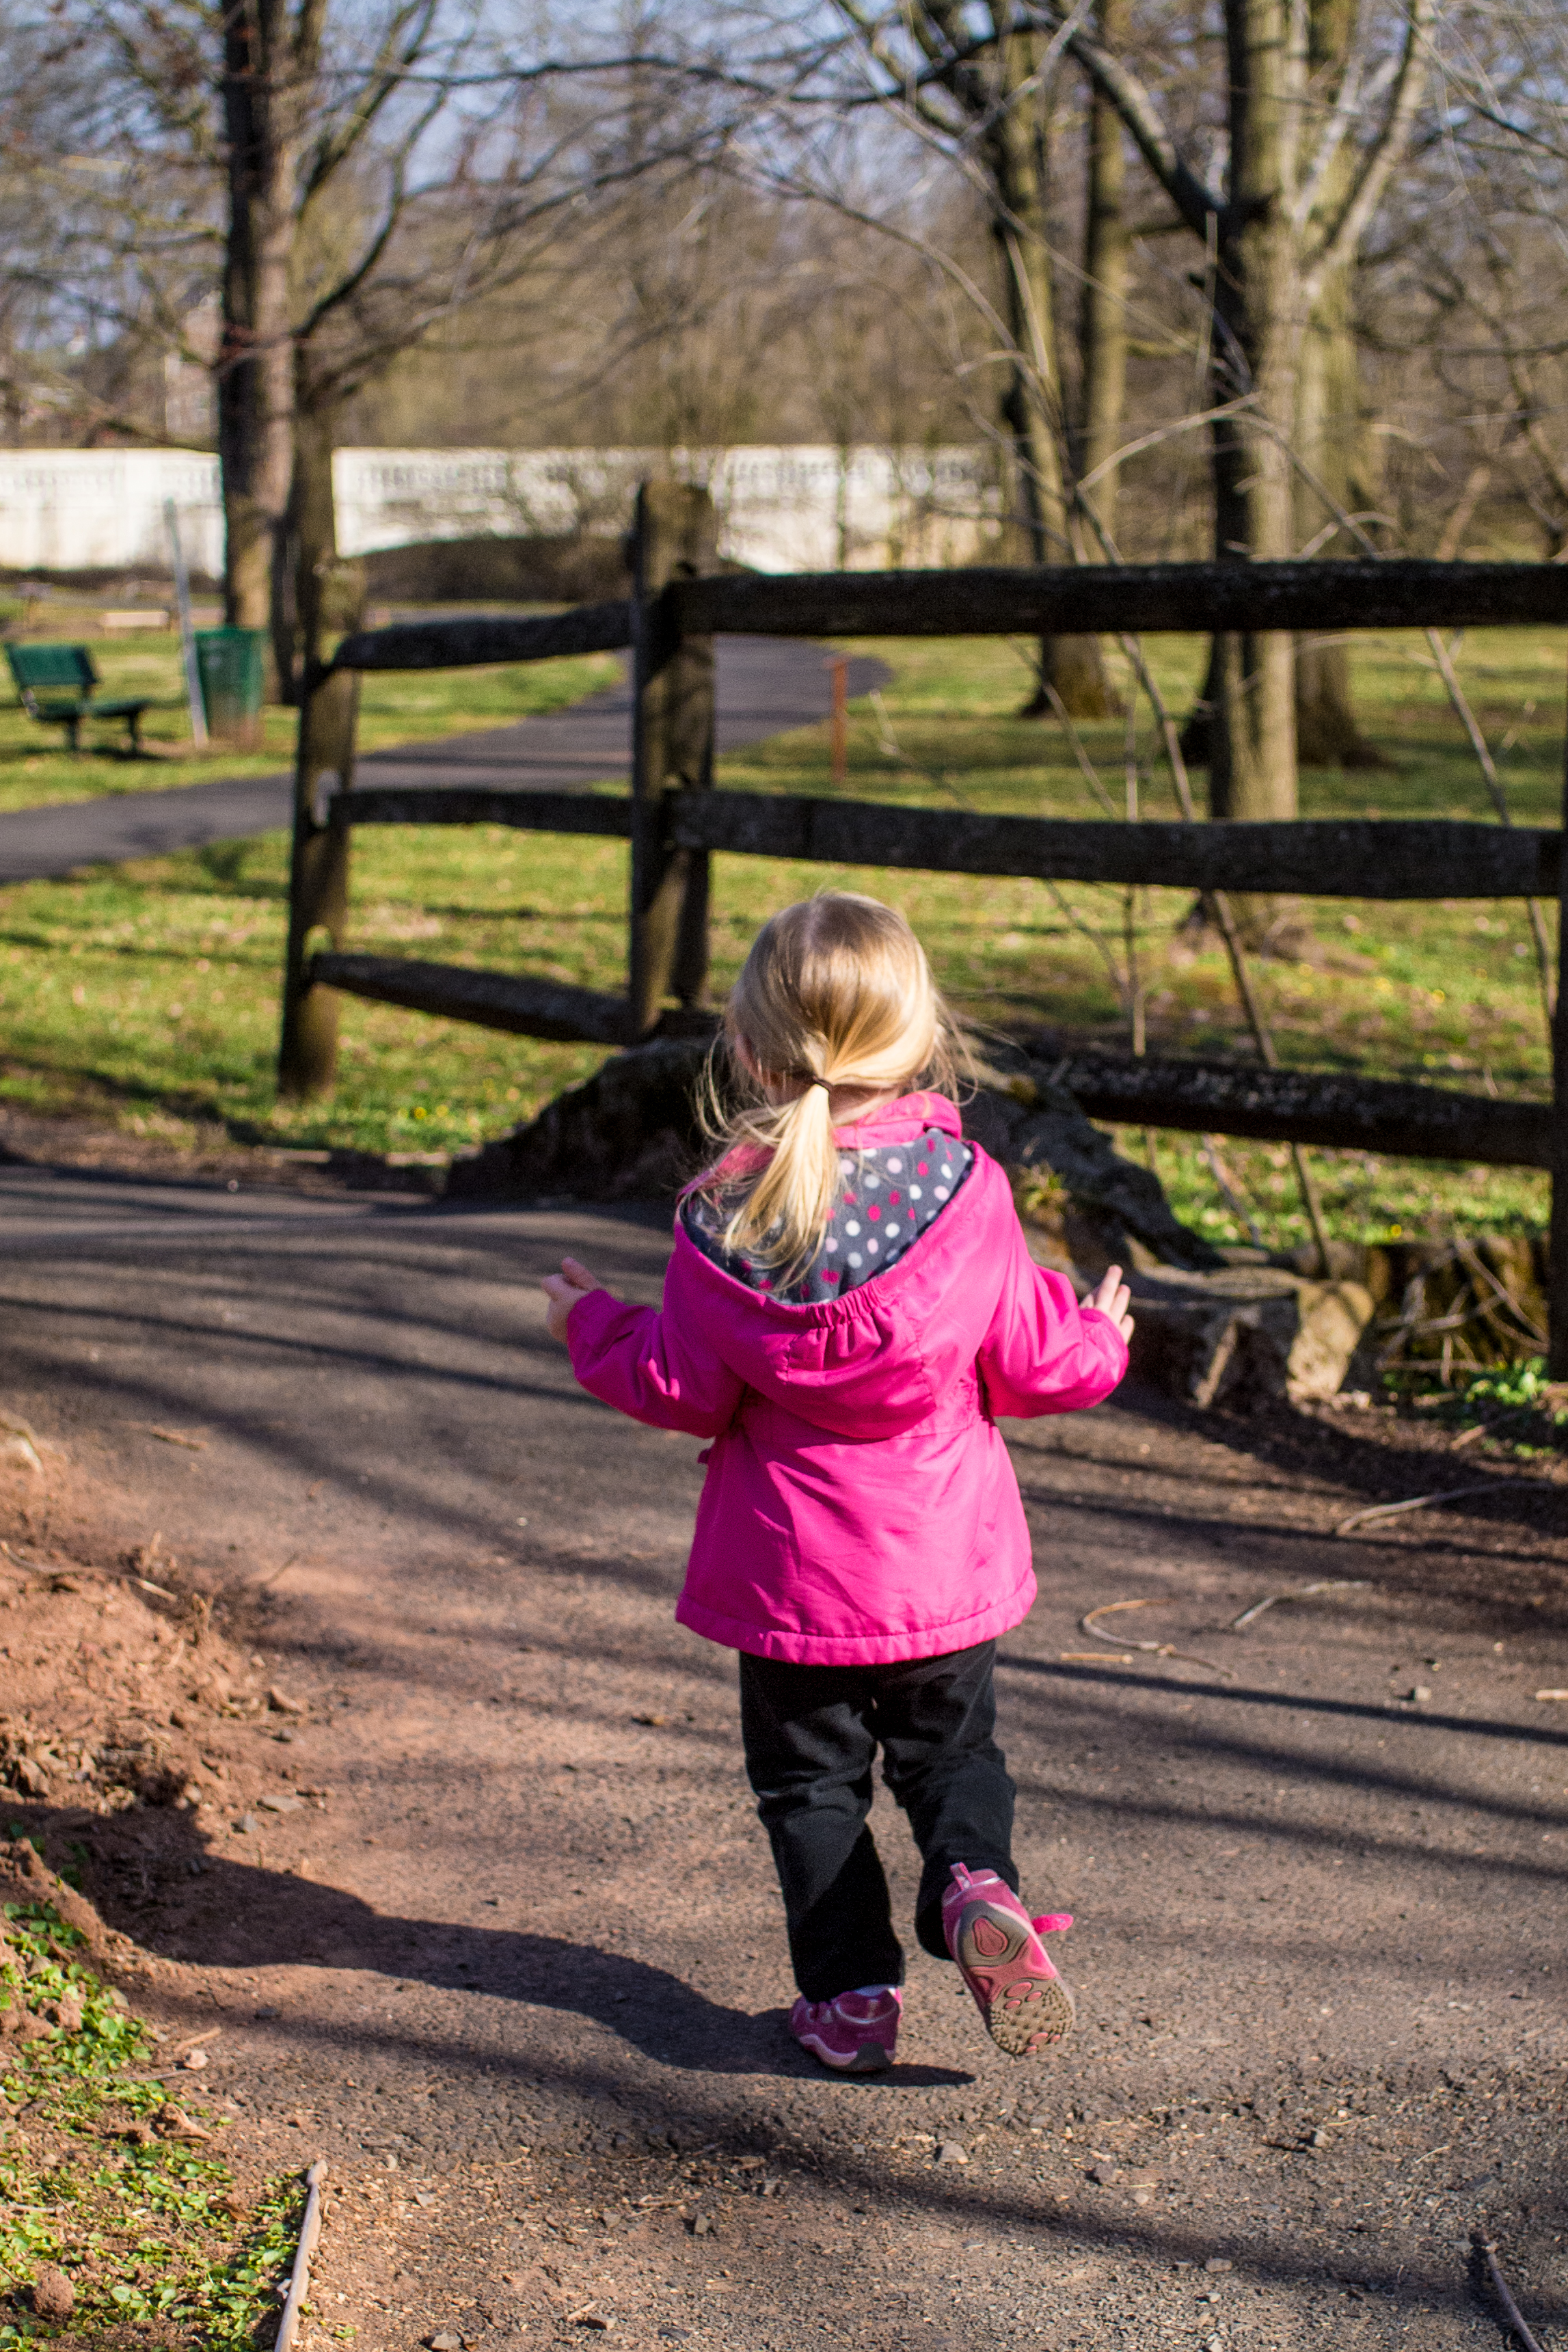
We’ll get you up and running with your DSLR and compact interchangeable photography! This photo was made with the Olympus E-PL2 in Aperture-priority Program mode to select the fastest F2.8 aperture and continuous AF on the Sigma 30mm F2.8 DN | Art lens o to track and freeze the action and also soften the background. Learning how and when to select different camera modes and settings helps take more creative control.
Cameras are smarter than ever–with predictive autofocus, advanced automatic metering and scene modes– it is really easy to leave a DSLR with the bundled lens on Program mode all the time with good results.
Taking creative control–selecting your own shutter speeds and F/Stop to adjust the feel of the photo in terms of how much is in focus and to freeze fast action or convey a sense of motion, or by selecting a longer or wider lens to bring a different feel to your point of view–this is truly where the expressive power of the camera shines through.
Sigma Photo Pro 5.5 is a significant update to the raw processor for X3F Raw files from Sigma’s cameras featuring the unique Foveon X3 Direct Image sensor as there is a completely new, dedicated monochrome processor for raw files from the original Sigma SD1 and all Merrill generation cameras, the SD1M, DP1M, DP2M, and the brand-new DP3M. And it is now available for download.
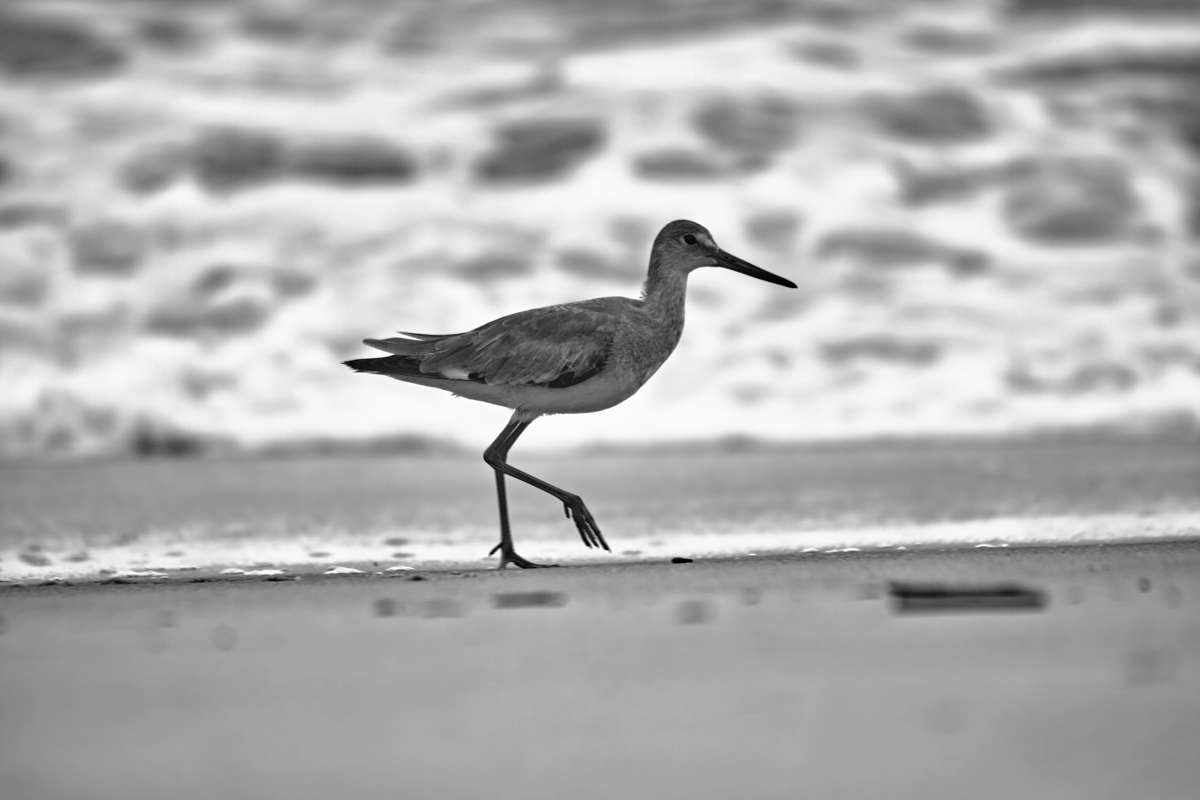
Eastern Willet, Sandy Hook, NJ. The dedicated black and white X3F RAW conversion mode in the newest version of SPP creates stunning silvertone images. Sigma SD1 and 50-500mm zoom. 1/640 F6.3 ISO 100. Converted to grayscale in Sigma Photo Pro 5.5 Monochrome.
The combination of the signature superfine detail of the X3 sensor and a touch of the film grain effect makes for amazingly tactile black and white images! This swan was seen through the SD1 and 50-500mm at 1/1600 F6.3 ISO 400 fully zoomed.
I was lucky enough to have spent much of the week prior to the release going public working up a ton of my X3 files in the new software, and I’ve smiled a lot seeing just how beautifully the new monochrome mode renders detail and tonal gradations. And the film-grain option is simply wonderful for adding a classic feel to images. The results, truly, can be breathtaking. I’ve worked up close to fifty of my shots so far, and this new monochrome process has me excited to get out and shoot more images with my SD1 and DP2M specifically for monochrome output. Continue reading Sigma Photo Pro 5.5 Monochrome: First Look, First Photos
Abandoned Diner, White House, NJ. Shot with the Sigma SD1 and Sigma 17-50mm F2.8 EX DC OS HSM. X3F Raw file processed in Sigma Photo Pro 5.5 Monochrome mode.
The X3 processing has completely re-engineered for exceptional monochrome results, with great control over tonal range, contrast, subtle gradations, and a simply beautiful film grain option for expressive creative control.
The holiday season is a great time to make photos with gorgeously softened backgrounds and shallow depth of field for painterly, creative, and festive results. Indoors and out, the Christmas trees bedecked with tiny lights, Menorahs, and decidedly secular seasonal displays that brighten the world each December present the perfect opportunity to experiment, explore and create. While we’ll obviously be featuring a number of Sigma lenses in this how-to, much of the information here is universal.
Selective focus at a wide aperture gives shallow depth of field for background separation and cool holiday light effects photography. SIgma 35mm F1.4 DG HSM at 1/320 F1.4 ISO 100 on Canon Rebel T3i.
We do have to start with a bit of the technicals to get to the creative applications, but we’ll try to keep keep it as short, and as easy to grasp as possible.
Halloween can be an amazing time to make all sorts of cool photos. Between the Jack O’Lanterns, people of all ages in silly or scary costumes, and haunted houses, there’s something great to shoot pretty much everywhere you turn.
Jack O’ Lanterns are one of the most popular Halloween photo subjects, and these present several challenges and several different methods for creating a cool image. Here’s a shot exposed for a relatively short (1/4 second) amount of time to showcase the illumination by the candle light, with the rest of the frame going to deep, deep shadow and dark tones. For this type of shot, a tripod is pretty much a must. Sigma 18-250mm F3.5-6.3 DC OS Macro, Canon Rebel T3i, 1/4 second, F5.0, ISO 800.
It’s also a great time of year to throw so many of the hard and fast guidelines of photography aside and have some fun by breaking some rules, and employing some cool photo tricks to make Halloween photos that’ll turn some heads. In this blog posting, we’re going to have some fun and give you some ideas on how to capture the spirit of the season.
The fourth of July means many things, and for photographers, one of the most exciting and challenging aspects of this holiday is capturing amazing photos of fireworks. The bright lights in the night paint the sky with multi-colored flames in a way that can be spectacular to witness and capture with your camera. And while it may seem that fireworks–and articles about how to capture fireworks with your DSLR–only appear for a few nights in early July, there are actually tons of nights from coast to coast all summer long when the skies are illuminated with fireworks.
We’re going to explore the ways to ensure sharp shots of these colorful subjects, along with some other ideas for nocturnal bright-light photography, and we’ll also offer up some pointers for tracking down upcoming fireworks displays, for the Fourth, and all summer long!
Photo Caption: Post-game fireworks light up the night over TD Bank Stadium following a Somerset Patriots baseball game as a trailer hauling a small racecar stops to admire the display. Canon EOS 5D with Sigma 15mm F2.8 EX DG Fisheye, cropped to remove some dead space in the sky. BULB exposure mode, 3 seconds, F10, ISO 100. Tuned in Adobe Camera Raw 7.1