The fp is SIGMA’s first camera to be released in L-Mount format. This compact mirrorless camera breaks boundaries between Still and Cine, and packs an amazing feature set into its compact build. We asked SIGMA team members to talk about some of the features and functions that really stand out for them on this groundbreaking camera.
Intuitive Operations and the Quick Set Menu
Jared Ivy – Retail and Tech Support Manager, California
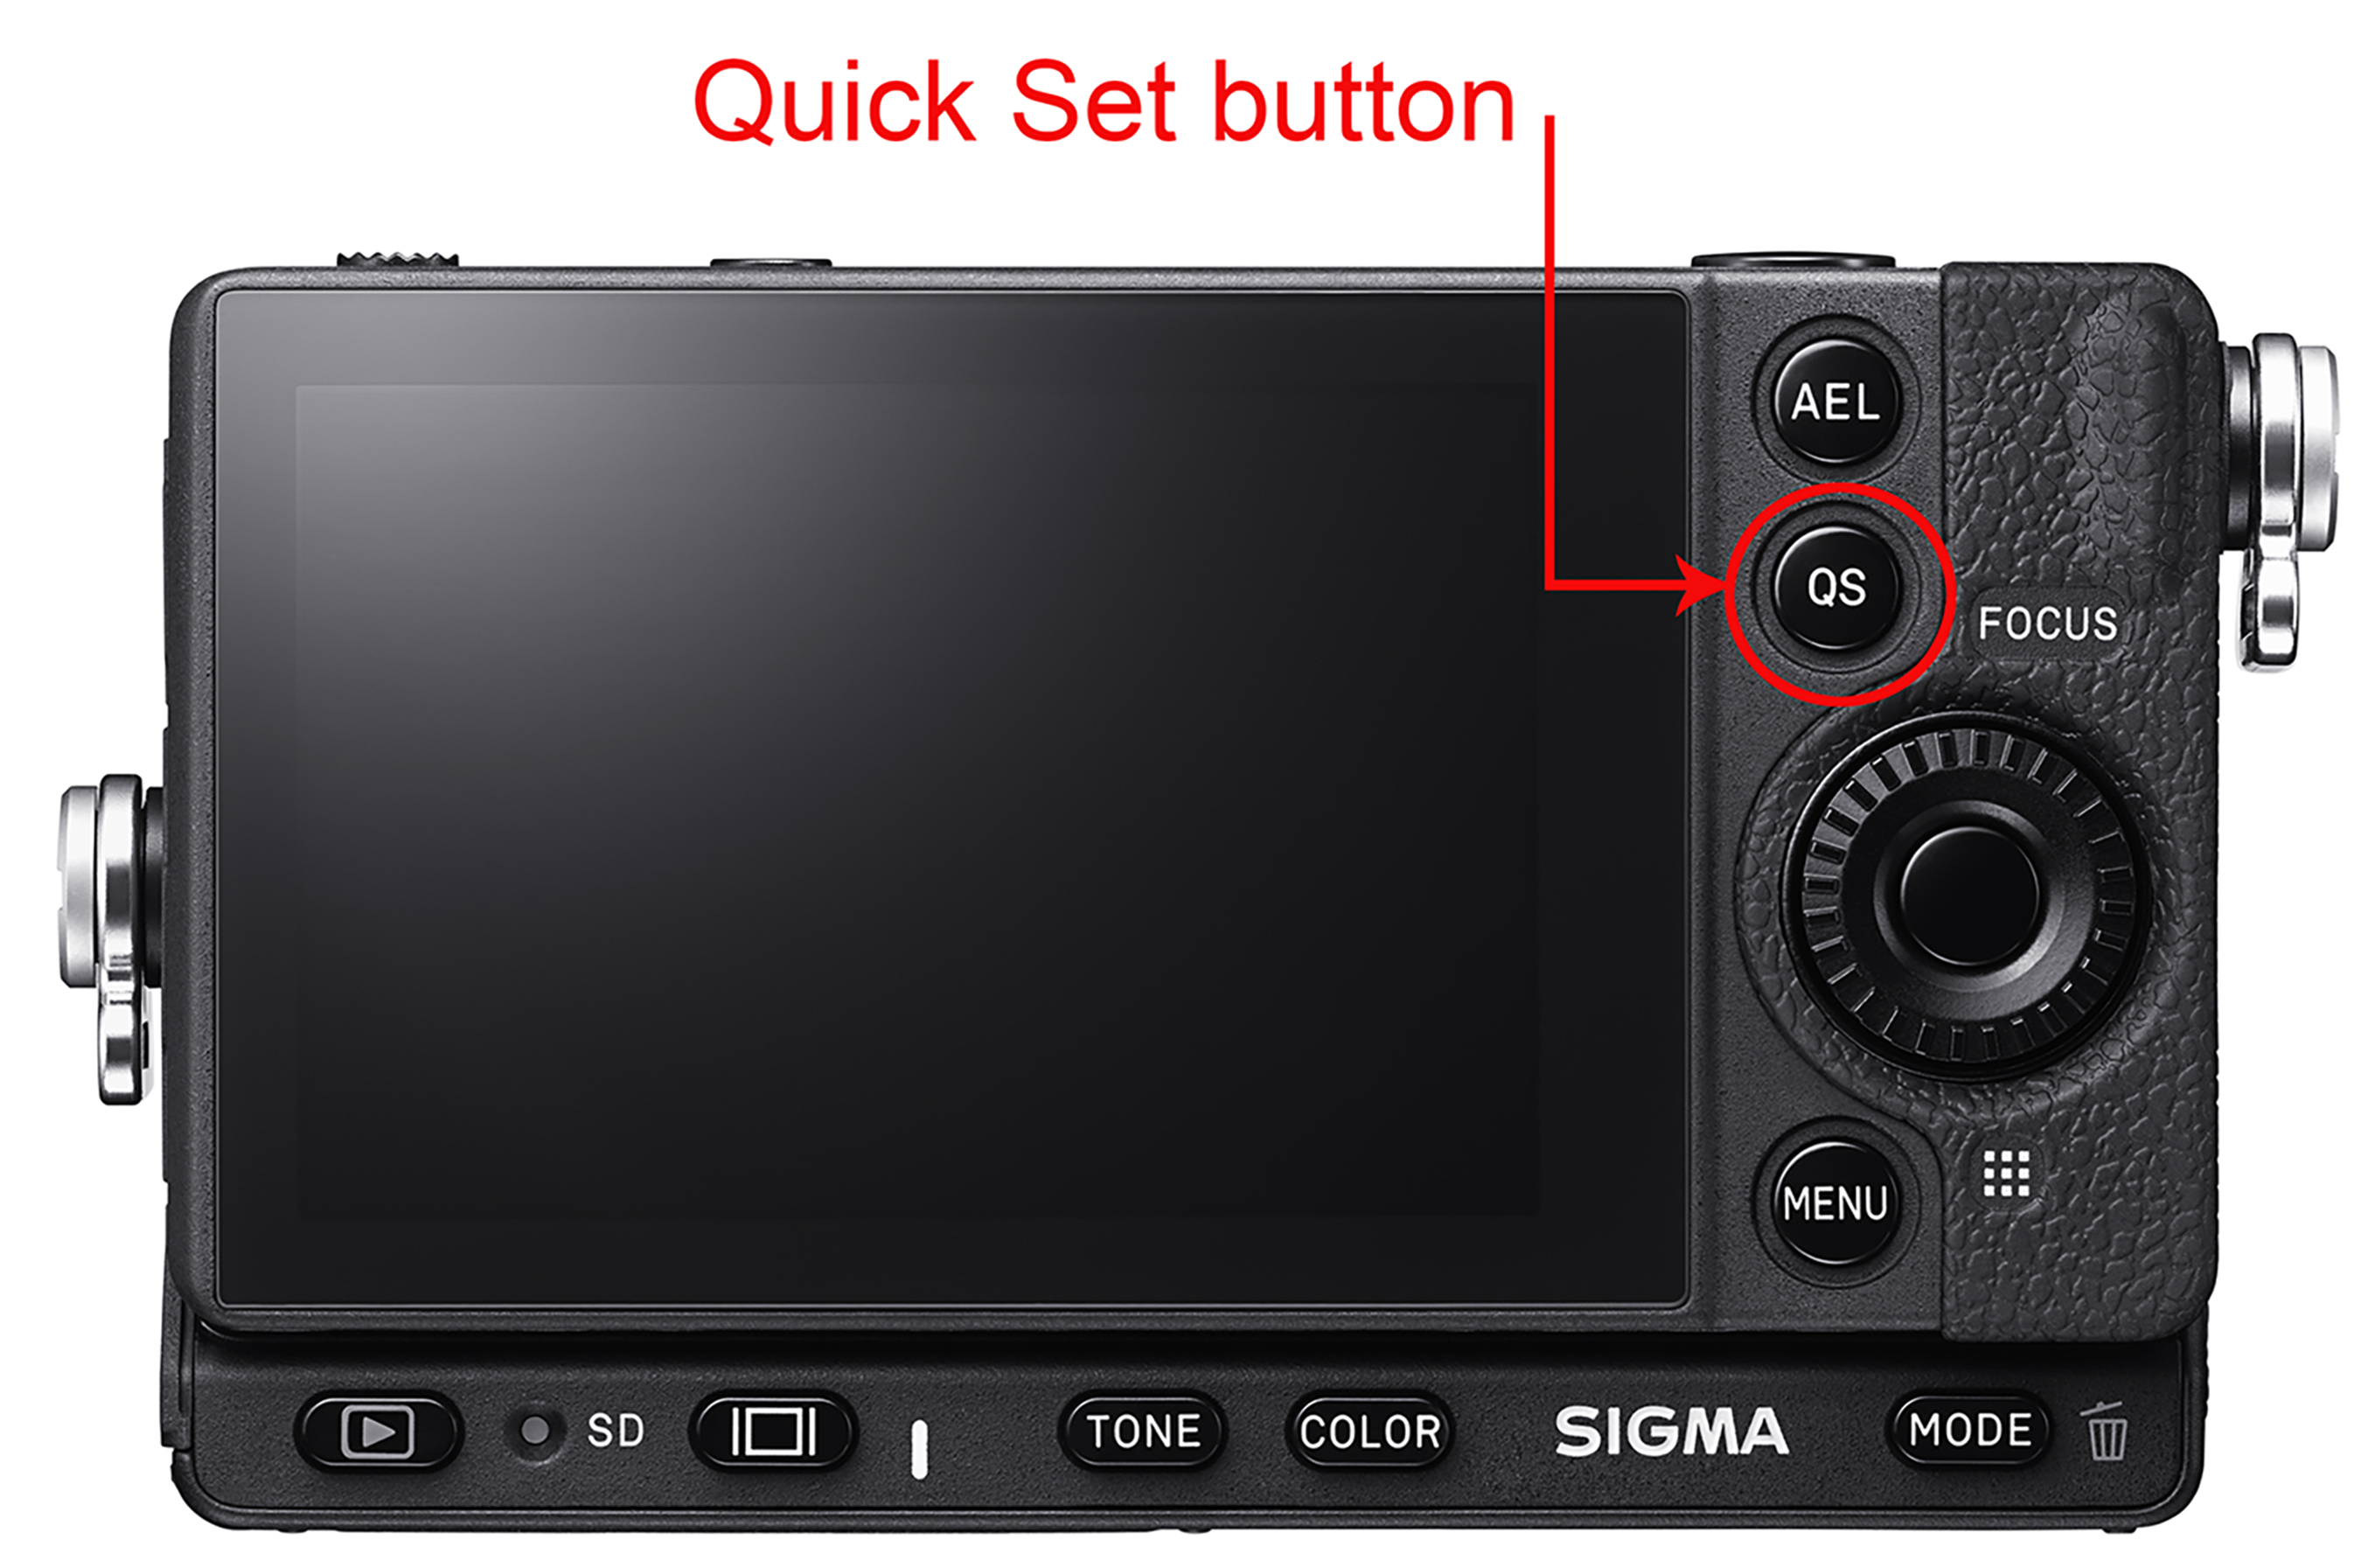
The SIGMA fp is one of my all-time favorite cameras for many reasons, and I am not saying that because I work for SIGMA. Anyone that has tried this camera will tell you that it is one of the most intuitive menus they have seen (especially since there are two separate interfaces for Still and Cine, another one of the reasons it’s my fav). In order to keep the small form factor, SIGMA — like other manufacturers — has turned to the menu to control many functions rather than outward facing buttons. For convenience SIGMA gives the user the option to allocate their most used functions to the QS (Quick Set) menu, that can be accessed using the QS button!
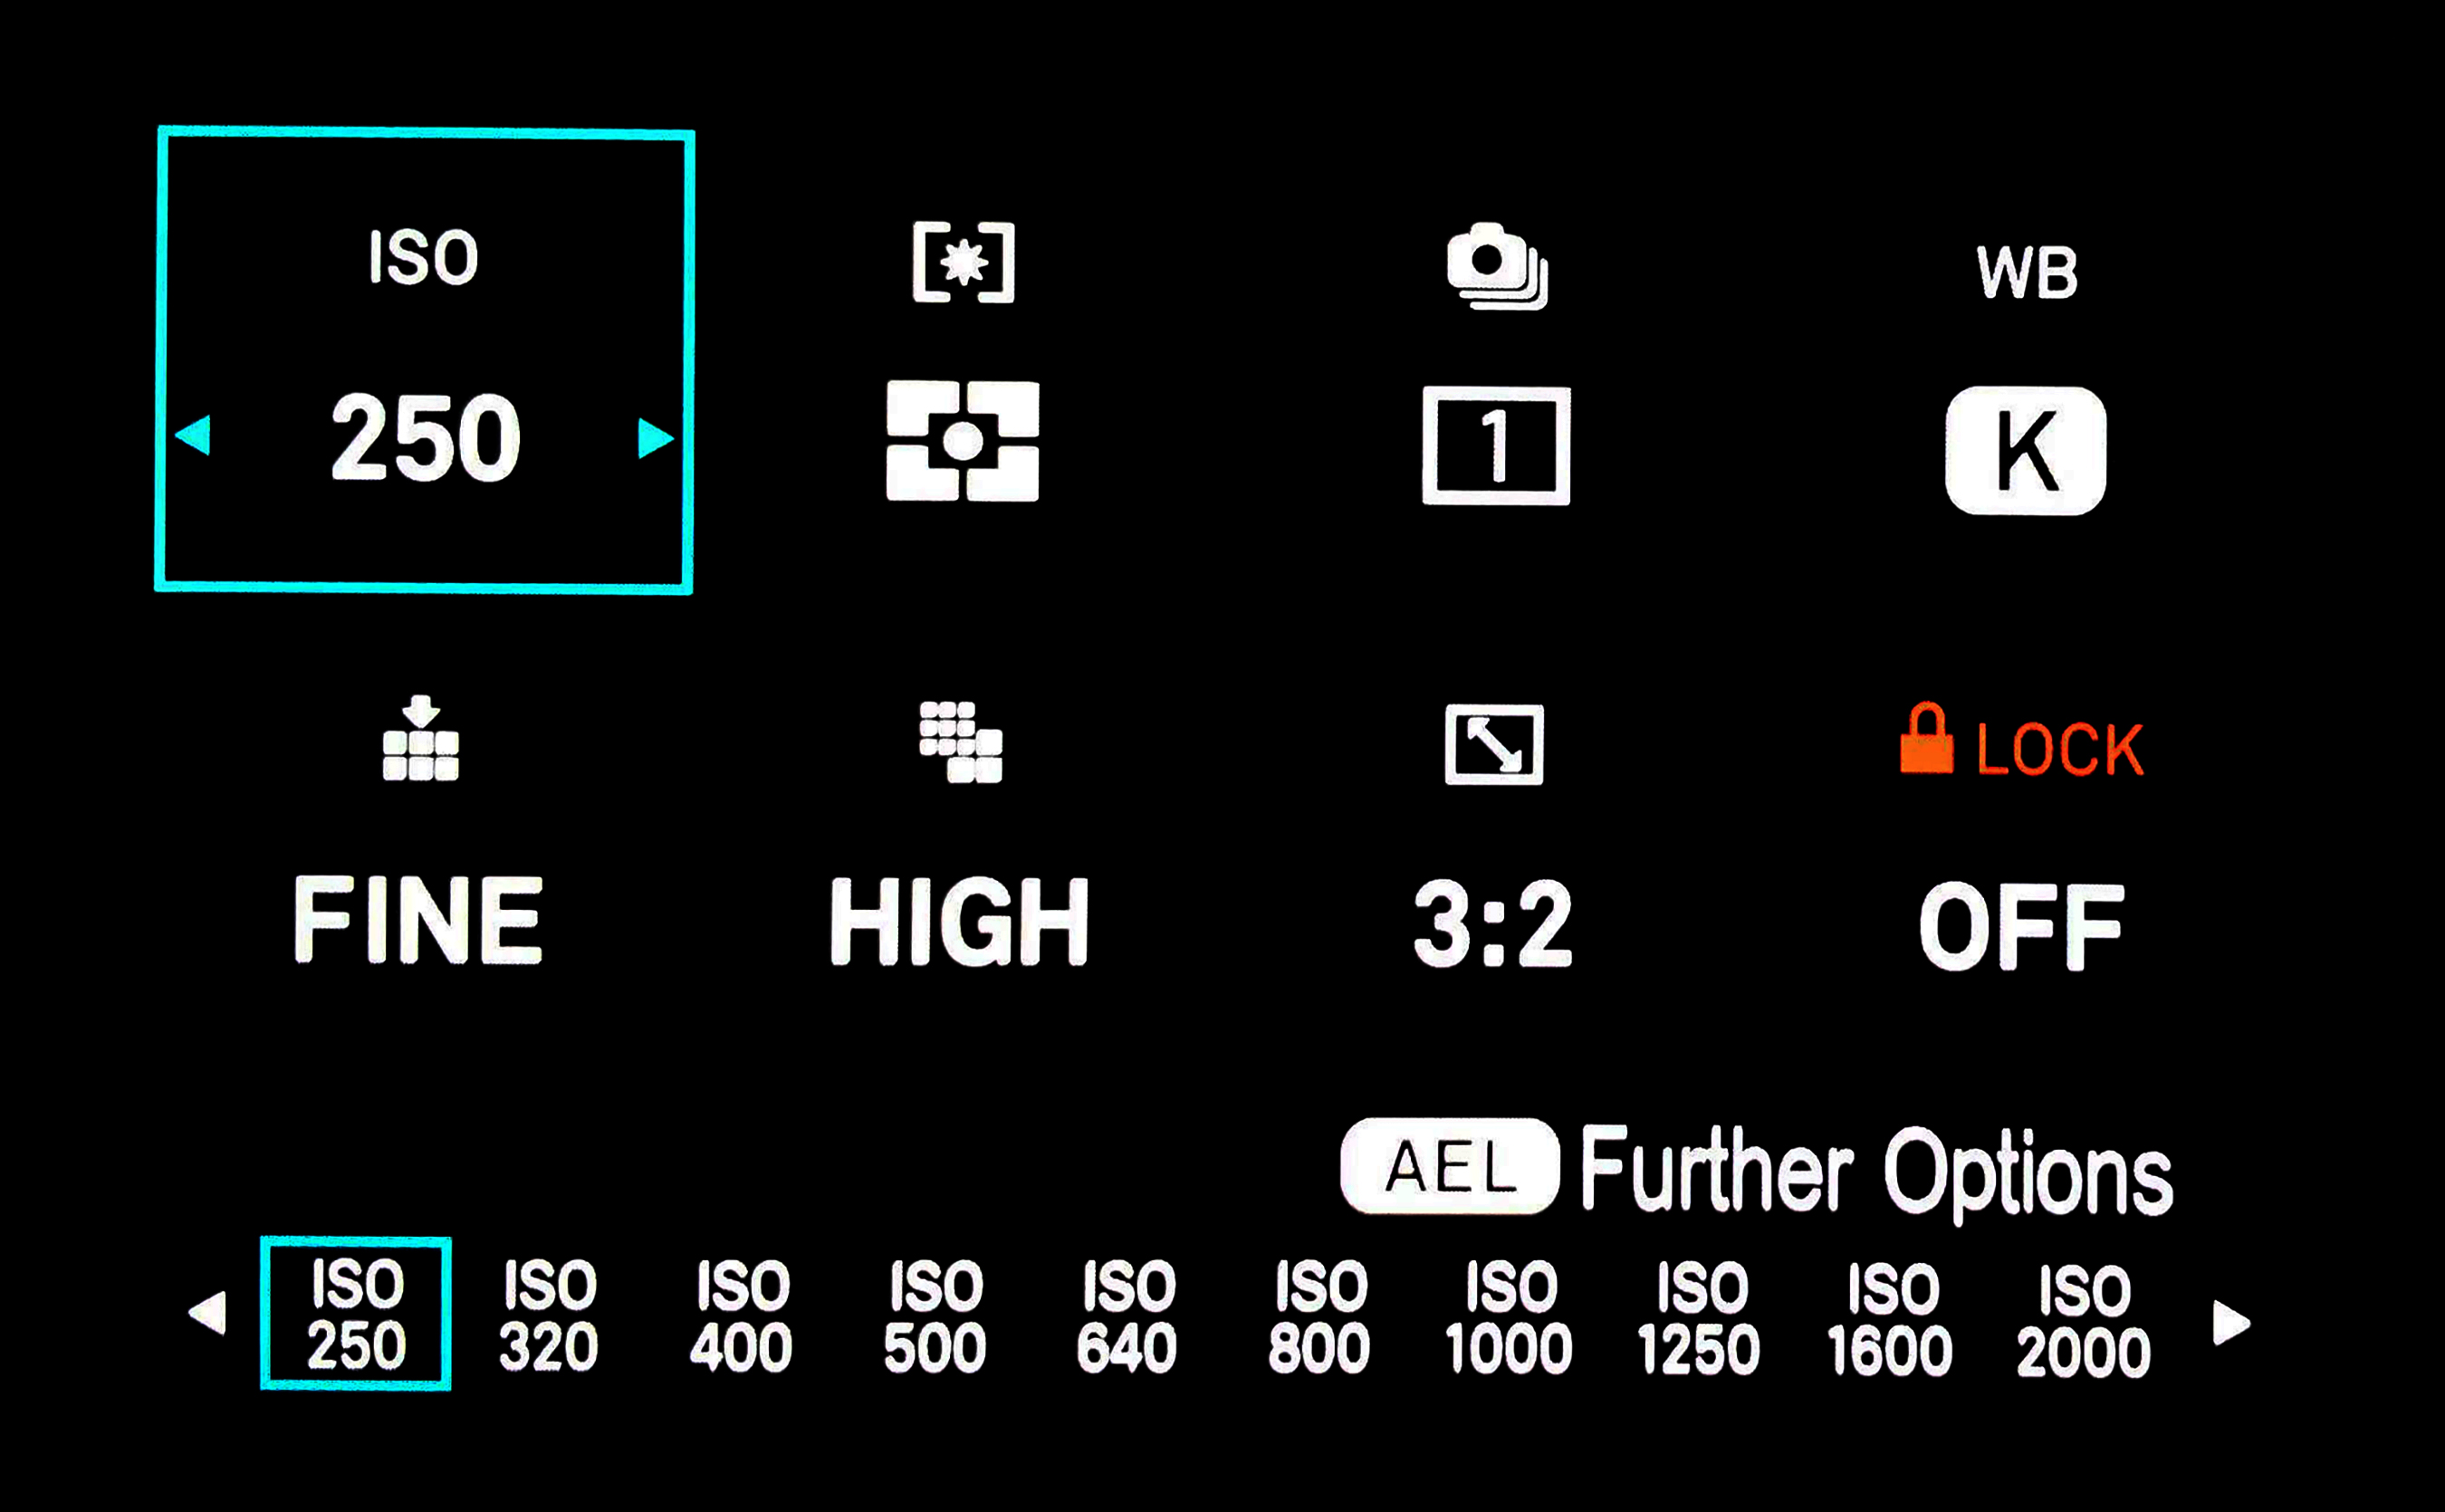
Once you press the QS button the top 8 features you want to use will appear on the screen so you can choose the one you want to change.
The BEST part of this is that you can determine where you want the feature to live in the 8 tiles. The functions you can choose from are: Shooting Mode, ISO, AE Metering, Drive, Exp Bracketing, Focus Bracketing, WB Bracketing, Color Bracketing, Fill Light Bracketing, HDR, DC Crop, Image Quality, Image Size, Aspect Ratio, WB, Color Mode, Color Effect Amount, Tone Control, Fill Light, Color Shading Correction, Focus Mode, Focus Area, Pre-AF, Focus limiter, Focus Peaking, Optical Stabilization, Electronic Stabilization, Flash Exposure Compensation, Red-eye, Rear Curtain Sync, Slow Sync, LOCK, and LCD Brightness.
Whew! Many choices, eh?
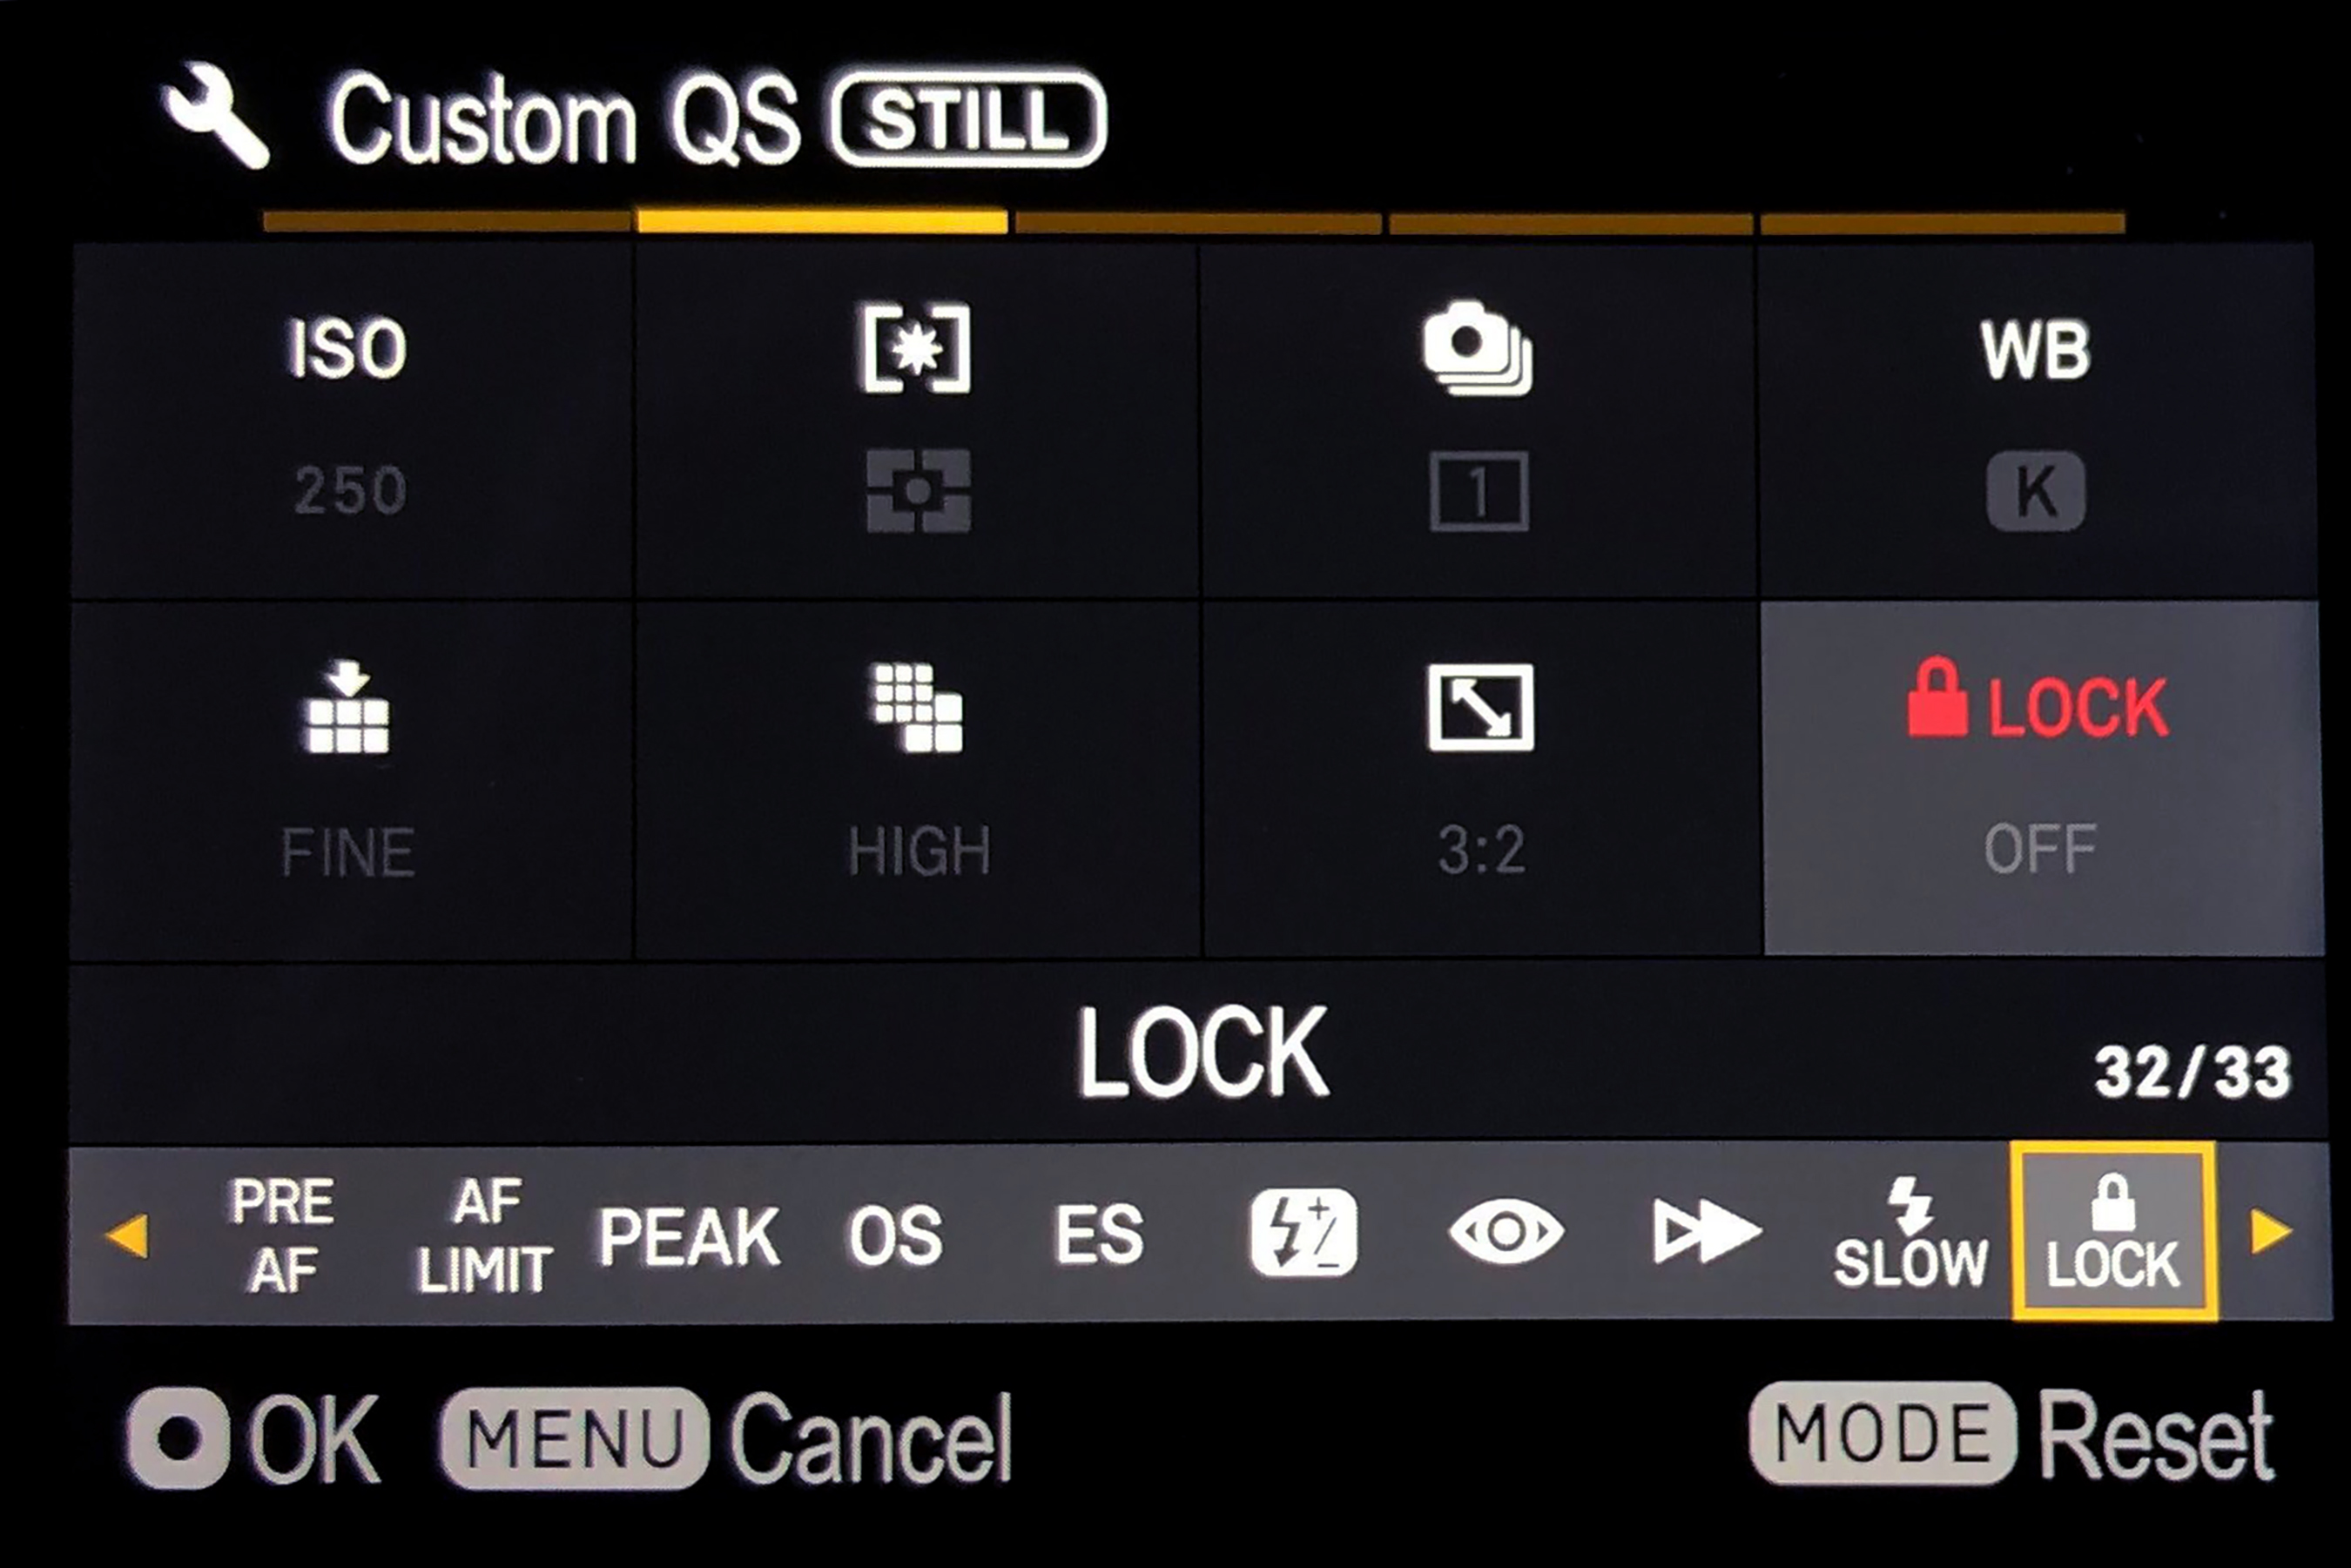
We could write articles upon articles about the additional features many of those functions have (by pressing the AEL button), but just know that the customization doesn’t end there. Of course many of us would choose some of the same common features while others would take advantage of the unique look and corrections they can give their images in camera when shot. But in my opinion one of the most useful functions in the QS menu is LOCK! For all the advantages that a small camera has to offer, one of the drawbacks for me is how easily my hand/fingers hit buttons and dials. Locking the screen allows me to avoid changing exposure, focus, shooting mode, etc. completely unaware. If one of the buttons or dials is touched when locked the screen tells me to Slide the screen to unlock it. It’s that easy.
Although the SIGMA fp is the smallest fish in the ocean of full frame mirrorless, it is way more powerful than people assume. Of the fp’s many strengths the one I think people overlook (or rather do not fully understand) is the customization capability. From bracketing in 5 different functions to custom tonal curves to complete color control, you can truly make your images as unique as yourself.
Working with Face/Eye Detection Autofocus on the fp
Mike Hill – Technical Representative, Nevada
The SIGMA fp camera has useful focus features to assist you when photographing people. The face and eye detection auto focus locks on to your subject ensuring tack sharp focus. To turn on the face/eye detection simply go to the bottom of the rear dial on the fp camera and press the focus point icon with 9 tiny squares (right next to the menu button). You can select Multi Auto focus points or Single. Let’s choose “Single” for this and while it is open click the AE-L button on the top right for more options and click the Display button (located at bottom left of camera) to activate face focus (smiley face icon lights up) and eye focus (the word EYE lights up).
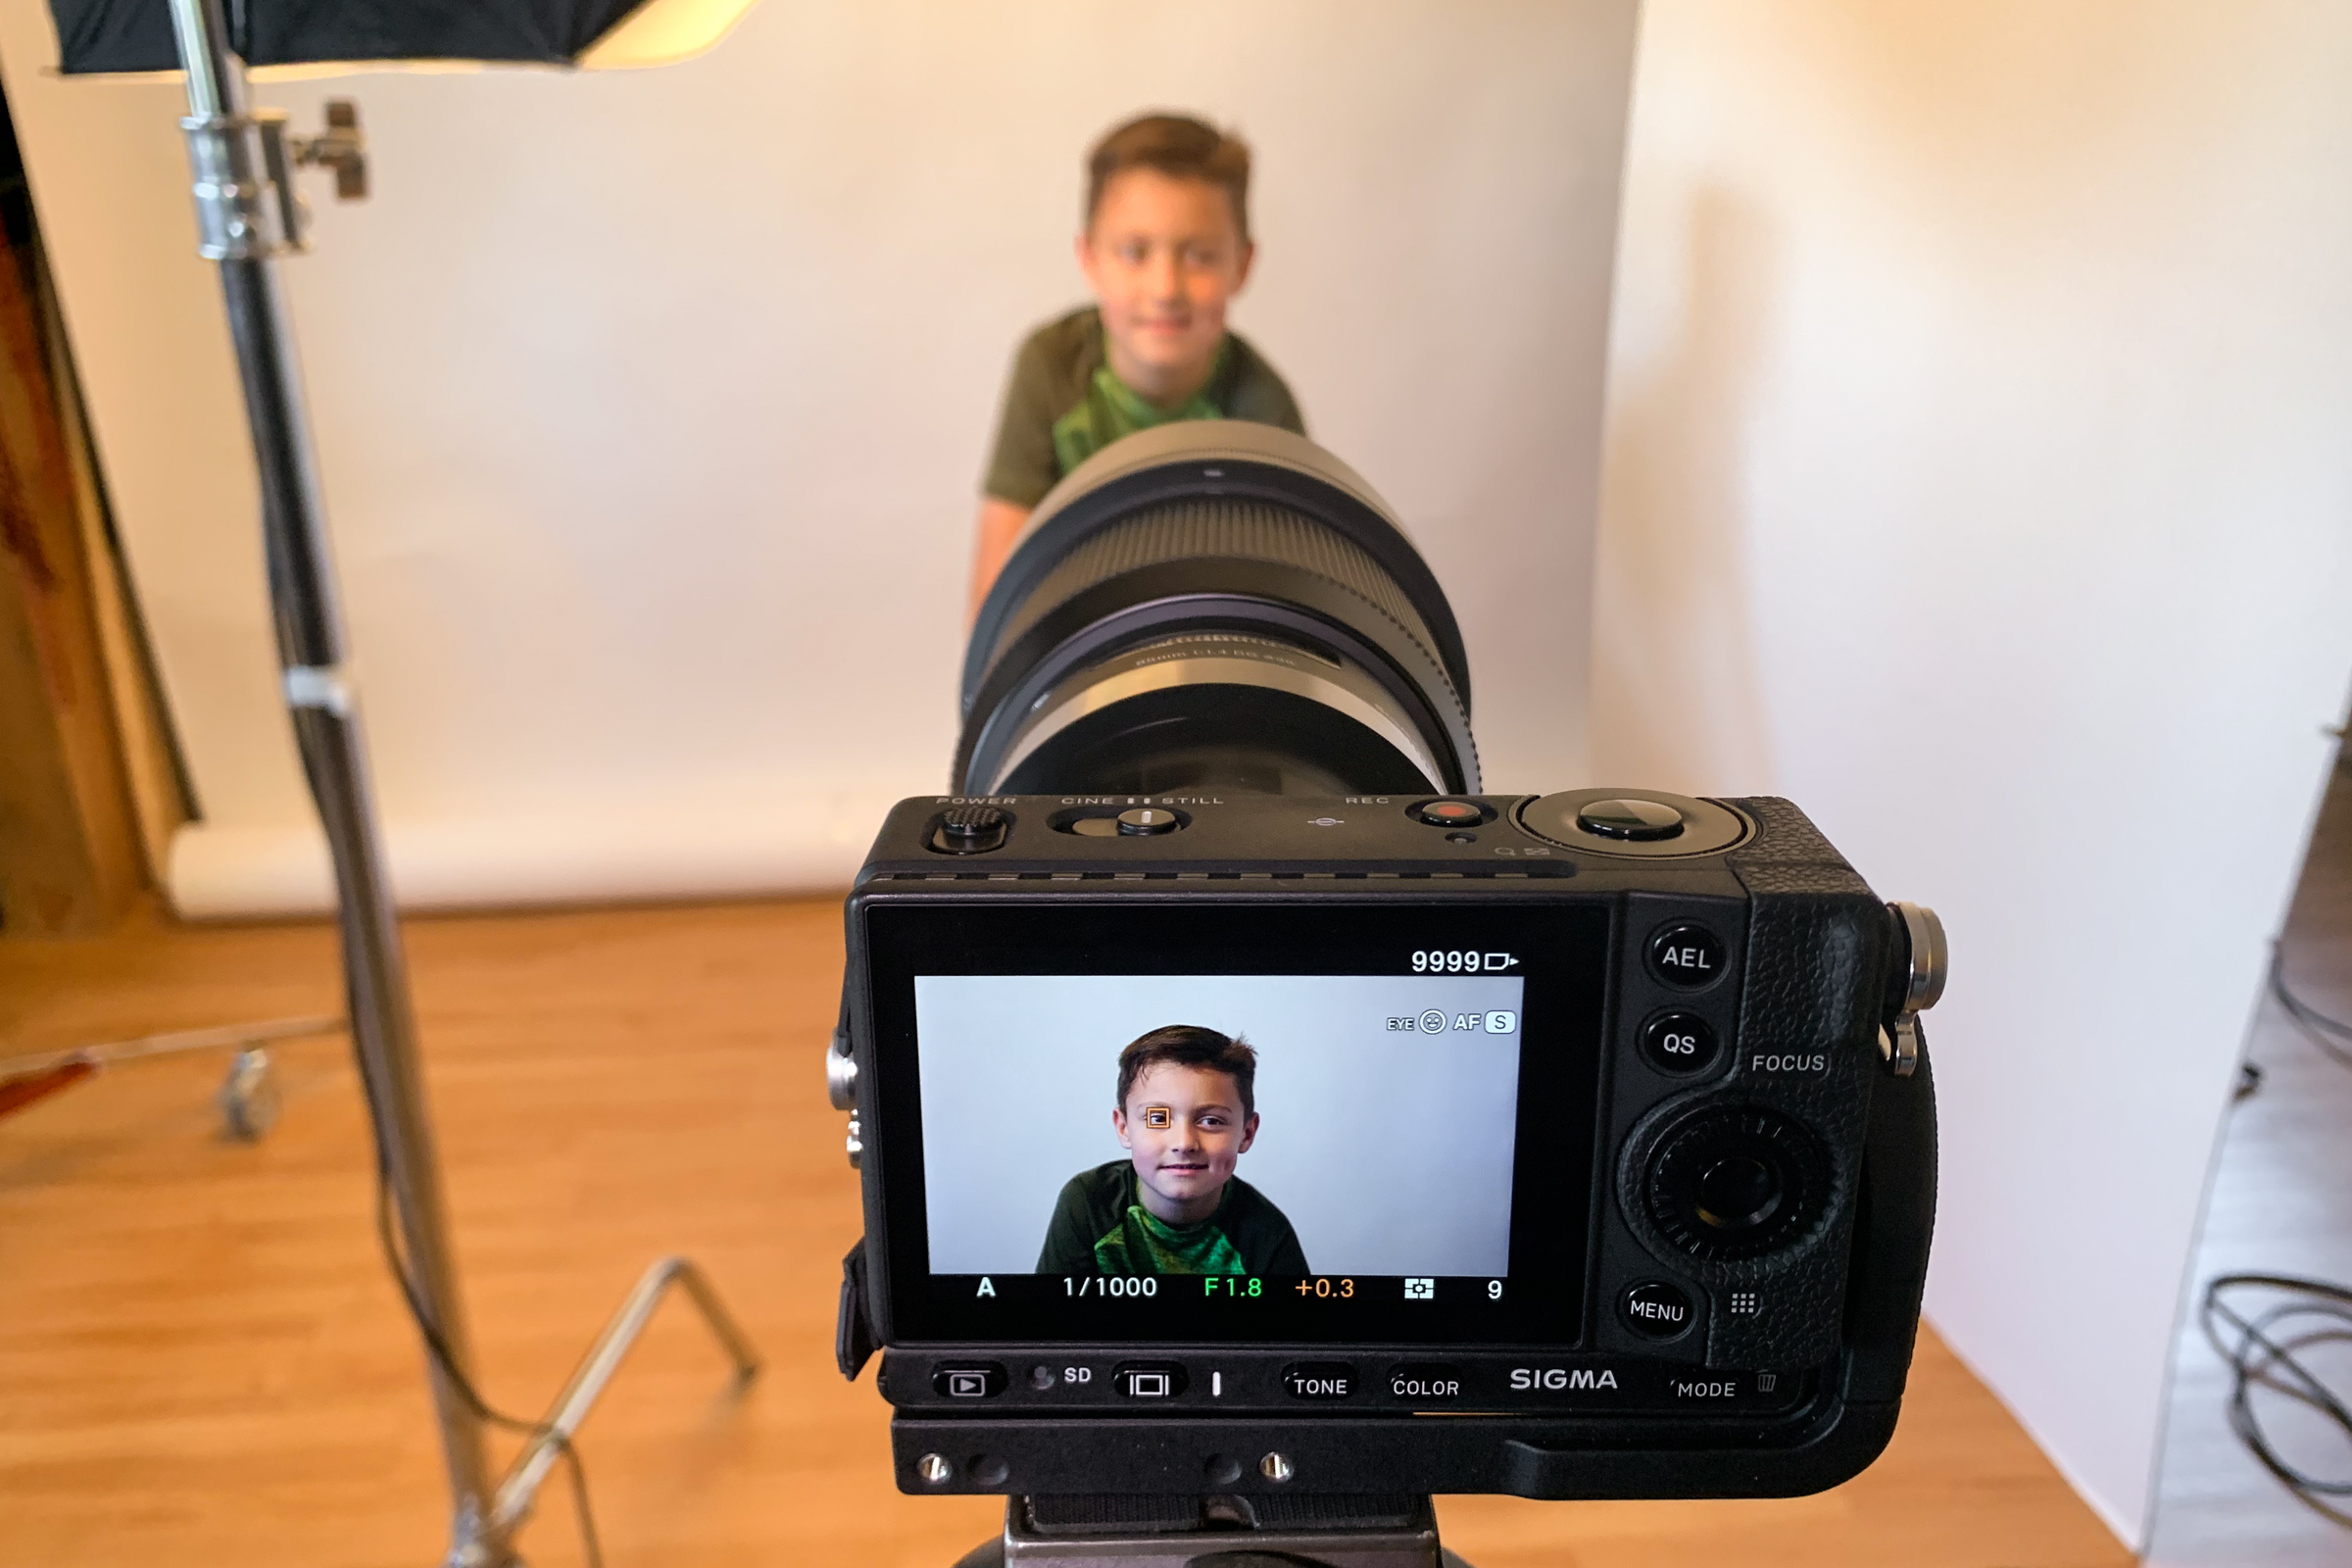
I love the eye auto focus feature and keep it on at all times. It is especially useful if someone is wearing glasses as it will catch the eye and not the frame of the glasses. If you have face and eye detection on it will first locate the face and if the eye is visible focus will lock on to the eye.

Today I took a portrait of my son indoors and he is not one to sit still long. The great thing about the eye focus is that as he moved around slightly the focus stayed locked on his eye and I could concentrate on communicating with him more and getting him to change expressions. I was using one of my favorite lenses, the SIGMA 85mm 1.4 | Art L-mount at a very shallow depth of field of f/1.8. The eye detection on the fp with the 85mm Art is the perfect combination for portraits.
SIGMA fp for Live Streaming: Your Full-frame Interchangeable Lens Webcam
Brian Linhoff – Senior Cine Specialist, Missouri
Right now, suddenly, the need for video conferencing and the ability to keep in touch with our friends, families, clients, customers and co-workers through streaming platforms has grown exponentially.
What has not improved is the quality of the video we typically get from a laptop webcam. One of the little known features of the SIGMA fp is its easy use as a streaming device. Need to give your videos a better look and feel? It’s very difficult to do this with today’s webcams that have tiny sensors and optics. Enter the fp.
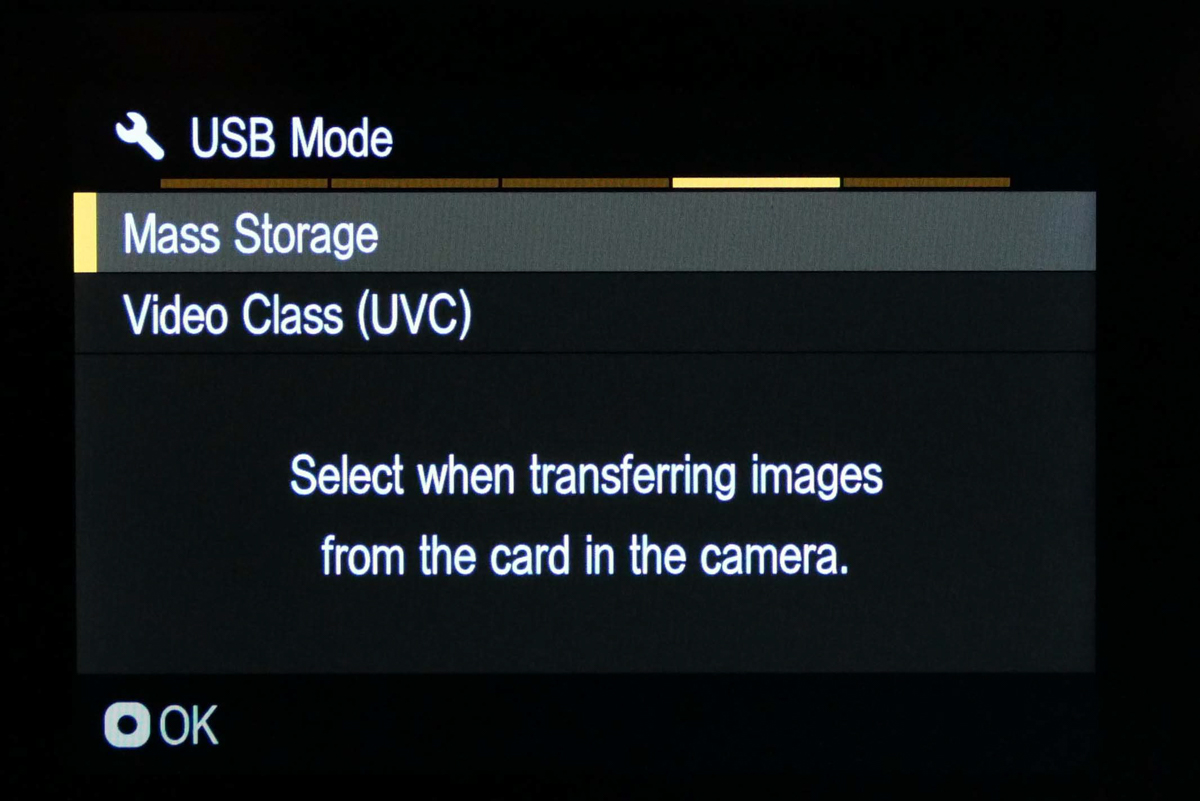
It is very simple to up your streaming skills by just plugging a SIGMA fp into a USB-C or USB 3.0 port on your laptop or desktop. Once plugged in, you just need to make the choice to use the camera as Video Class (UVC) device instead of using it as Mass Storage. This is a pop up menu when you plug the camera into the laptop. Ensure video resolution is set to full HD and All-I codec are selected.
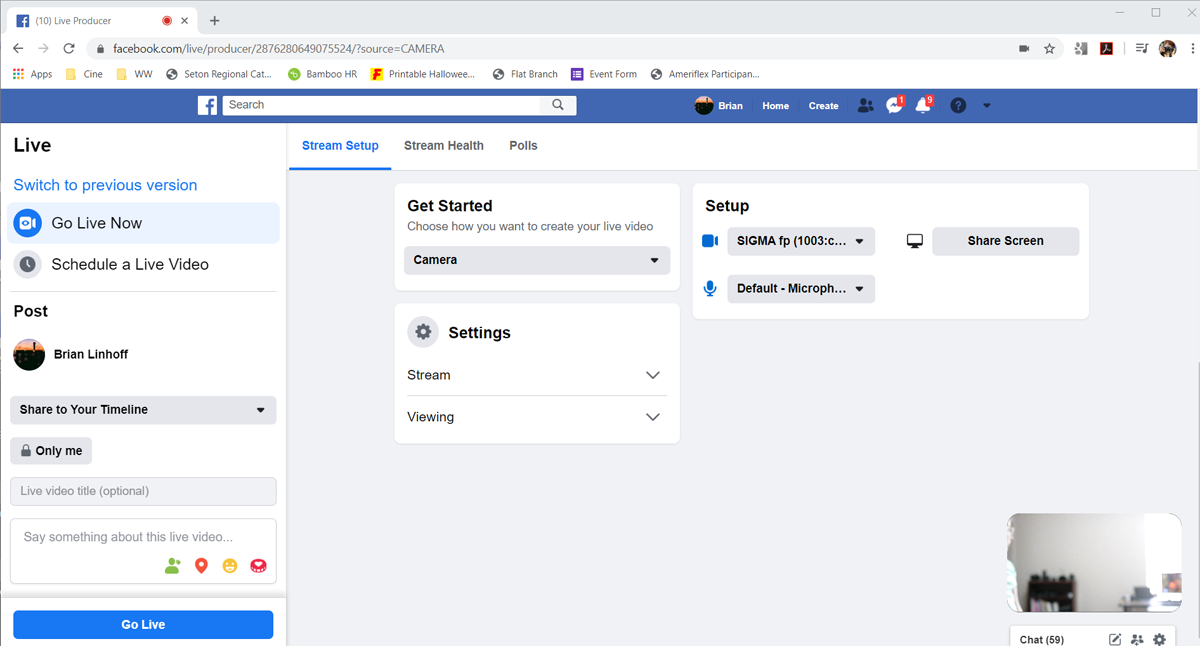
Once you are connected, go into whatever service your using and select the fp as your camera in that program’s settings bar. In Facebook, it defaults to laptop camera, in Skype it defaults to the fp, so just double check in the settings on your Mac or PC to select the fp as the camera. And note that many interfaces will additionally let you choose the microphone source as well.
Suggestions on how to setup your camera
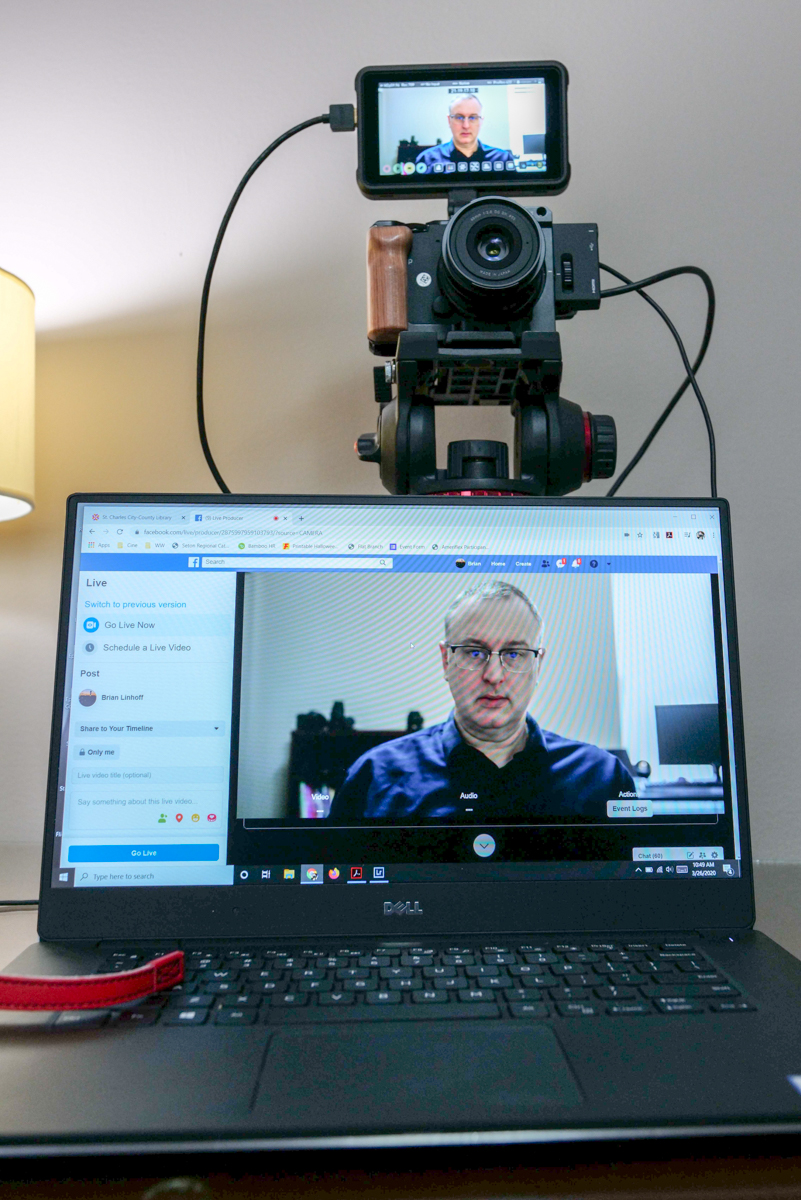
Once the camera is attached and running as a webcam, you can not change any settings. You need to test, review, and change any settings to get a good image beforehand. For my office setup, I go to Manual, 180 degree shutter angle, 3200 ISO, f8. I use a larger F-stop to ensure I am in focus, but since I am close to the camera it still allows me to cause the background to blur and be less distracting. Once the camera is focused, I reach up and turn the lens to MF, thus locking in focus. My two favorite lens choices are the SIGMA 24-70mm F2.8 DG DN | Art for a bit of versatility when framing my shot, or the bundled 45mm F2.8 DG DN | Contemporary that you can buy with the fp. If you want to take it to the next level, you can attach an external monitor and flip it around for framing. I find this helps in ensuring that I am looking at the camera instead of looking down at my laptop.
Already own an fp? Try it to maximize the quality of your video for your next virtual get together or tutorial piece. Need a high-quality solution to set your video apart? Take a look at the SIGMA fp and add it to your cart.
Multiple Quarter-Twenty Connection Points on the Base Camera and Accessories
Jack Howard – Content Marketing Supervisor, New Jersey
The SIGMA fp camera has three 1/4-20 sockets built into its basic configuration. And most of the accessories and extensions, including the hand grips, viewfinders and the MC-21 also have 1/4-20 sockets for adding the camera straps, for various riggings, and for overall mounting flexibility.
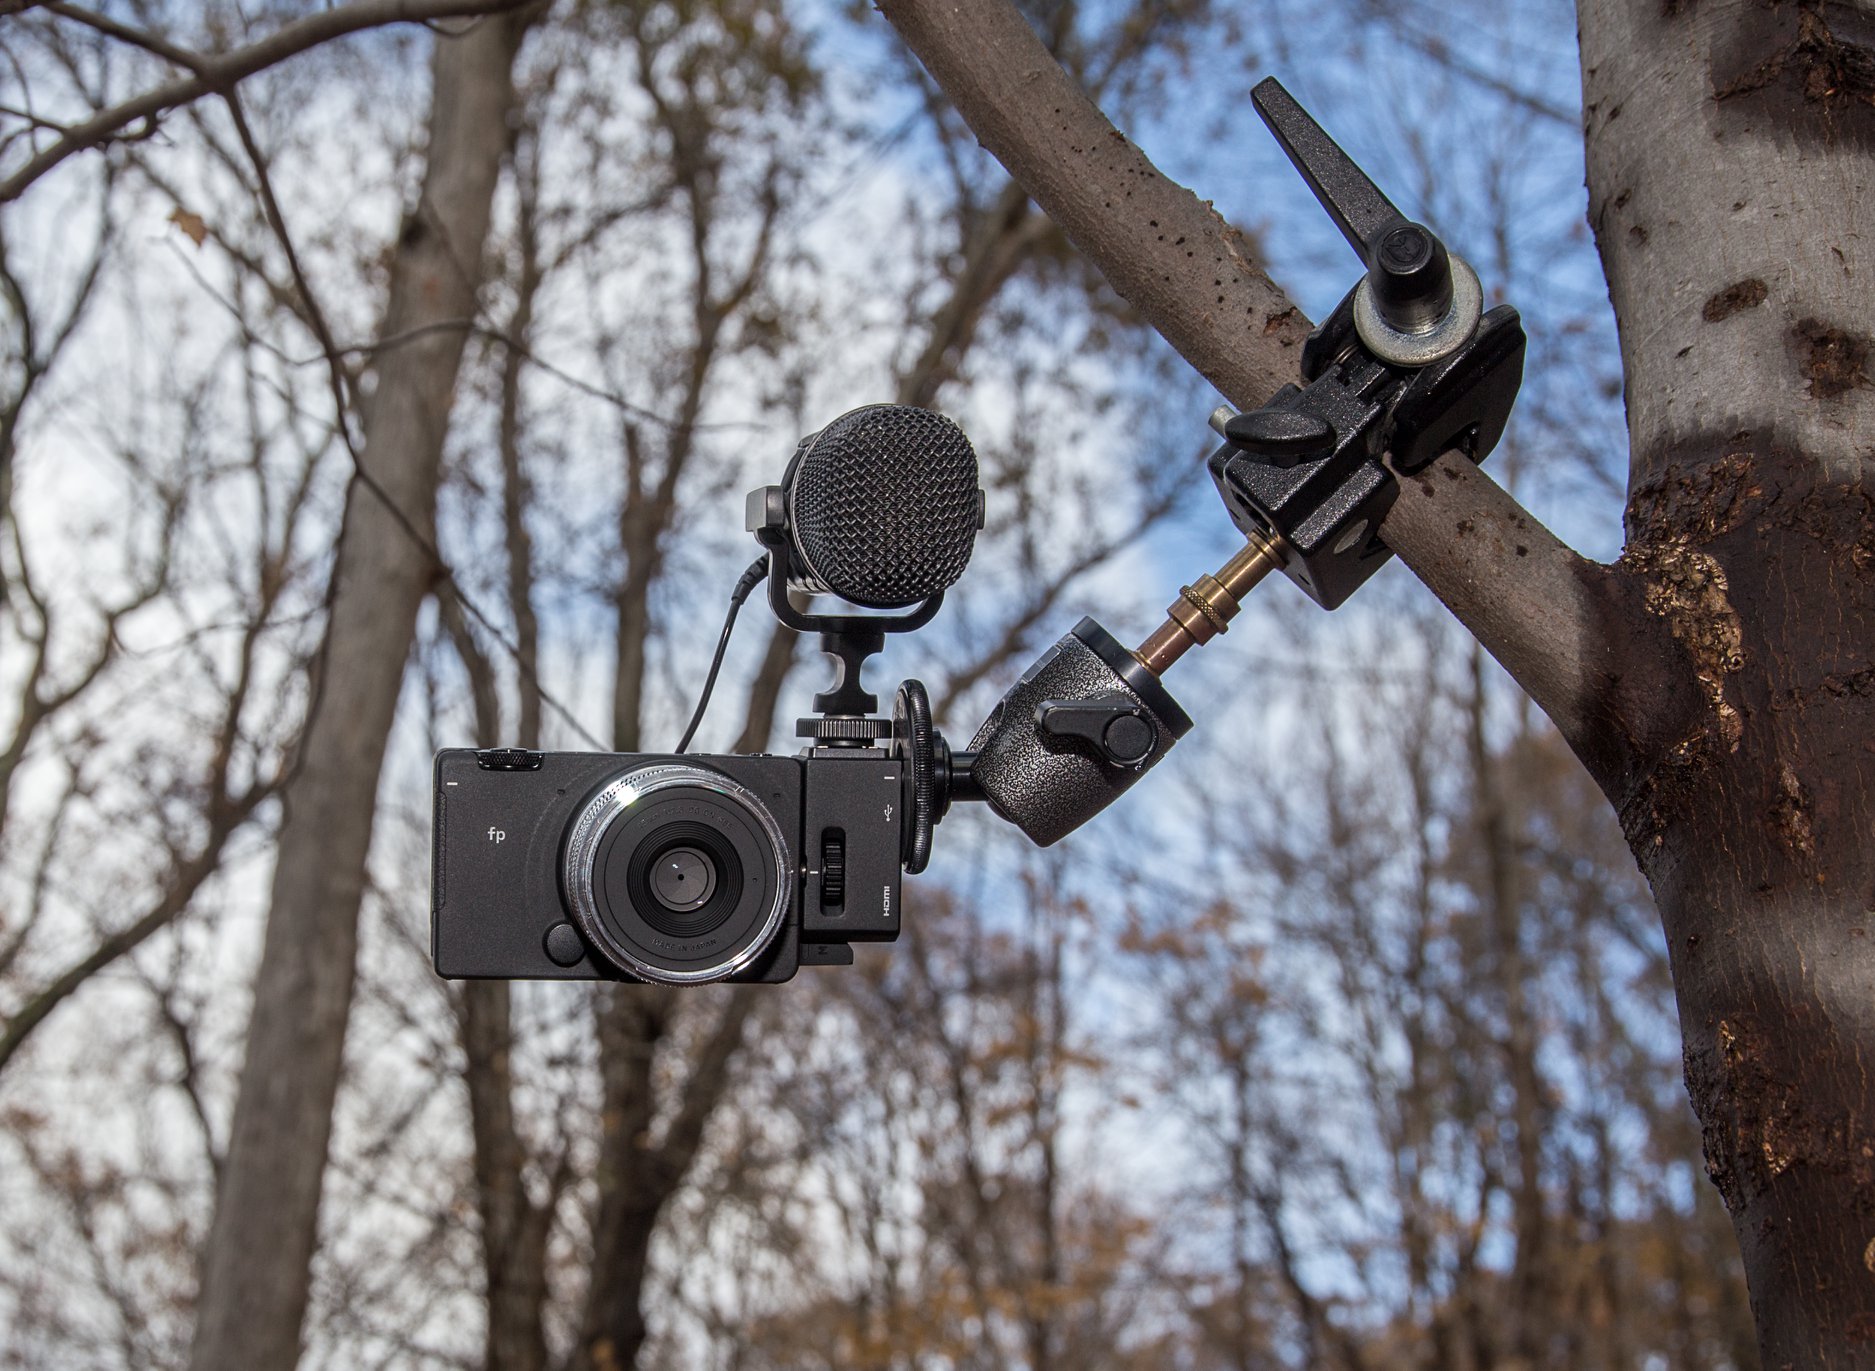
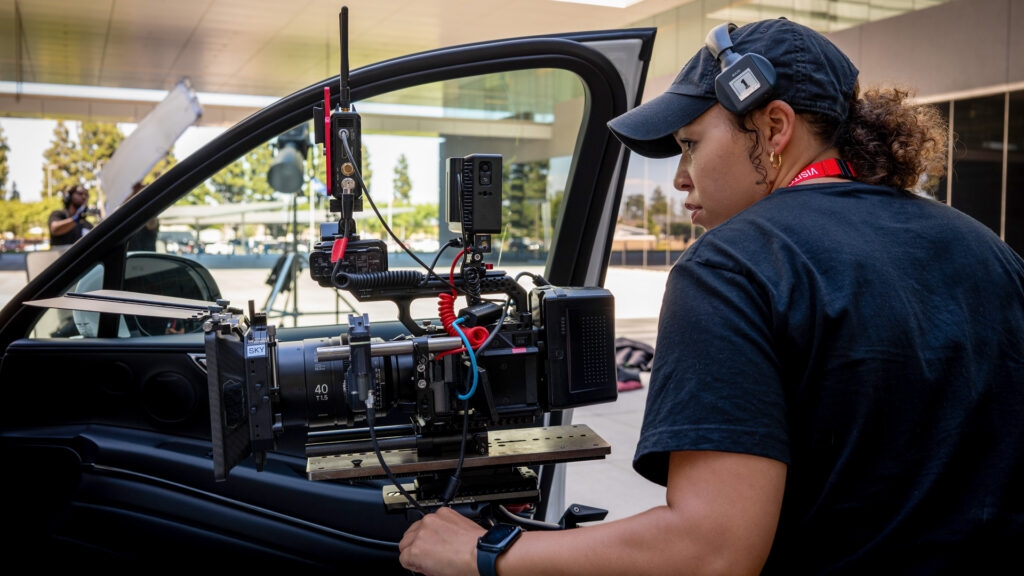
Here, for example, we’ve got the fp camera paired with the hotshoe accessory that’s both hosting a Røde Stereo VideoMic, and connecting the camera to a Gitzo mini-ballhead and Manfrotto Superclamp that’s hooked around a tree branch to hopefully catch a passing whitetail buck or red fox on the trail below while the camera’s rolling.
I didn’t have much success the first time I shot this in video, but I’ve since caught a couple deer in intervalometer mode while doing some lighting study timelapses, which is itself, another great built-in feature of the fp.

We figure this setup would also be great for trail running and mountain bike races as well out doors; and musicians and band photographers can probably come up with a ton of cool clamping options to capture live performances from stage riggings. And we’ve heard from videographers shooting vertical video for ads and Instagram stories that ability to easily mount the camera in a vertical orientation is much appreciated. For me, it is one of those “small” design details that is really greatly appreciated!
Full-frame Quality in the Smallest Package
Brett Wells – Technical Representative and EDU, Georgia
The SIGMA fp is the world’s smallest and lightest, full-frame camera with interchangeable lenses. That’s truly a remarkable achievement. The size and weight alone allow this camera to go places and do things that bigger cameras can’t. The capabilities SIGMA has packed into this camera makes it even more versatile, due in part to a sensor as big as a 35mm negative, with a surface area nearly 2.5 times that of an APS-C sensor.
Given the same number of pixels, a camera with a larger sensor will have larger pixels yielding more dynamic range. Back-side illuminated sensors allow for larger pixels still, letting in even more light. Think about a pixel collecting photons of light like a bucket catching drops of water. A larger bucket can catch more drops before it fills up. An overflowing pixel causes highlights to clip and lose detail.
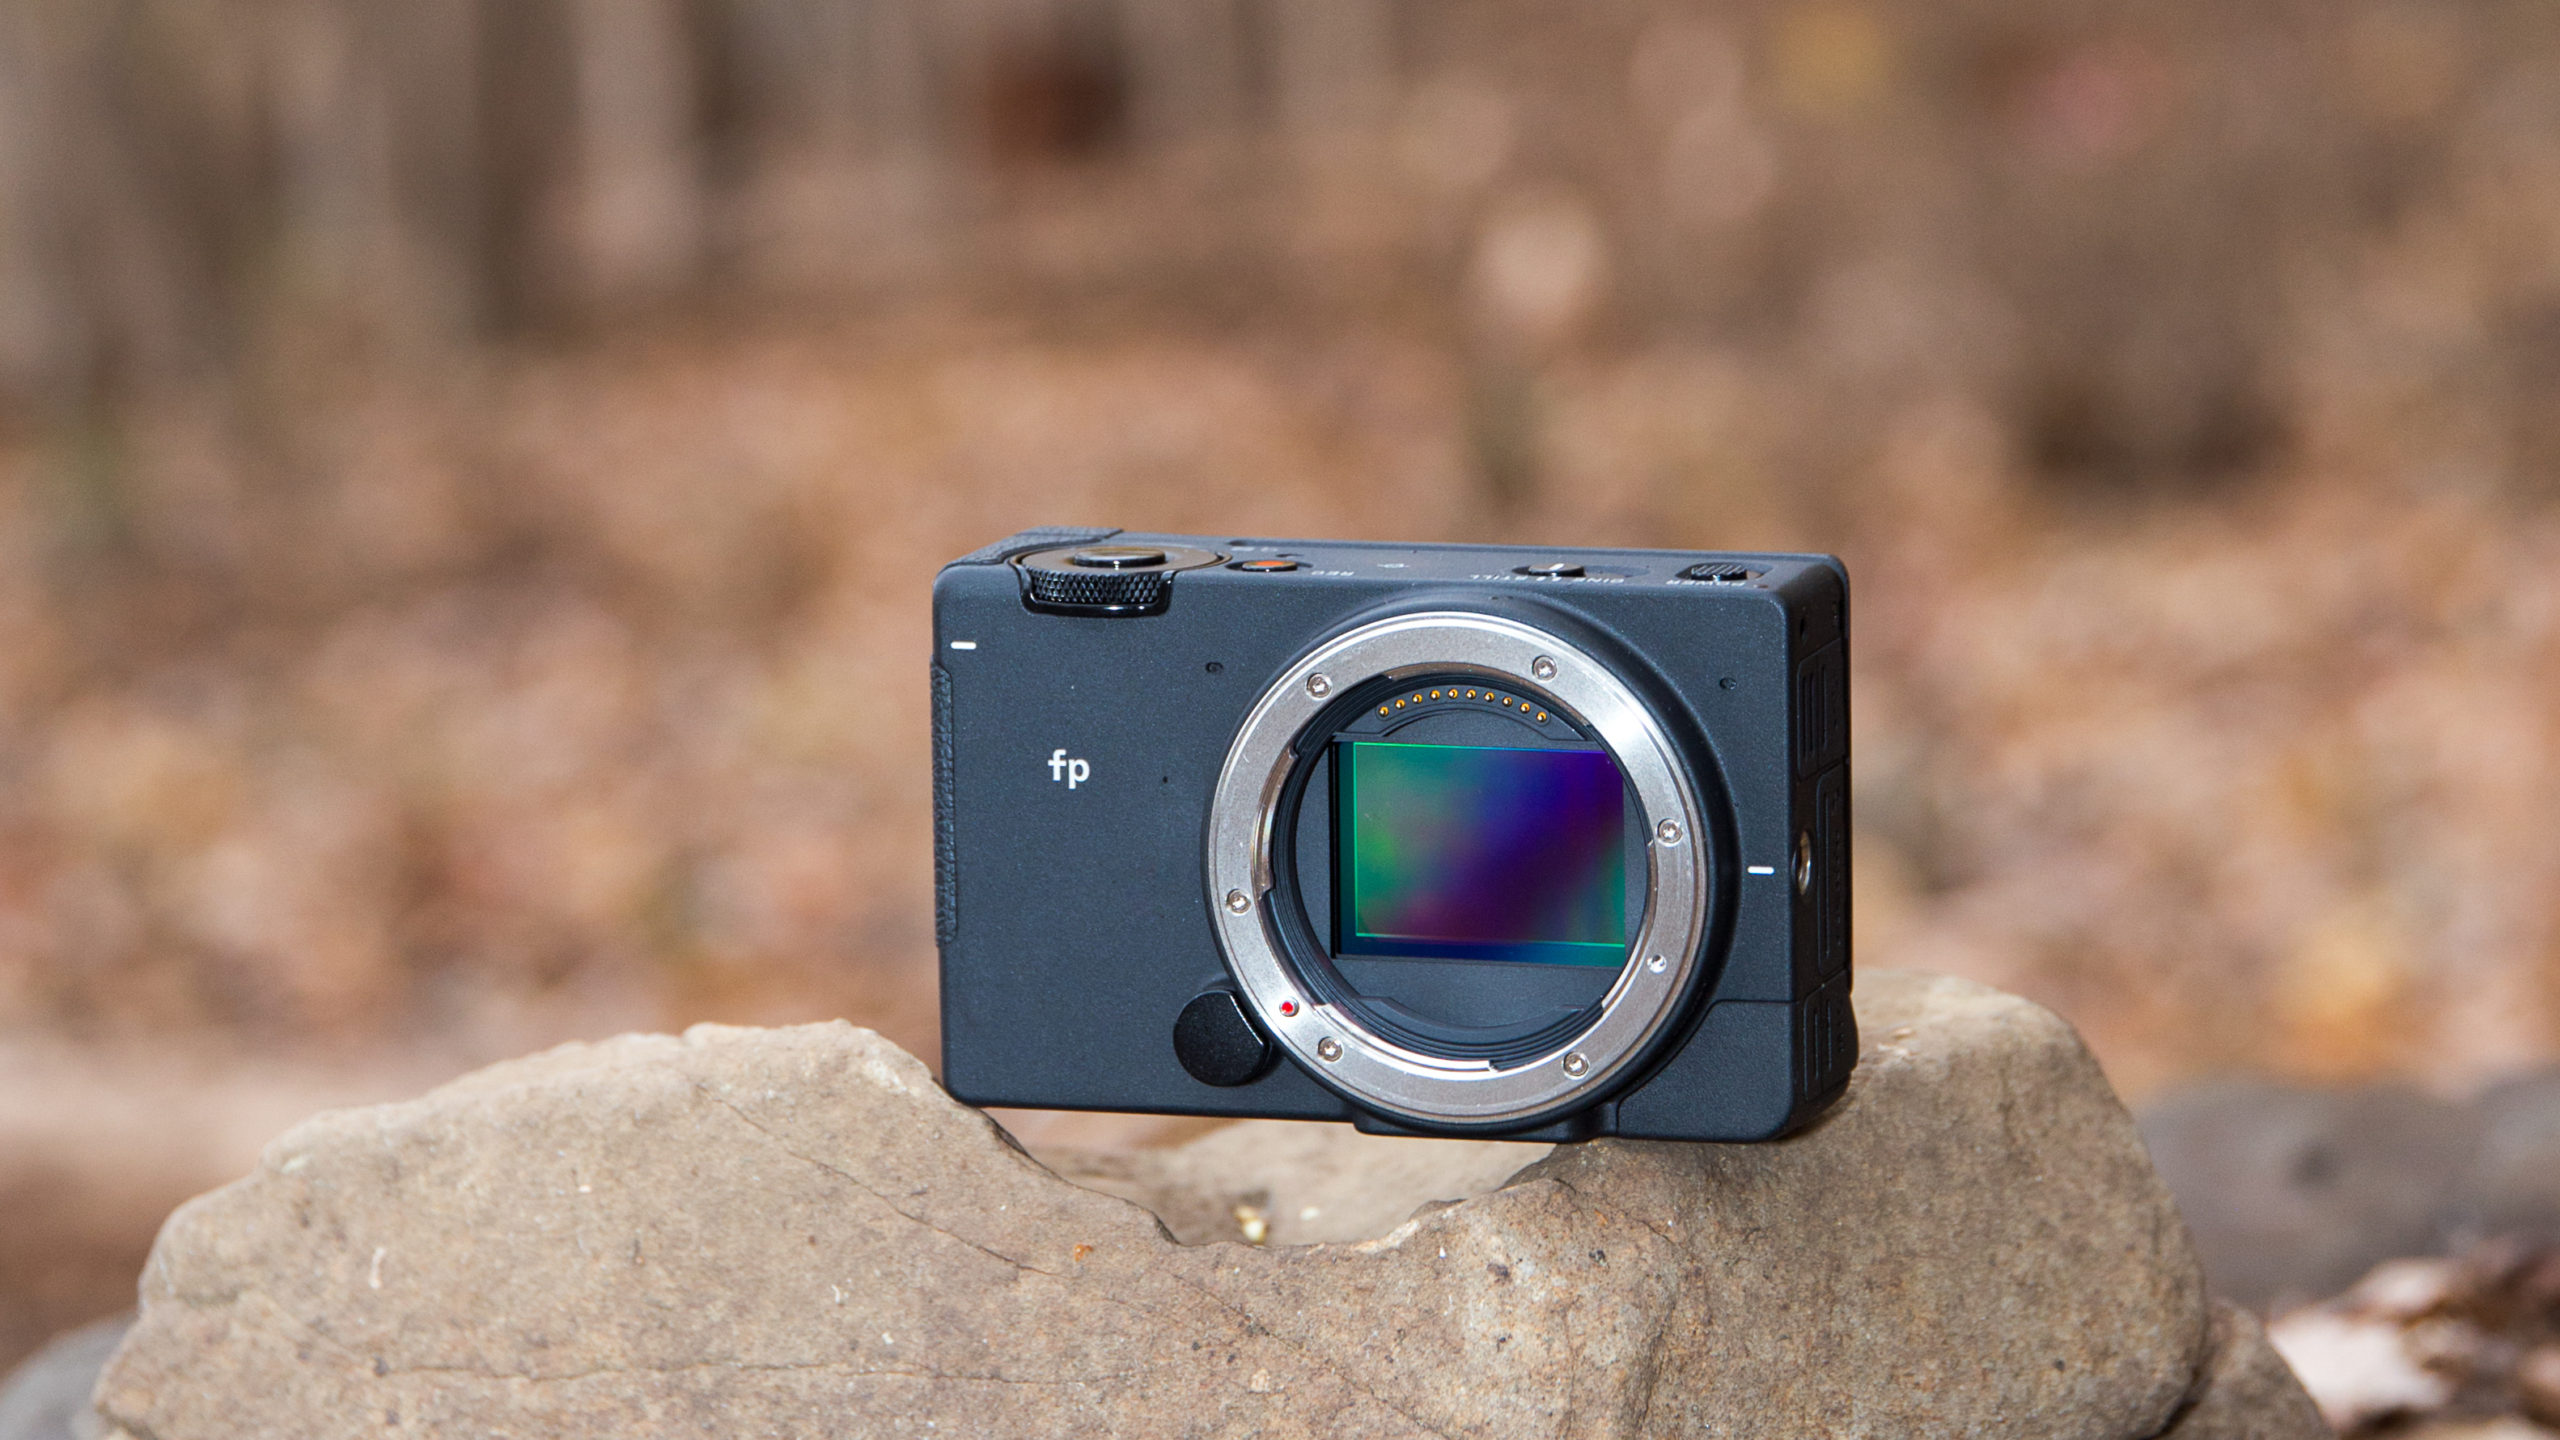
To maximize sharpness, the SIGMA fp doesn’t use an OLPF over the sensor. Also known as an optical low-pass filter or anti-aliasing filter, these were used to slightly blur the image and help prevent moiré that could be caused by the color filter array. Without it, the images have even greater detail.
Lens choice for full-frame cameras is much greater as well, especially for wide-angle lenses. You can put a full-frame lens on a camera with a smaller sensor, but only a full-frame sensor is going to utilize the entire field of view available. SIGMA offers many incredible lenses for the fp, including some more compact options designed specifically for mirrorless cameras. There are mount converters from SIGMA and other companies that allow even more lens options.
Using lenses with the same field of view at the same aperture, a camera with a larger sensor will perform better in low light too. A 50mm lens at f2.8 will allow more light to hit the sensor than a 30mm lens also set to f2.8. Light gathering is a factor of the diameter of the aperture of the lens, not simply the f-stop. For low light photography, more photons equals less noise in the final image.
A compact camera with this kind of image quality and industry-leading lenses is the perfect companion on so many photographic journeys – landscape, travel, architecture, night skies, street photography. The SIGMA fp offers exceptional performance in the smallest package available, encouraging photographers to shoot more, more often, and in more places.
The LVF-11 LCD Viewing Hood for the fp Camera Is the Best Hood I’ve Ever Used
Brian Matsumoto – Technical Representative, Illinois
There is a base plate that screws into the bottom of the SIGMA fp and the LVF-11 viewing hood screws into this base plate. This arrangement allows for a rock solid attachment of the viewing hood to the camera. I have used other cameras with viewing hoods and all of the others never quite seemed locked on tight to the camera. The LVF-11 viewing hood is solid and it is not going anywhere. There is also an adjustable diopter eye piece on the LVF-11 so it is easy to adjust this viewing hood to the user’s vision, with or without glasses. There is a slight magnification of the LCD screen on the camera so that the menu and the icons on the screen are also easier to see, along with the through-the-lens experience, which is especially helpful when shooting outside on a bright sunny day.
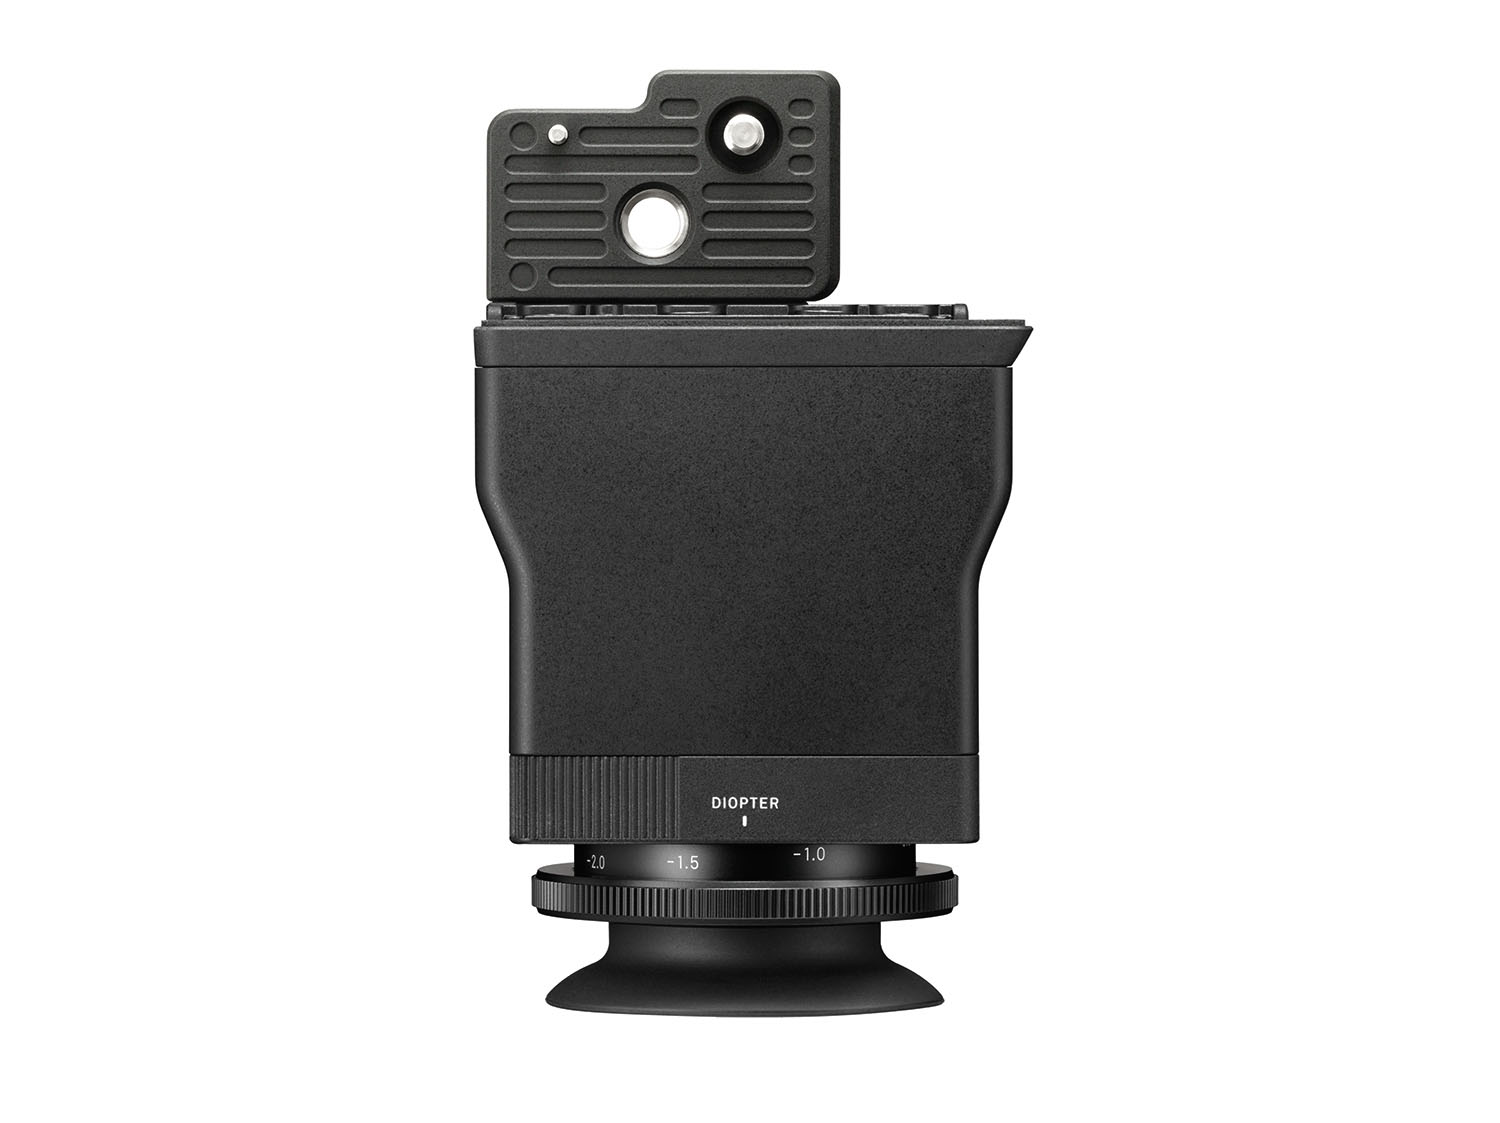
In my opinion, this is the best add-on tool for using the camera outside in bright conditions for both stills and video. Add in the small hand grip and the fp camera is now a rock-solid run and gun stills and video camera.
It’s a “Modern Classic” Everyday Camera
Nick Vrona – Marketing Specialist, New York
From the day I was born until the day I moved out of the house over 20 years ago, my dad shot every last occasion with a basic film camera and a 50mm lens. That single camera and lens combo was able to capture birthdays, vacations, family get-togethers, random shots around the neighborhood, and so much more. While there’s really no modern-day equivalent to a mostly-manual 35mm film camera, the versatile SIGMA fp — combined with the 45mm F2.8 DG DN | Contemporary lens — is pretty darn close, from the angle of view to the boxy feel of the camera body.

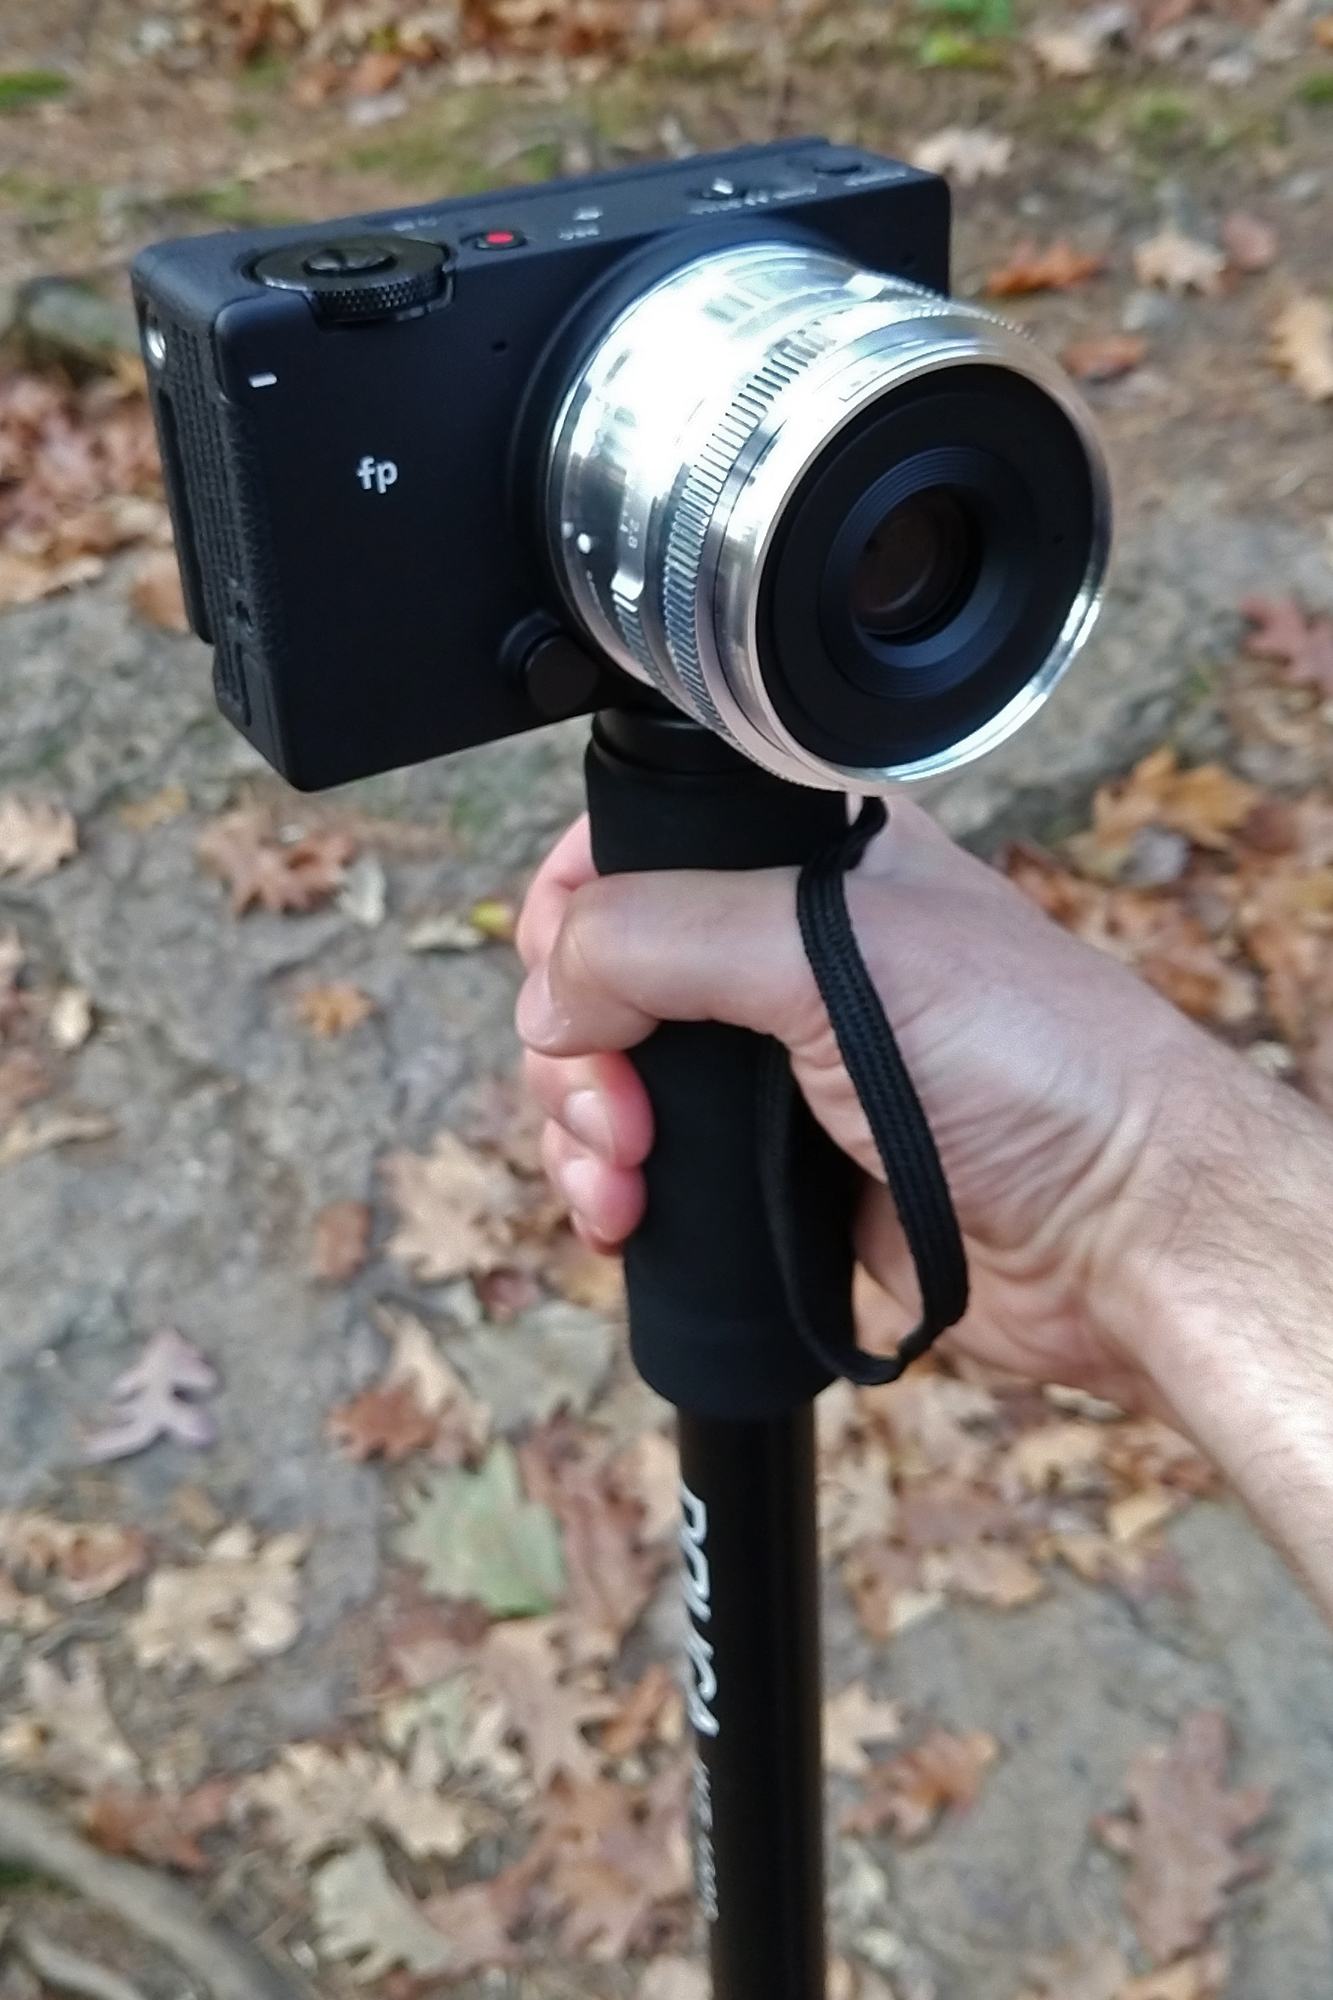
Usually when I pack “light” for a trip, it means bringing along a camera with a relatively bulky all-in-one zoom lens, or a couple lenses to cover a broad focal range. By forcing myself to stick with one standard focal length — like my old man did so many moons ago — I was able to condense my photography gear to a single pocket of my messenger bag. Literally the only accessory in my bag was an extra battery. Of course, limiting myself to a single, moderately-fast prime lens did make certain situations more challenging, and I wasn’t able to get those impressive ultra-wide shots or zoom in on wildlife in the distance, but I was able to use my monopod with the fp on it as a walking stick! Try that with a 70-200.

When I wasn’t on a trail, the fp fit nicely in my tiny satchel and didn’t weigh me down in the least. And as much as I love the SIGMA 60-600mm Sports lens mounted on a chunky DSLR, I think I did a lot more shooting with the fp at my side, and the images captured on the fp’s full-frame sensor in DNG format offered a ton of dynamic range and clarity that I certainly wouldn’t have if I were taking pictures with my phone or a camera with a tiny sensor.

Understandably, one might not buy a full-frame mirrorless camera solely for travel snapshots, and indeed, I primarily use my fp for other, more ambitious endeavors. But when I distilled it to the most basic of functions, the fp plus the 45mm F2.8 DG DN | Contemporary lens reminds me of the SLR my father used to sling around his neck with its ubiquitous nifty fifty, as we crowded in front of the next landmark, happy to capture another special memory.


Dedicated Still and Cine Interfaces
Marc Farb – Technical Representative, New York
Being a still photographer for more than 35 years it’s a strange feeling to learn about something that is very similar in many ways but very different in a lot of ways to still photography. What I’m talking about is with the advance of technology and the move of videography or cinematography into a more affordable place that everybody can take advantage of. That being said it allows the end-user to be both a still photographer and cinematographer with the flip of a switch.
By default the “switch” is set to Still on the fp out of the box. When powered up the LCD looks just like any other digital still camera giving all the normal exposure and metering info you’d expect. Flip the “switch” to Cine and suddenly the LCD looks like the screen of a high end Cine monitor on a movie set. The information overload at first is crazy. Some of the technical names are different but you have much of the same information as the still camera menu supplemented by some of the internal options that you normally don’t think about are also there. Things like how far from subject, the sound levels that the internal mic are picking up, T-stops instead of F-stops, time encoding, just to name a few, including Shutter Angle. I think for many photographers, thinking of exposure time in terms of shutter angle is one of the bigger challenges.
In cinematography shutter angle is a term that describes your actual shutter speed relative to a frame rate. This concept was started in the early film days with a hole in a Rotary disk that would spin at a given rate exposing film to create motion. The earliest versions of this the disc move slow enough that movement look very choppy. As the mechanics changed over time even with mechanical disk spinning around exposing film you could get decent motion with little to no blur.
In a still camera, the concept of shutter speed is pretty simple… the shutter opens and closes at a given interval to achieve a single frame. Putting aside all of the other attributes of exposure, the goal is to typically get a sharp image of the subject. Most cameras will allow you to operate the shutter from a 30-second exposure all the way up to 1/8000 of a second. Now, in a still camera, again the idea is to get a sharp image.
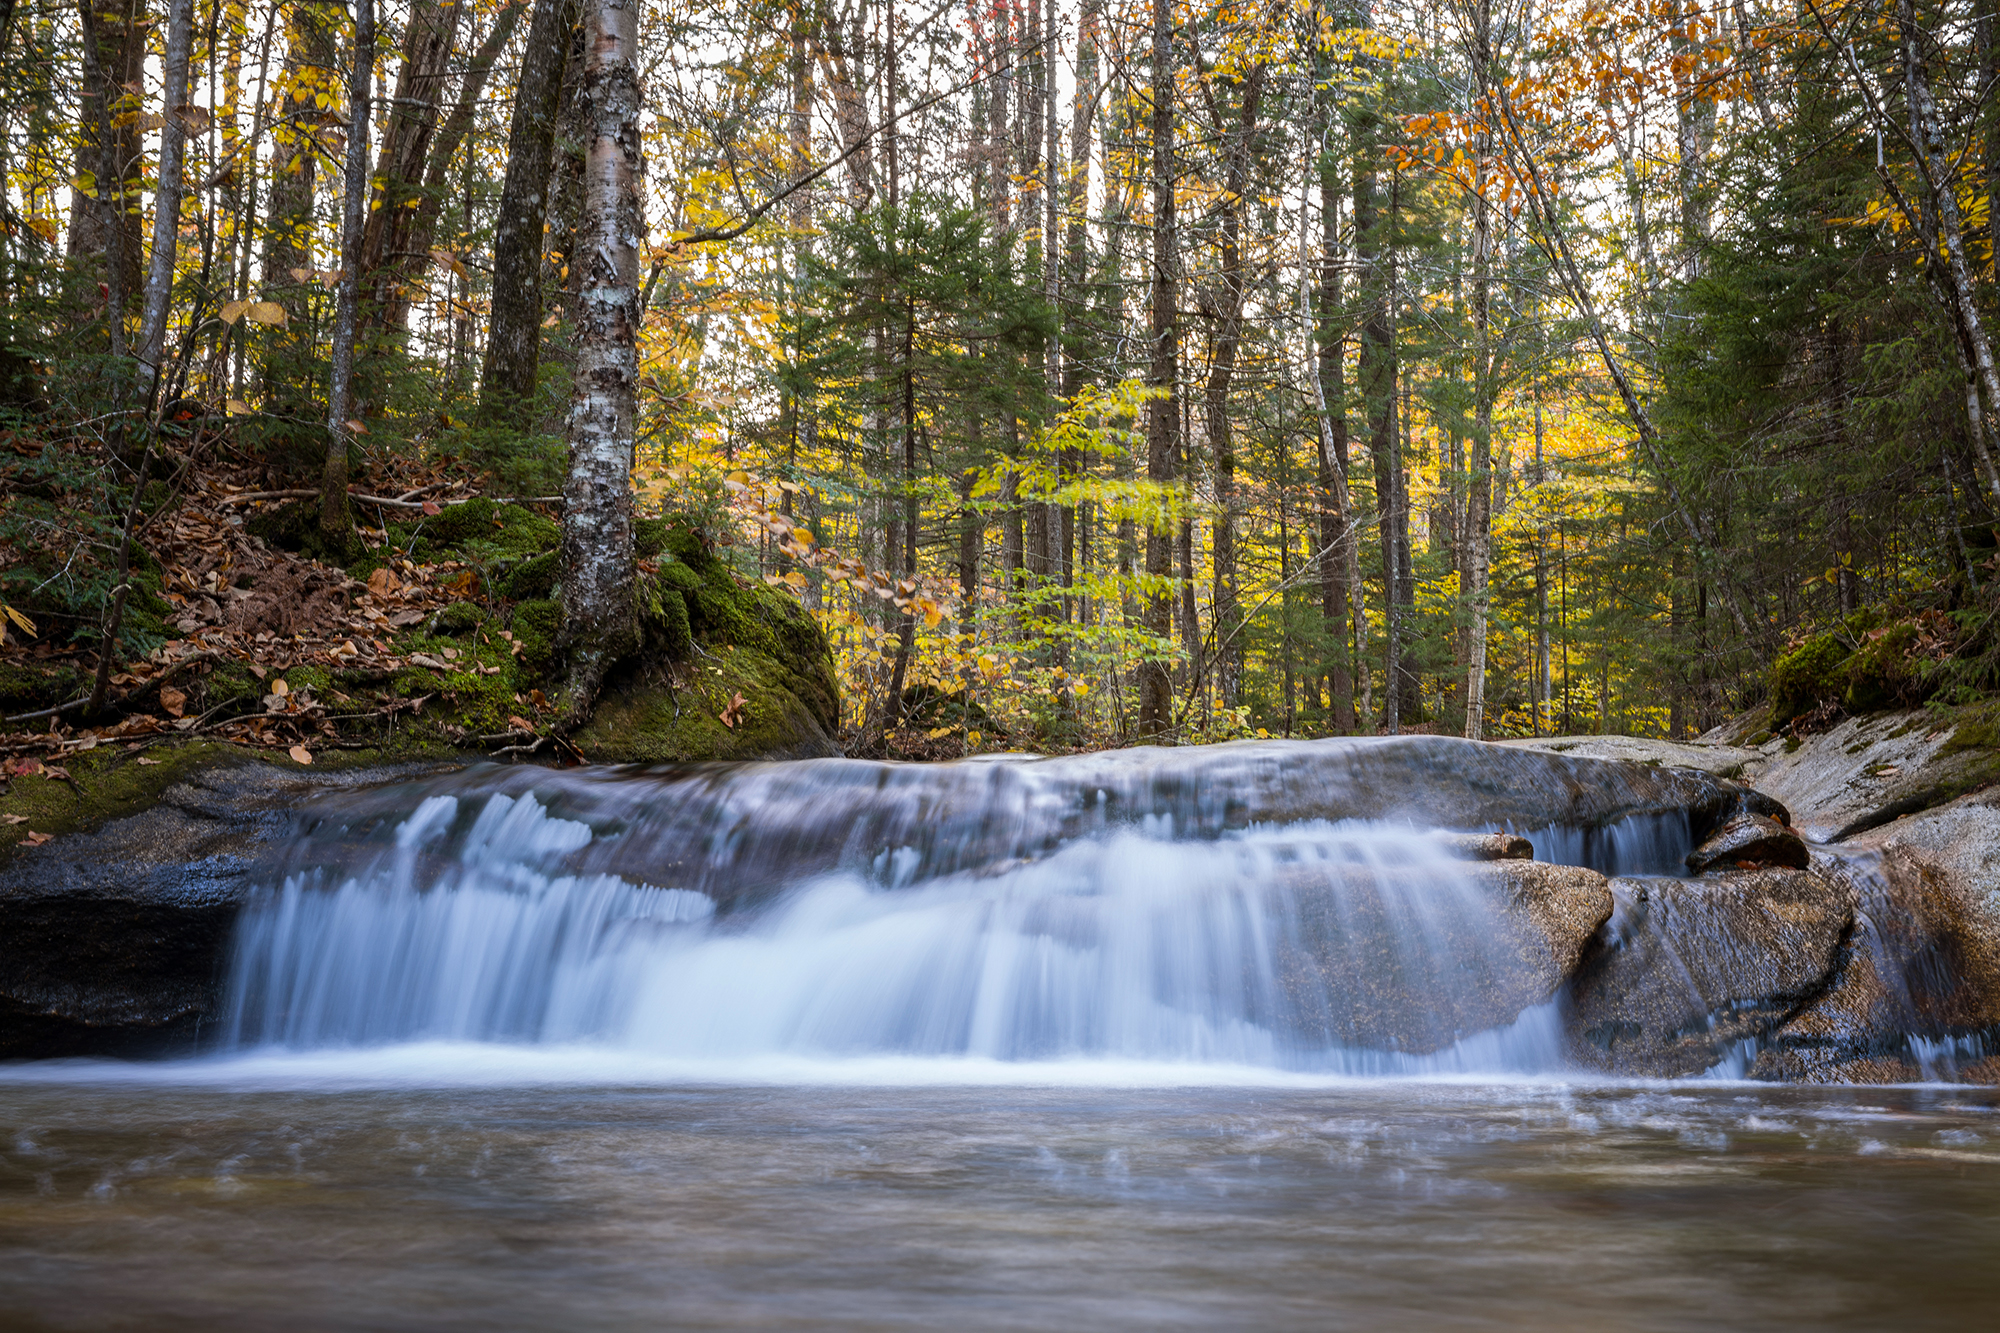
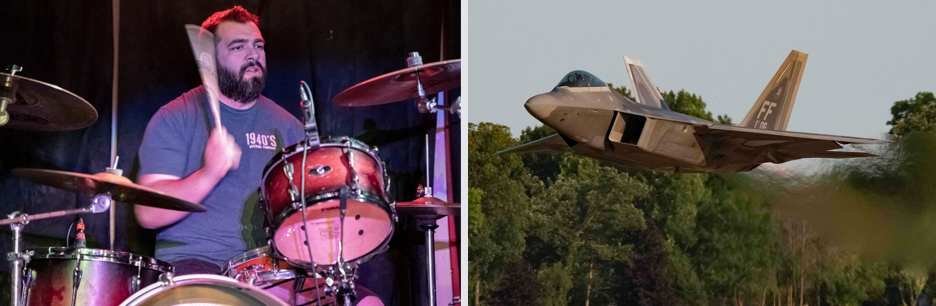
However, in some cases, showing some motion blur by dragging the shutter also indicates speed in the subject which is a little bit more of a creative concept. Pictured here are two examples of just that the first one is dragging the shutter a little to show movement on the drumsticks. The second image is taken at over 2000th of a second capturing an F22 fighter jet at well over 300mph on a high-speed pass.
Most cinematography uses 24 frames per second is a standard baseline for motion video. The breakdown on this is your shutter speed is approximately 1/50 of a second giving of shutter angle of about 180° allowing proper exposure and minimal amount of blur in motion. The use of shutter angle is what a cinematographer uses to control motion blur. The tighter the angle there is minimal blur but the byproduct is a stuttered motion. By increasing the angle you are able to increase the blur to get a smoother motion.
Fortunately, for longtime Still photographers just experimenting with Cine work, there is a menu option to swap Shutter Angle for exposure time in fractions of a second to mirror the still style shutter speed selection option.
Three other items that different names between the two art forms are Timecode, audio monitor, and waveform. These all are Cine terms that translate into ensuring the final output video has proper sound and exposure—just like the histogram and light meter in the camera for stills help inform exposure decisions. Obviously there’s no sound in the still setting, though.
The Time code is time registration to allow for syncing the sound with the video during the editing process, as well as to sync different cameras on a set. The audio monitor is showing the highs and lows of sound as not to peak too high or sink too low during recording. This can be adjusted in-camera from +6dB to a -36dB in 3dB increments just like exposure in a still camera.
Last is the waveform. This is a real-time histogram showing channel information that makes sure that your exposure does not clip highlights and shadows during recording. This also aides in the editing process so you can make adjustments in post to correct some issues to maintain consistency of the video. And just as you can convert shutter angle to fractions of a second in the Cine operations, filmmakers who are more comfortable with exposure information being displayed in wave forms have the option to swap the histogram for wave form in Still mode; perfect for scouting scenes with the critical information displayed in a native filmmaker’s format.
Cut to the Chase With the SIGMA fp as a Director’s Viewfinder
Aaron Norberg – Technical Representative, Oregon
If you’ve ever worked as a DP on a larger production you probably can appreciate the impact that camera position, focal length and sensor format all play in the final look of the recorded image. For many however, visualizing the particulars of perspective and depth of field does not come naturally. In the stills world it’s common practice to take multiple images from different positions utilizing various aperture and/or focal length settings in order to overcome this hurdle but with the increased complexities that come along with creating content as part of a video production team such exercises are often impractical. Hence the creation of the director’s viewfinder accessory to fulfill this role.
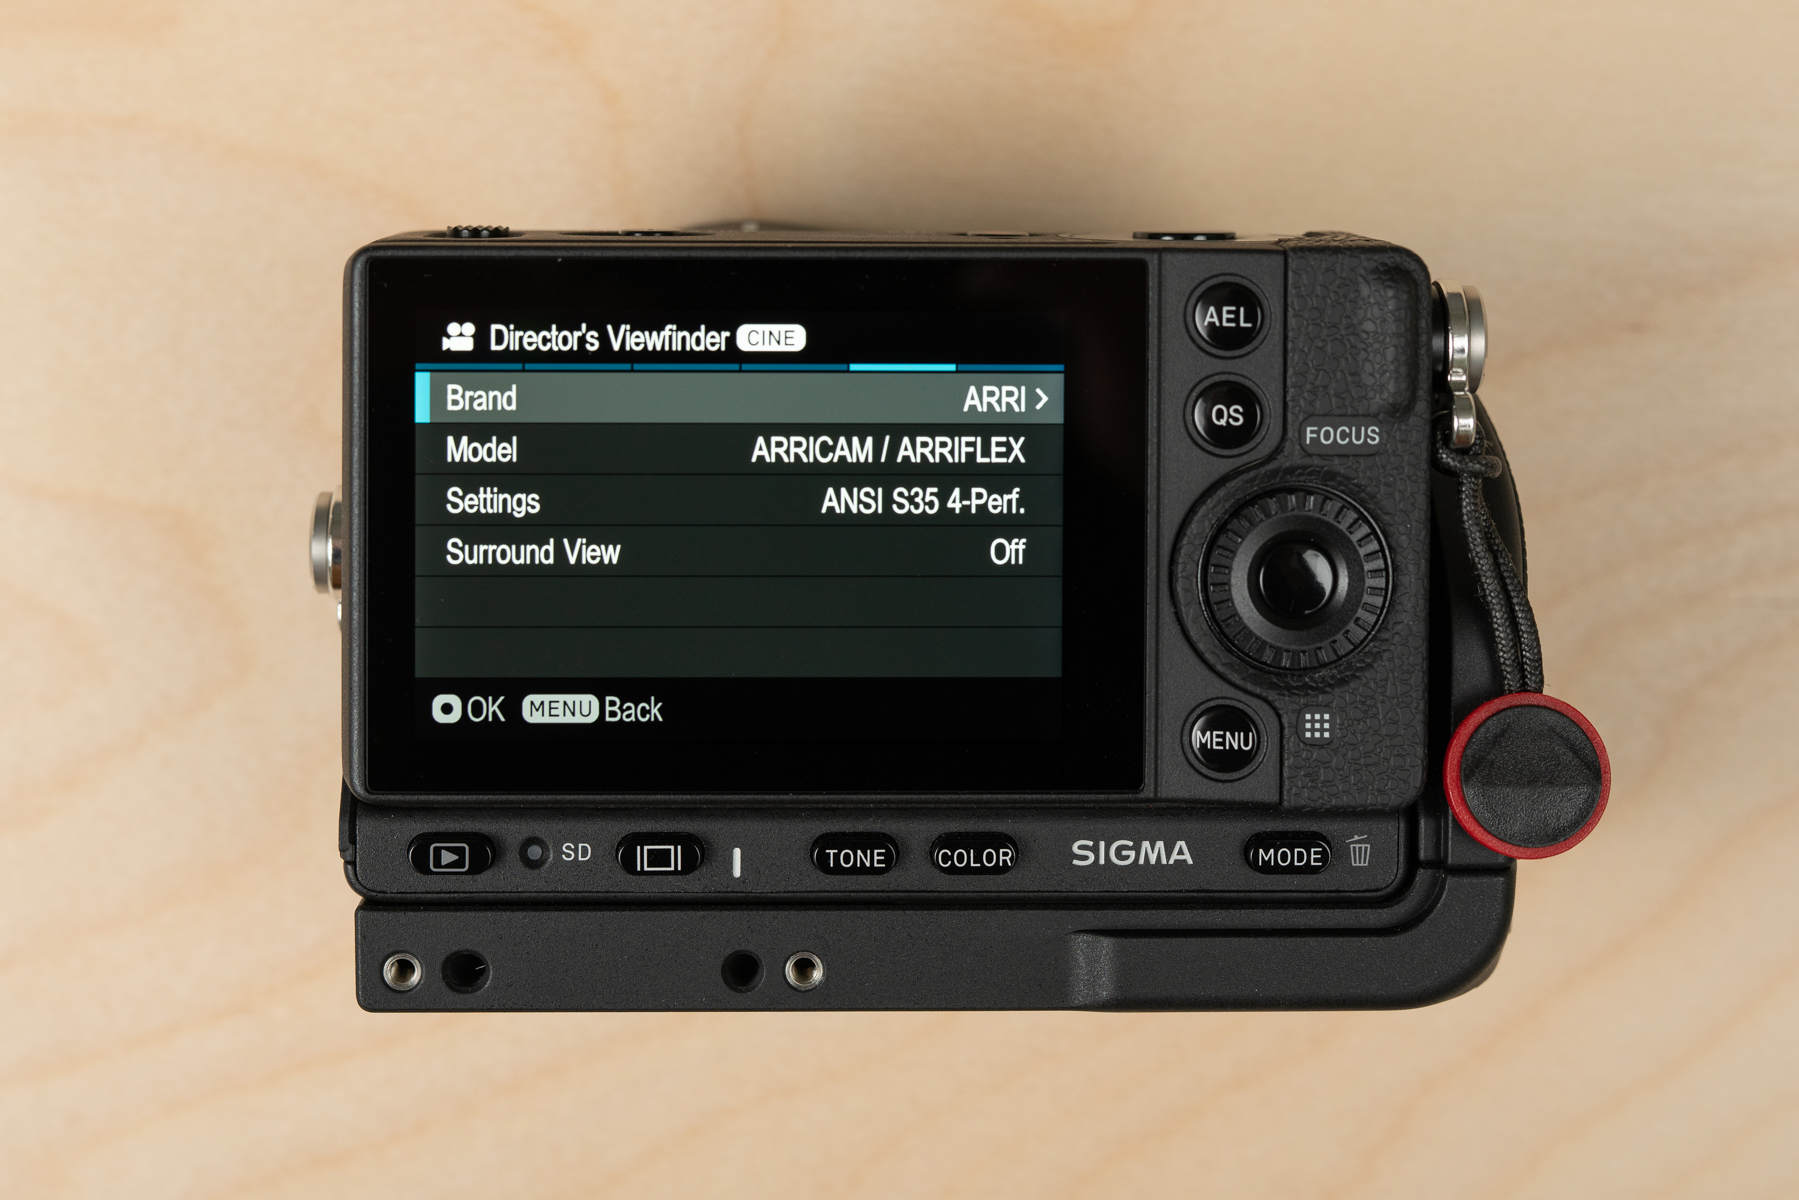
While there have been a number of devices created over the years to meet this need, most options within reach are designed with Super 35 or smaller formats in mind and as such won’t be able to replicate the perspective seen by the more recent advent of large format cinema cameras. There are some app-based solutions available to fill this gap, but as these rely on the lens and sensor in your smartphone or tablet, they can really only give a rough guideline for general composition. With this growing need in mind SIGMA has incorporated a feature aptly named the ‘Director’s Viewfinder’ in it’s most recent camera, the fp.
The SIGMA fp’s combination of a 35mm full-frame sensor and the readily adaptable Leica L-Mount make it a natural fit for this use. In addition to the full ecosystem of native mount lenses available from the L-Mount Alliance partners (Leica, Panasonic and SIGMA), SIGMA’s own lens mount adapters can also facilitate the use of Canon EF mount lenses (via the MC-21) as well as PL mount lenses (via the MC-31), making it easy to fit just about any focal length you might need on set. Once your lens is mounted, simply input the camera model (options from Arri, RED and Sony available currently) and aspect ratio to be used in the menu prompts and the fp will match its sensor readout to that of your main camera. This not only allows you to preview how the perspective and character of your actual lens will project onto your camera’s sensor without needing to go through the trouble of relocating your main camera, it can also help you to dial in your ISO and iris settings quickly with a live preview exposure. SIGMA also offers an LCD viewfinder accessory (via the LVF-11 Brian Matsumoto talks about above) to further aid in visualizing the scene by blocking all extraneous light from the rear screen and increasing magnification by 2.5x.
In addition to the powerful functionality of the Director’s Viewfinder setting the fp is also a full-featured camera in its own right, its ability to output up to 12-bit Cinema DNG footage and 24-megapixel stills make it a very handy tool to have on set. The next time you have a production where you can try something new check out an fp from your favorite rental house, you may just find it fits right in with your workflow.
The MC-21 and MC-31 Mount Converters
Eric Hall – Service Manager, Sigma Burbank, California
The SIGMA MC-31 is a new mount converter which converts any L mount camera into a precise PL mount camera. With two points of shim adjustments (ARRI PL Shim and Leica L shim) you can fine tune your camera flange to perfection. All with the precision and build quantity you have come to expect from a high-end cine camera. Both PL and L mounts are solid brass construction with an aluminum alloy body the MC-31 is built with excellent durability for sustained professional use.
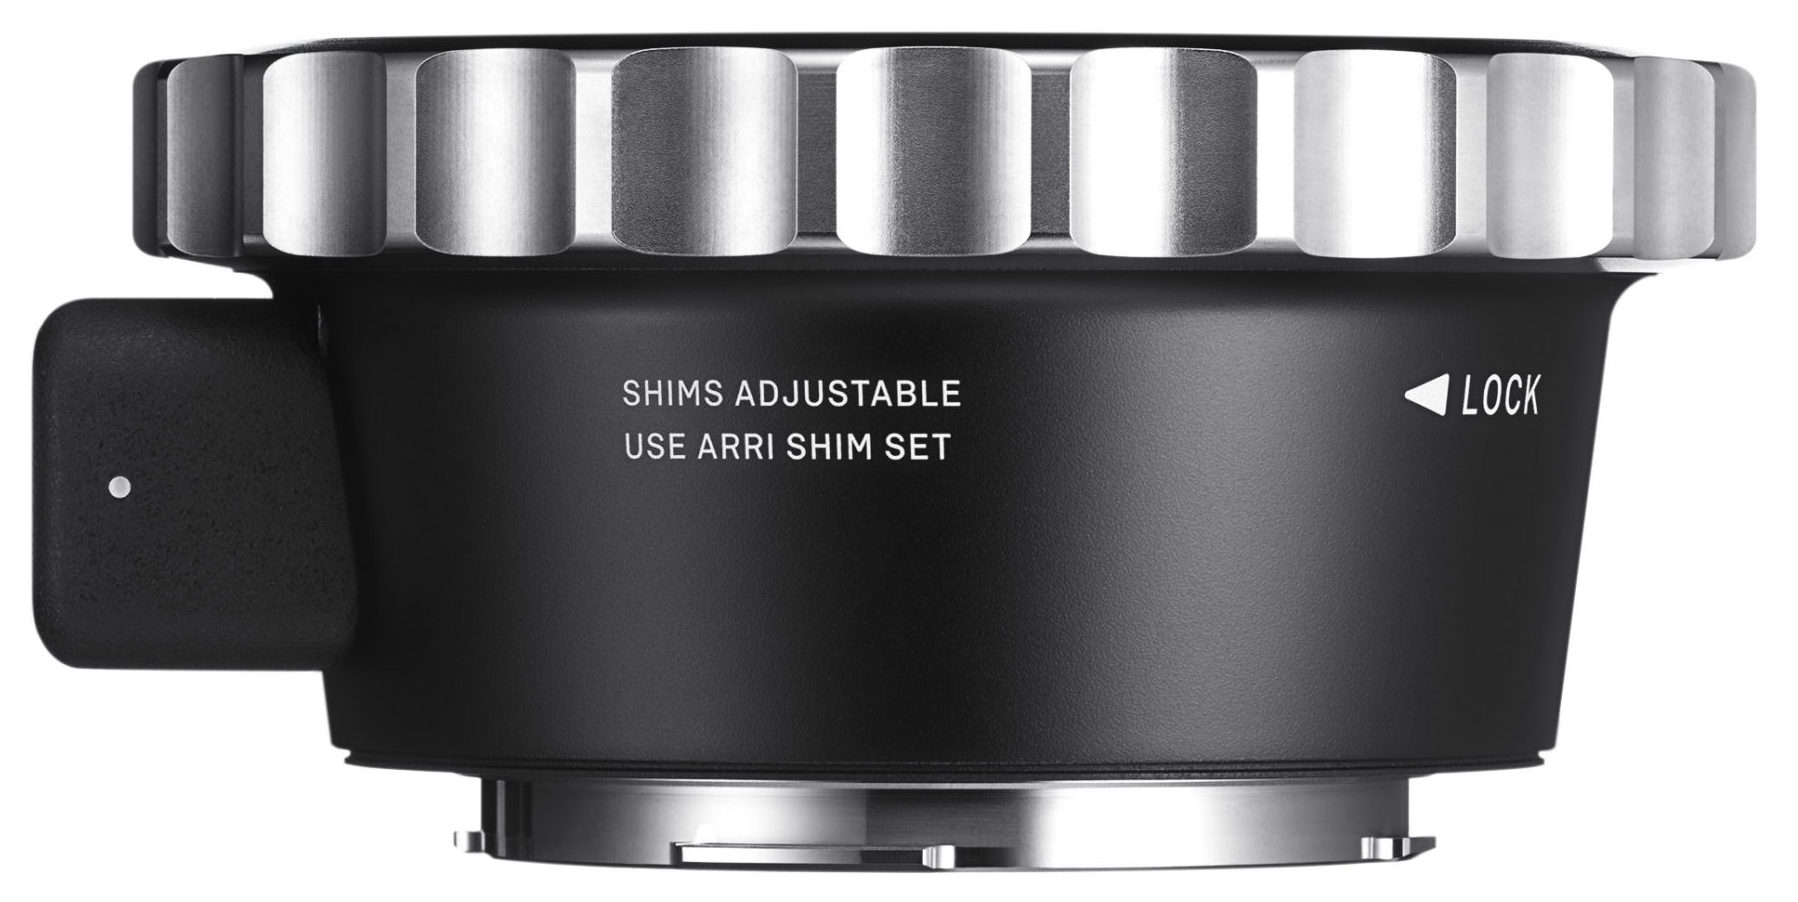
Compatible with any PL mount lens mount tightness is easily adjustable so thin or loose PL mounts will never be an issue for the MC-31. All that is needed is a 1.5mm hex driver.
This allows for a vast assortment of Cine lenses to be paired with the SIGMA fp for any-budget film making.
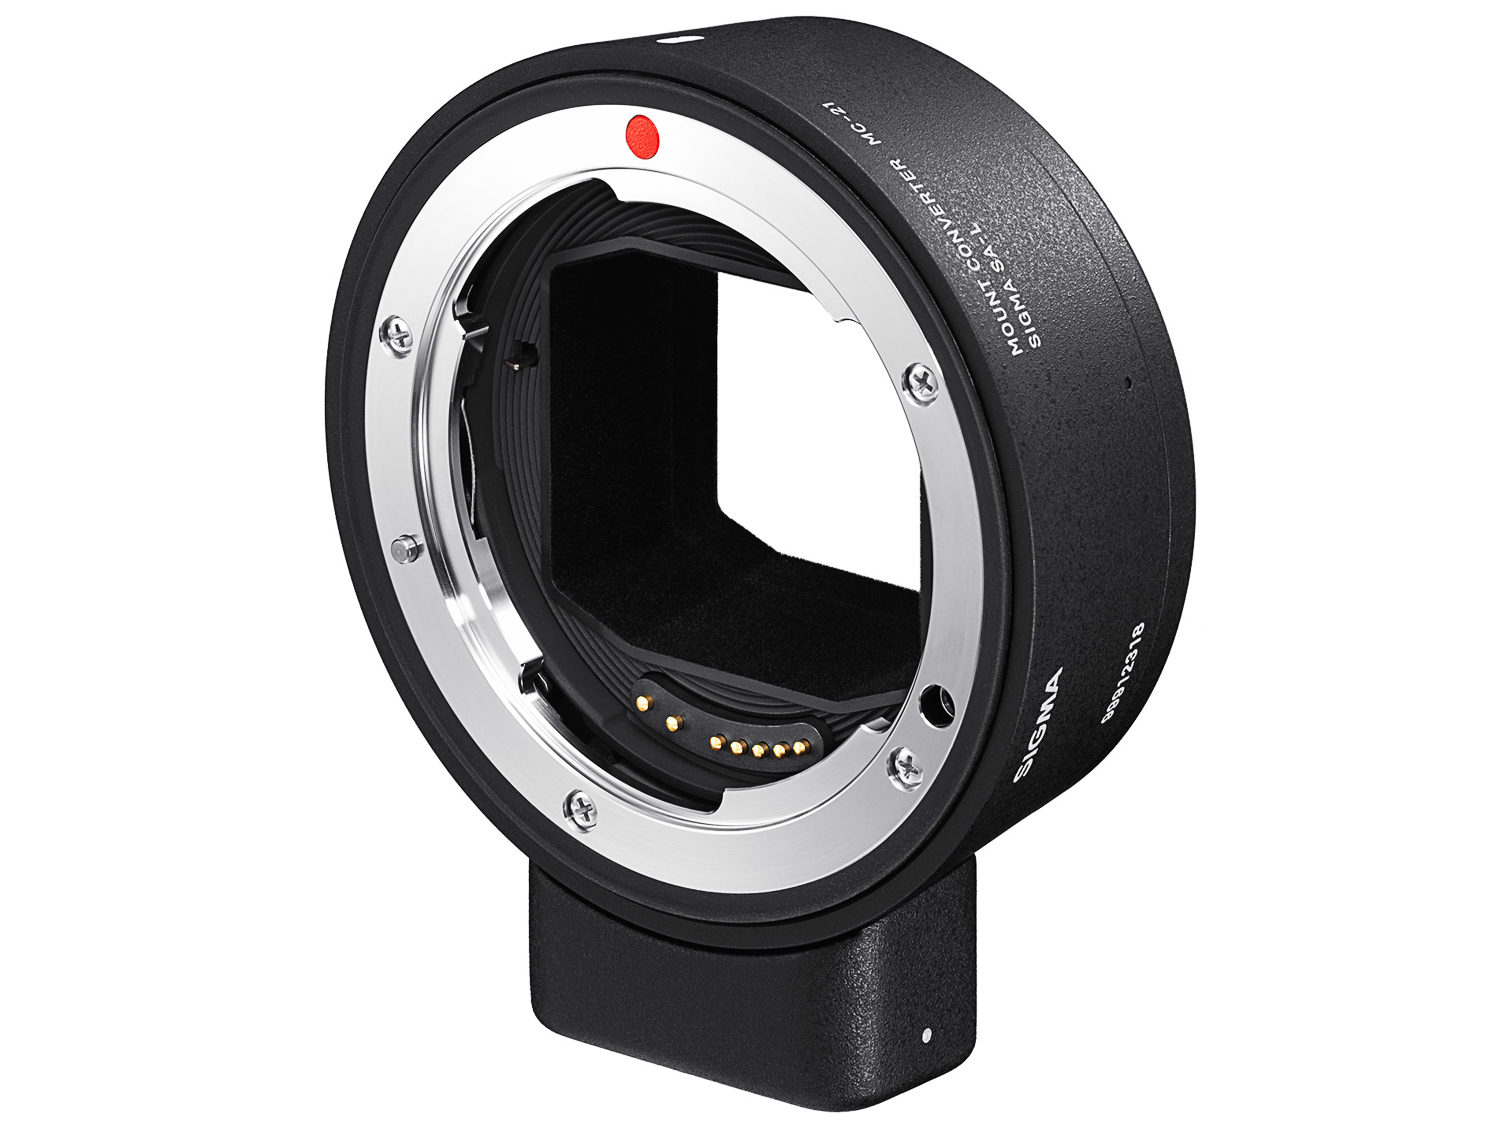
Additionally, the MC-21 Mount Converter, allows Canon EF-mount lenses to pair with the fp with full electronic communication for autofocus and other operations. These two adapters help create an incredible rich ecosystem of native and adapted lenses for the fp camera for both still and video projects.