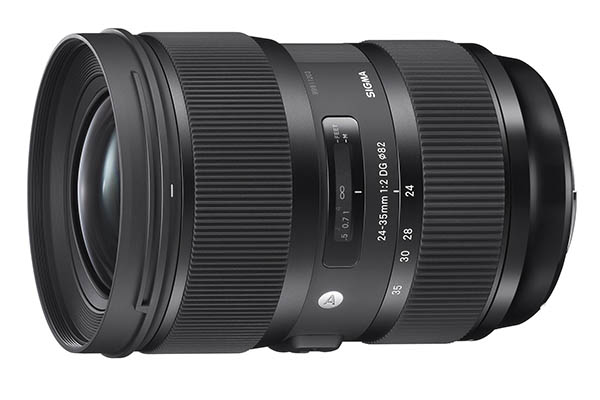
Uncategorized

Photos at the Aquarium: Tips and Tricks

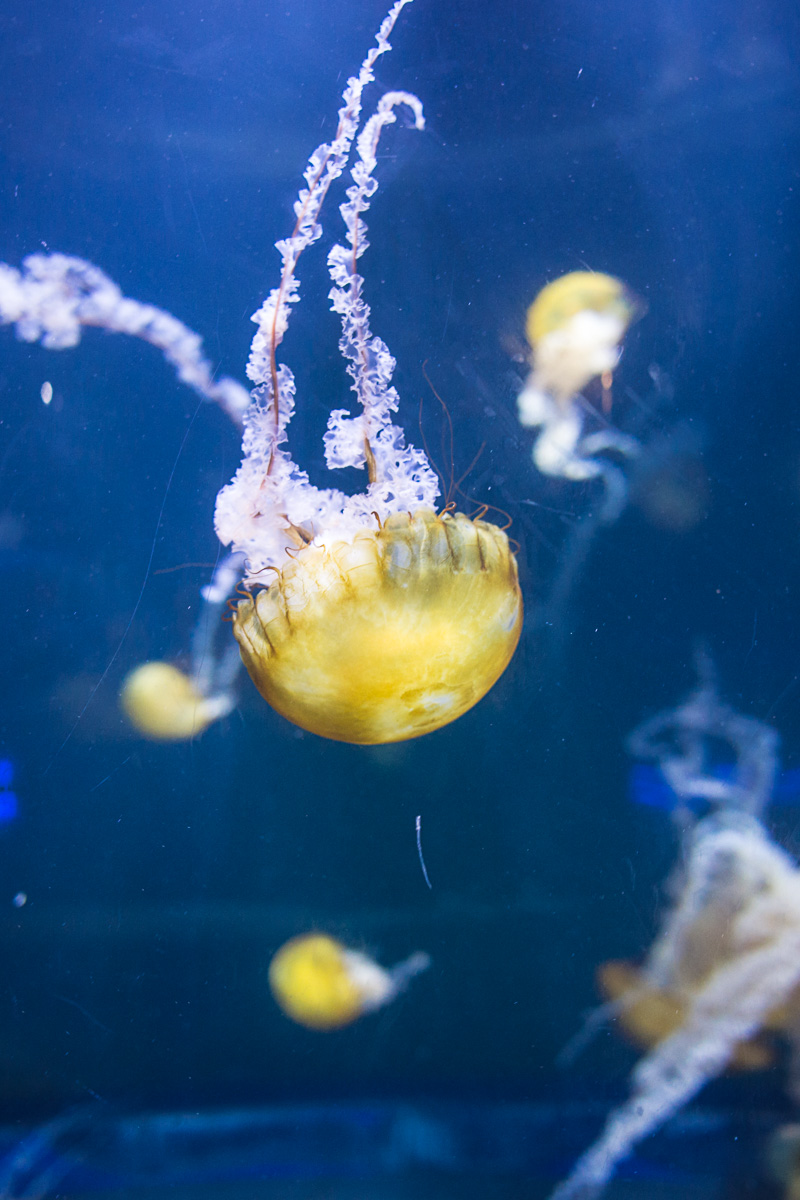
Aquariums present a number of challenges for photographers hoping to make keepsake photos of a visit to view undersea animals. Between the dim lighting conditions, highly reflective surfaces, and active subjects, it can be a recipe for disappointment. Here are some tips and tricks to up the odds of landing a winning shot of sharks and other aquatic animals the next time you visit the aquarium.

Eye contact with a shark at the Adventure Aquarium. Sigma 24-35mm F2 DG HSM | Art at 24mm. 1/80 F2 at ISO 1600. RAW photo worked up in Adobe Camera Raw. We'll go into the full workup later in this piece.
When it all comes together: Great Eye contact with a shark at the Adventure Aquarium from the Shark Tunnel.  Sigma 24-35mm F2 DG HSM | Art at 24mm. 1/80 F2 at ISO 1600. RAW photo worked up in Adobe Camera Raw. We’ll go into the full workup later in this piece.

Pack a fast-aperture wide angle lens

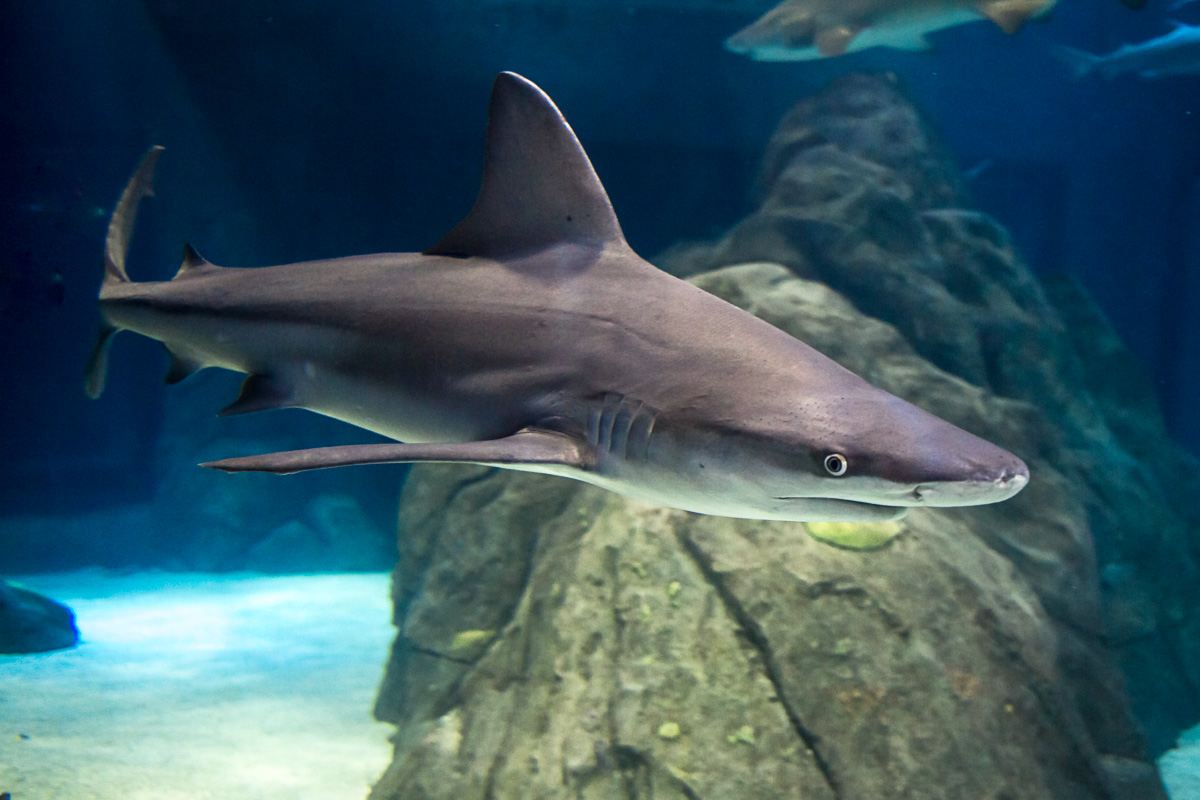
For my visit to the Adventure Aquarium, I chose the Sigma 24-35mm F2 DG HSM | Art lens as my go-to lens for almost all the photos in this piece. The wide-angle field of view and very fast F2 aperture allowed for fast shutter speeds in the ever-changing interior lighting conditions both inside and outside the giant tanks.

The Sigma 24-35mm F2 is the world's first F2 full-frame zoom lens.
The Sigma 24-35mm F2 is the world’s first F2 full-frame zoom lens.

Other great lens options include the full-frame 24mm F1.4 DG HSM | A, 24-70mm F2.8 EX, and the 17-70mm F2.8-4.0 DC OS HSM | C and the 18-35mm F1.8 DC HSM | Art lenses for APS-C cameras like the Canon Rebel Series, 7D, and DX-format Nikon DSLRs. If you don’t have a super-fast lens in your bag, make sure you are shooting with your kit zoom as wide open as it will go, usually F3.5, for the most light-gathering power.

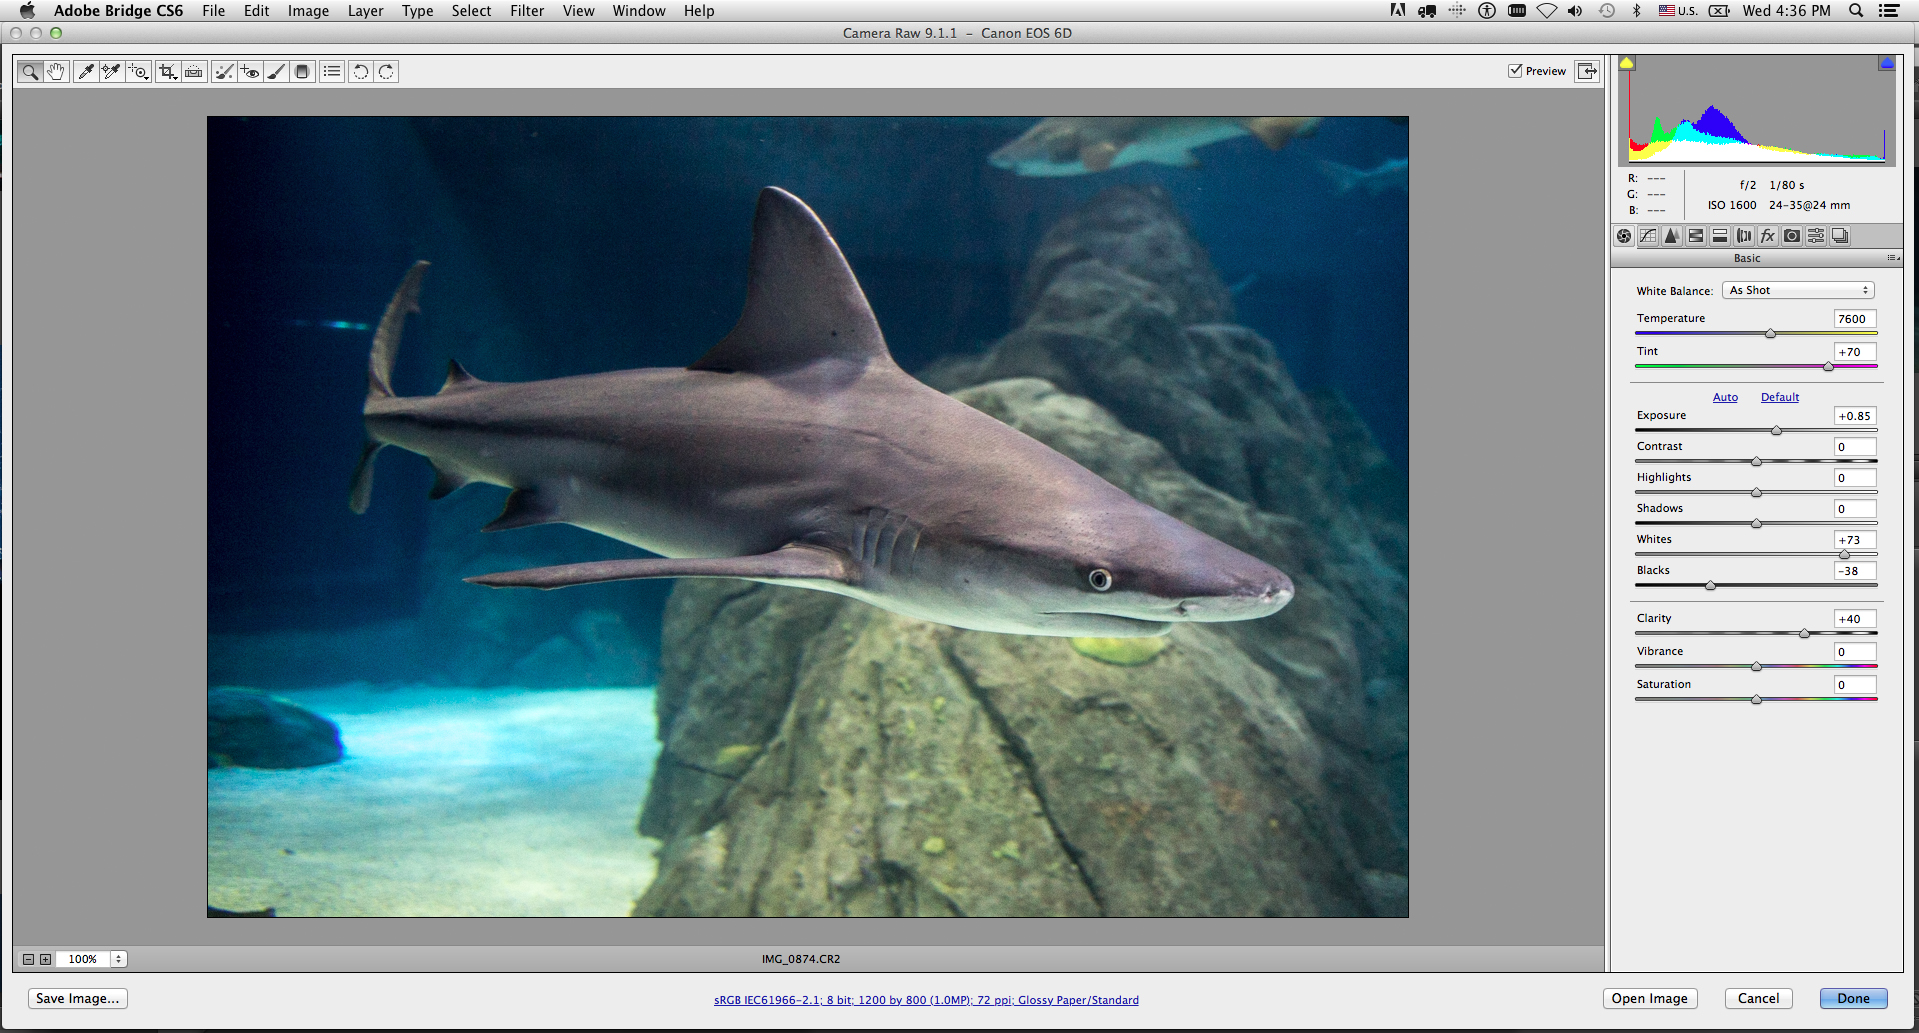
Choose the highest ISO you are comfortable with on your camera, and shoot RAW plus JPG

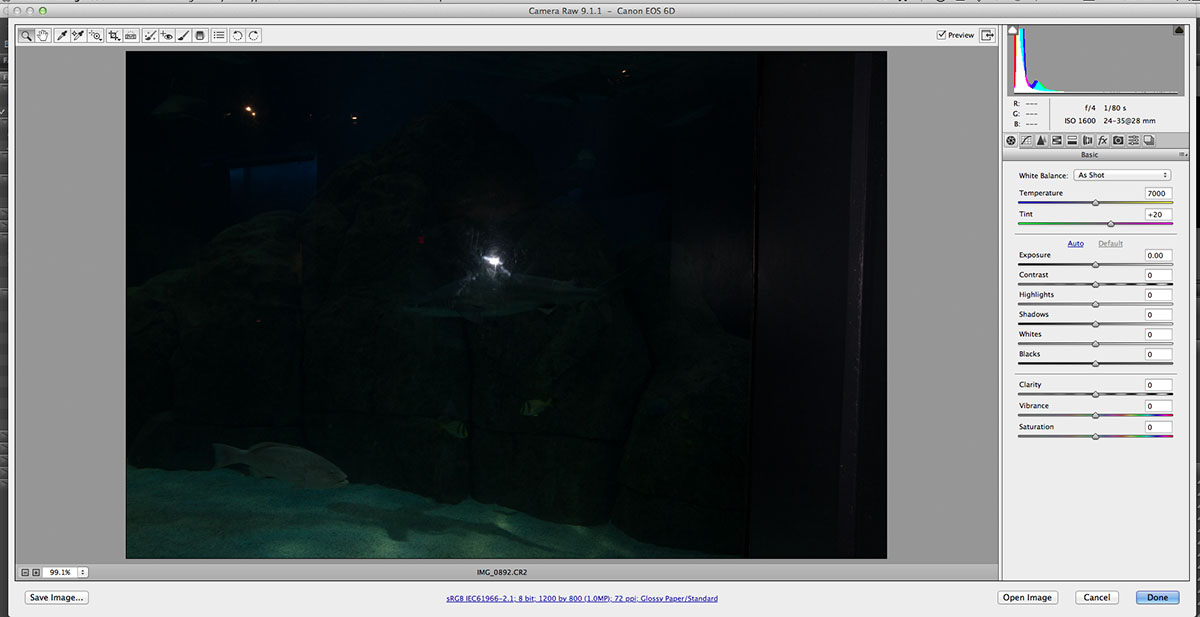
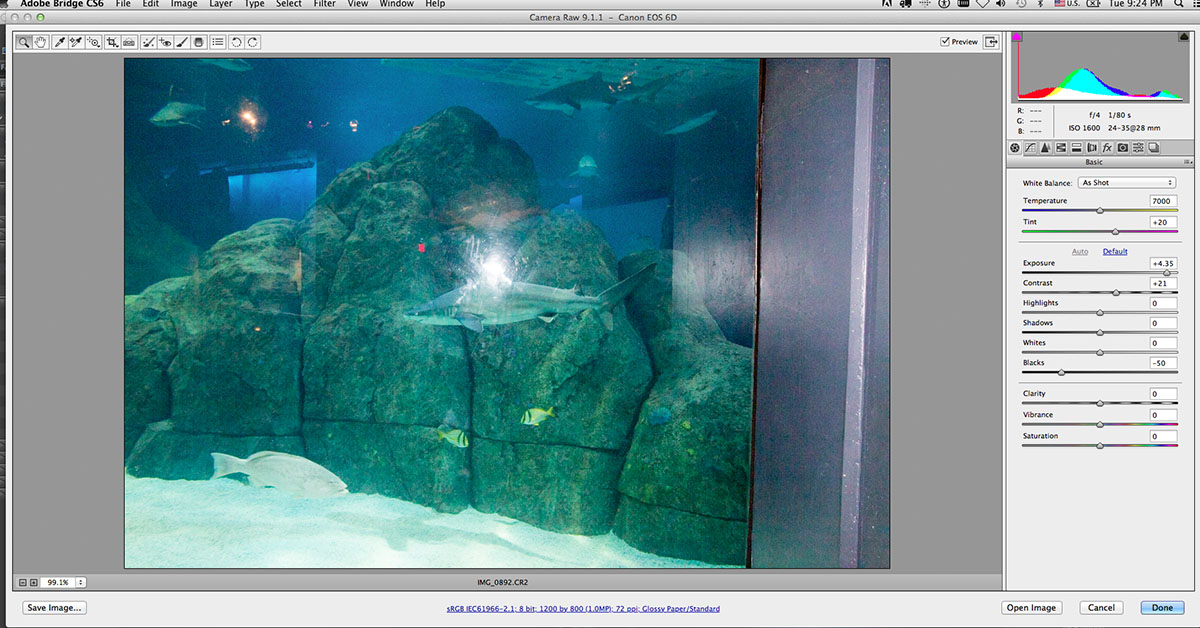
The High ISO performance on modern DSLRs, combined with very smart noise reduction, particularly when shooting RAW and using a leading Raw Converter like Adobe Camera Raw or Lightroom, has opened up new possibilities for imaging. Be sure to have an sense of how your DSLR and chosen RAW converter can work together for sharp, high-ISO images with minimized noise. I chose to cap my ISO at 1600 on my 6D for these photos, knowing I might be doing some aggressive post-processing to gain up the exposures and tone down the chrominance noise.

I chose ISO 800 and ISO 1600 as my highest ISOs on the 6D, based on my experience with the camera's performance in low-light conditions and Adobe Camera Raw's Noise reduction processes. No NR has been applied here to this shot. 1/80 F2 ISO 800 at 24mm.
I chose ISO 800 and ISO 1600 as my highest ISOs on the 6D, based on my experience with the camera’s performance in low-light conditions and Adobe Camera Raw’s Noise reduction processes. No NR has been applied here to this shot. 1/80 F2 ISO 800 at 24mm.


Consider Metered Manual Exposure mode

Depending on the exhibit, the proper or best exposure can vary significantly from what a metered program mode is determining it to be. Even when you switch to manual exposure mode, the meter keeps on working, and is visible through the viewfinder. Use this as a baseline, and set a manual exposure based on a test shot, and then review the histogram and adjust shutter speed and ISO up or down accordingly. Too slow a shutter speed will allow for camera shake and subject movement blur, too fast an exposure will dramatically underexpose a scene. But modern DSLRs have much greater latitude, and being a few stops underexposed isn’t as dreadful now as it was a decade ago.

The exposure for these small jellyfish was 1/1000 at F2 at ISO 800.
And these larger jellyfish, the very next tank over, the best exposure was 1/50 at F2 at ISO 800. Metered manual, combined with quick LCD/Histogram inspection is very helpful in changing, challenging lighting conditions.

Skip the Polarizer

Normally, it makes sense to use a polarizer to cut glare, but with the thick “glass” of an aquarium, which may be glass, or might be acrylic, the overall loss of light associated with a highly effective polarizing angle usually doesn’t make much sense.

Manage reflections if you can’t avoid them entirely

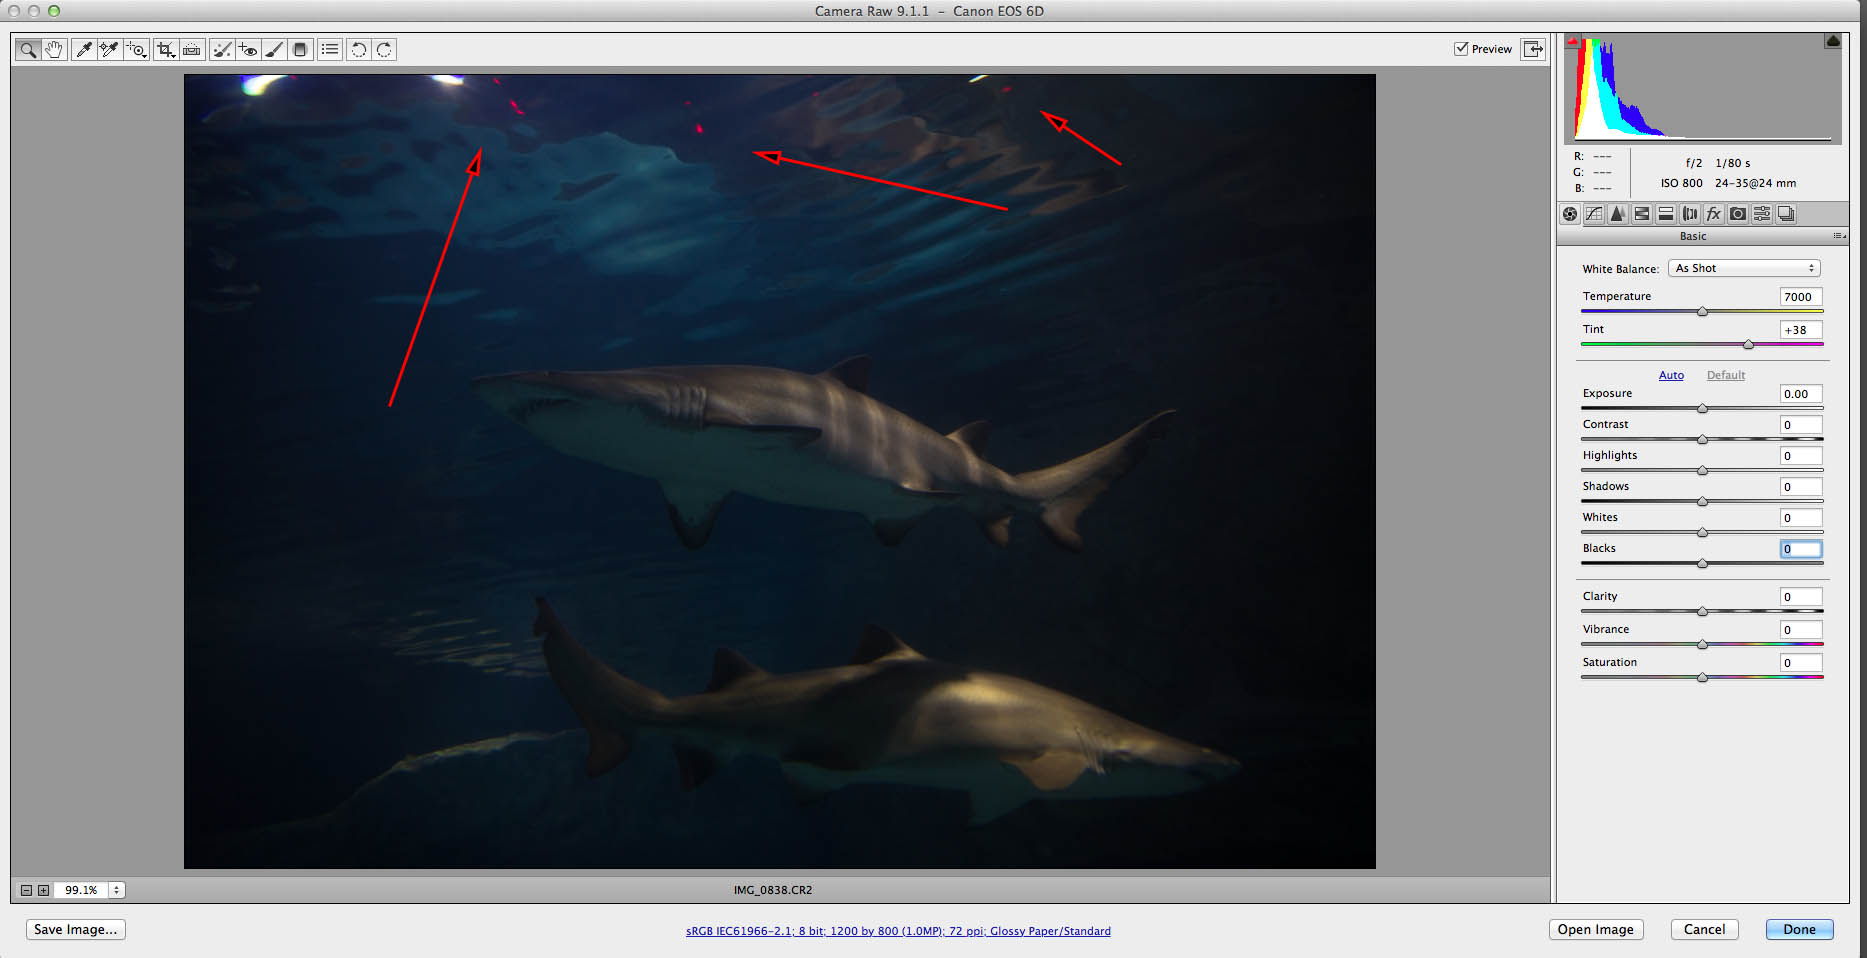
Take it as a given that you won’t be able to totally avoid some reflections and glare; but make sure anything glaring is away from the main subject and focus point of the image. A slight change of angle or position can very easily put a reflection right on top of your subject, or move it to the edge, or even out of frame.

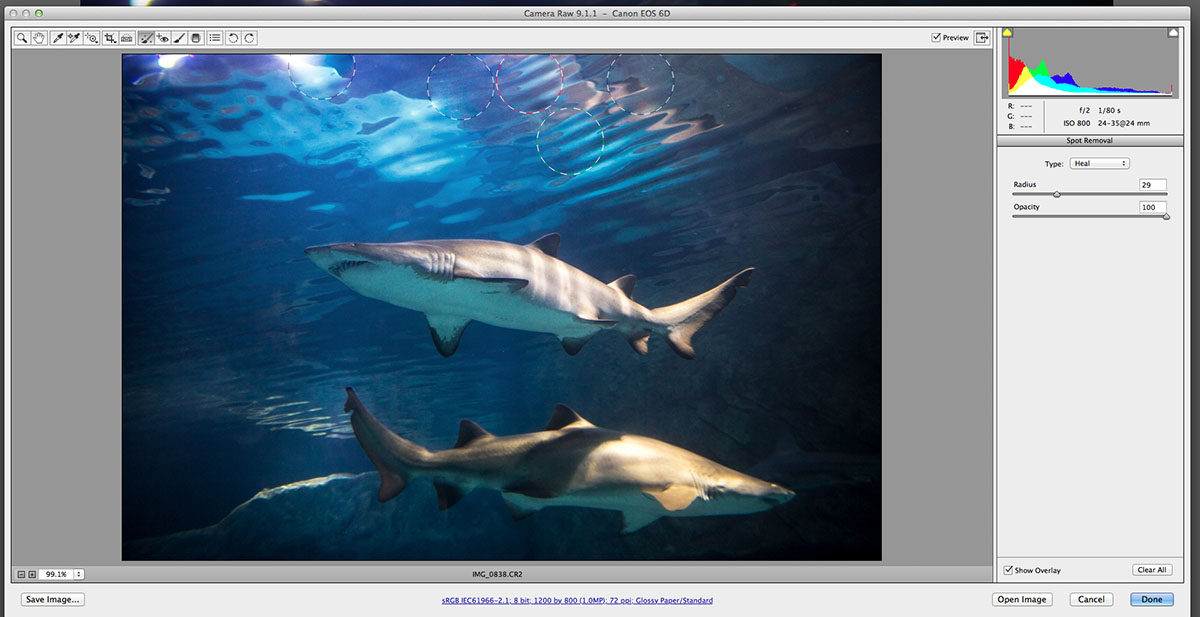
And then, if you want, use healing tools and cloning brushes to sweep them away, when possible.

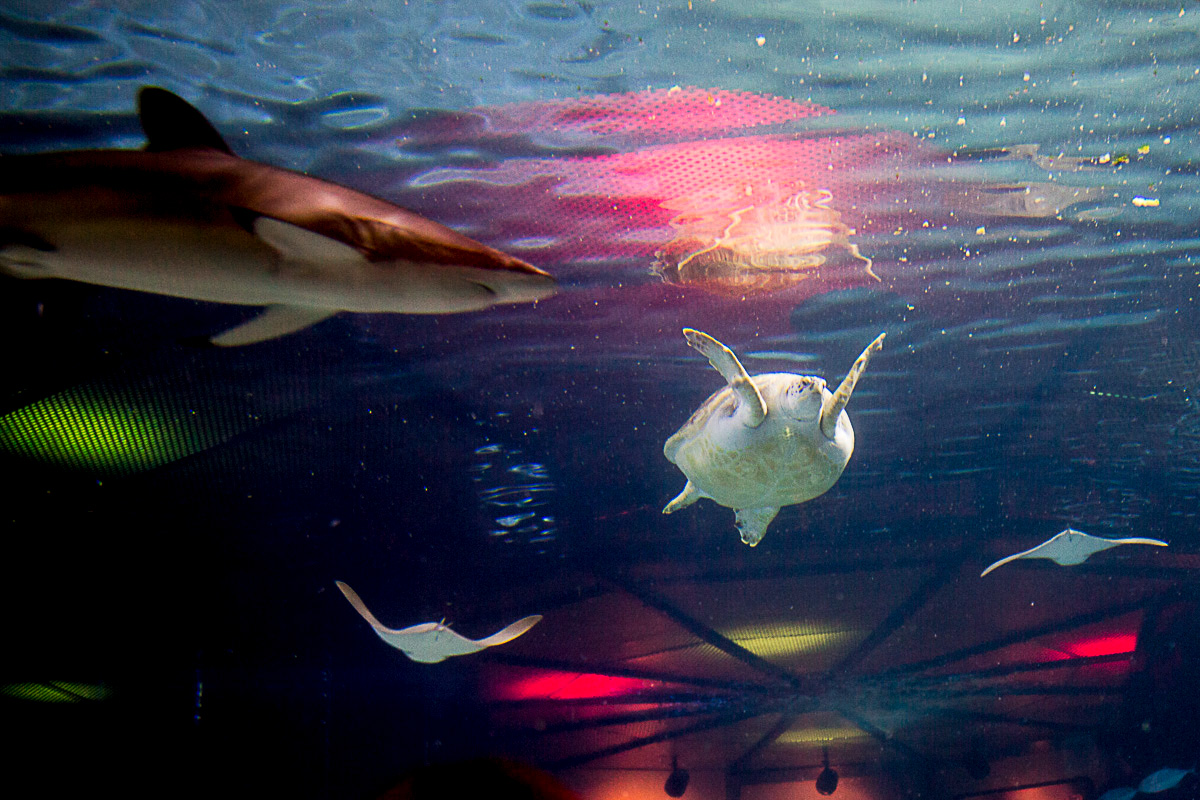
Or use the reflections and lights as design elements. For example, here the sea turtle, rays, and sharks are all positioned around the reflections of rooflights over the giant tank.

A polarizer filter wouldn't have done much to tame these wild reflections and the shutter was at a very slow 1/40 second as it was, so I incorporated the lighting reflections into the composition. Adding a polarizer would have dropped the shutter speed to 1/20 or 1/13, wouldn't have wholly cut the glare, and allowed for subject movement blur.
A polarizer filter wouldn’t have done much to tame these wild reflections and the shutter was at a very slow 1/40 second as it was, so I incorporated the lighting reflections into the composition. Adding a polarizer would have dropped the shutter speed to 1/20 or 1/13, wouldn’t have wholly cut the glare, and allowed for subject movement blur.
The red spots in the water are from an emergency exit sign, reflecting into the frame from somewhere.
A couple touches with the healing brush in Adobe Camera Raw sweeps these right away.

Frame the Photo with people for Scale

Stand a little ways back from a large viewing window into a tank and wait for a large sea creature to swim between or above some of the silhouetted people in the foreground to give a sense of scale and place to the scene.

Stepping back from one of the biggest observation windows allowed me to frame the silhouettes of fellow visitors along with the animals. I waited 'til a shark swam through the scene to make this shot. There's a tiny bit of motion blur at 1/40 second at ISO 400 at F2. but as far as an atmospheric shot, it works for me.
Stepping back from one of the biggest observation windows allowed me to frame the silhouettes of fellow visitors along with the animals. I waited ’til a shark swam through the scene to make this shot. There’s a tiny bit of motion blur at 1/40 second at ISO 400 at F2 at 35mm on the 24-35mm F2. but as far as an atmospheric shot, it works for me.


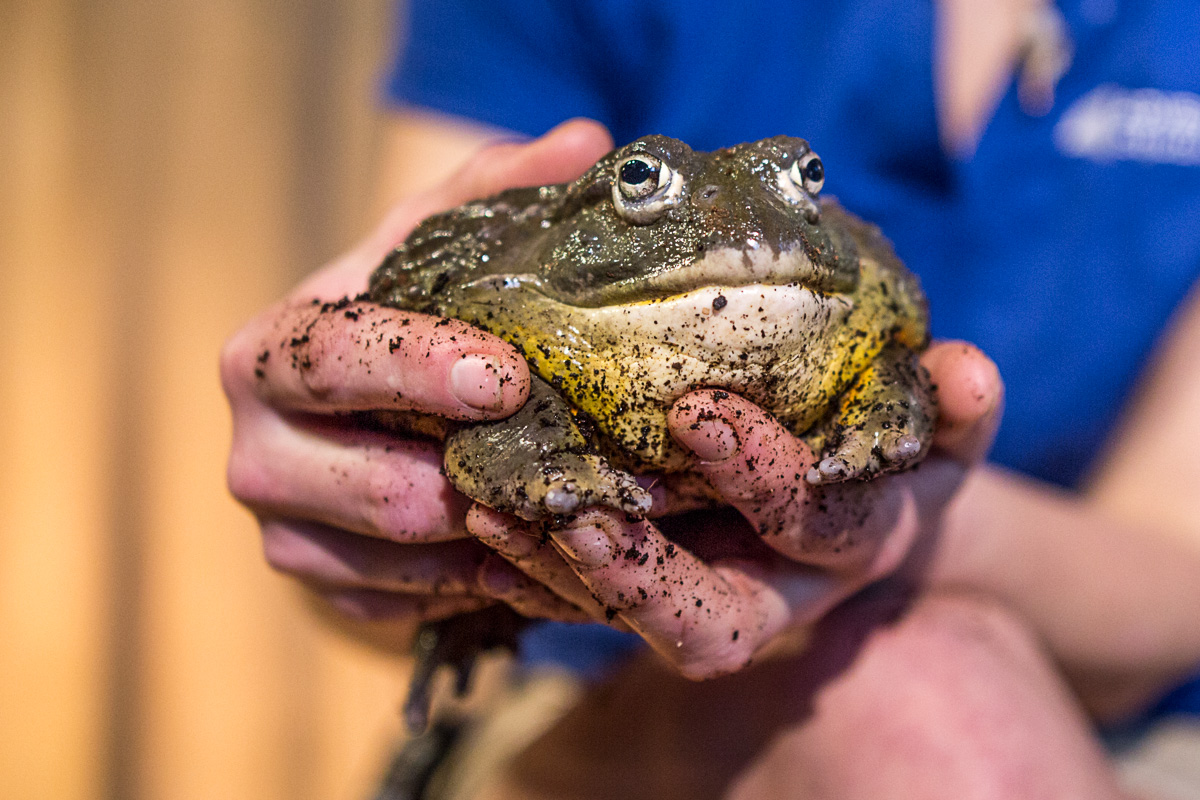
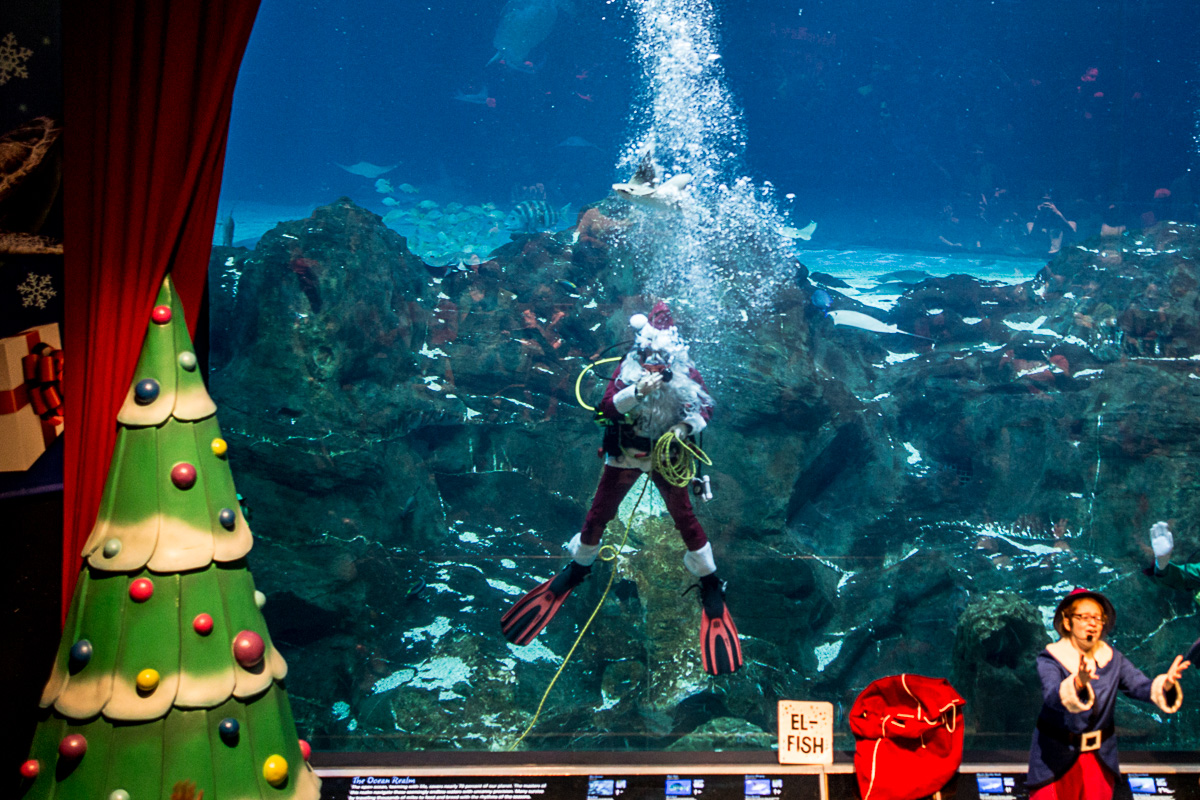
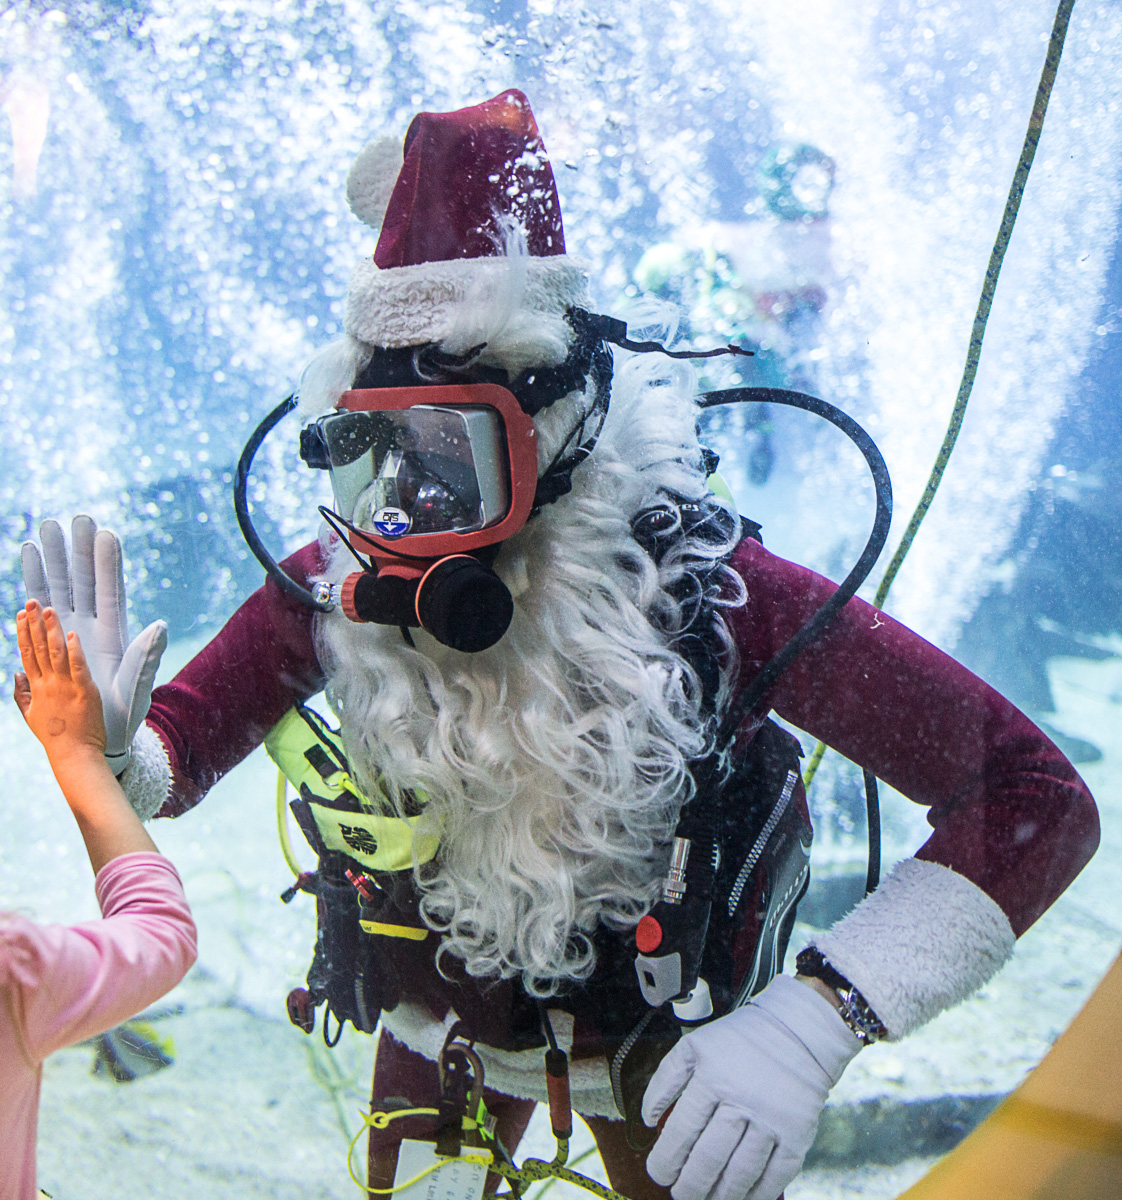
Look for anything unusual or eye catching, and try a shot, even if it might not work

I head a loud croak behind me and saw an educator holding up an African bullfrog in a small demo area. It wasn’t what I was expecting, but I was able to get up close and make a quick photo.


I cropped in to make the frog the only focal point of this image. 1/60 F2 ISO 640.

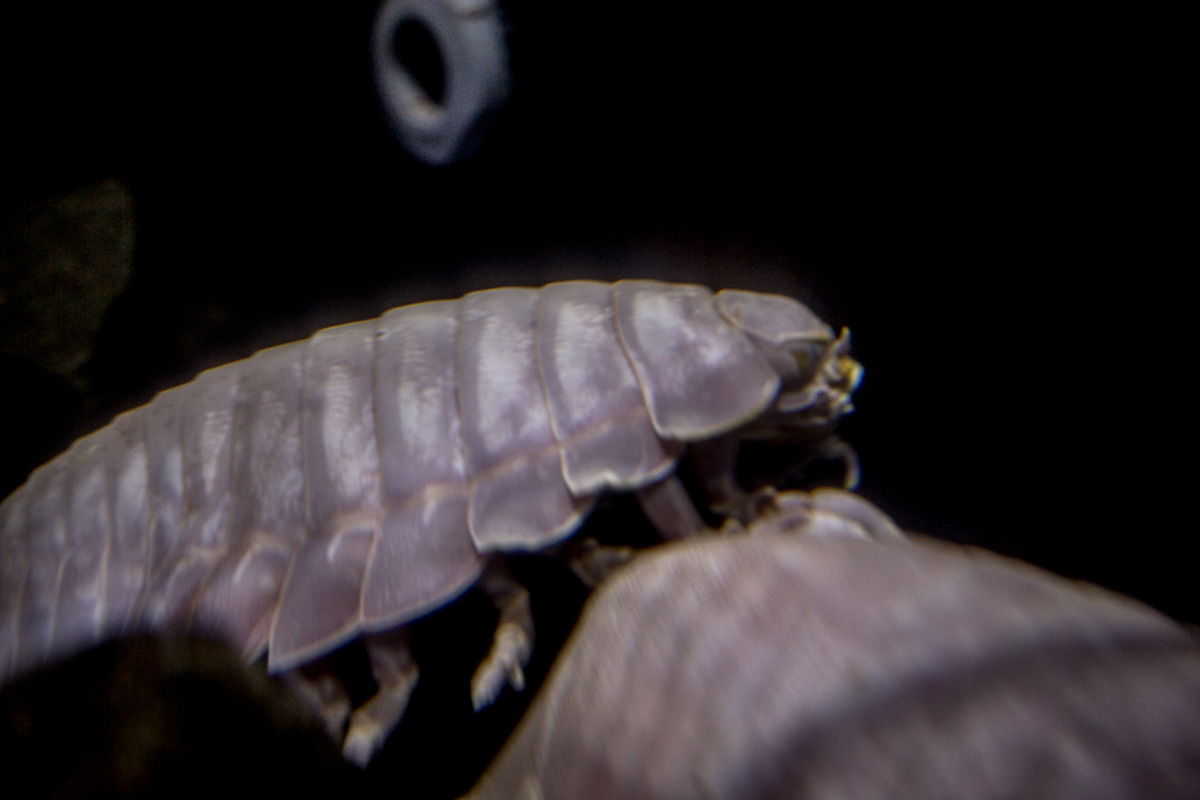
The Giant isopods, on the other hand; were a serious challenge. They were in a darkened area, with dim light, and even with an open-top tank, I wasn’t able to get a pleasing shot of these gigantic pillbug cousins in their small, dim touch tank in between a sea of other visitors. Not every shot is going to be a winner.

Dim lighting, crowded conditions and moving subjects meant I just could not get a sharp enough shot of the giant deep-sea isopods. Wow, these things are big!

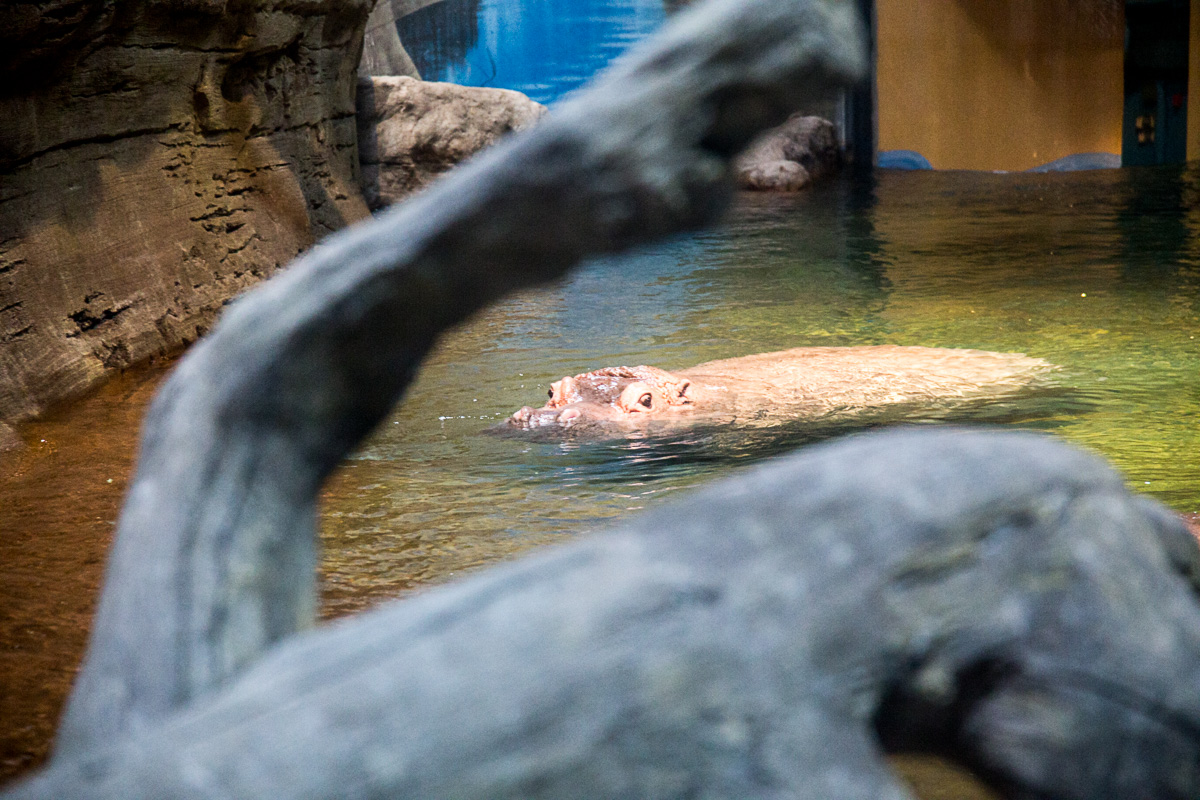
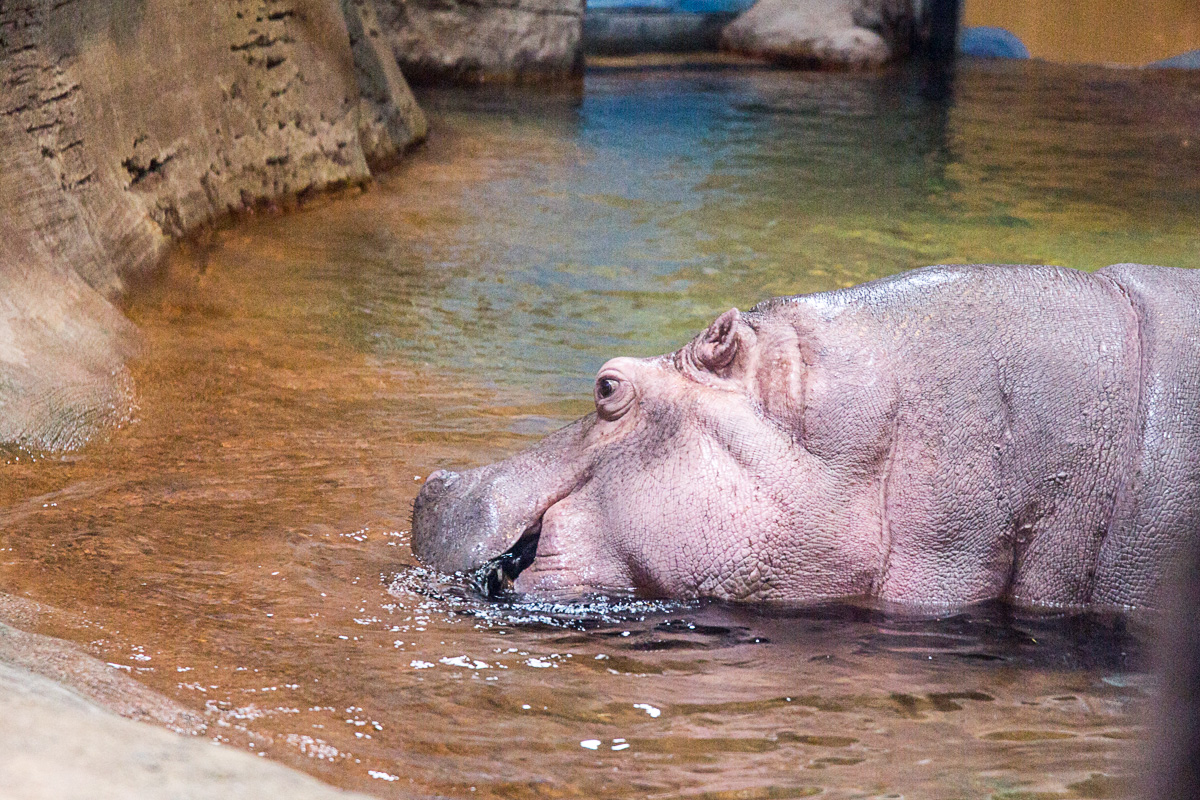
Accept that not every shot is going to be a winner

I missed a lot of shots on my recent visit, mostly of the smaller, fast-moving fish. It just wasn’t meant to be. And the pair of hippos were not active near the underwater viewing areas on all three occasions I stopped in on my most recent visit. So despite having the right lens, the right camera, and right settings, I couldn’t get a head-on shot of either hippopotamus through the water.

The hippos were very camera-shy on my most recent visit. Despite the right exposure, relatively uncrowded conditions, the subjects were just not active near the viewing windows while I was there. I got as close to the glass as possible to minimize reflections of other aquarium attendees.
Since I couldn't get the underwater shot of the hippos I'd hoped for, I went to a different angle, and switched to the 24-105mm F4 DG HSM | Art lens to get in closer. That F4 aperture is slower than the F2 of the 24-35mm, so I activated OS, and adjusted my shutter speeds accordingly.
Since I couldn’t get the underwater shot of the hippos I’d hoped for, I went to a different angle, and switched to the 24-105mm F4 DG HSM | Art lens to get in closer. That F4 aperture is slower than the F2 of the 24-35mm, so I activated OS, and adjusted my shutter speeds accordingly. 1/80 F4 ISO 800.
I paid special attention to the reflections off the glass to make sure that a handrail behind me was out of frame. In my first shot from here, it was covering the hippo's face, and was quite distracting. Moving just slightly allowed me to eliminate that distraction.
I paid special attention to the reflections off the glass to make sure that a handrail behind me was out of frame. In my first shot from here, it was covering the hippo’s face, and was quite distracting. Moving just slightly allowed me to eliminate that distraction.

Skip on-board Flash, Especially through glass

Flash isn’t a good idea when shooting through thick glass. It will create hotspots, confound the metering, and probably won’t illuminate anything inside the tanks. And if you are shooting from above into touch tanks or otherwise open tanks, it can cause unwanted glare and reflections off the water surface.

Firing the flash isn't the way to go. Here it reflects off the curved wall of the tunnel, and all we've got is an underexposed shot with a hotspot.
Firing the flash isn’t the way to go. Here it reflects off the curved wall of the tunnel, and all we’ve got is an underexposed shot with a hotspot.
And then when you do try to tweak the exposure, there's a big glare right on top of the glass, right where the focal point of this frame should be.
And then when you do try to tweak the exposure, there’s a big glare right on top of the glass, right where the focal point of this frame should be.

Try panning

If you are tracking the swimming of an animal on the other side of the glass, be sure to keep the motion of the camera consistent as it passes nearest to you as you fire the shutter button, particularly when the shutter speed is slower than 1/100 of a second in conditions like this. Matching the camera’s motion to the swimming motion can mean the difference between sharp edges on a moving subject and motion blur.


Track the camera as larger animals swim past you. Focus on the subject as you are following it; and keep the camera moving through the exposure to minimize subject motion effects in the frame. As you can see, we are moving in the same direction of the sharp, opposite direction of the small fish here. 1/80 F2 ISO 800 with the 24-35mm F2 at 24mm.


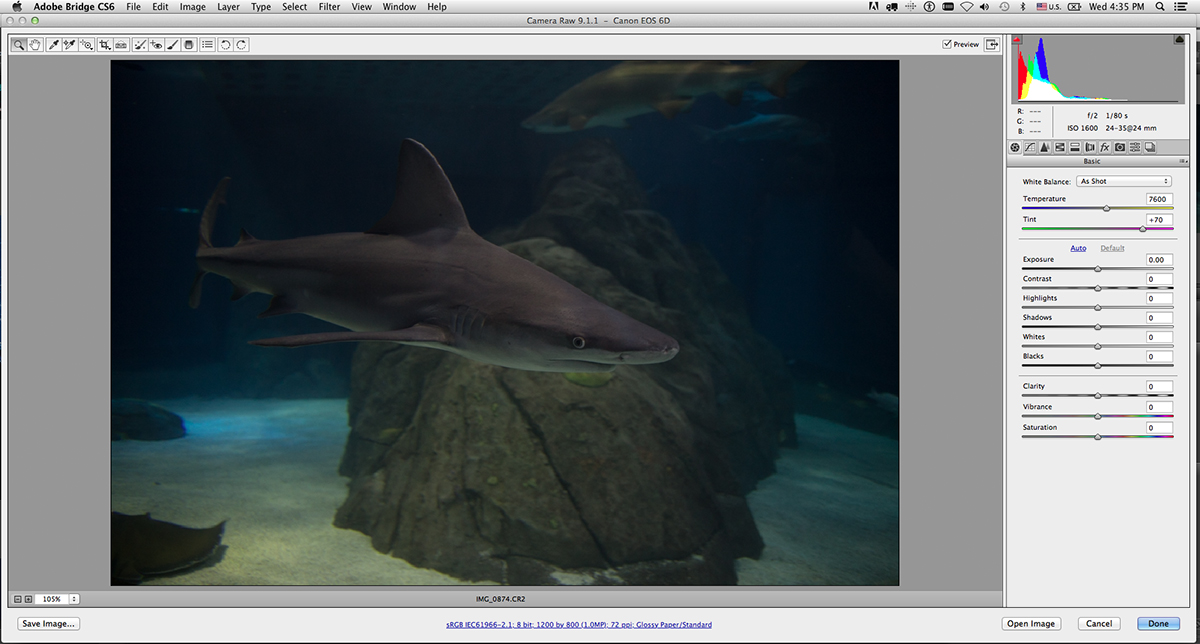
Prefocus when at a distance

When you know that the focal distance is hyperfocal, prefocus and turn off Autofocus, so you can fire the shutter without the lens trying to refocus. For example, I was about thirty five feet from this very large “theatre” window, and with the 24-35mm F2, that is well into the far end of the focal range, so anything inside the tank will be focused at infinity. So once focus was determinined, I switched off AF so that I could fire the shutter as soon something interesting happened “on screen.”

Prefocusing from a distance allows the camera to be ready once the subject enters the frame. 1/50 F2 ISO 800.

Remember that you don’t own the place

Try to remember that you don’t own the place, and that there are many other guests who have also paid admission to view the undersea creatures. You’ll see them reflected in the glass, in the corners of your frames, and so on. Crop them out if you can, try to minimize the reflections of people in the glass through creative RAW processing (AUTO processing in situations with high glare and low light has a tendency to produce terrible output images.)

And remember, a lot of the kids you’ll see may be at the aquarium for the very first time. Don’t be “that photographer.” Wait your turn, take your turn, and move on. Unless you’ve booked the place all for yourself and paid a steep rental fee for the privilege, don’t monopolize the best viewing spots for excessive periods of time.


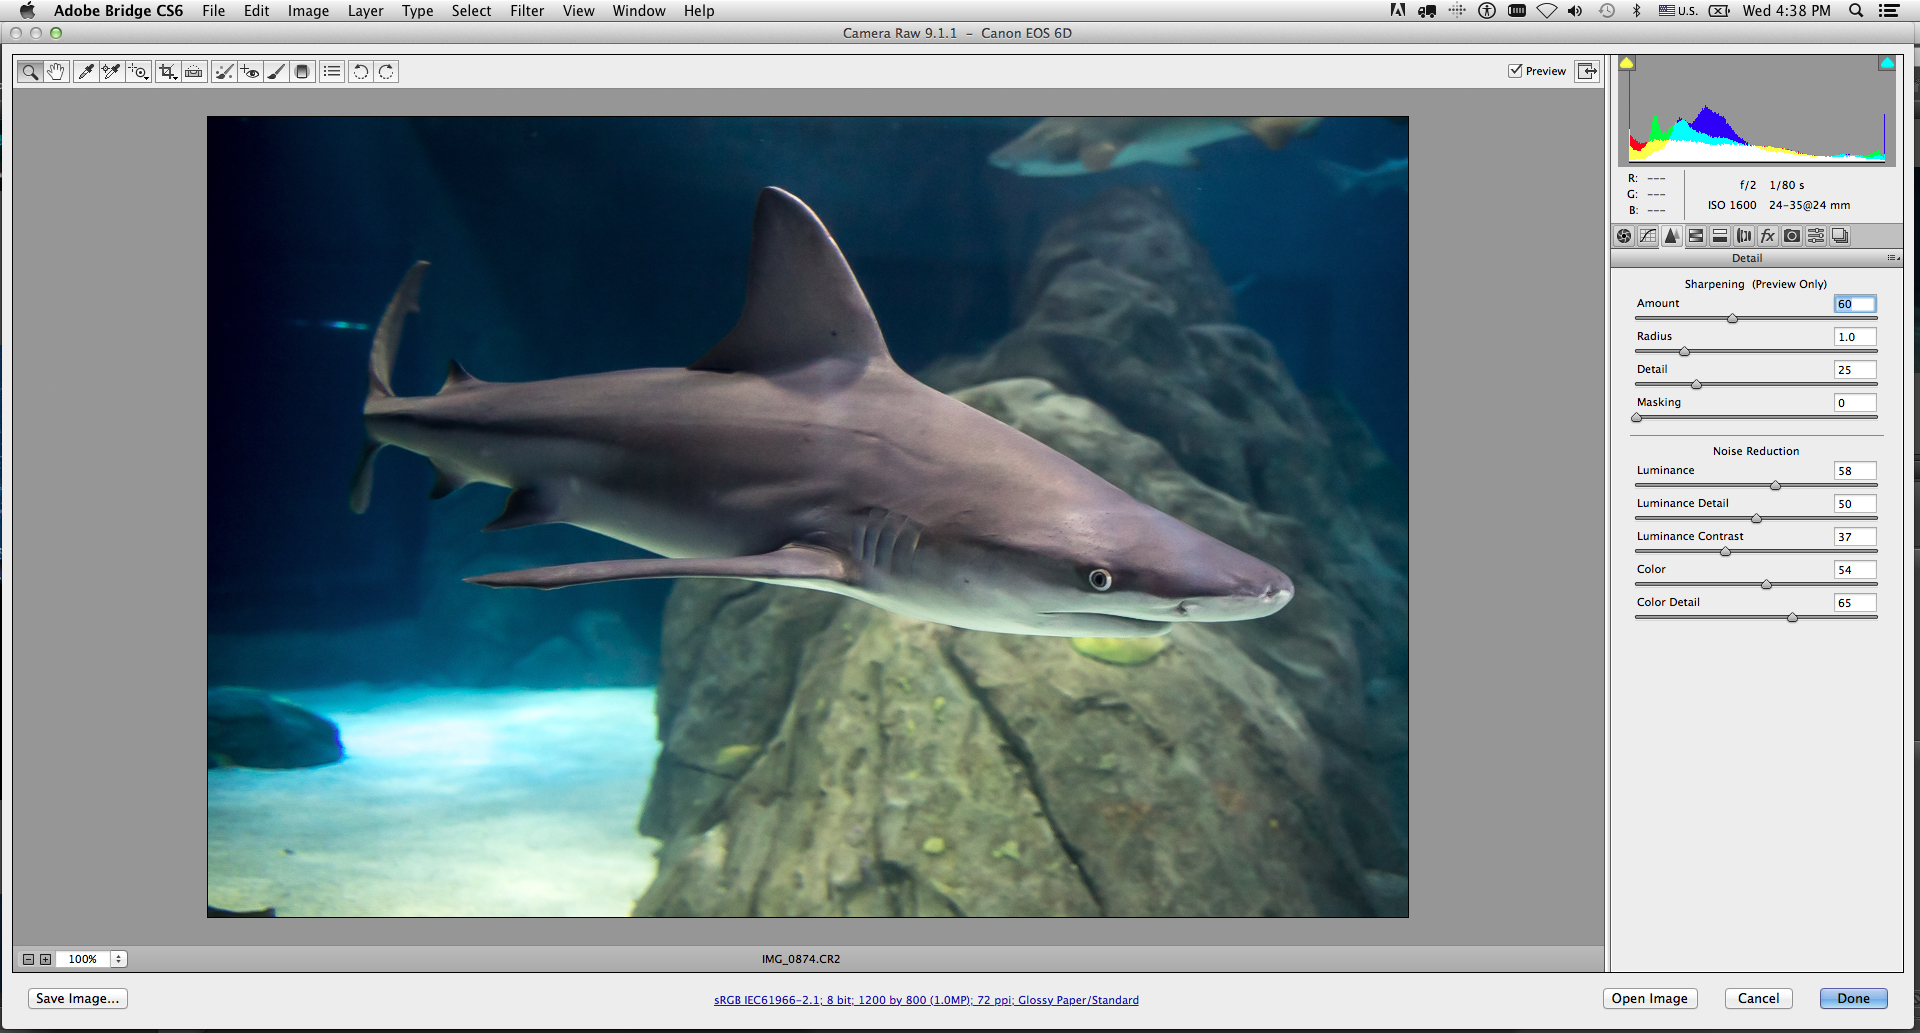
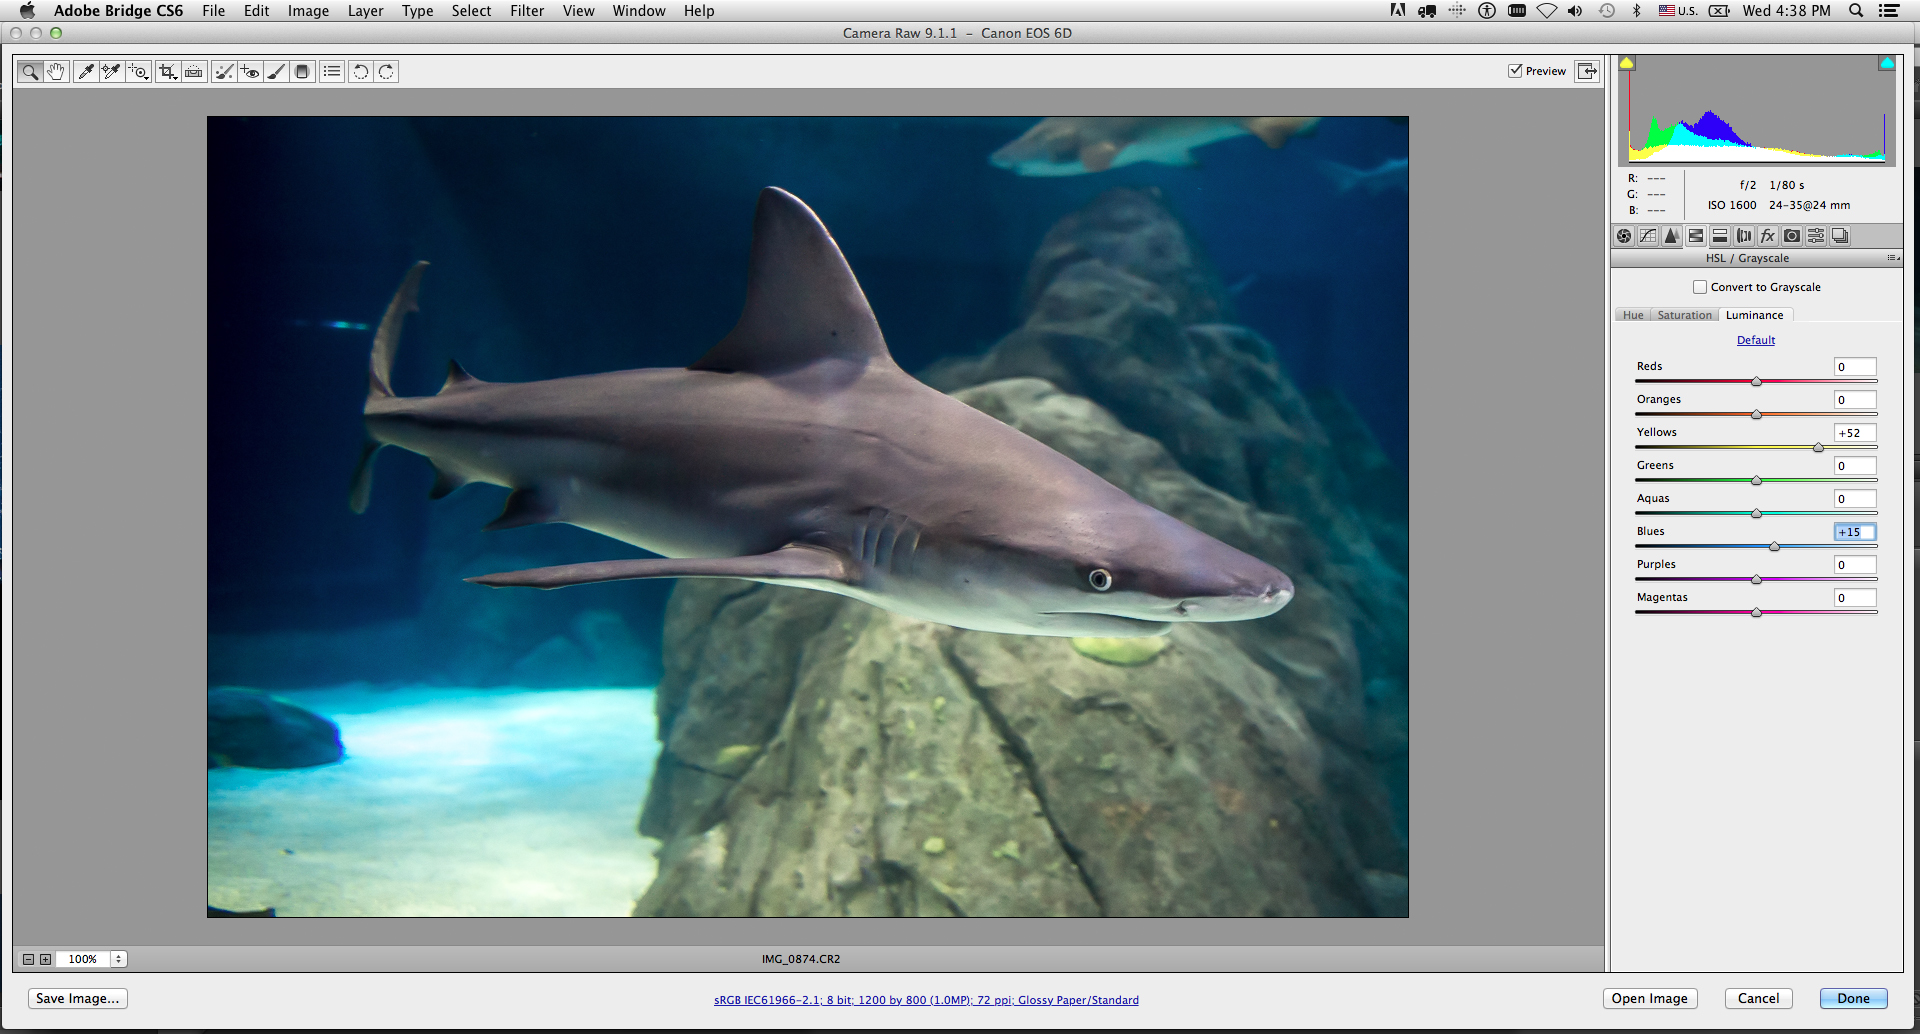
Use Noise Reduction during processing

Lean heavily on Noise Reduction in image toning. It can do wonders to smooth out the noise in the colors and really make your images stronger.

Here is my start-to-finish toning work on this image. I deliberately underexposed slightly to ensure action-freezing shutter speed of 1/80 as the shark swam towards me at an angle.
Step 2
Using Adobe Camera Raw’s main interface, I adjusted exposure, clarity, whites, blacks, and so on.
Step 3
I sharpened the edges slightly, while applying pretty aggressive noise reduction to smooth the noise in the image, paying particular attention to the skin of the shark during this process.
Step 4
Some minor adjustments were made using HSL controls to add yellow luminance to make the shark pop more from the rocks.
Step 5
The healing brush was used to get rid of the hot blue/cyan reflections near the shark’s tail. Then the image was saved out of ACR as a web-optimized JPEG.

 Be Ready for Anything!

Just before a scheduled appearance at the big theatre window, Scuba Santa made the rounds of all the windows and viewing areas on the other sides of the giant tank. He popped right up in front of us and we were all very surprised. My camera was at the ready to catch this rare undersea creature!

Keep mental notes of your varied manual exposures for certain viewing spots, and be ready for anything! You never know when something very photogenic is going to swim right past your window!


Comments (2)
  1. Alex Pol says:

    Really great article. Thanks for taking the time to explain things in such great detail in a way that is easy to understand.

  2. Great photos, especially the shark. The list was great, I just wish people with their cell phones would learn about not using flash when taking photos.

Leave a Reply

Your email address will not be published. Required fields are marked *