Camera Testing Basics
My philosophy behind camera testing is both quantitative and qualitative which is how I approached this SIGMA fp case study. Starting with my quantitative approach, I use charts to understand the dynamic range latitude of a camera. As my qualitative approach, I then create tests that cinematographers encounter daily in our work, based on narrative scenarios.
I wanted to explore the camera without bogging it down with so many accessories. What makes the SIGMA fp stand out from the pack is its weight, durability and compactness. Only the lightweight SSD on the camera gave me great maneuverability to shoot 12bit CinemaDNGs.
The lenses I used were:
- SIGMA 45mm F2.8 DG DN Contemporary (L-mount)
- SIGMA 14-24mm F2.8 DG DN Art (L-mount)
- SIGMA Mount Converter MC-21 (EF-L)
- 24-70mm Canon EF-mount
- 24-105mm Canon EF-mount
- 70-200mm Canon EF-mount
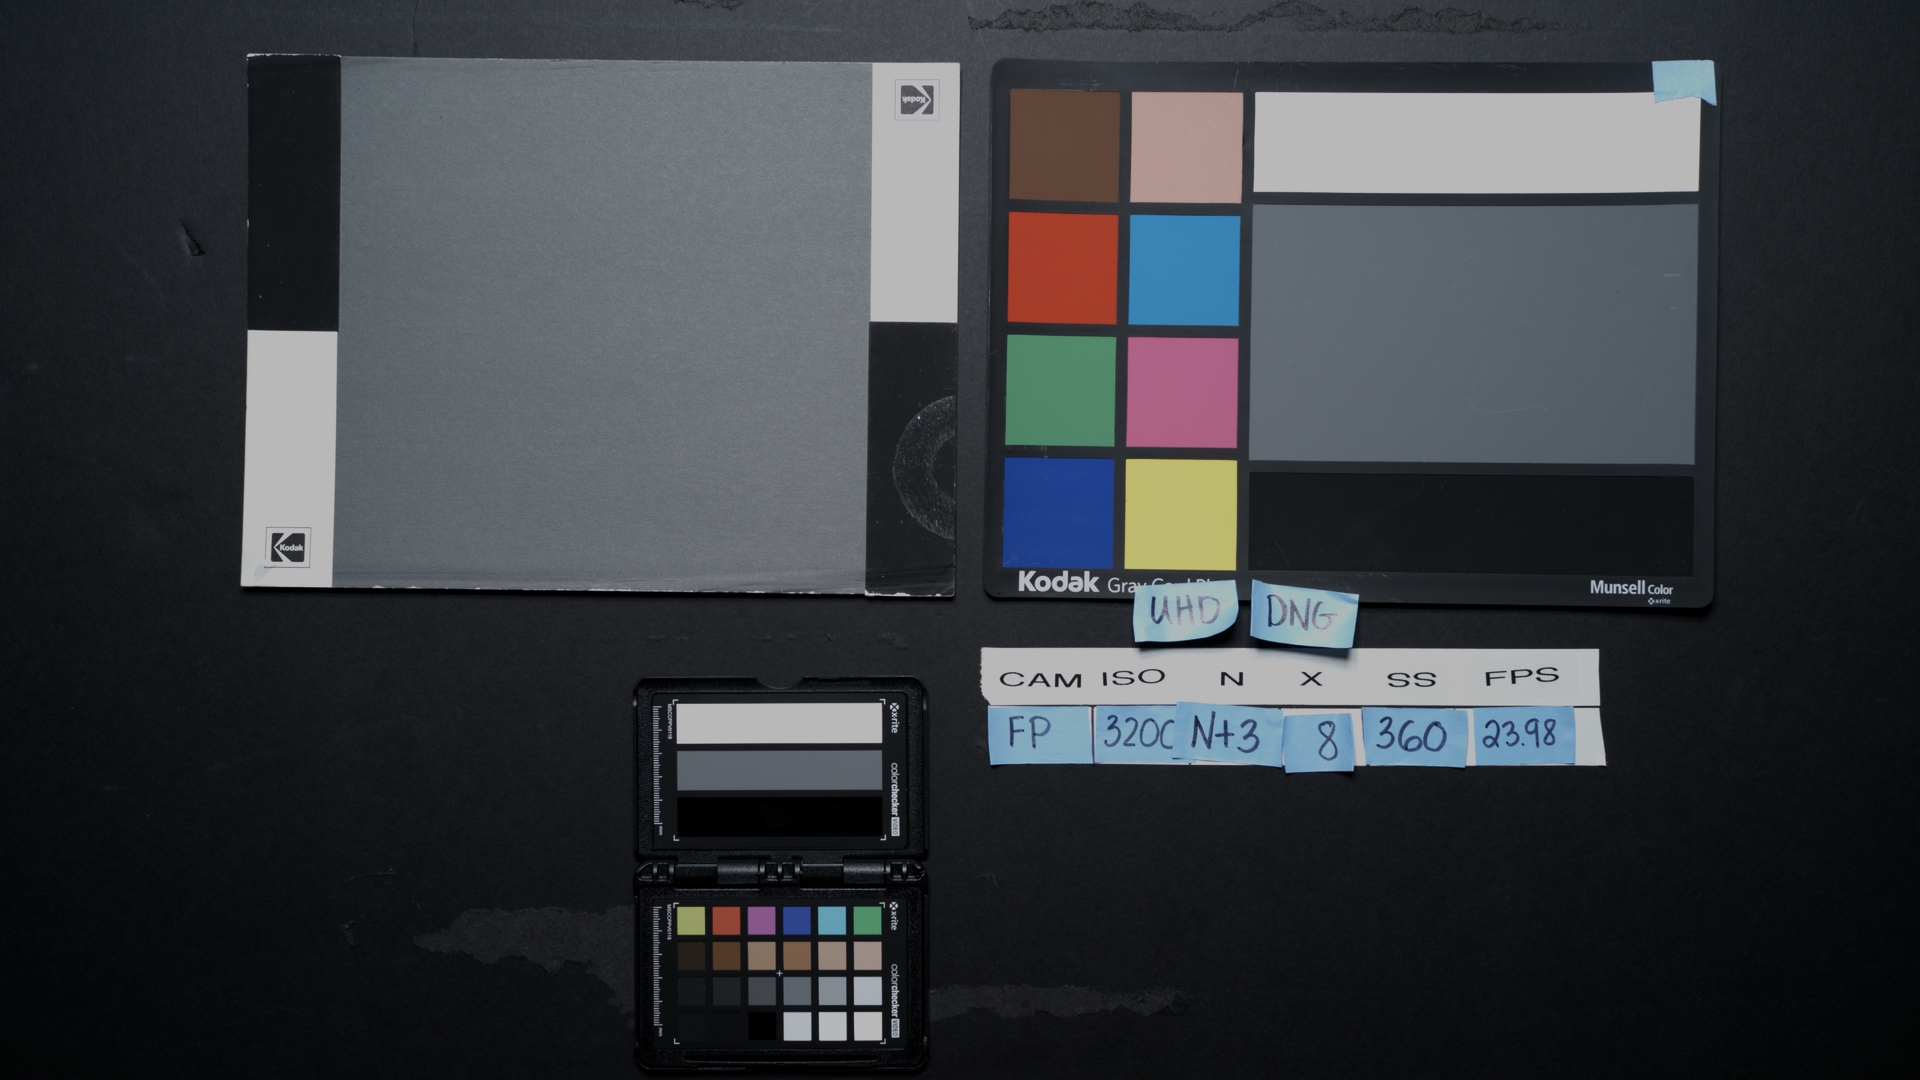
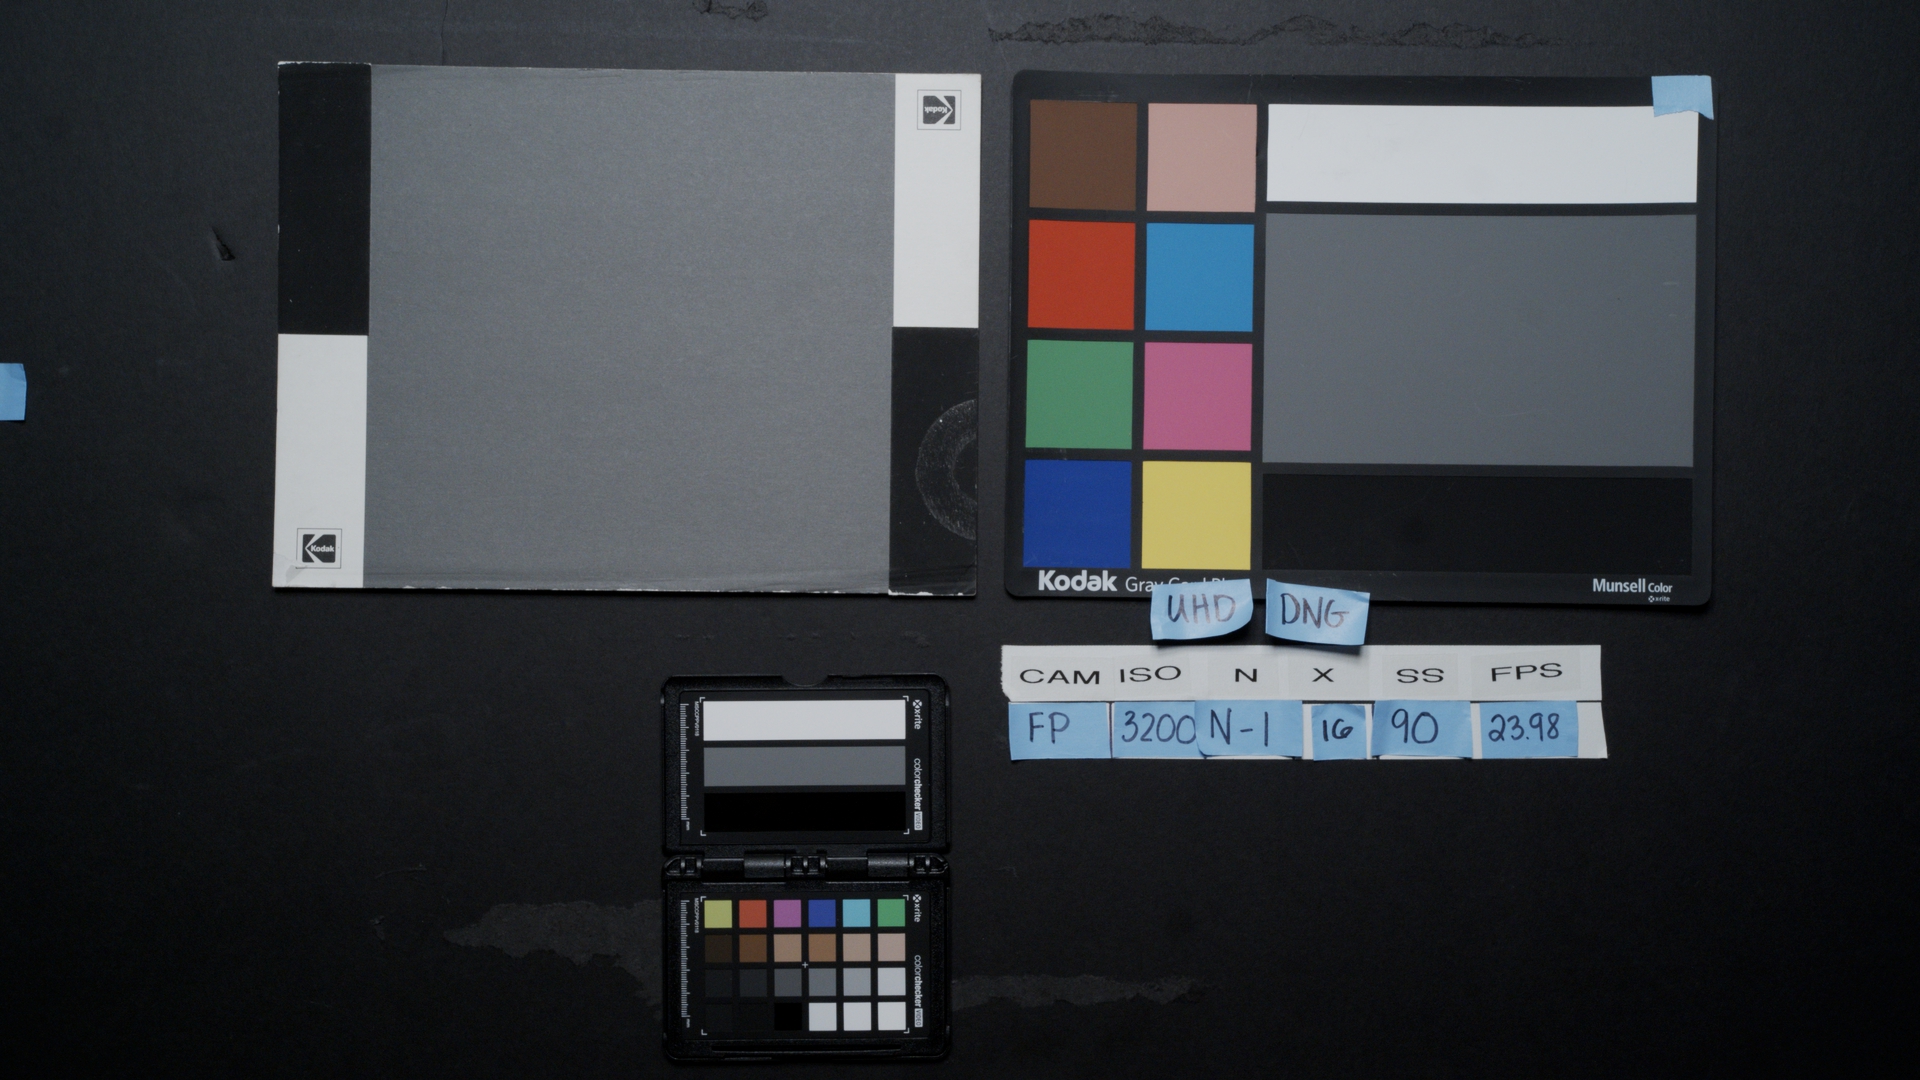
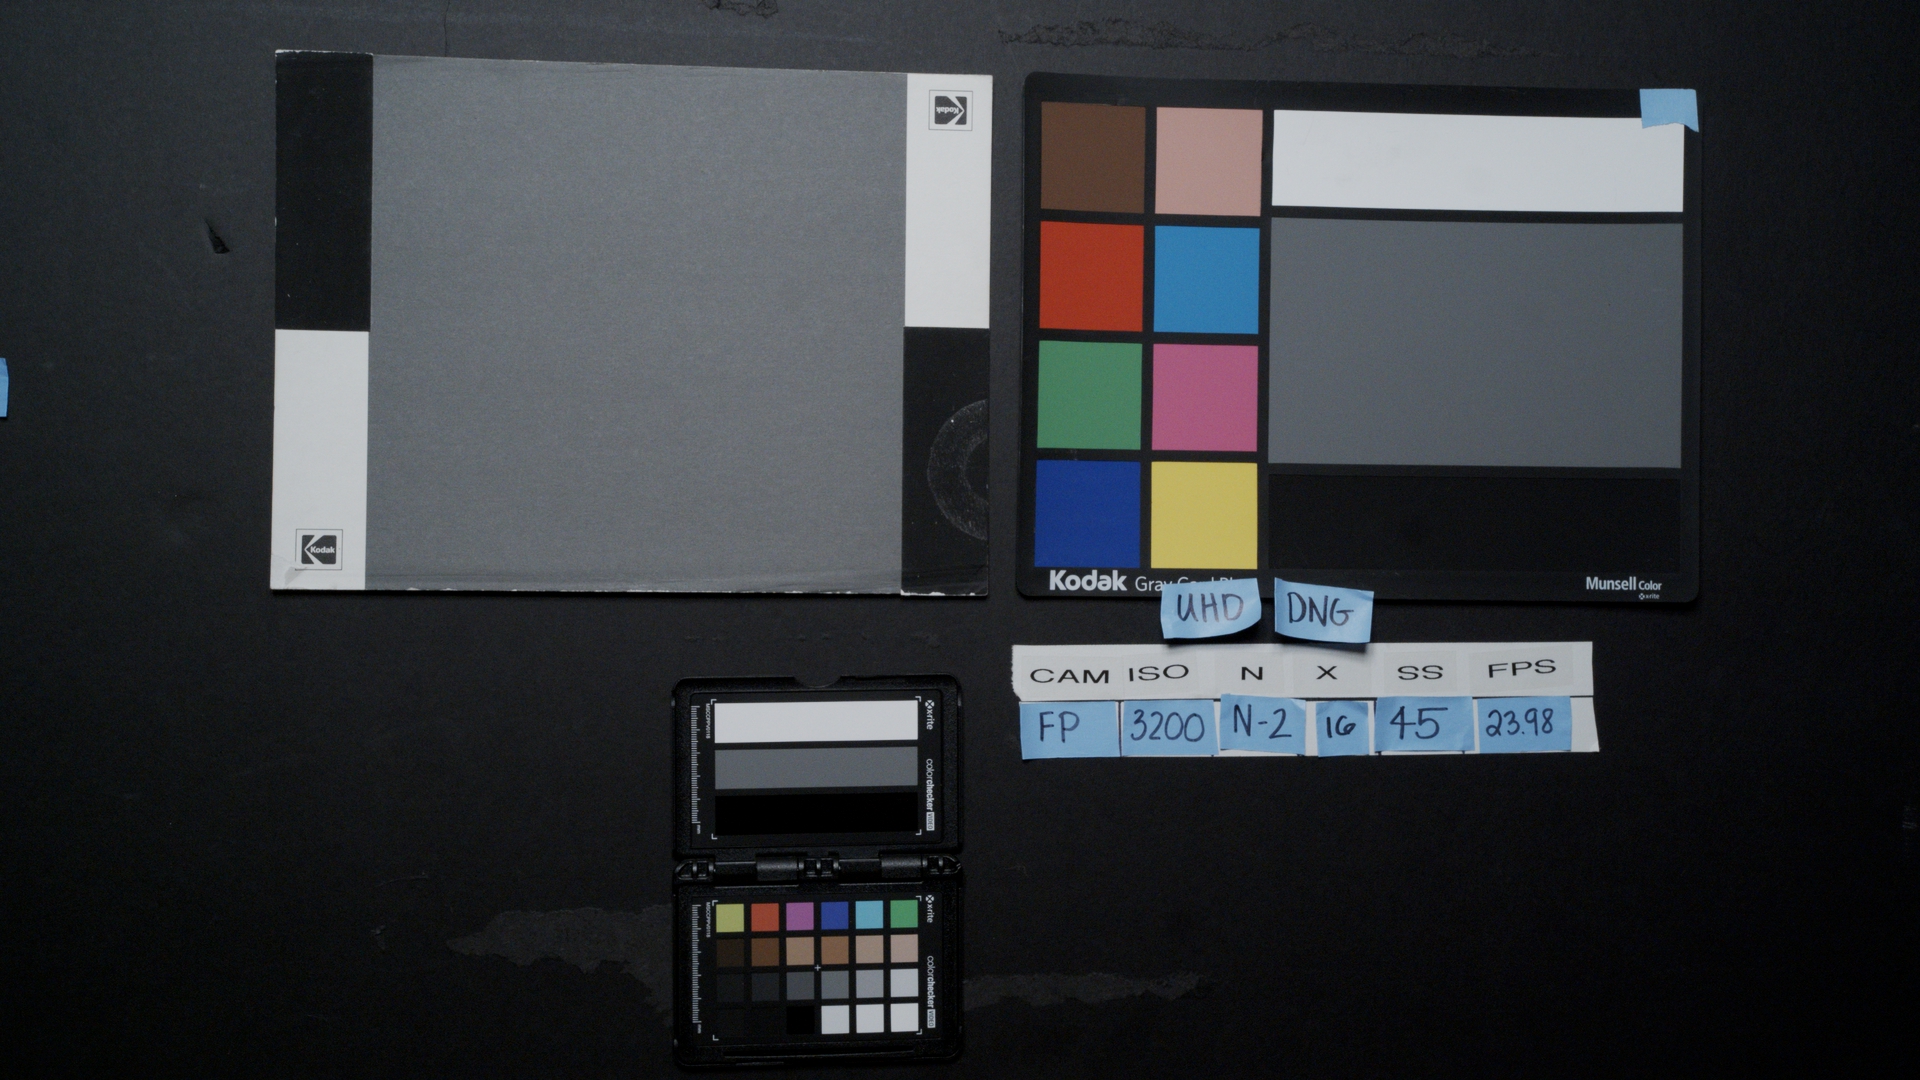
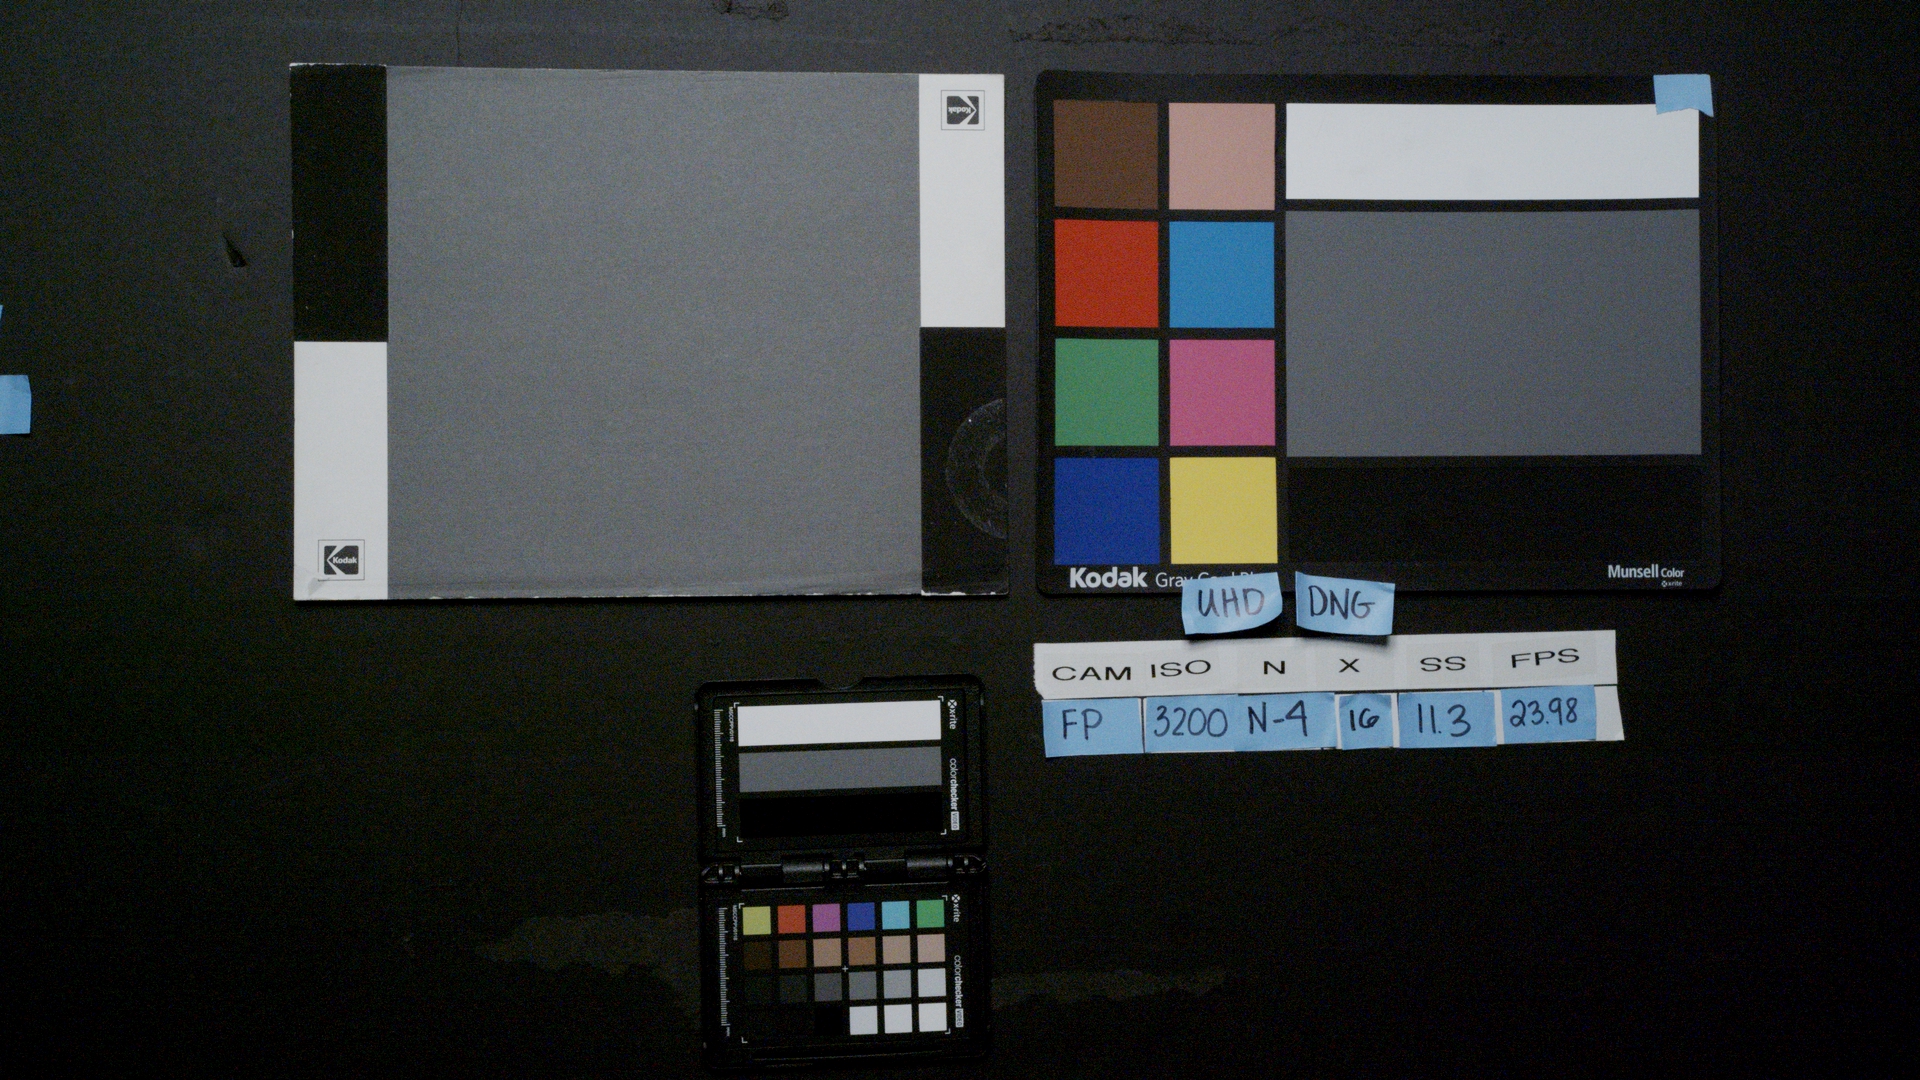
fp Dual Base ISO Test
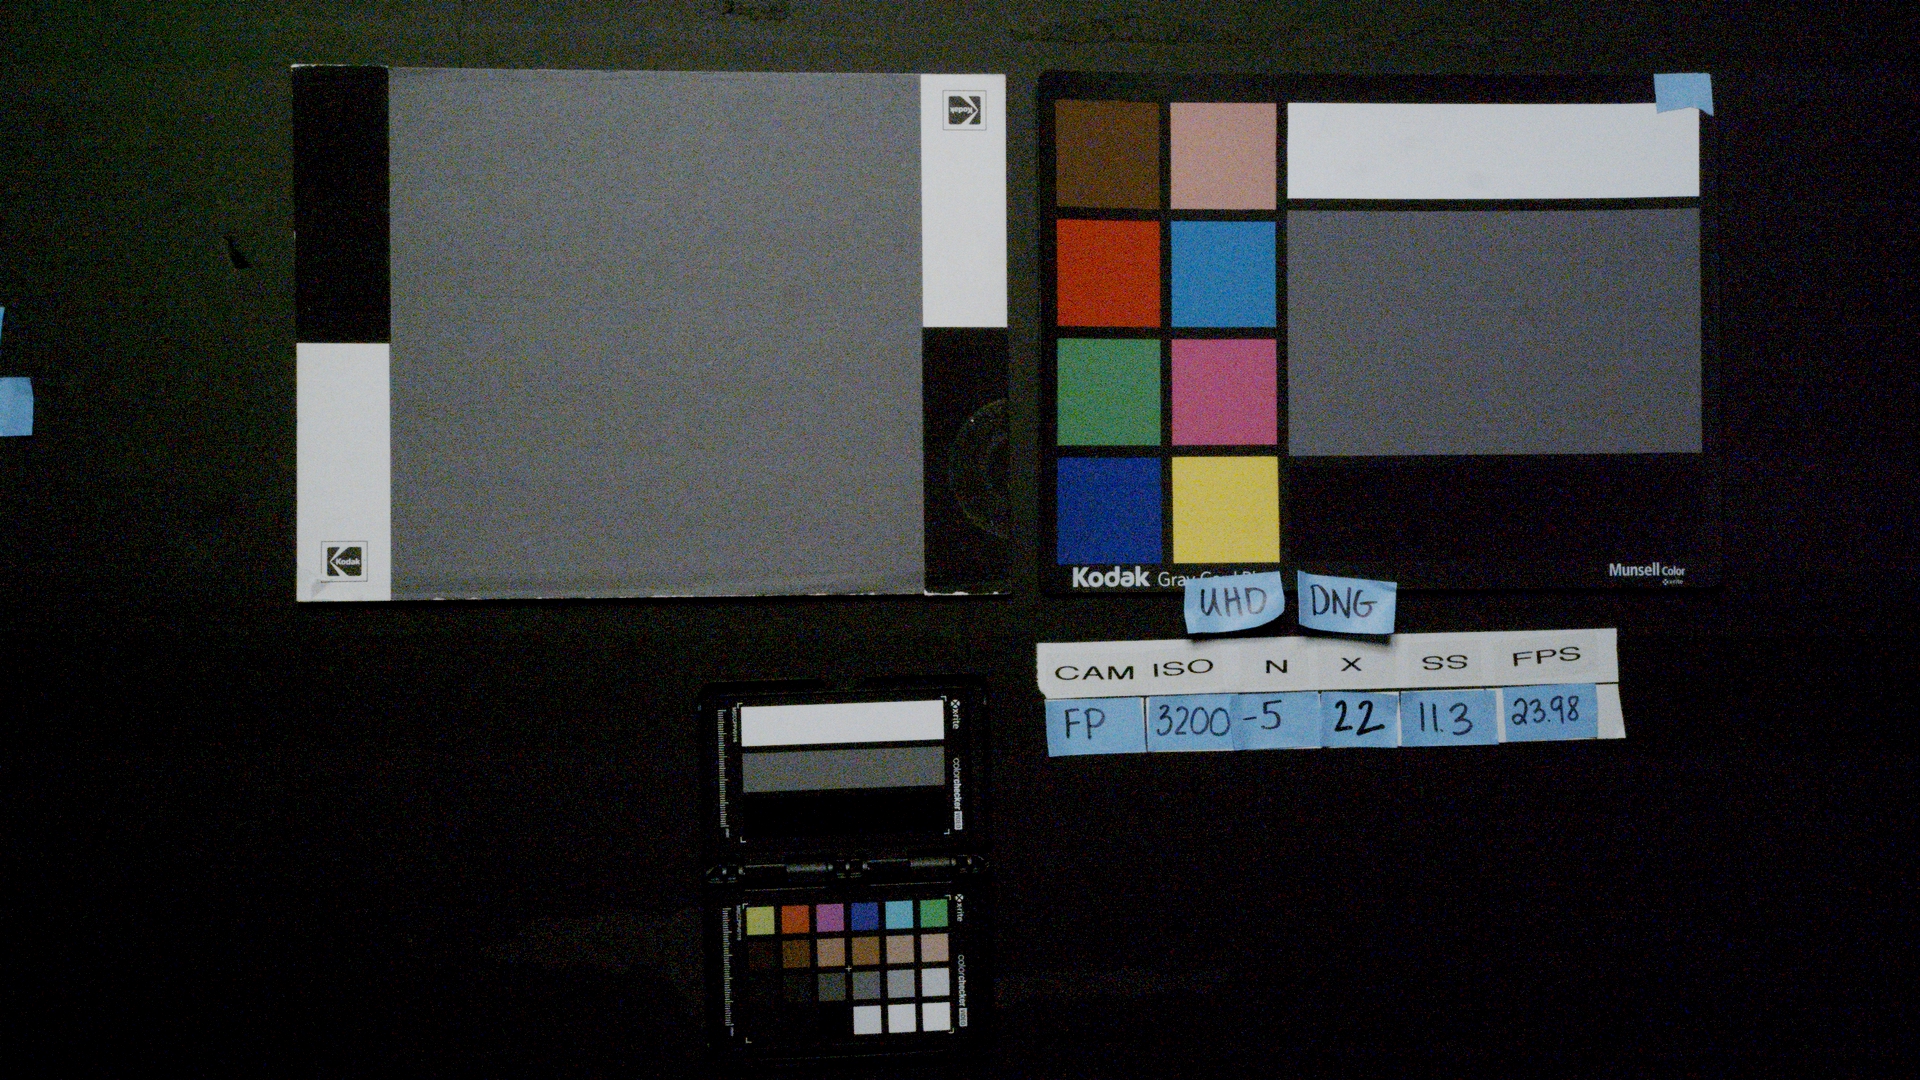
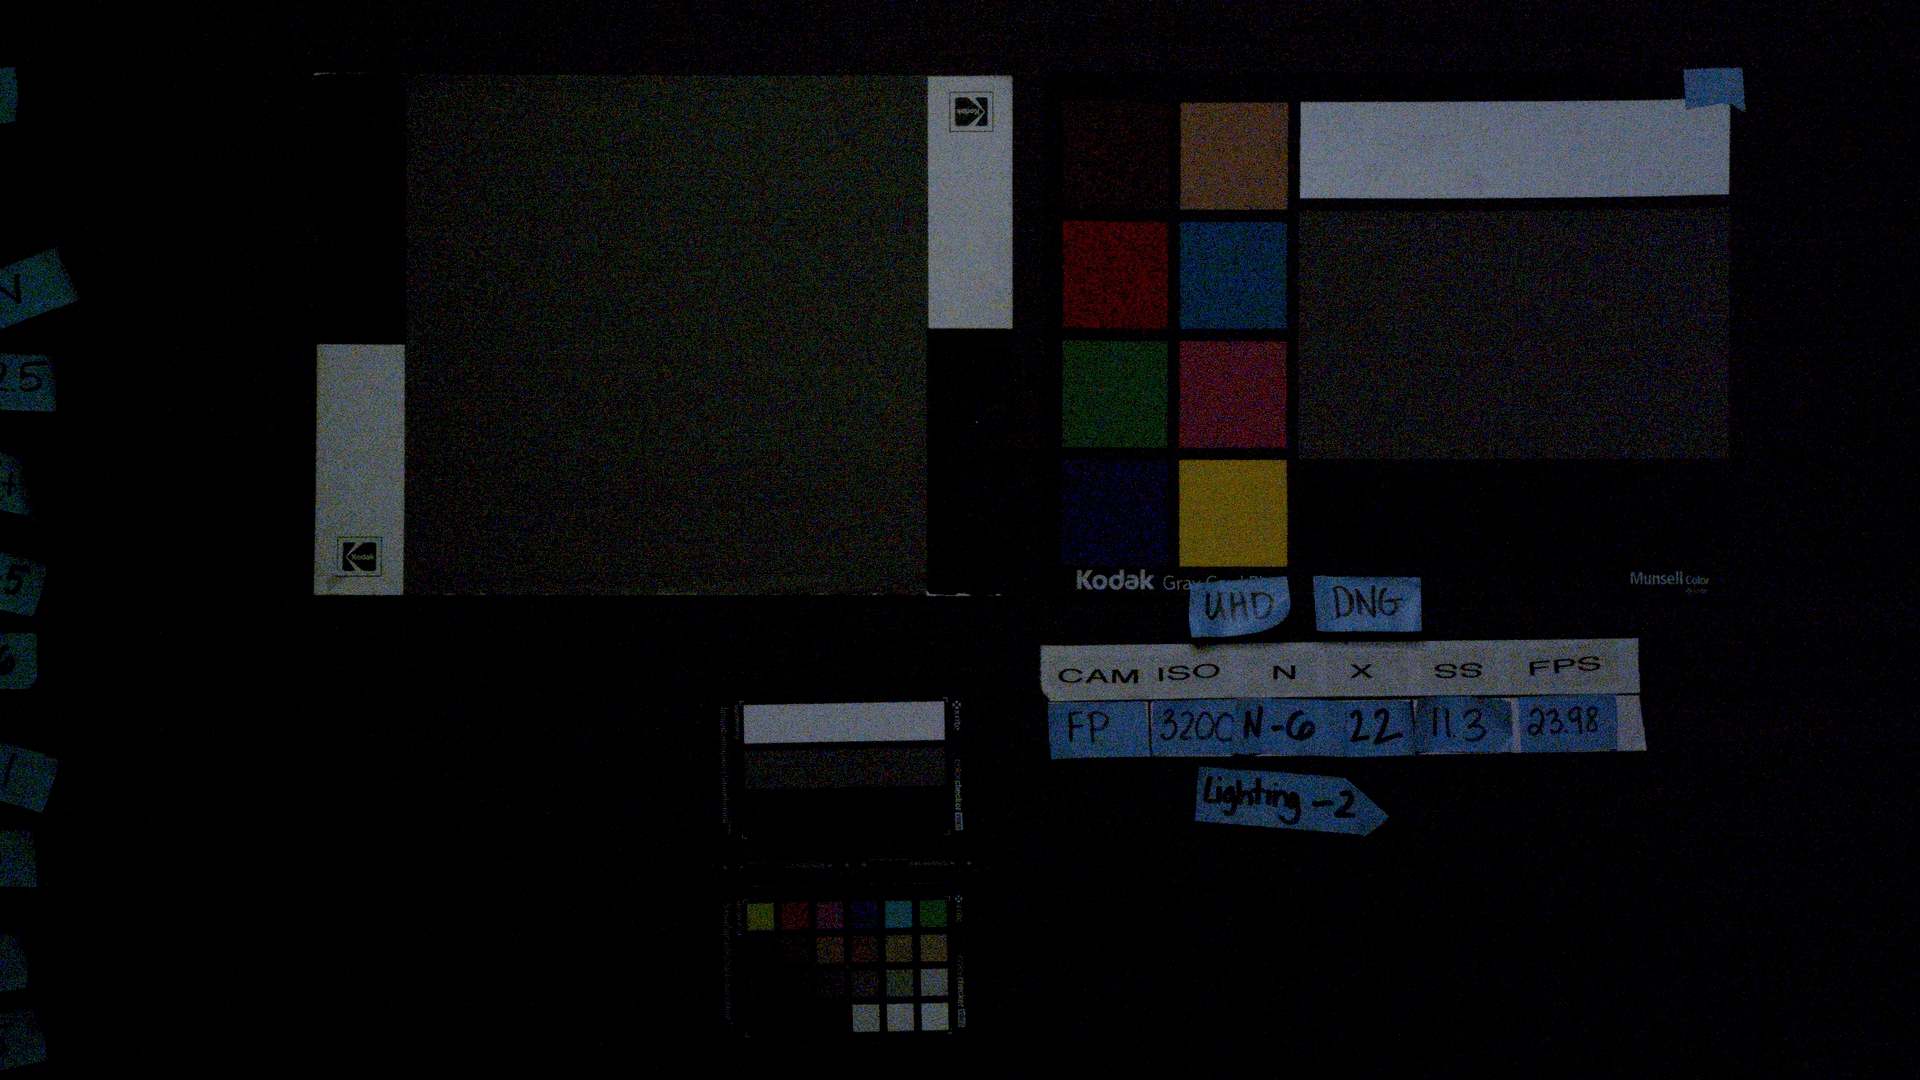
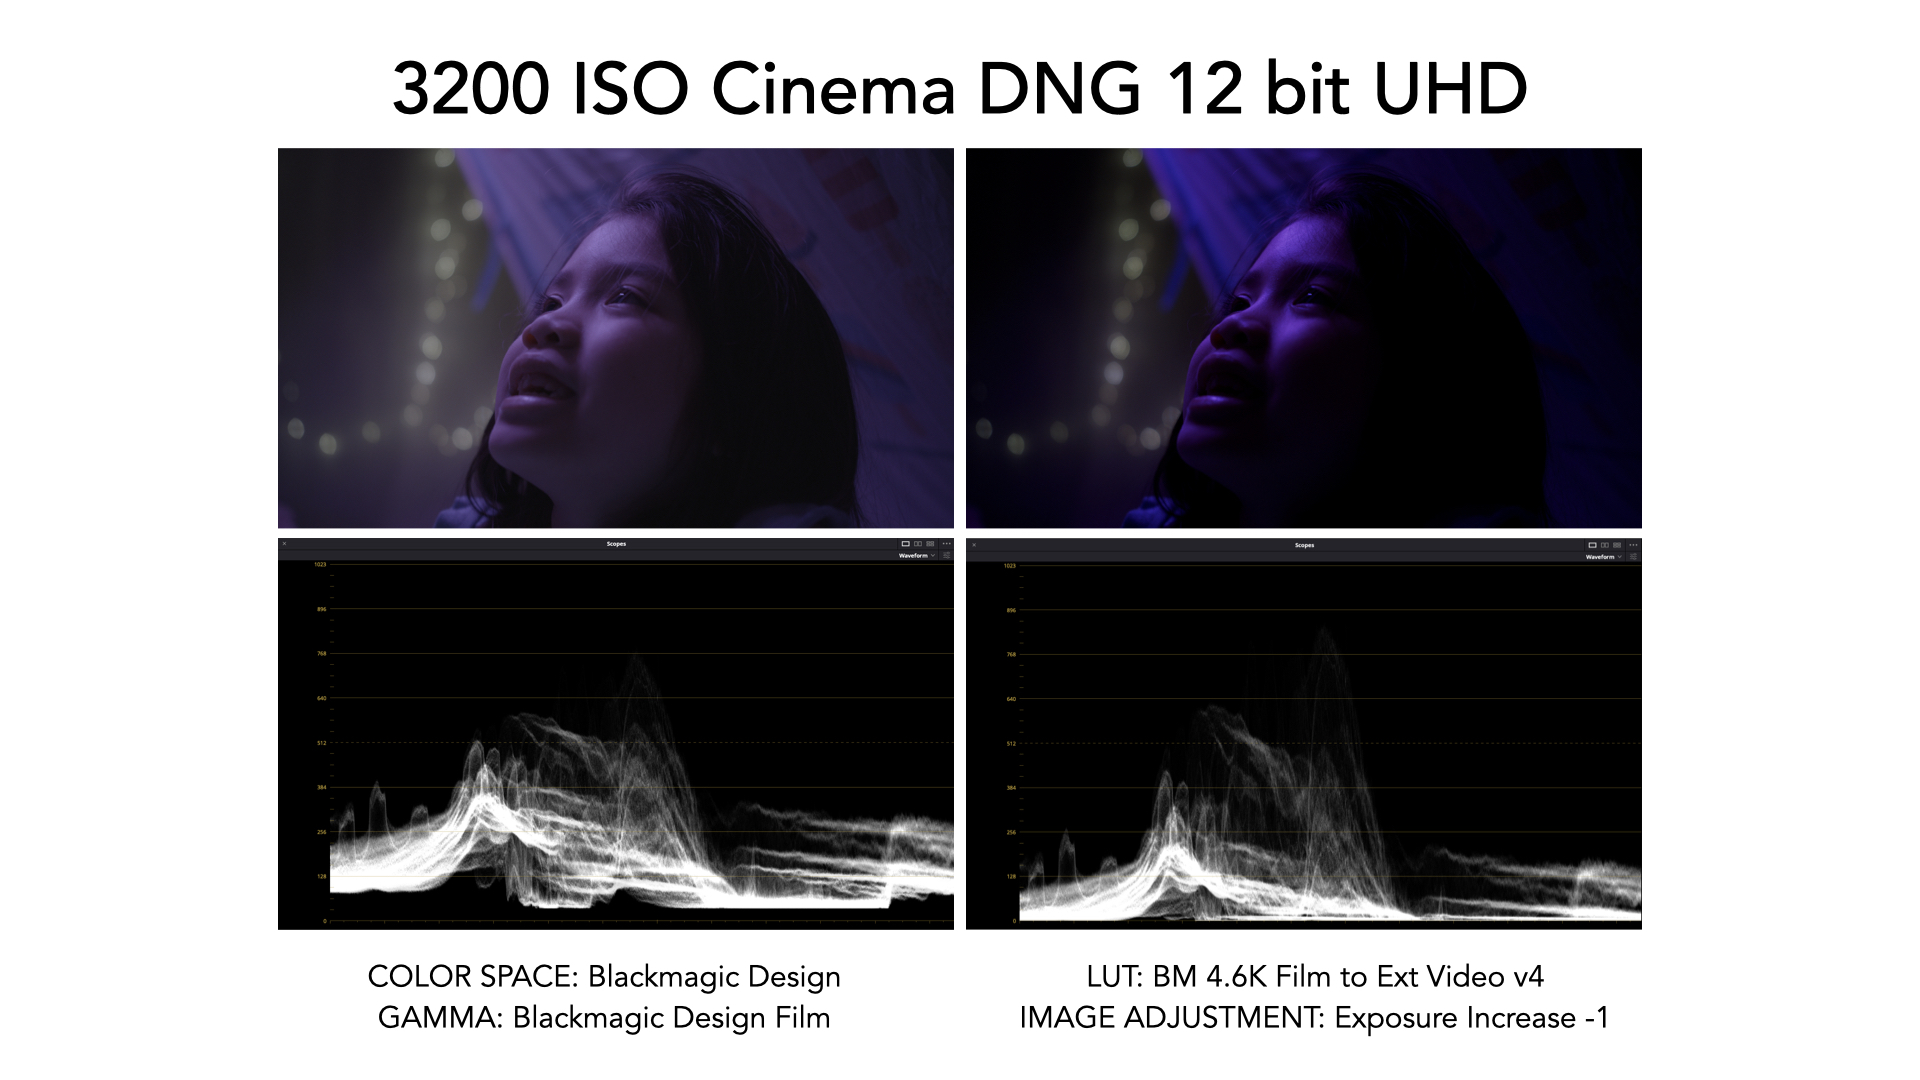
ISO 3200
Doing a latitude test with the SIGMA fp at the base ISO 3200 I am comfortable working within the +3 to -3 range. The caveat that at -3 the noise level does increase, but with a filmic quality to it that makes is an aesthetic option, as opposed to unwelcome artifacting.
Settings:
- CinemaDNG 12bit UHD
- Color Space: Blackmagic Design
- Gamma: Blackmagic Design Film
- LUT: Blackmagic 4.6k Film to Extended Video V4
- No Color Correction
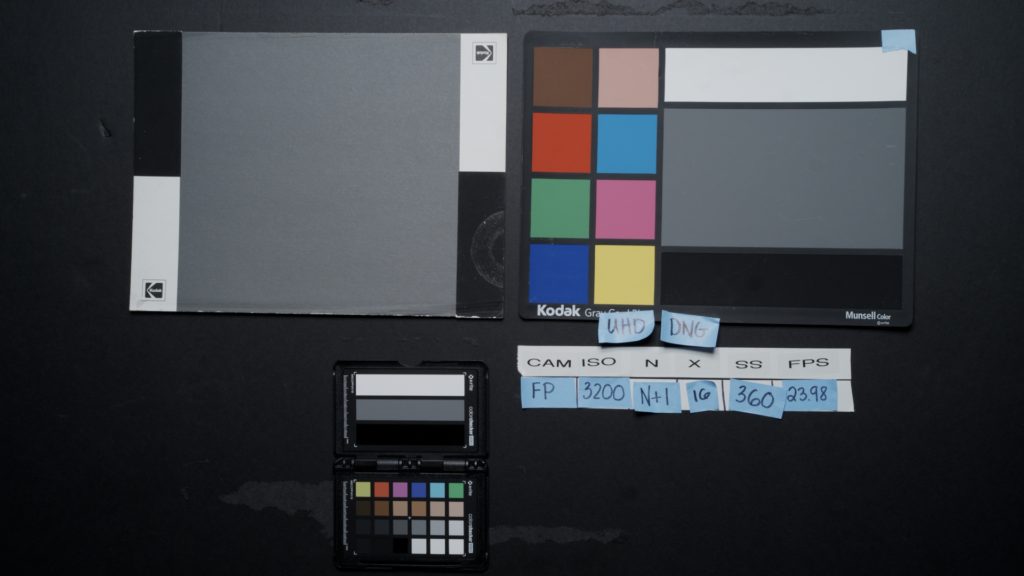
ISO 3200 +1 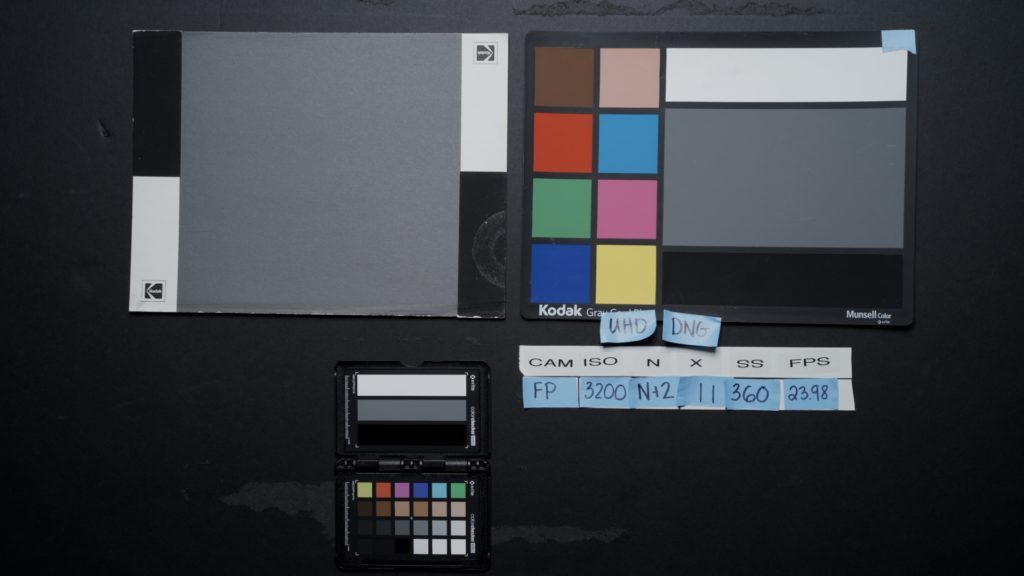
ISO 3200 +2 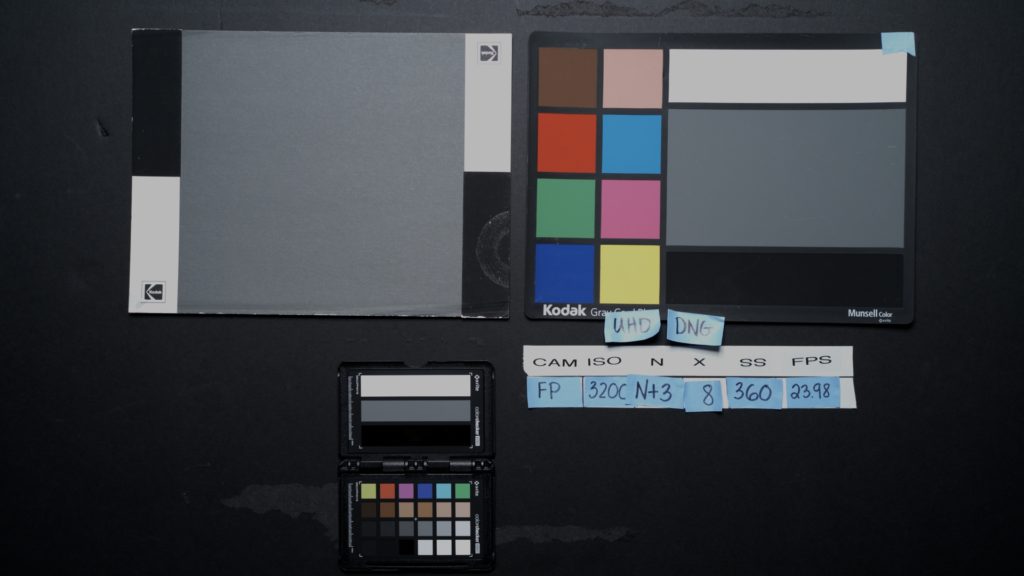
ISO 3200 +3 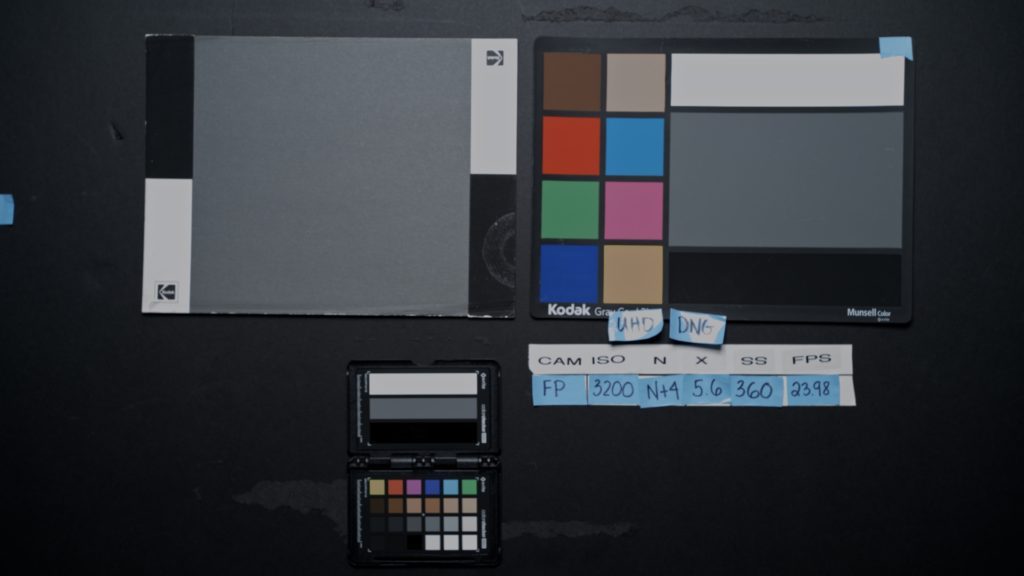
ISO 3200 +4 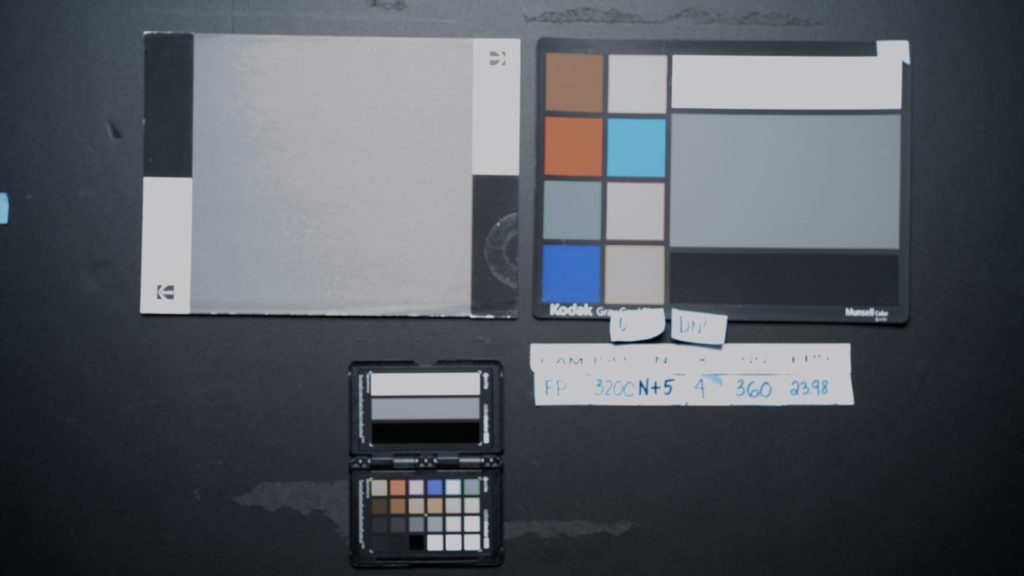
ISO 3200 +5 
ISO 3200 +6 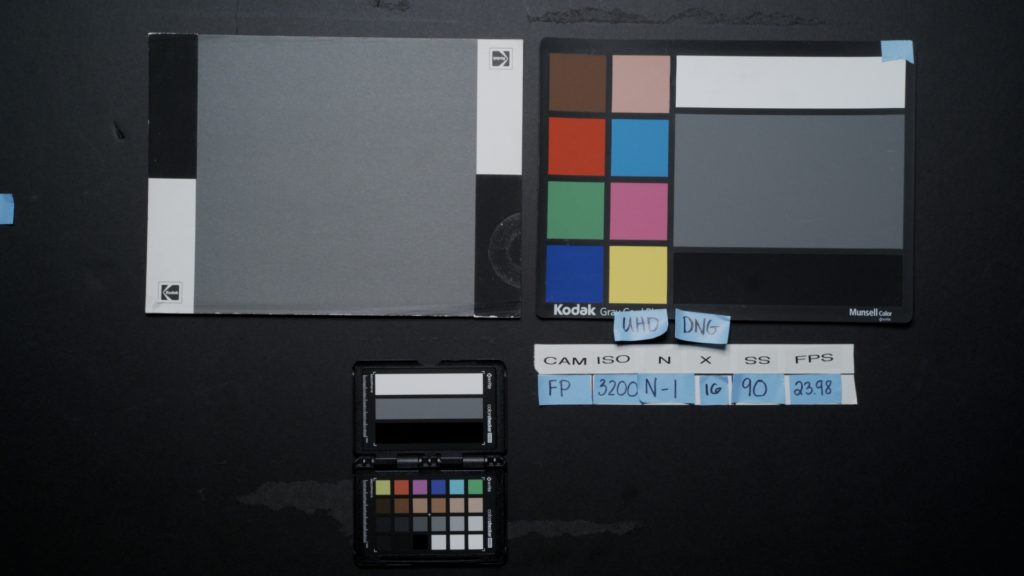
ISO 3200 -1 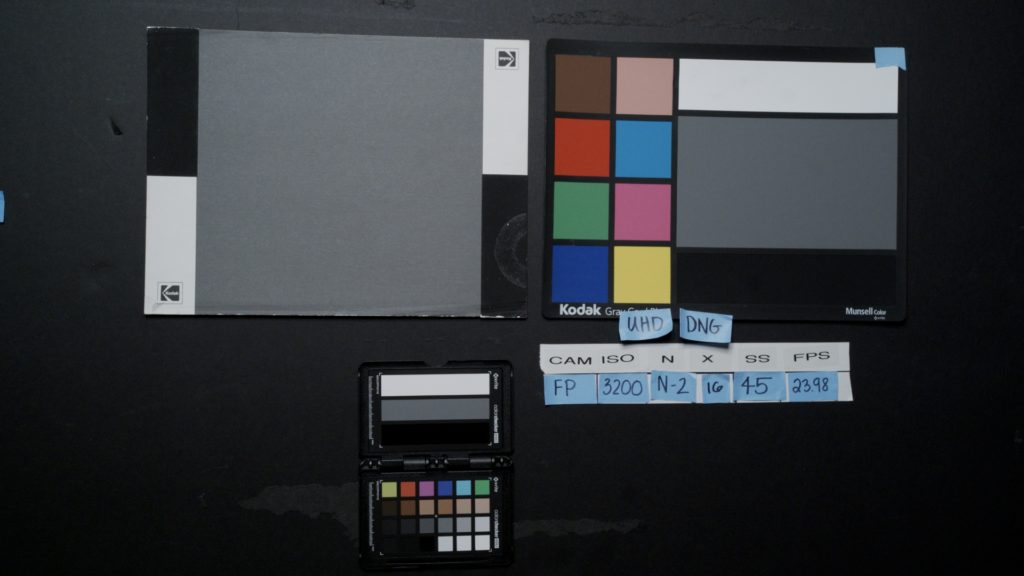
ISO 3200 -2 
ISO 3200 -3 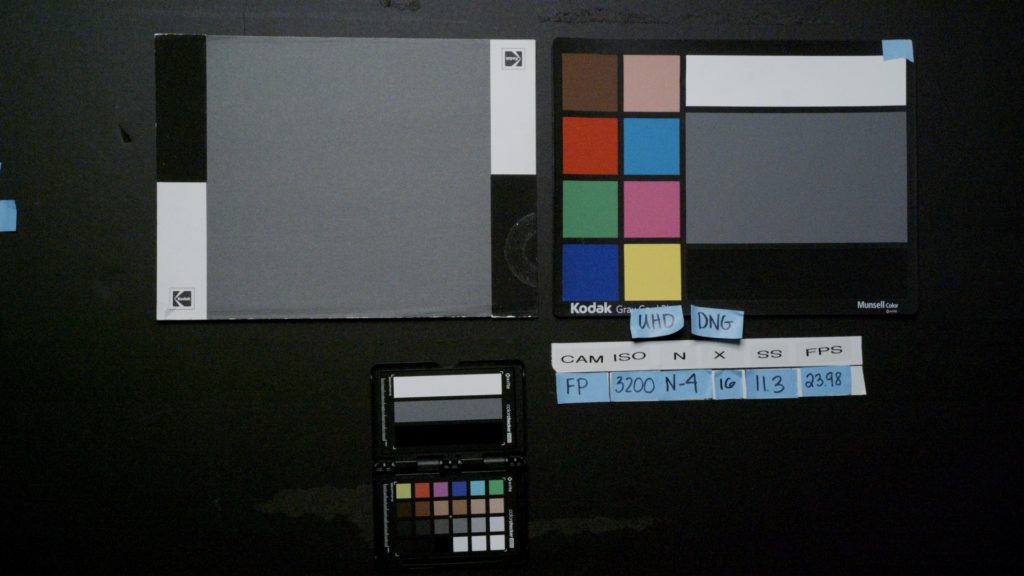
ISO 3200 -4 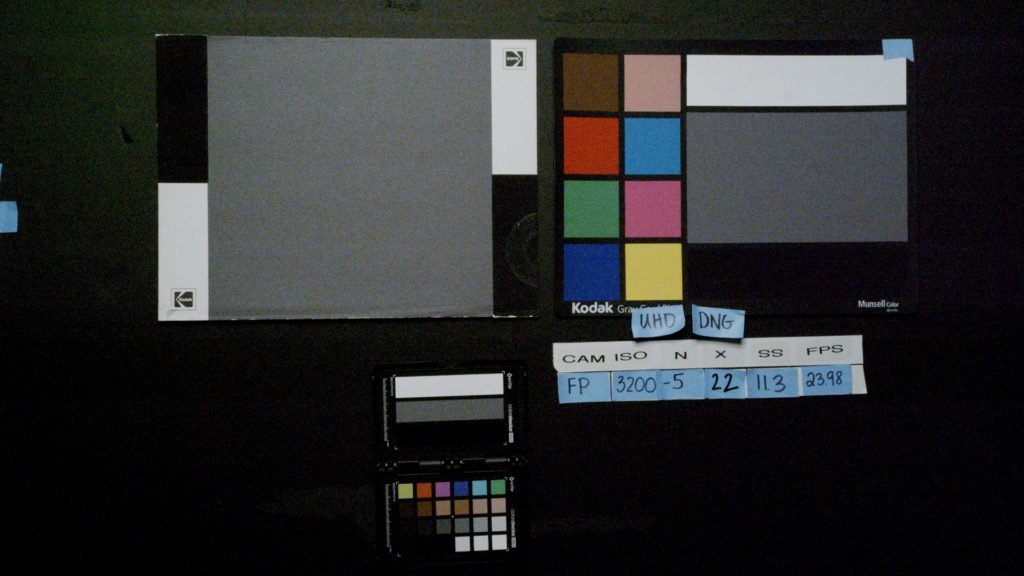
ISO 3200 -5 
ISO 3200 -6 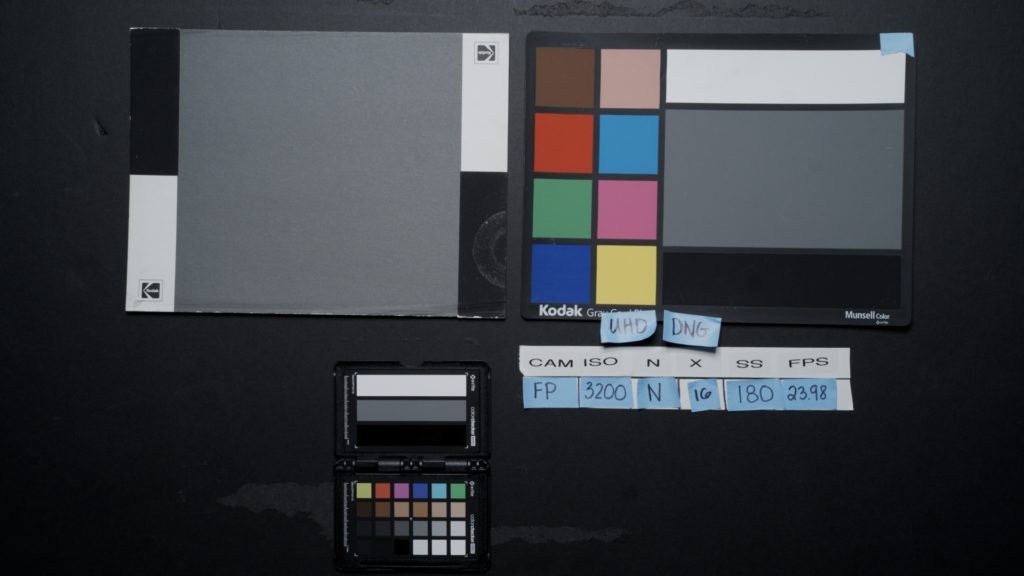
ISO 3200 N


Click here to view the over/under test.
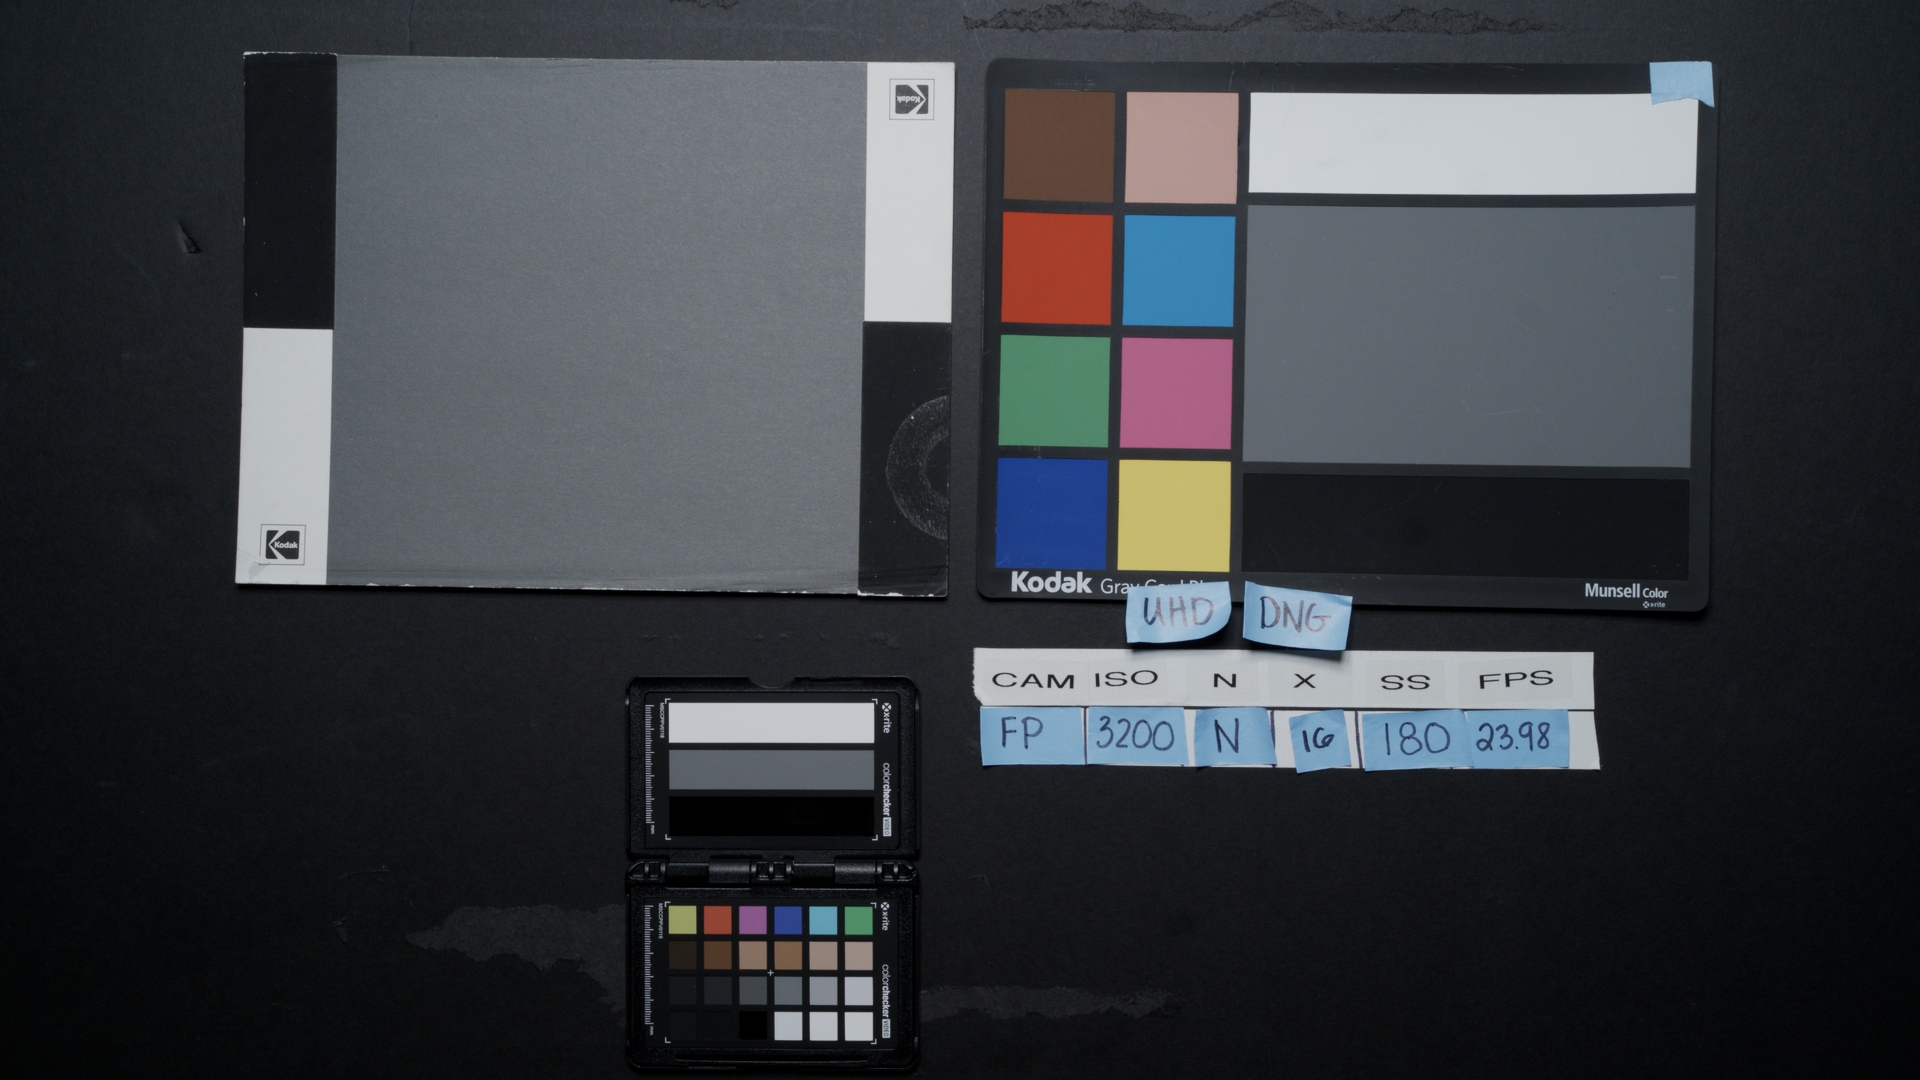
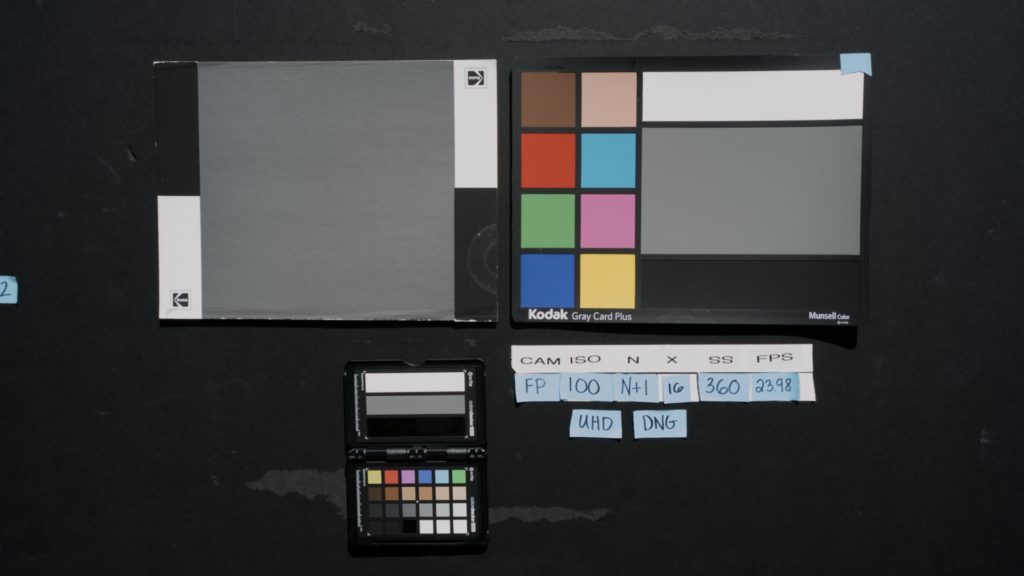
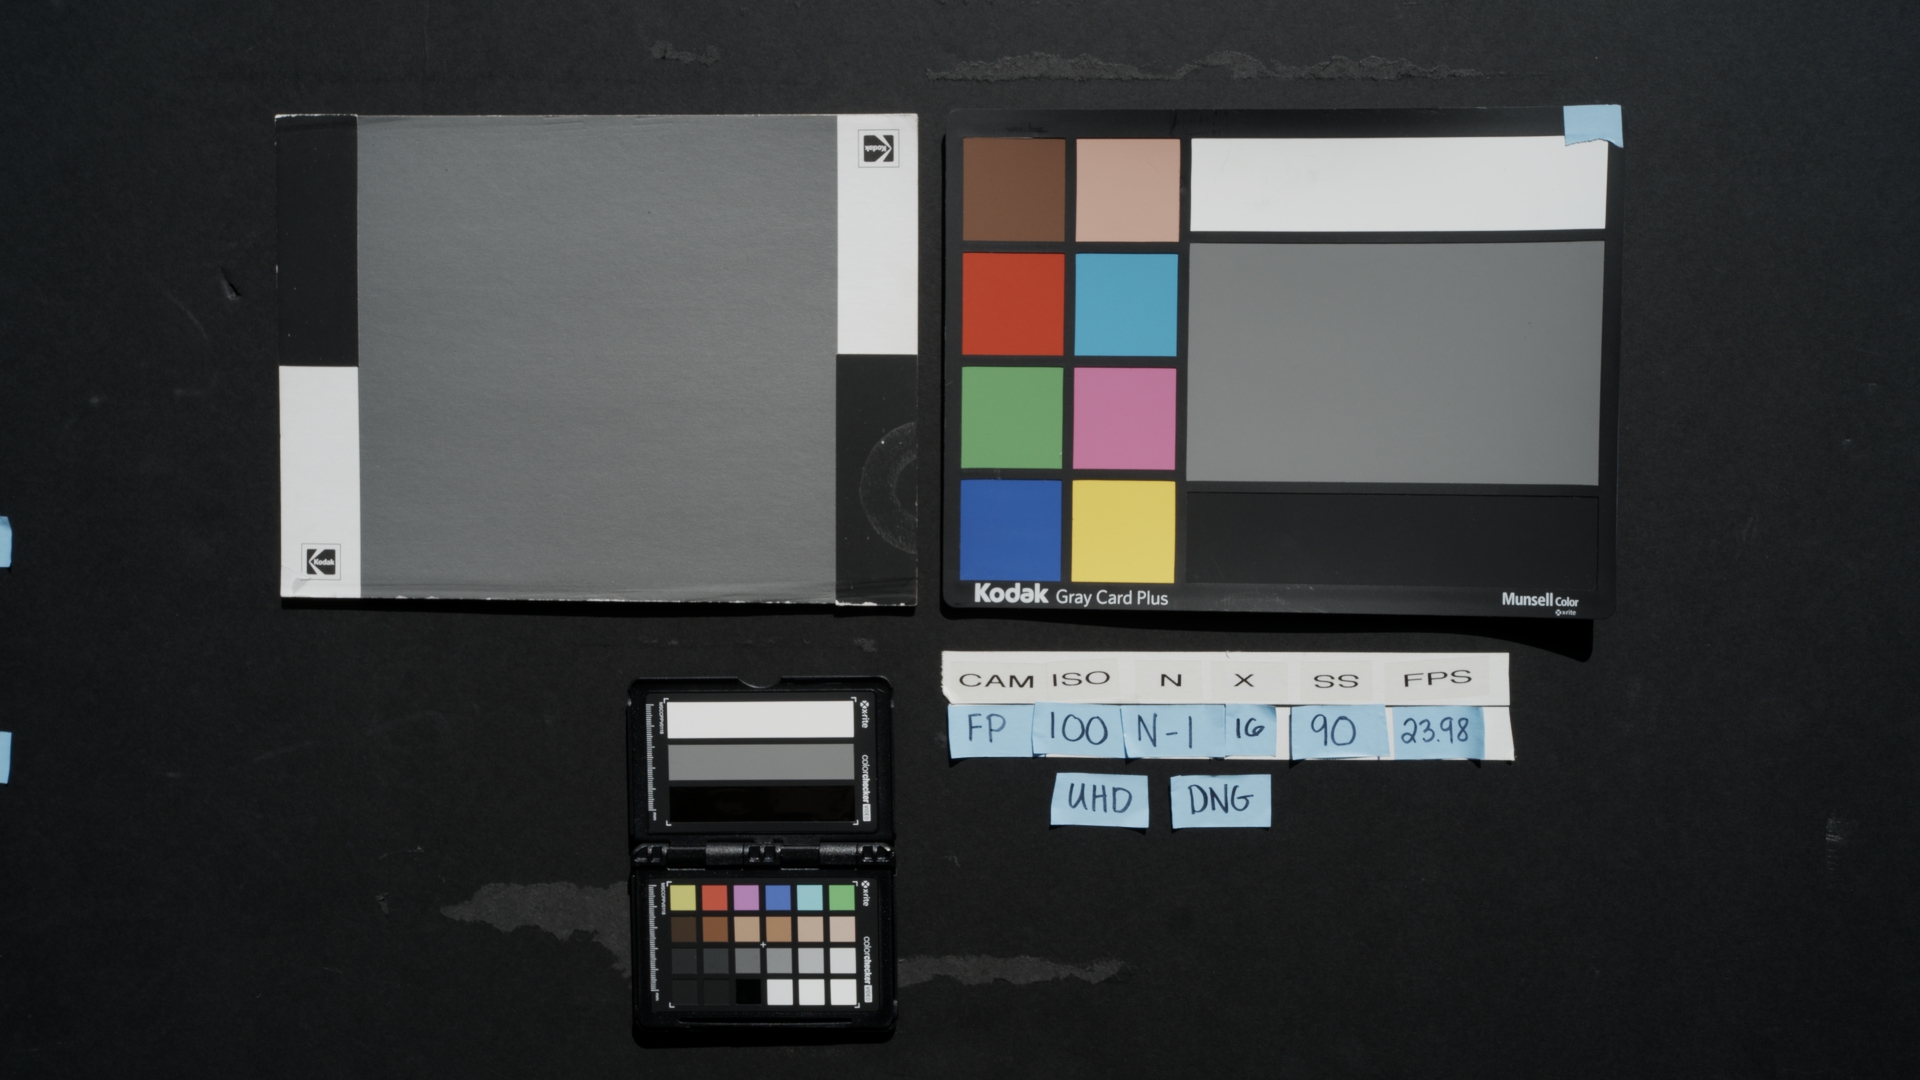
ISO 100
Doing a latitude test with the Sigma fp at the base ISO 100, I am comfortable working within the +1 to -5 range
Settings:
- CinemaDNG 12bit UHD
- Color Space: Blackmagic Design
- Gamma: Blackmagic Design Film
- LUT: Blackmagic 4.6k Film to Extended Video V4
- No Color Correction
ISO 100 +1 
ISO 100 +2 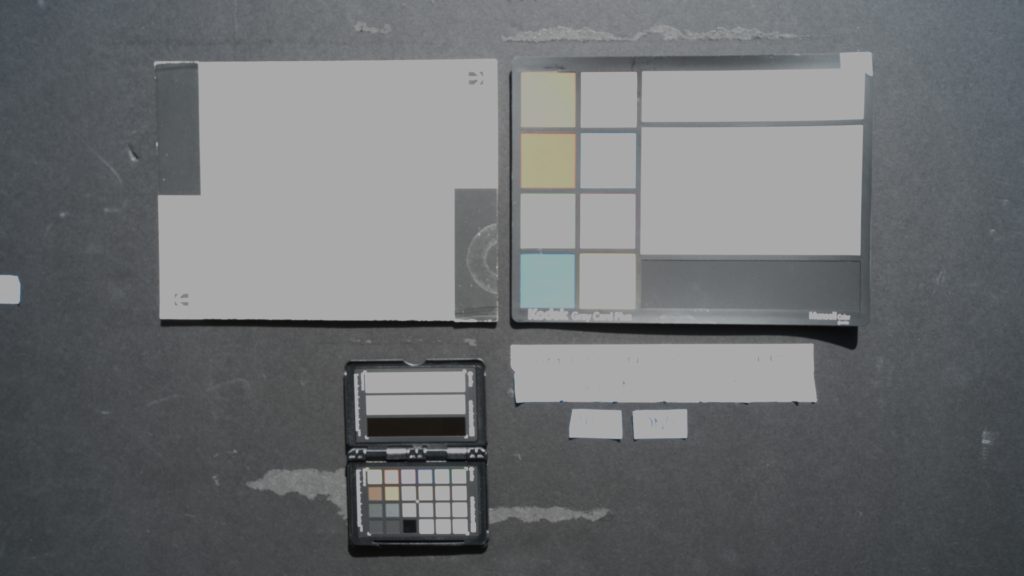
ISO 100 +3 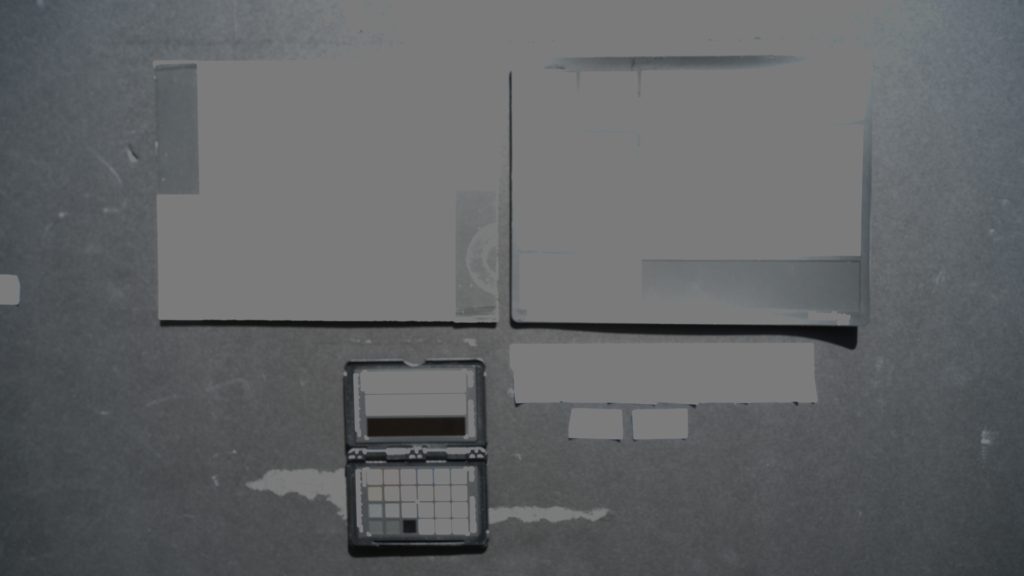
ISO 100 +4 
ISO 100 +5 
ISO 100 +6 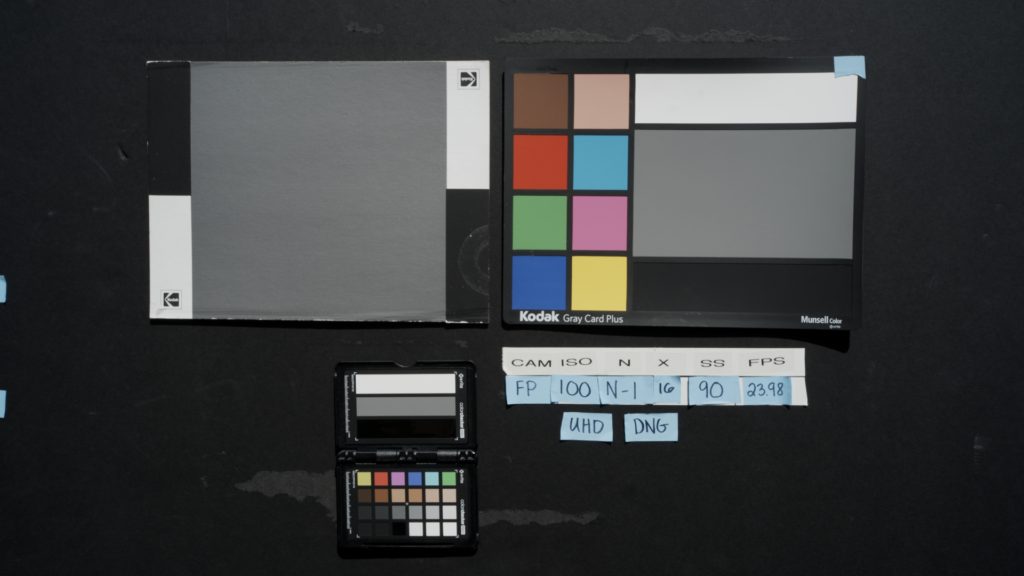
ISO 100 -1 
ISO 100 -2 
ISO 100 -3 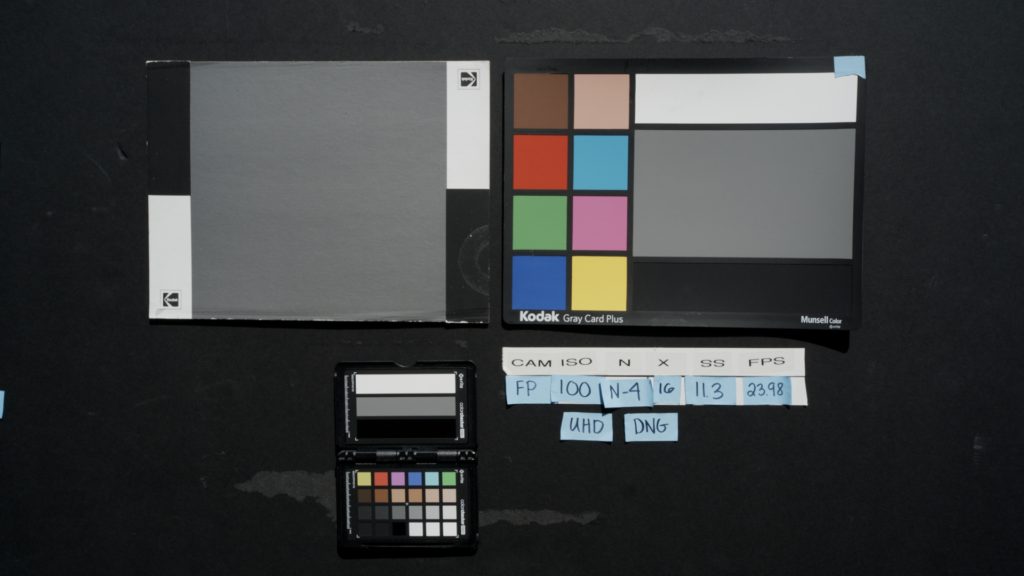
ISO 100 -4 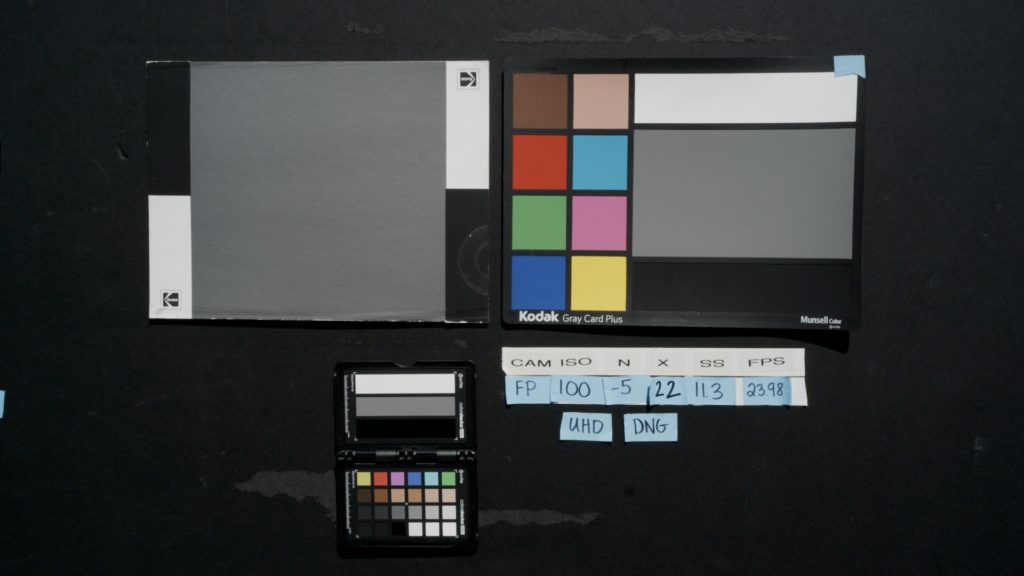
ISO 100 -5 
ISO 100 N
Click here to view the over/under test.
I found that the highlight roll-off in CinemaDNG is quite pleasing, so I would be comfortable with putting background elements out-of-focus beyond +3 at both 100 and 3200 ISO
Qualitative Test
My next step was creating tests that cinematographers encounter in the work we do, such as:
- Color
- Contrast
- Low-light
- Skin Tones
- Shutter Speeds
- High Frame Rates
My goal was to push the camera to its limits when I could and see how the camera handled all of the above and more. I only used materials that I had at home. I aimed to see whether the SIGMA fp could be used not only in high-end film production but also in productions with much smaller budgets, where resources are minimal.
Consumer Flicker Test
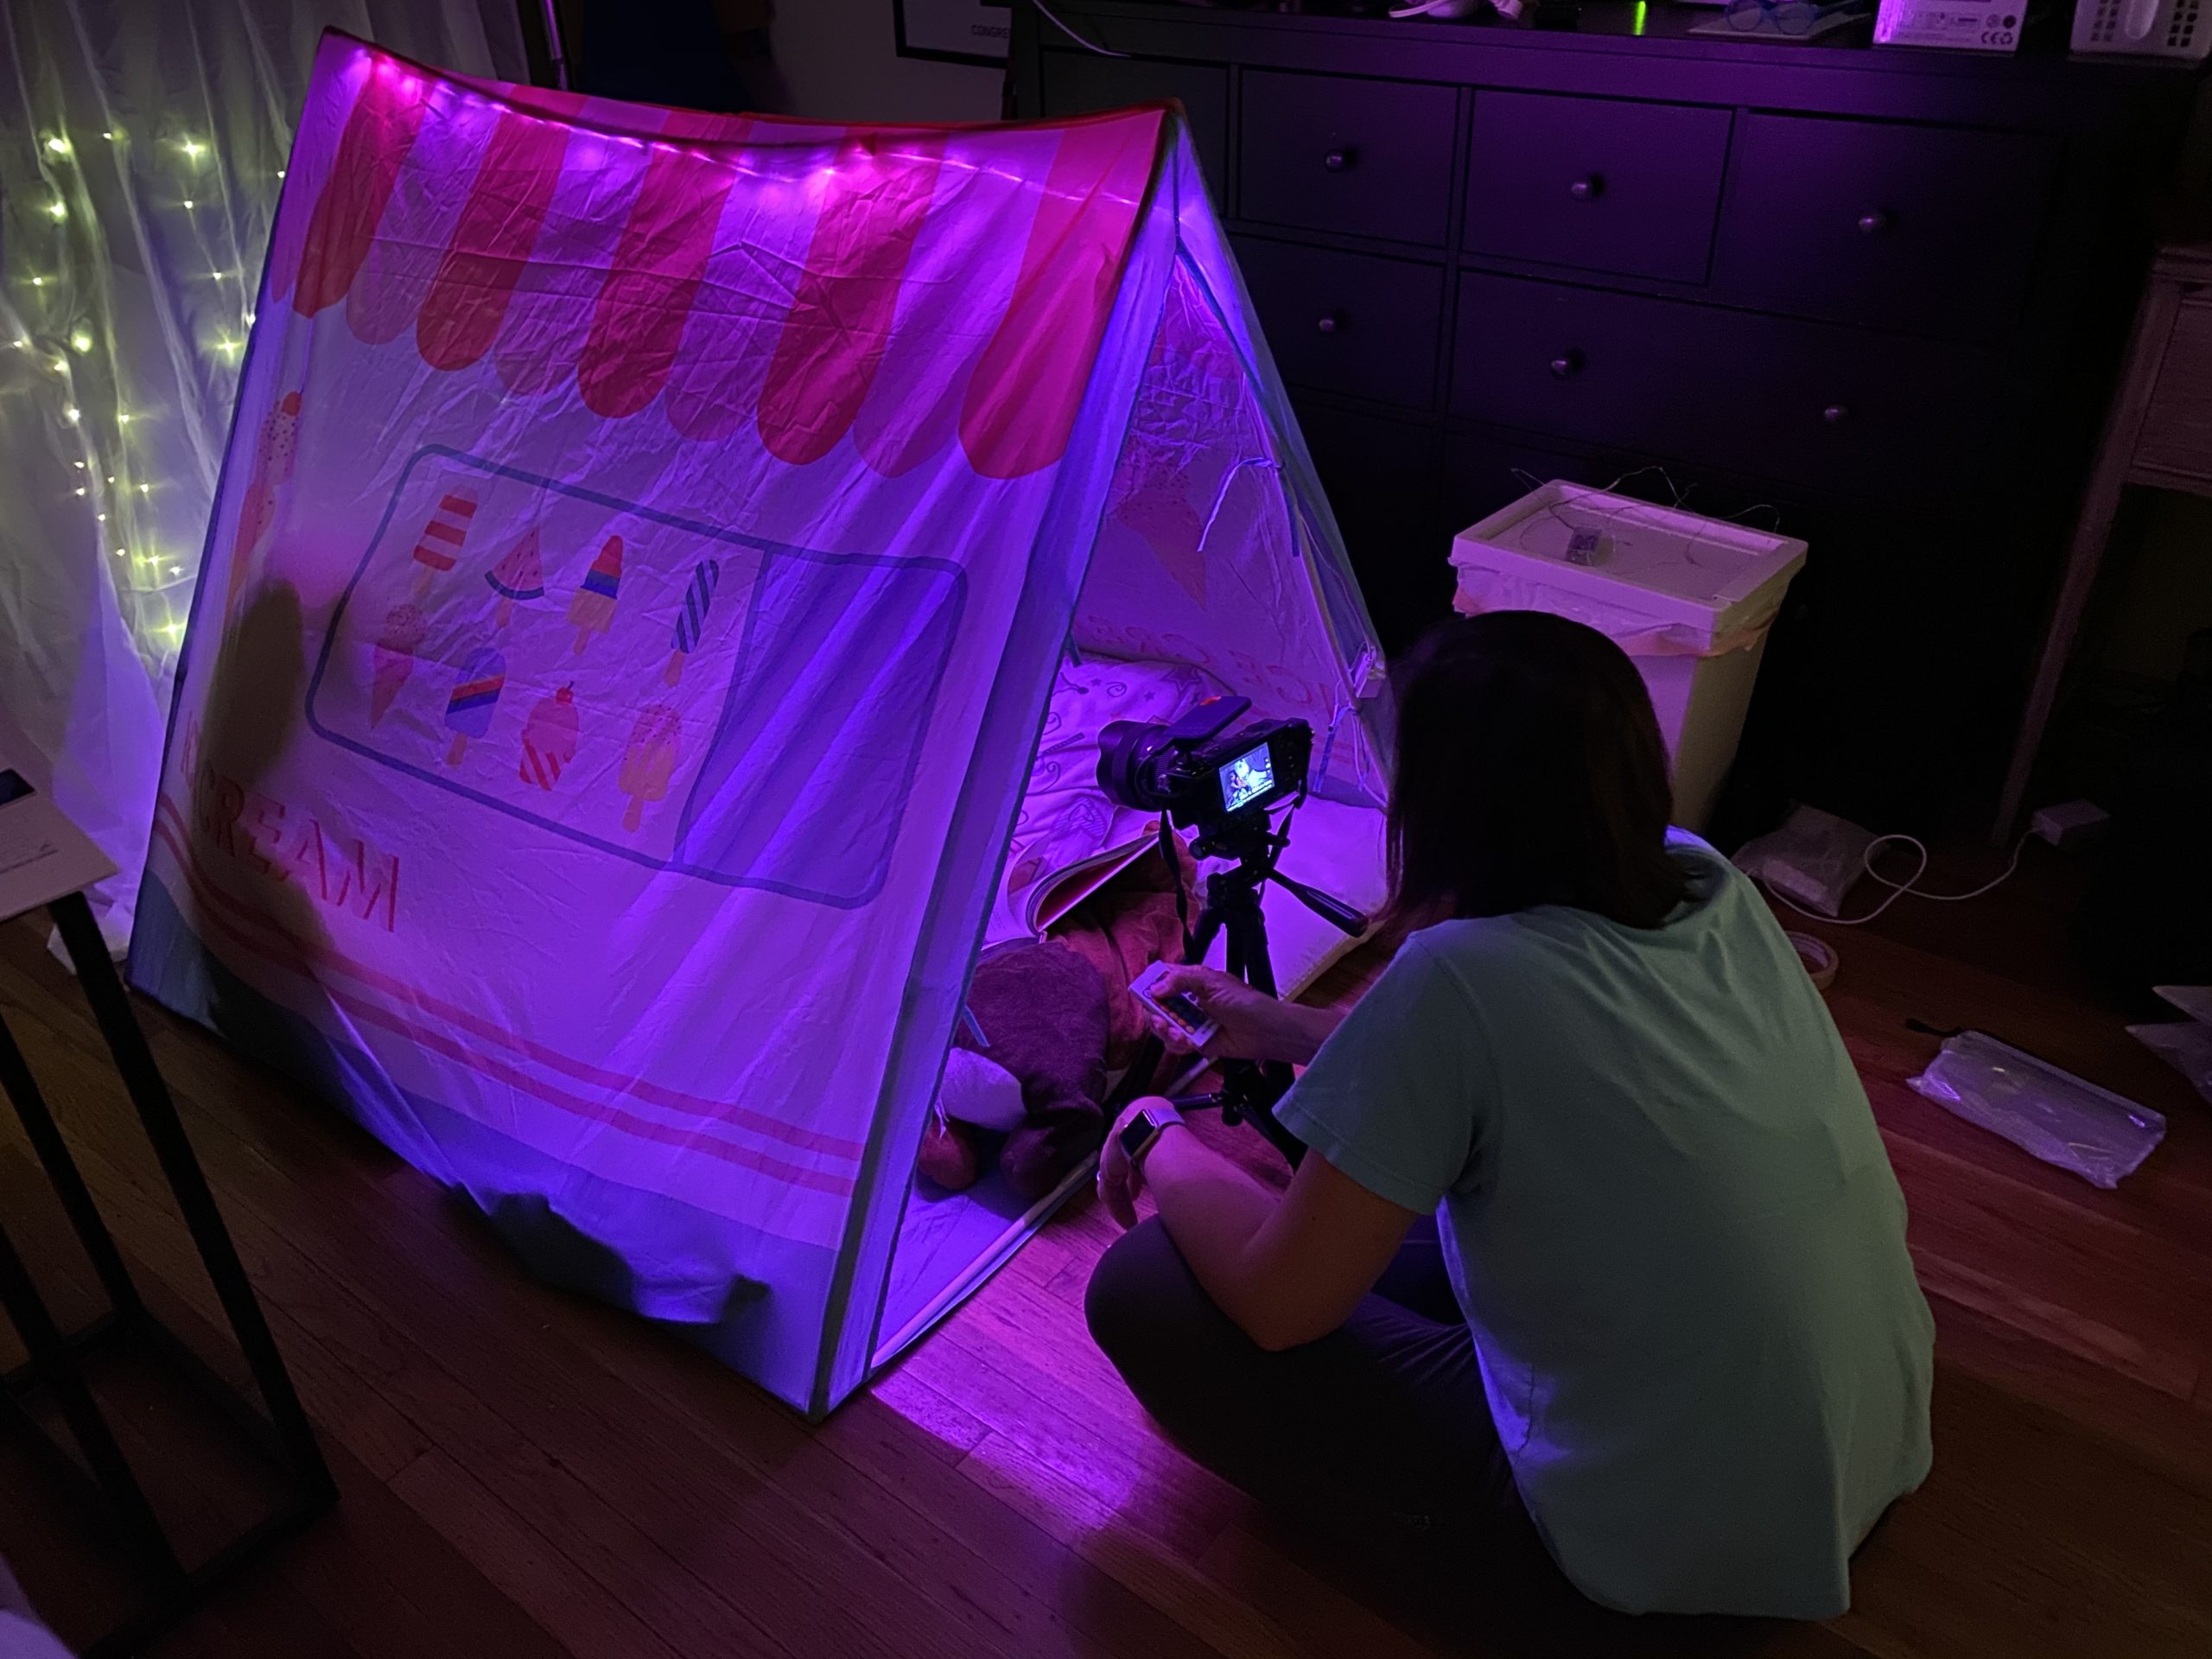
In this test I see how the fp handles color, particularly the range of the CinemaDNG versus MOV. I lit the entire test with consumer LED strips, fairy lights and an LED book light. There were no professional cinema grade LEDs used in this test.
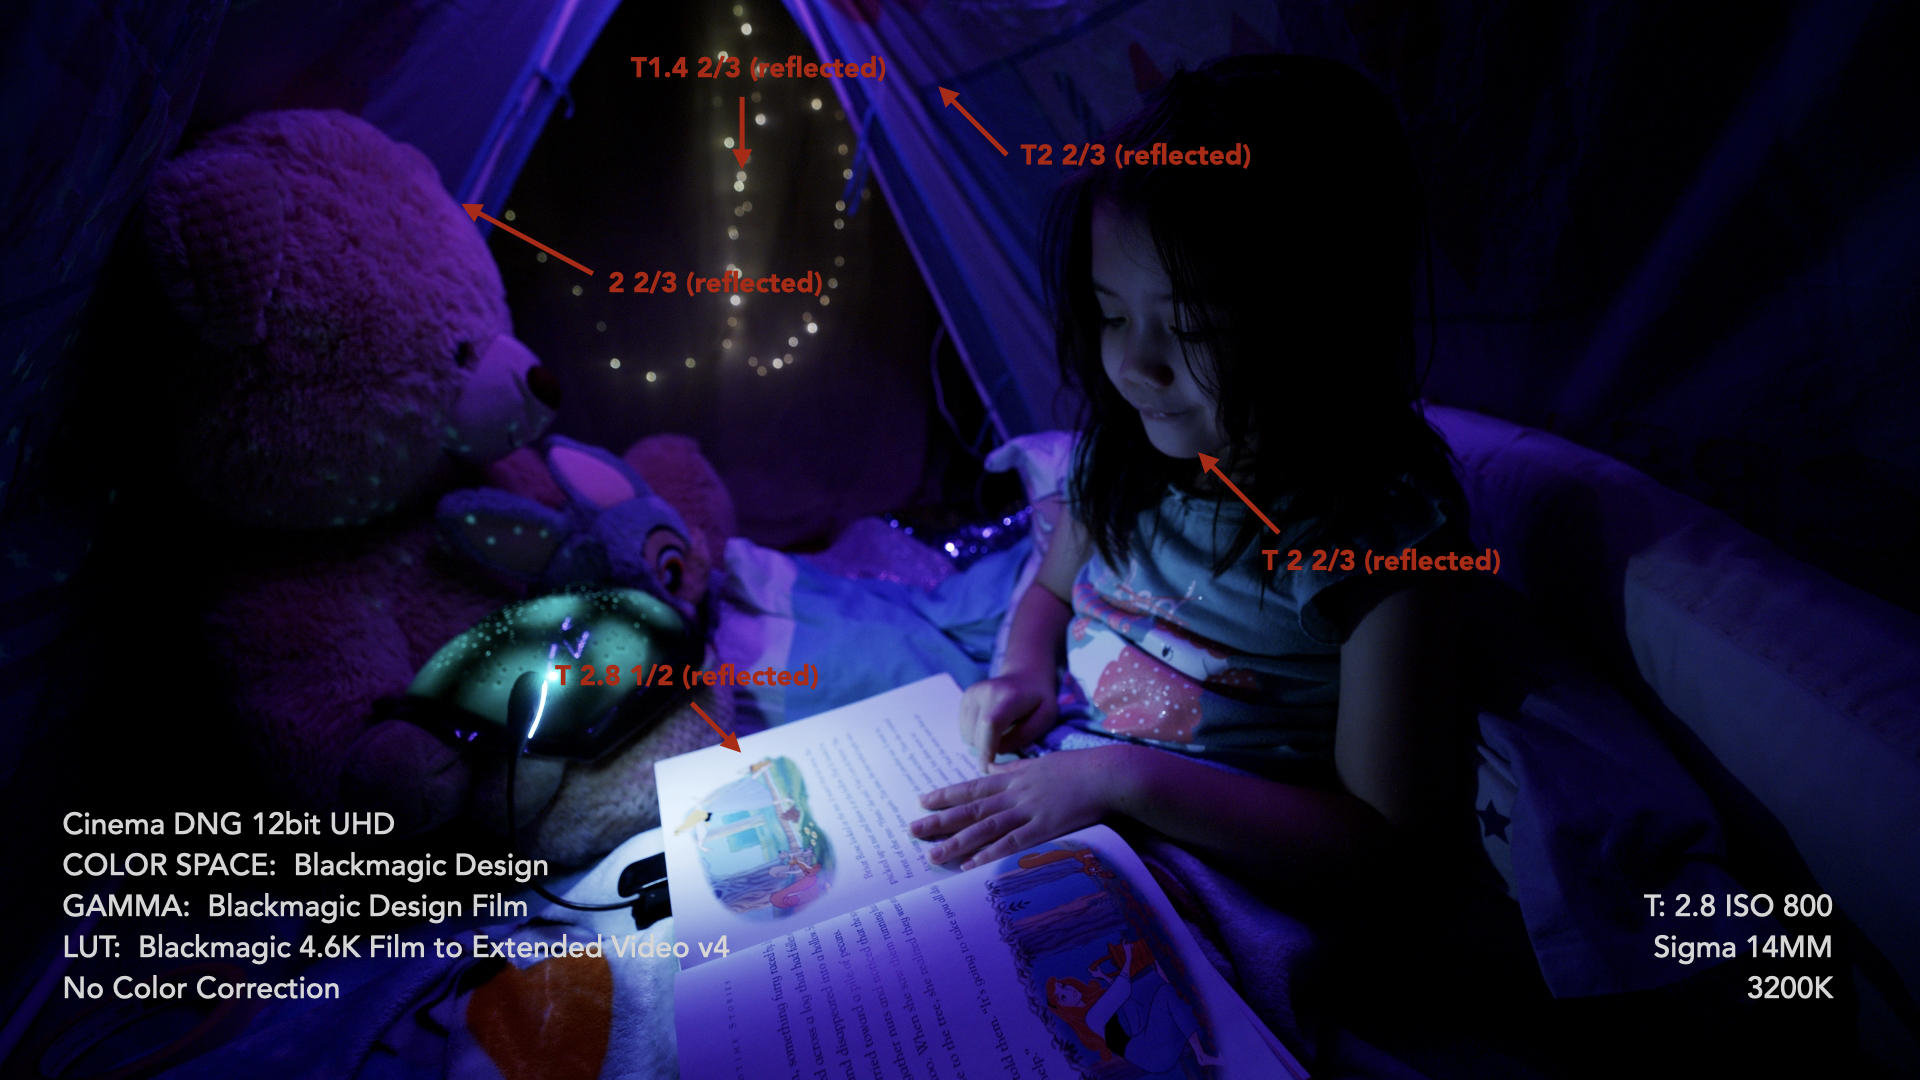
The CinemaDNG 12 bit format handled color rendition beautifully. I aimed to create the colors of deep purples, magentas, blues, greens and yellows that were saturated and rich. The CinemaDNG 12 bit format produced colors wonderfully without any further color correction beyond the BLACKMAGIC 4.6K Film to Extended Video v4 LUT.
The CinemaDNG 12 bit format also handled this low-light situation very well. I was able to see detail where I wanted to see detail and the CinemaDNG 12 bit format with the LUT created such rich blacks. This test was fairly early on in my testing process and automatically rated the camera at ISO 800, which is what I’m used to working with. I felt 800 ISO captured this scenario well, but I wish I had shot at ISO 3200 because I later found it to be very clean and workable, particularly in low-light scenarios. The SIGMA fp did not produce a flicker that is commonly seen with other cameras when using the consumer LEDS used in my test.
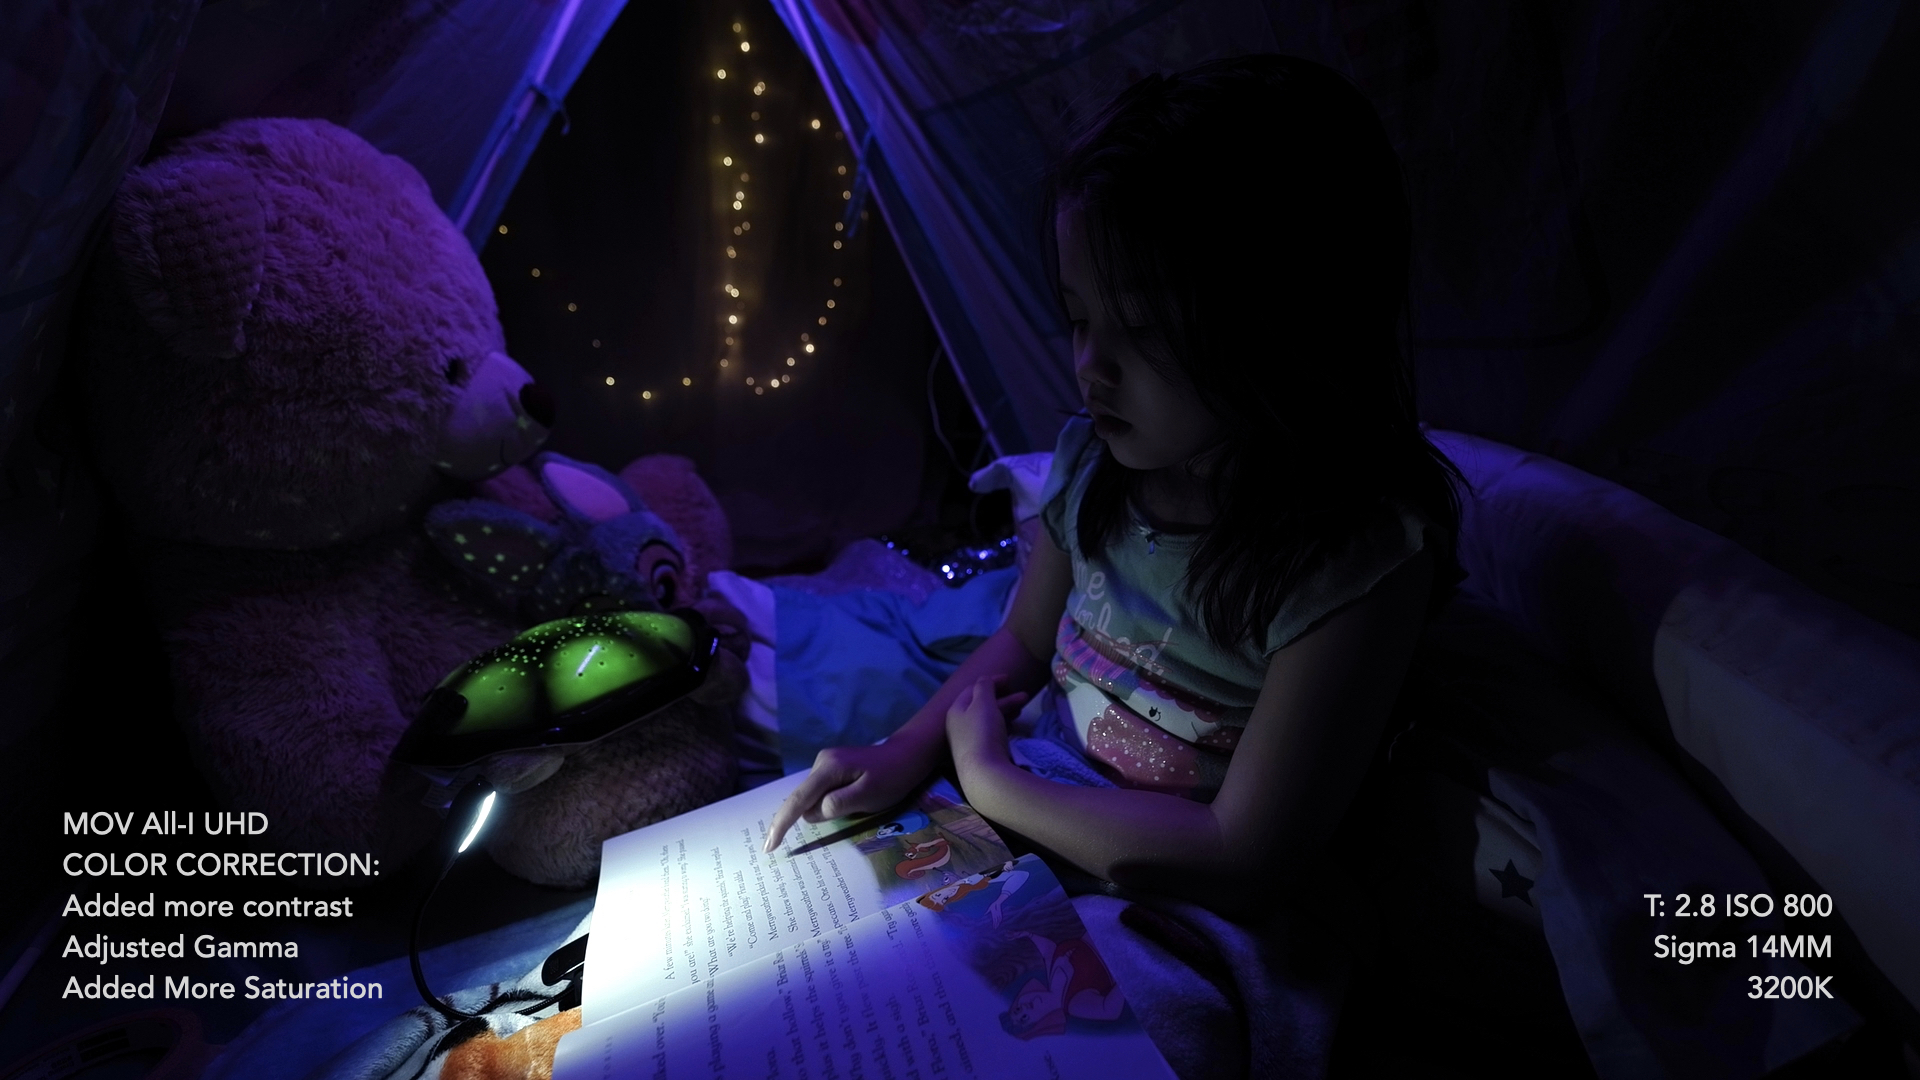
CinemaDNG To .MOV All-I Test
I shot the above test in the .MOV ALL-I format. I found that the .MOV format, as expected, did not allow for any wiggle room in luminance adjustments and its color depth was very limiting. Since I am comfortable working in CinemaDNG, I don’t have much use for the .MOV format, however it could still be useful when working in Director’s Viewfinder mode or creating cinemagraphs.
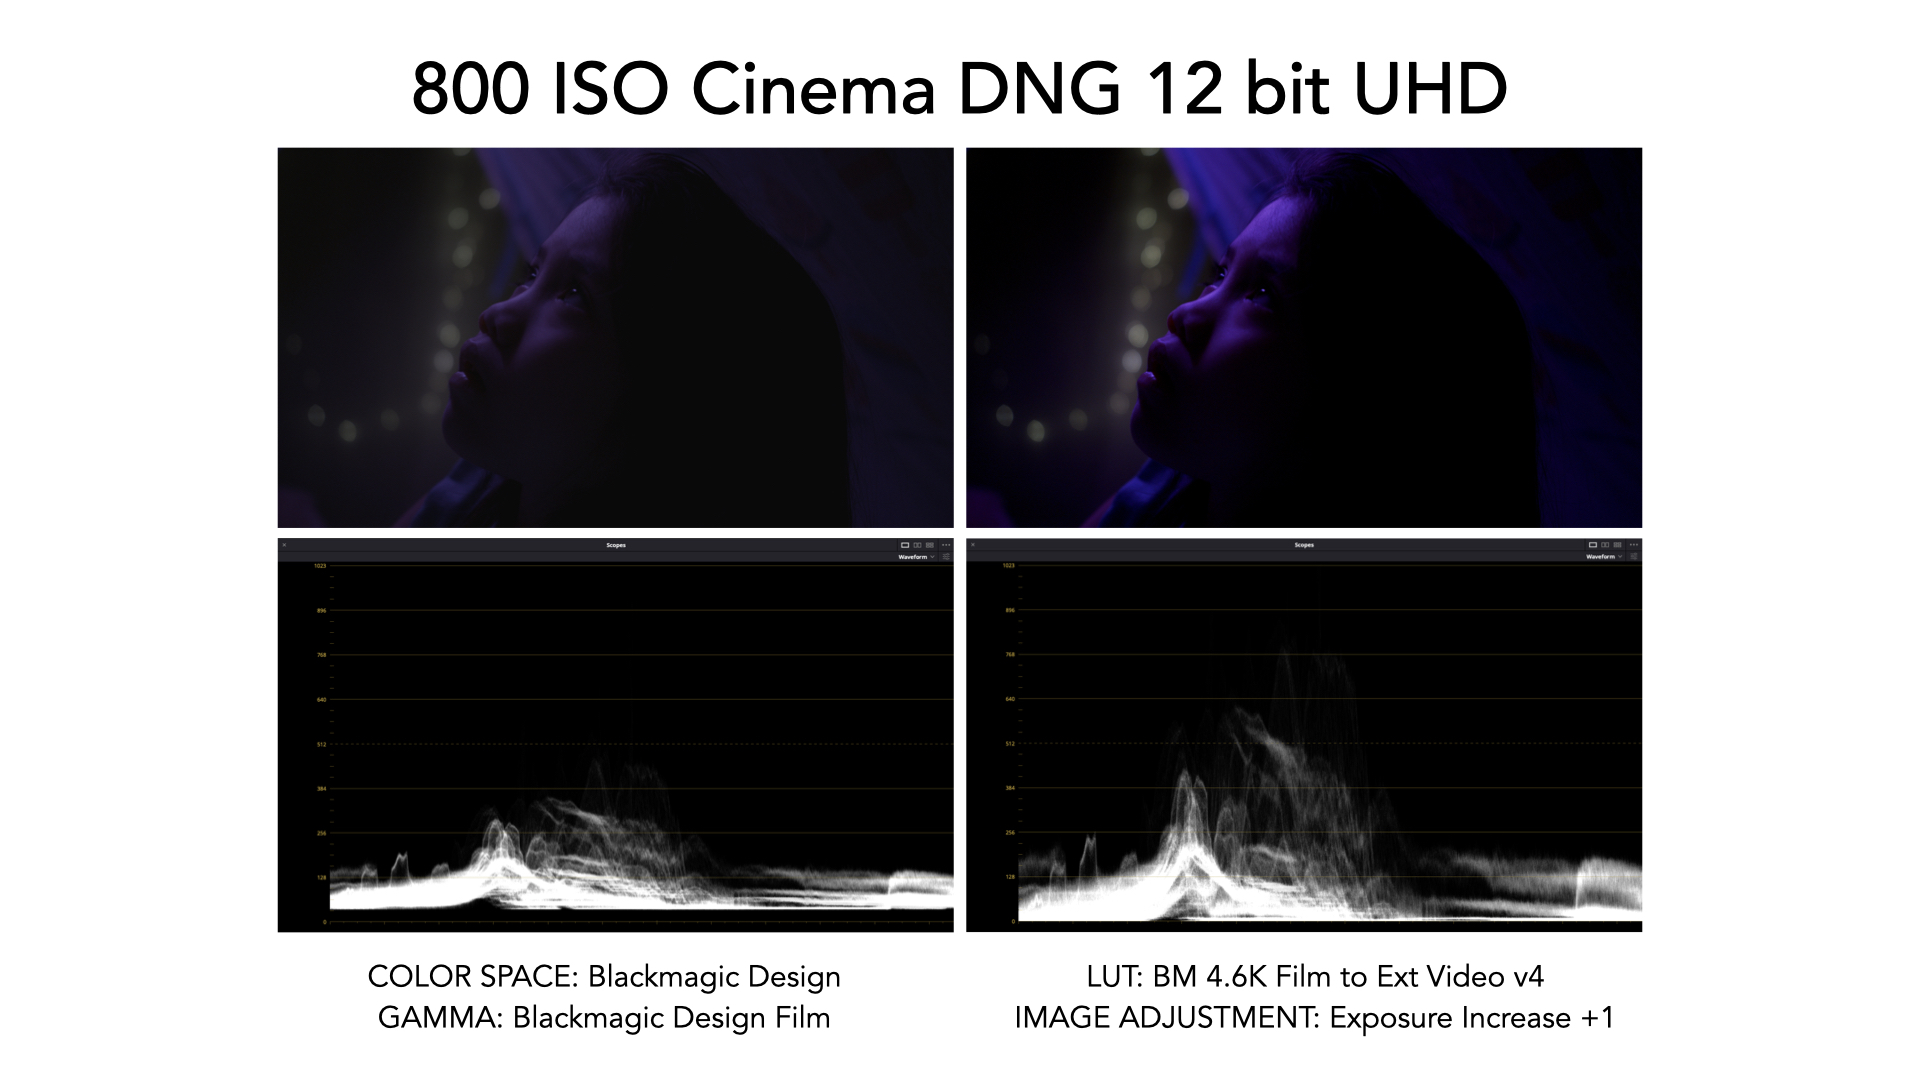
CinemaDNG ISO 800 Vs ISO 3200
I shot the below shot at both ISO 800 and ISO 3200. I was able to produce similar results in both ISOs by increasing exposure by 1 in ISO 800 and decreasing exposure by 1 in ISO 3200. But I am usually not comfortable working at the toe of the curve in my negative – there is little wiggle room and potential for more noise. In the ISO 3200 shot I had much more room to adjust the image and a much thicker negative.
Overall, I believe ISO 3200 image, even though subtle, is cleaner than the ISO 800 image. Having the base ISO at 3200 in low-light situations helps to speed up production and use less resources. My negative take-away here is the viewing capabilities of viewing 3200 images in the camera is deceiving. The color modes in the SIGMA fp do not give us a good viewing LUT and the NO color mode needs to be more accurate in simulating what the CinemaDNG Raw File format can actually do.
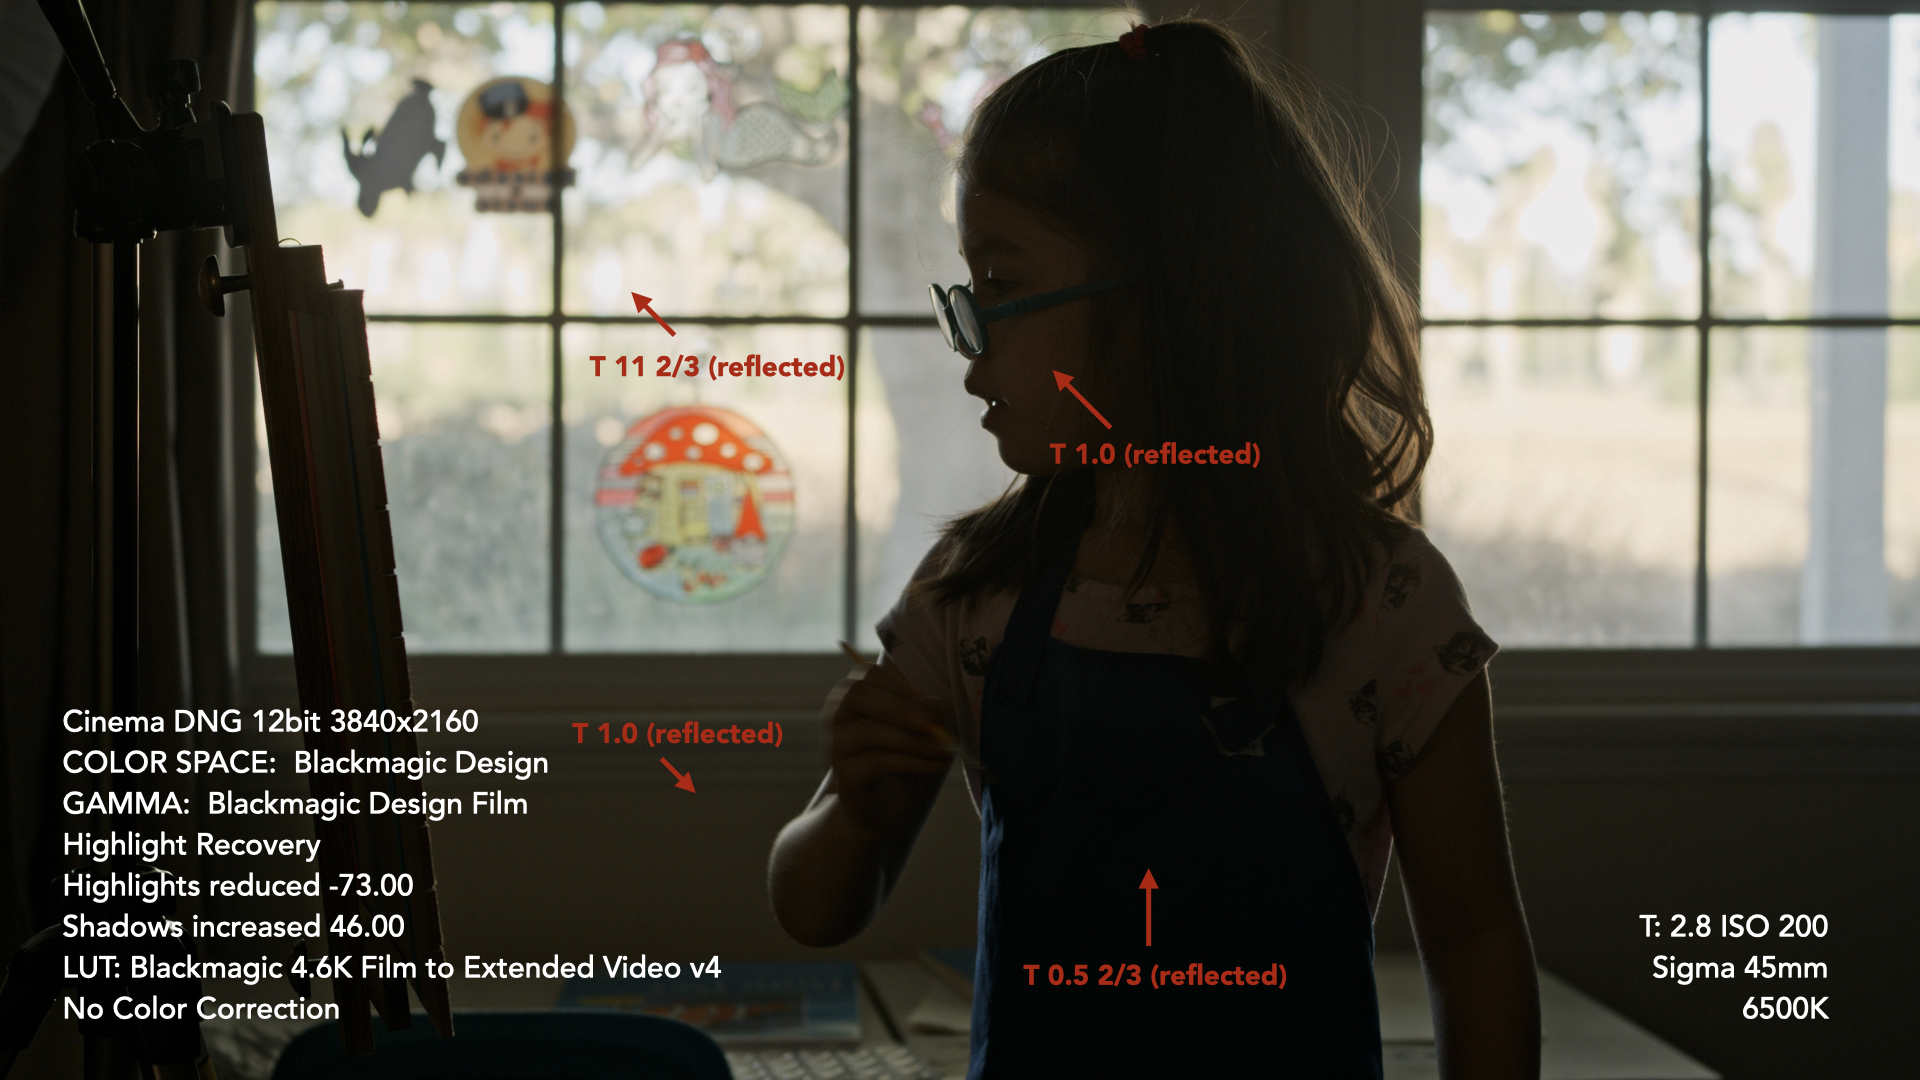
High Contrast Test
In this test I wanted to see how the SIGMA fp in CinemaDNG handled both ends of the contrast scale. From my tests, I found the SIGMA fp due to the CinemaDNG Raw format has full control of both highlights and shadows. Overexposed highlights look pleasing and you can still dig into the shadows.
In my test below, there is -2 under and +4 over range that the camera can see. This scene was shot with nothing more than what the ambient window was giving me. No need for HDR. I did shoot both sequences at ISO 400 and ISO 200 respectively because I wanted to maintain T/2.8 exposure for depth of field purposes. In most of my scenarios, if I have areas of the image that are bright and over-exposed that I don’t have control over I make sure that those highlights are out of focus. I was generally pleased by the highlight roll-off of the SIGMA fp. There were no color aberrations or image tearing that would make overexposure look more like a mistake than an aesthetic choice.
CinemaDNG Highlight Recovery
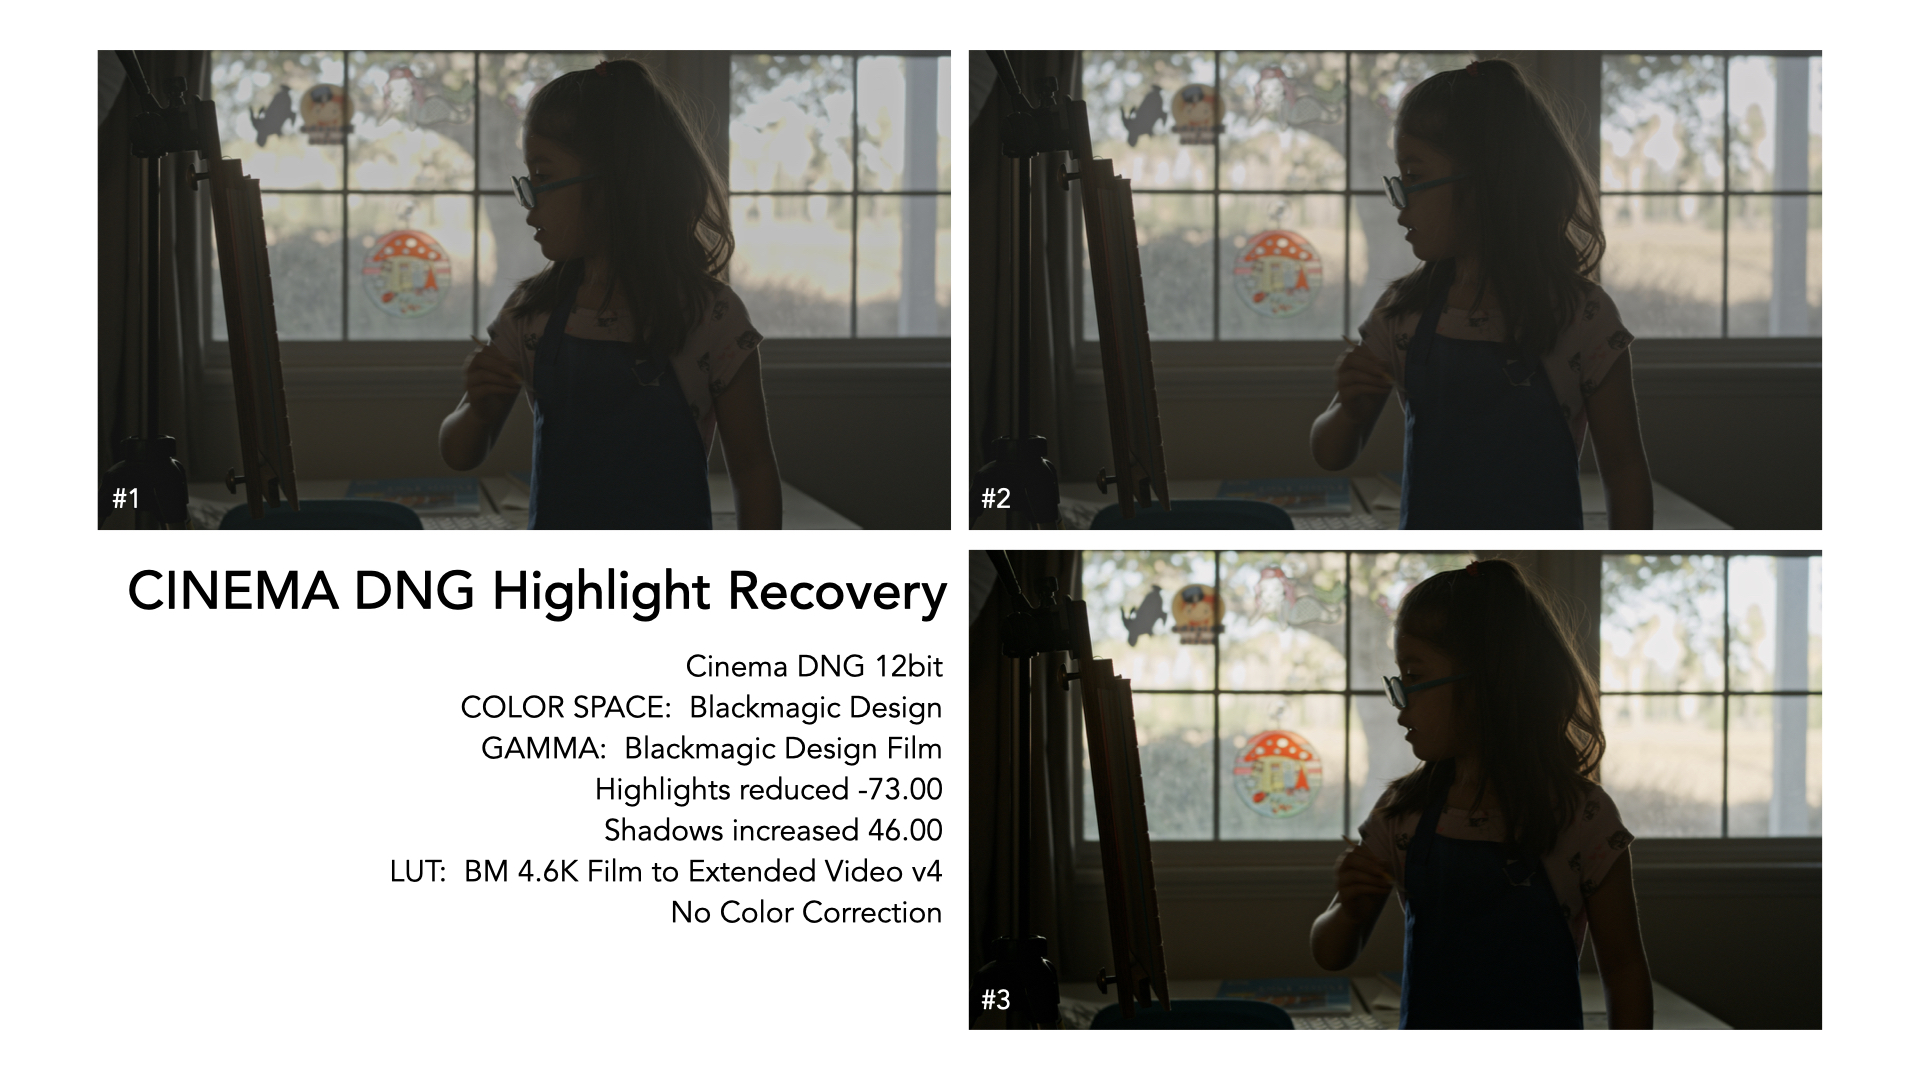
Working with CinemaDNG in Resolve allowed me to work with the Highlight Recovery option, which I found very effective.
In the #1 image this shows the RAW image right out of the camera, where the background highlights are clipping. With Highlight Recovery chosen, in the #2 image my highlights are gained back. In the #3 image, once the LUT is applied, the highlights are bright but pleasing to the eye. Having the option to shoot CinemaDNG in the SIGMA fp allows a very good handle on highlight and shadow detail which allows you to shoot with very little resources. I was able to retrieve a comfortable amount of detail for this scene on both ends of the scale.
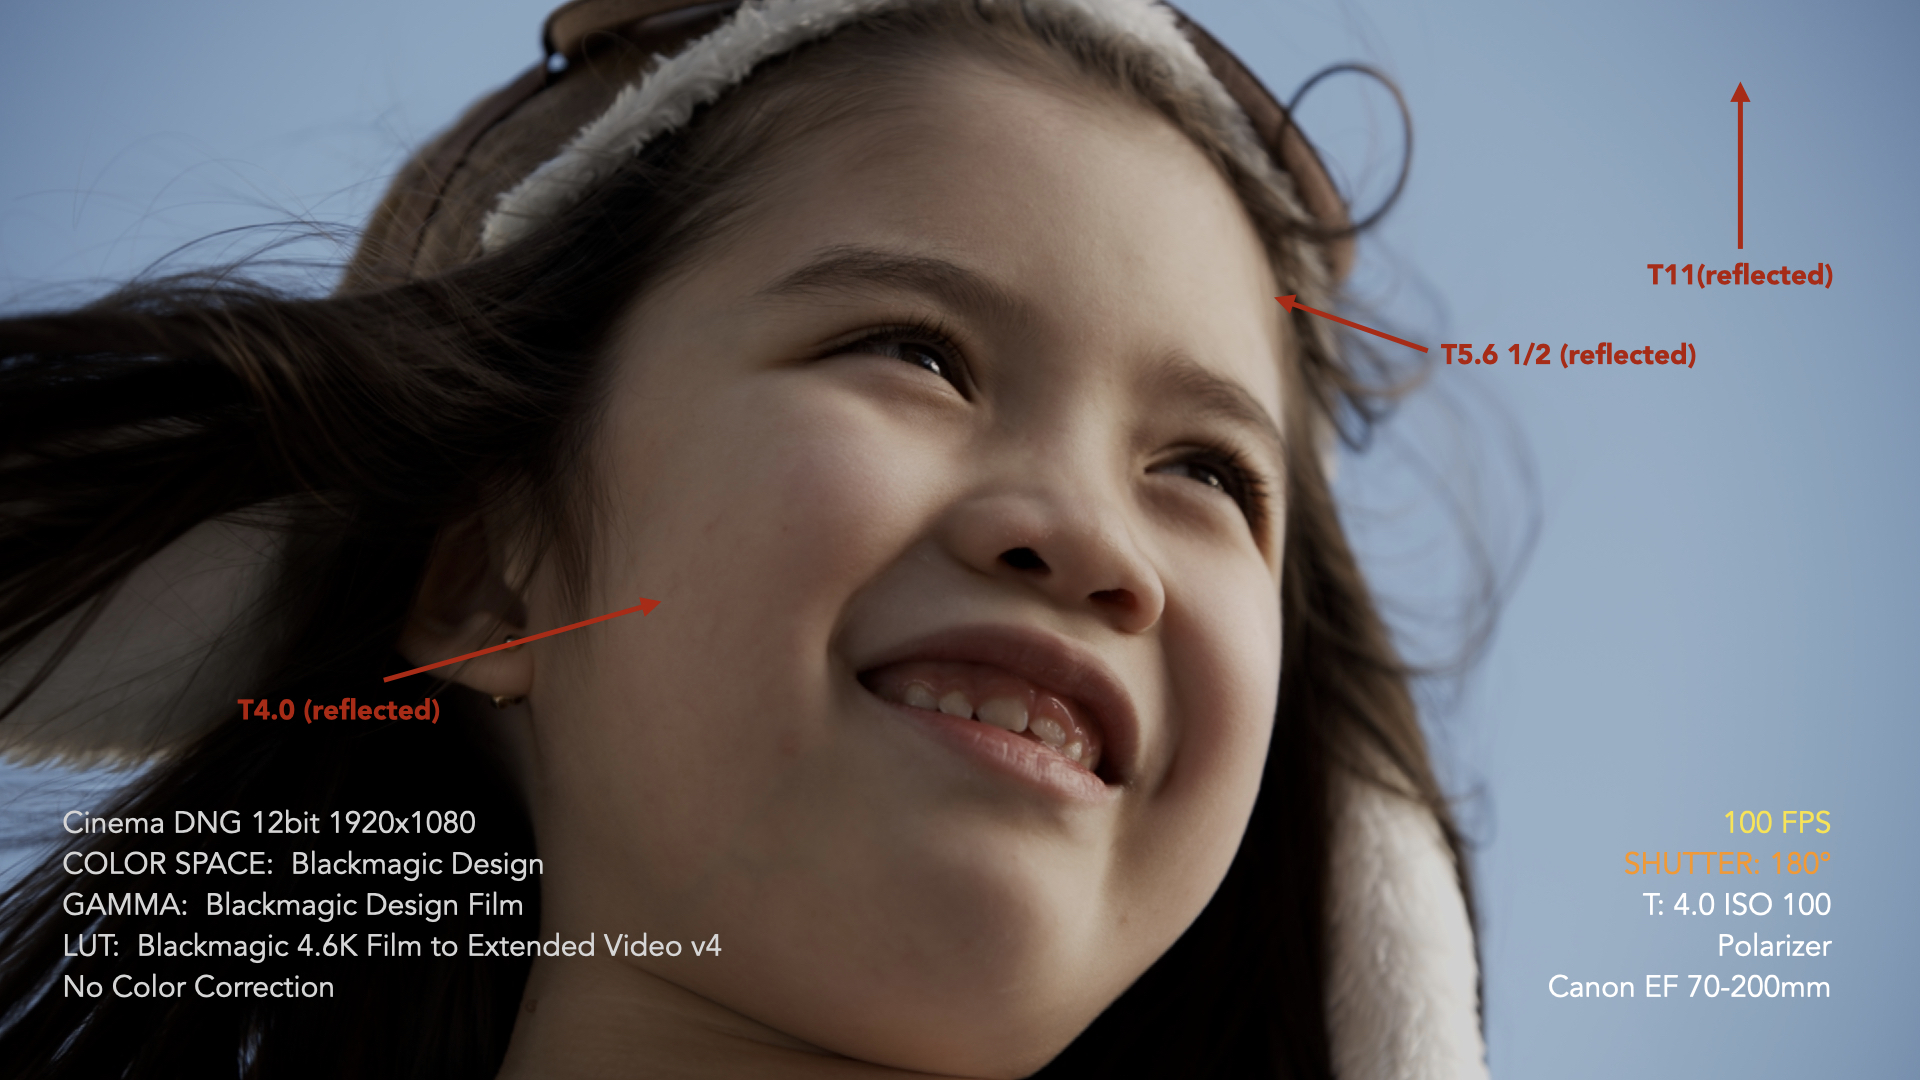
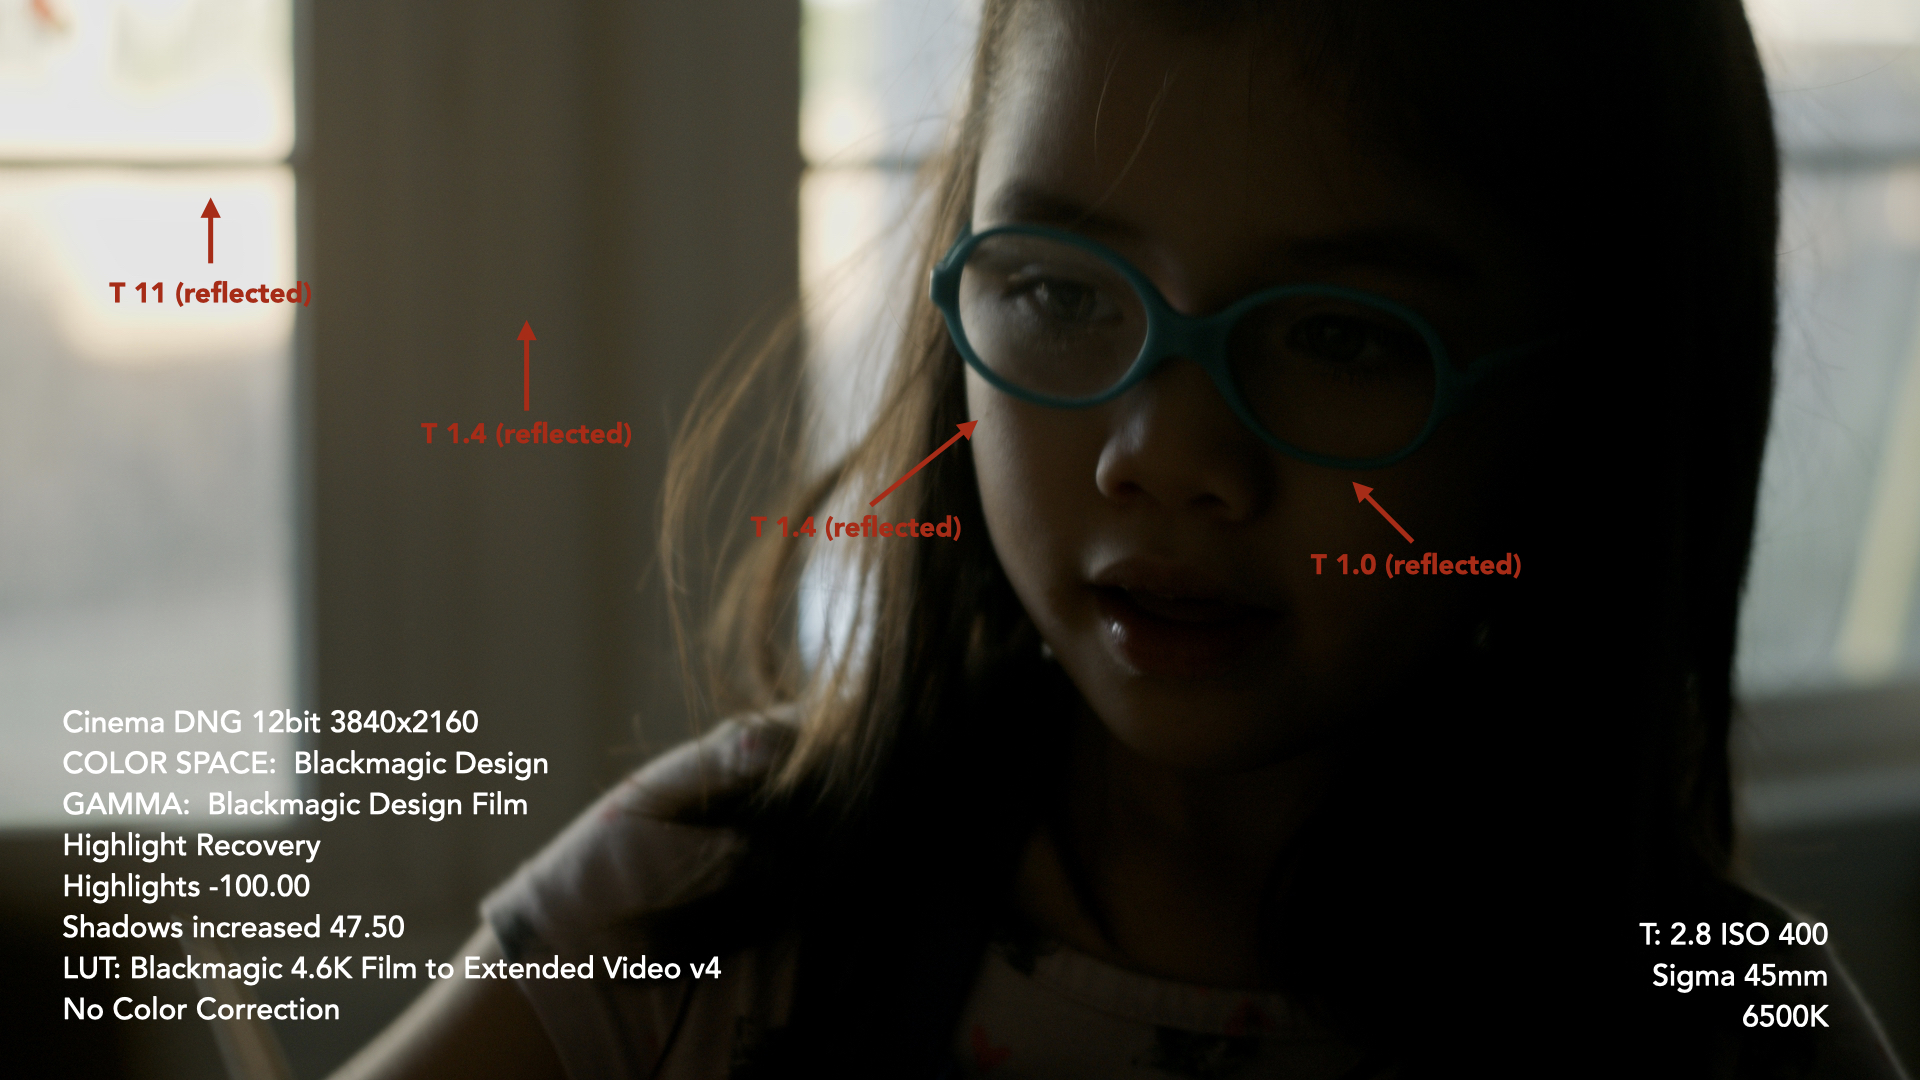
Skin Tone Test And High Frame Rate Test
In this test, I wanted to see how the camera handled the high frame rates of 100 FPS and 119.88 FPS. The camera handled them beautifully, but the difference between 100 and 119.88 is negligible, so having more varied frame rates would be a great option for the SIGMA fp.
This test also was to study how the SIGMA fp handles one specific skin tone. Due to Covid, I didn’t have access to different skin tones. In any other skin tone test I would incorporate other types of skin tones to acquire a much more accurate data set. But based on the skin tone above I was pleased by how the Sigma fp handled the different shades/nuances in her skin tone (coolness under her chin, pink in her cheeks, highlights in her forehead). Her skin tone overall was reproduced with very creamy textures.
Shutter And High Frame Rate Test
I performed a shutter and high frame rate test by using sprinklers as my test. Varied the shutter in the degrees of 180, 90, 45, 22.5 and the frame rates of 100FPS and 119.88 FPS. I thought the camera handled this test very well and gives further option to the filmmaker to visually create compelling images.

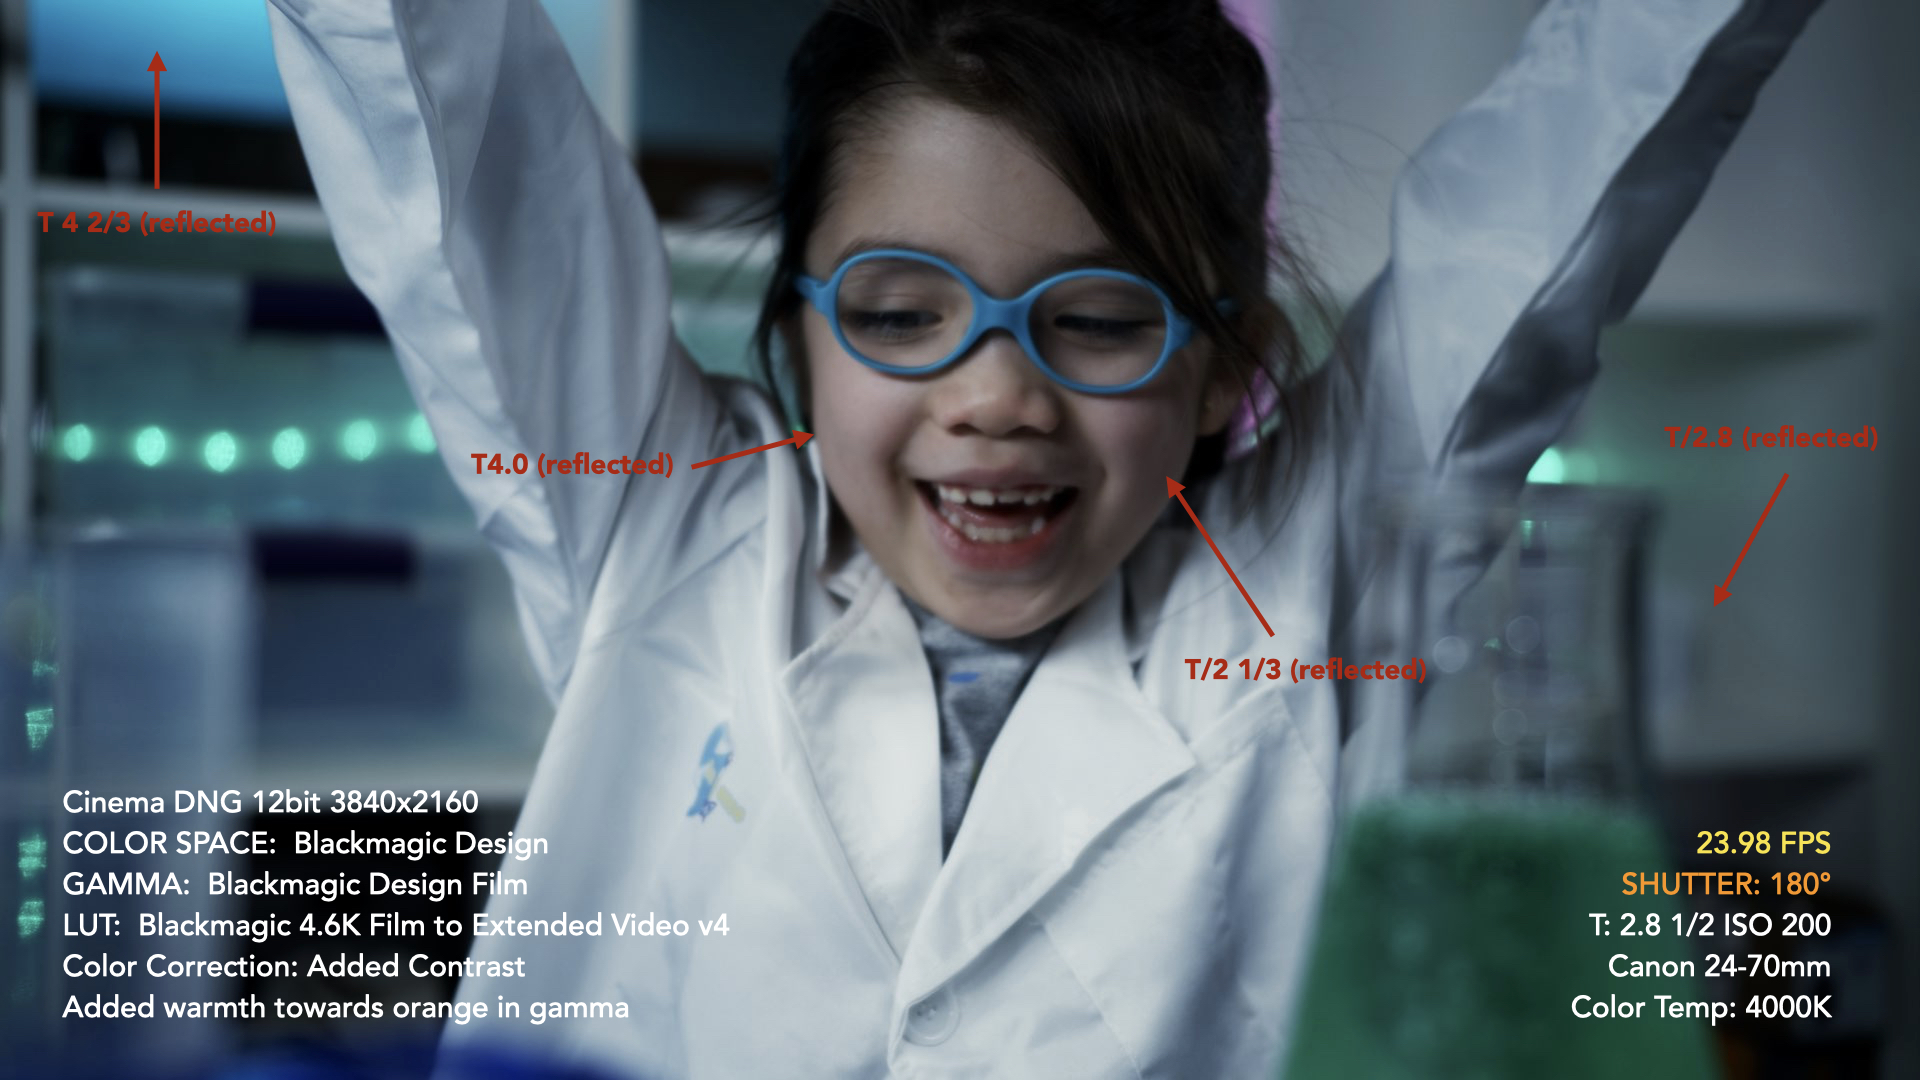
Fluorescent Lighting Test
This test explores how the camera handles a fluorescent lighting situation. I set the camera to the color temperature of 4000K. Overall, I was satisfied, but wish I could have found a better skin tone for the test subject. While I am not a colorist, but I’m confident given the color bit depth of CinemaDNG 12 bit that finding a pleasing skin tone within this scenario will not be a problem.
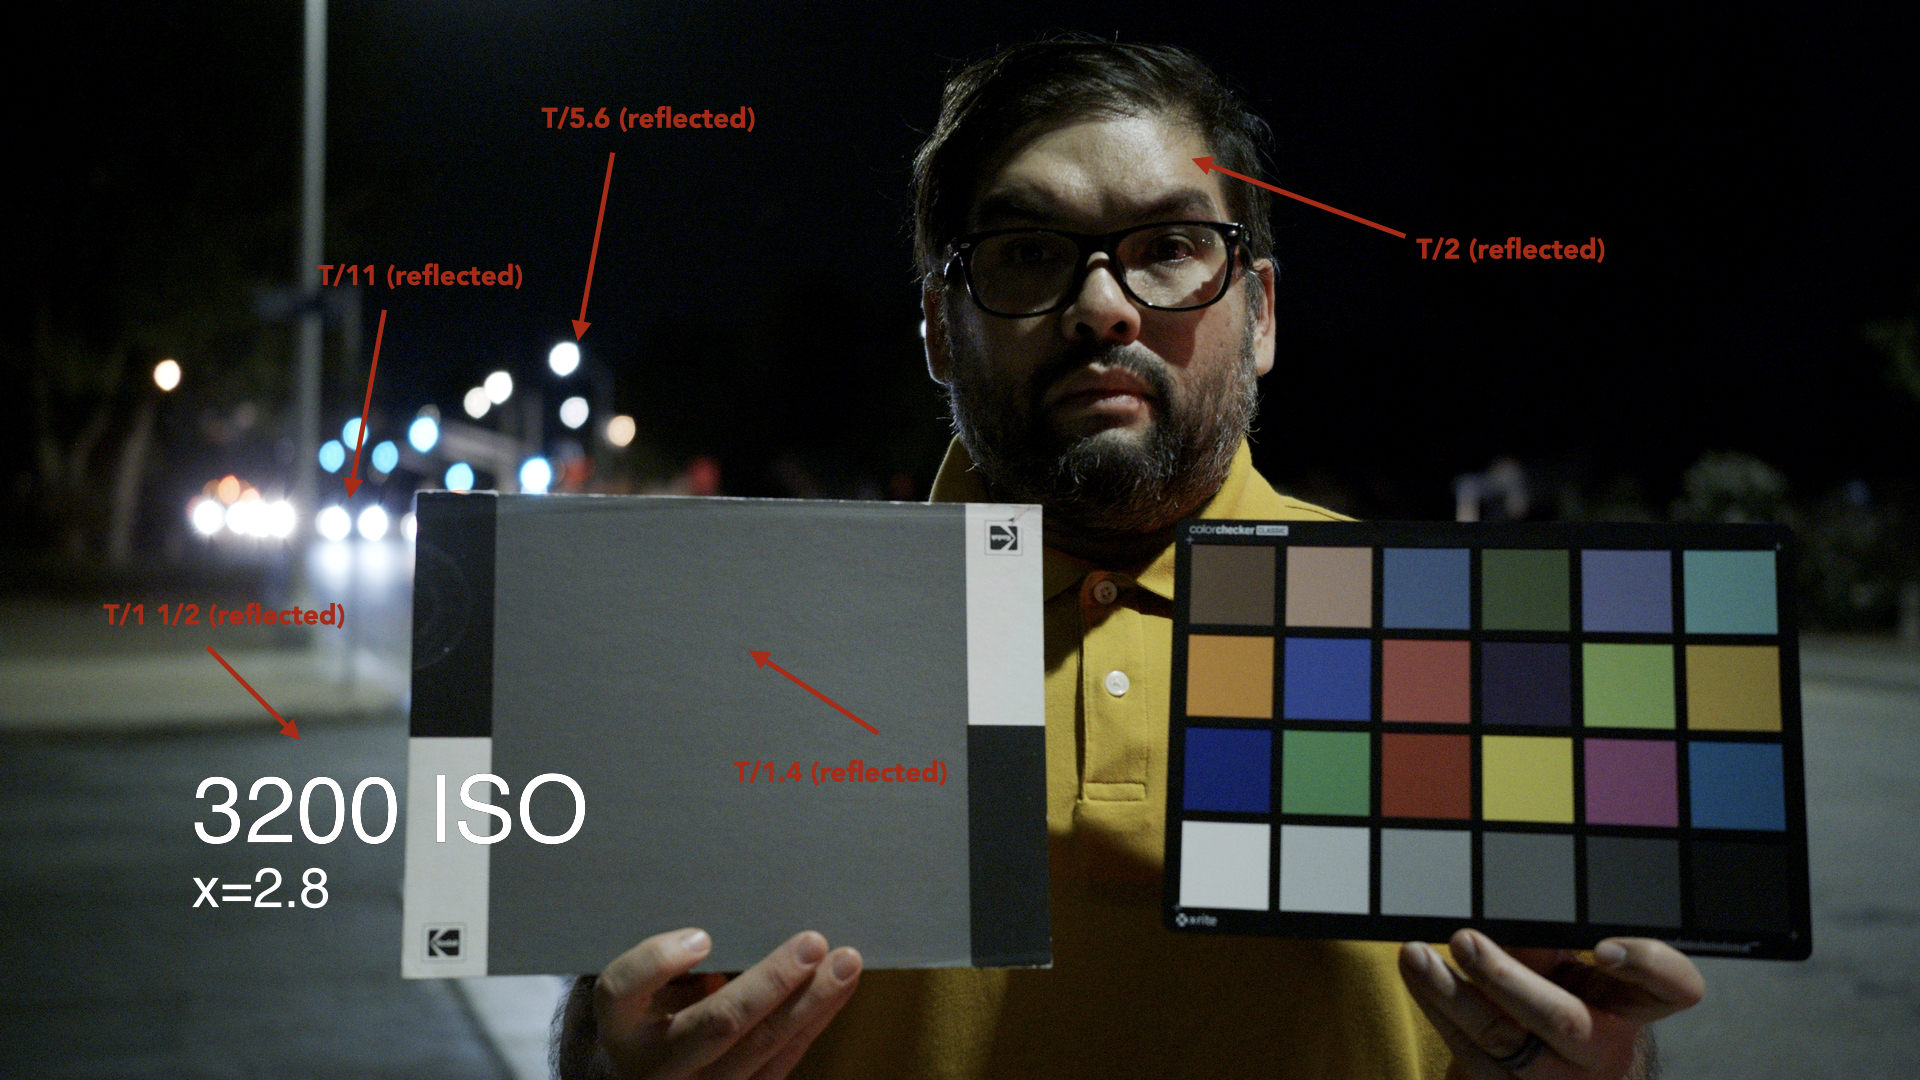
ISO Sensitivity Expansion Test
Sigma’s ISO Sensitivity Expansion thoroughly impressed me. In this test, I set up my subject with charts underneath an existing street light with street lights and car headlights in the background. This was my only lighting source. I shot the same shot in ISOs from 800 to 102400. In Resolve, I processed the images:
- COLOR SPACE: Blackmagic Design
- GAMMA: Blackmagic Design Film
- LUT: Blackmagic 4.6K Film to Extended Video v4
I adjusted each image via the Exposure control matching the gray card to my “NORMAL” which I set at ISO 3200. From this test, it truly showed the ISO 3200 as the base ISO of the camera. The 800 ISO image was very noisy and very contrasty, which ultimately saturated the colors beyond what I would define as natural. The 1600 ISO image, noise existed but less than 800 ISO, still very contrasty and natural colors were not there yet. Once I saw the 3200 ISO image, the image became very clean, almost noiseless. You could see shadow detail in the dark areas particularly in the face and the colors appeared more natural.
What was remarkable to me was as you increased ISO, shadow detail still remained, colors still appeared more natural and inherently noise increased, but in a very filmic way. As a cinematographer, I hope to never find myself in a situation where I would have to be shooting at 102400 within a narrative scenario. However, knowing how the SIGMA fp has been able to create acceptable images at such high ISOs gives me a further cushion of relief when I’m put in scenarios where I have to move fast and my resources are minimal.
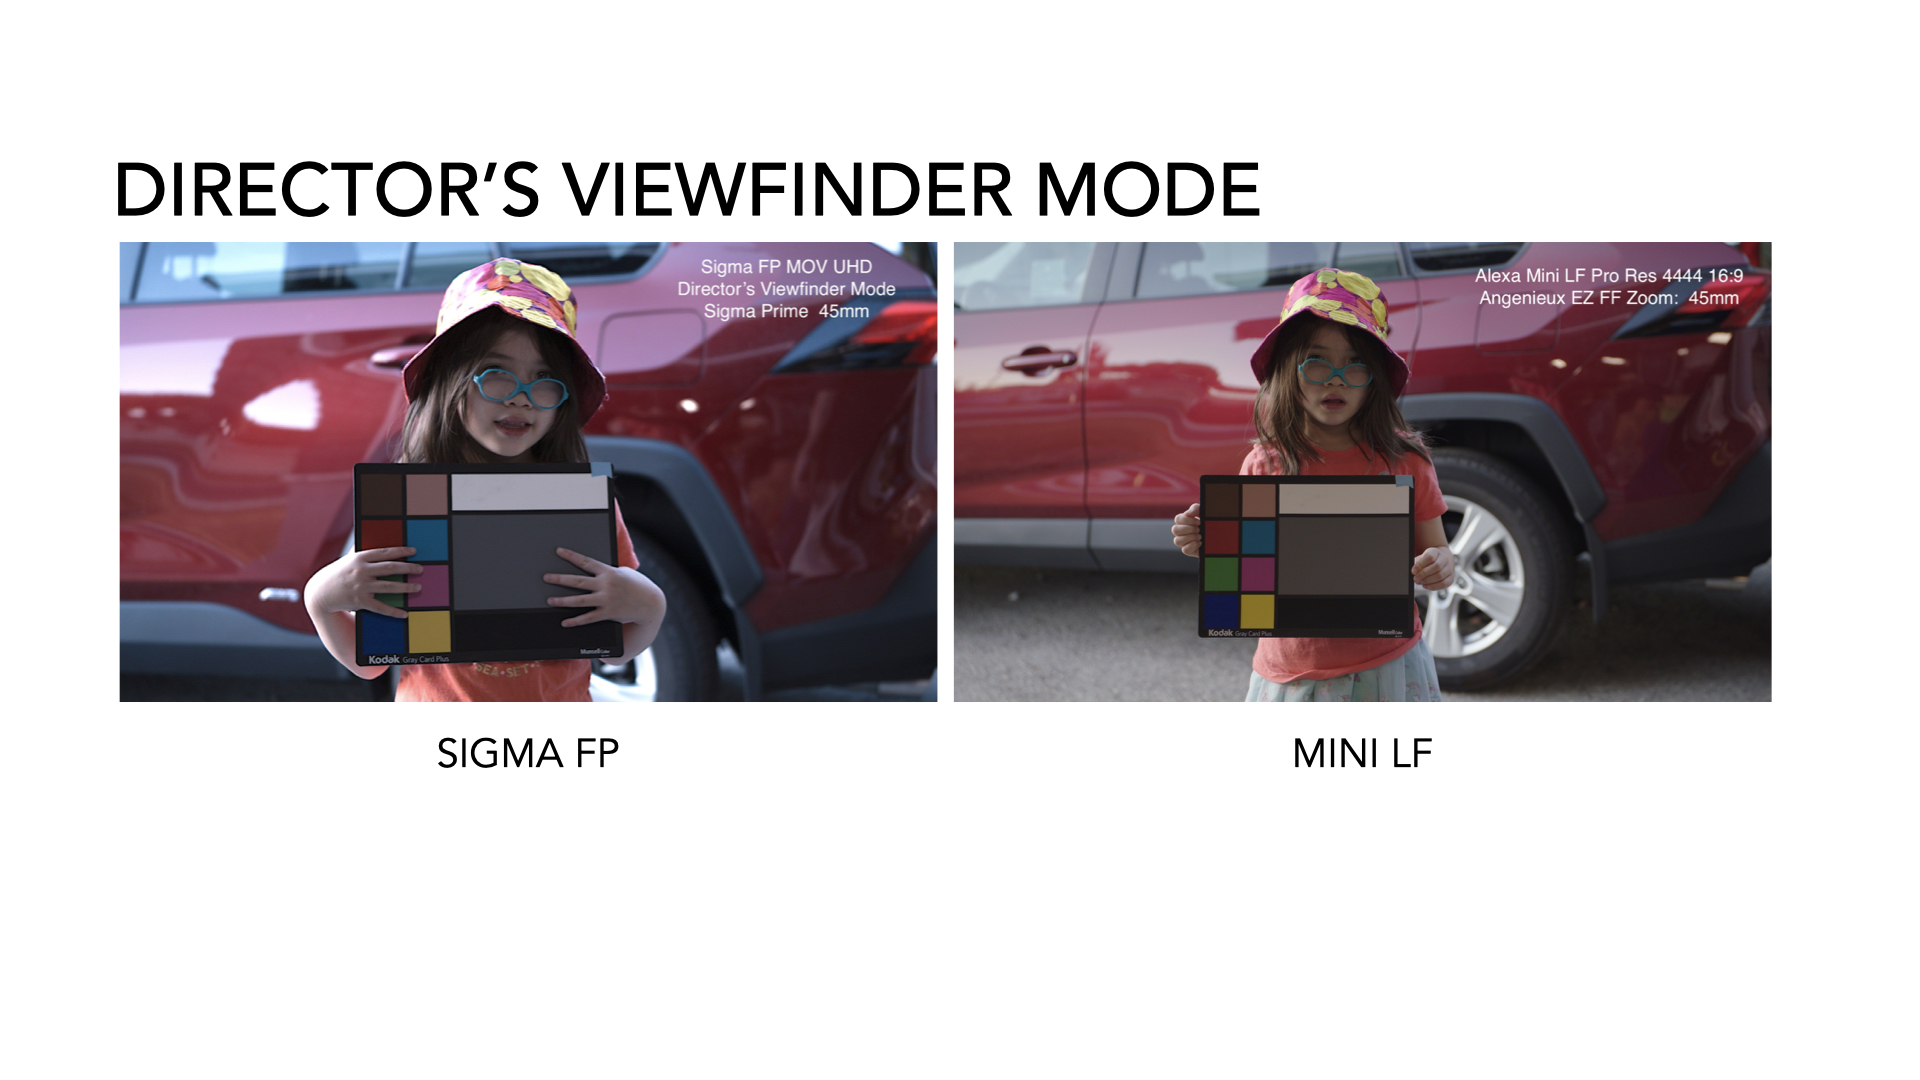
The Director’s Viewfinder
Although the options of Red, Sony and Arri are popular options for camera brands, I believe this camera would benefit from adding more Super35 camera options.
Having a way to see the camera metadata embedded into the still image like other viewfinder apps will give this camera a leg up.
Side-By-Side Comparison With Mini LF
I created a setup between the SIGMA fp and the Alexa Mini LF side by side. The cameras were “eye-balled” to match each other’s focal plane, so my framing match is not scientifically accurate. While the test is not precisely accurate, I did notice that between the viewfinder and the actual camera is not a 1 to 1 comparison. As all director’s viewfinders, they should be used as interpretations of the shot versus actual shot sizes, because even in a real world scenario unless absolute measurements are taken there is not an equal match between the viewfinder image and the actual image coming from the capture medium
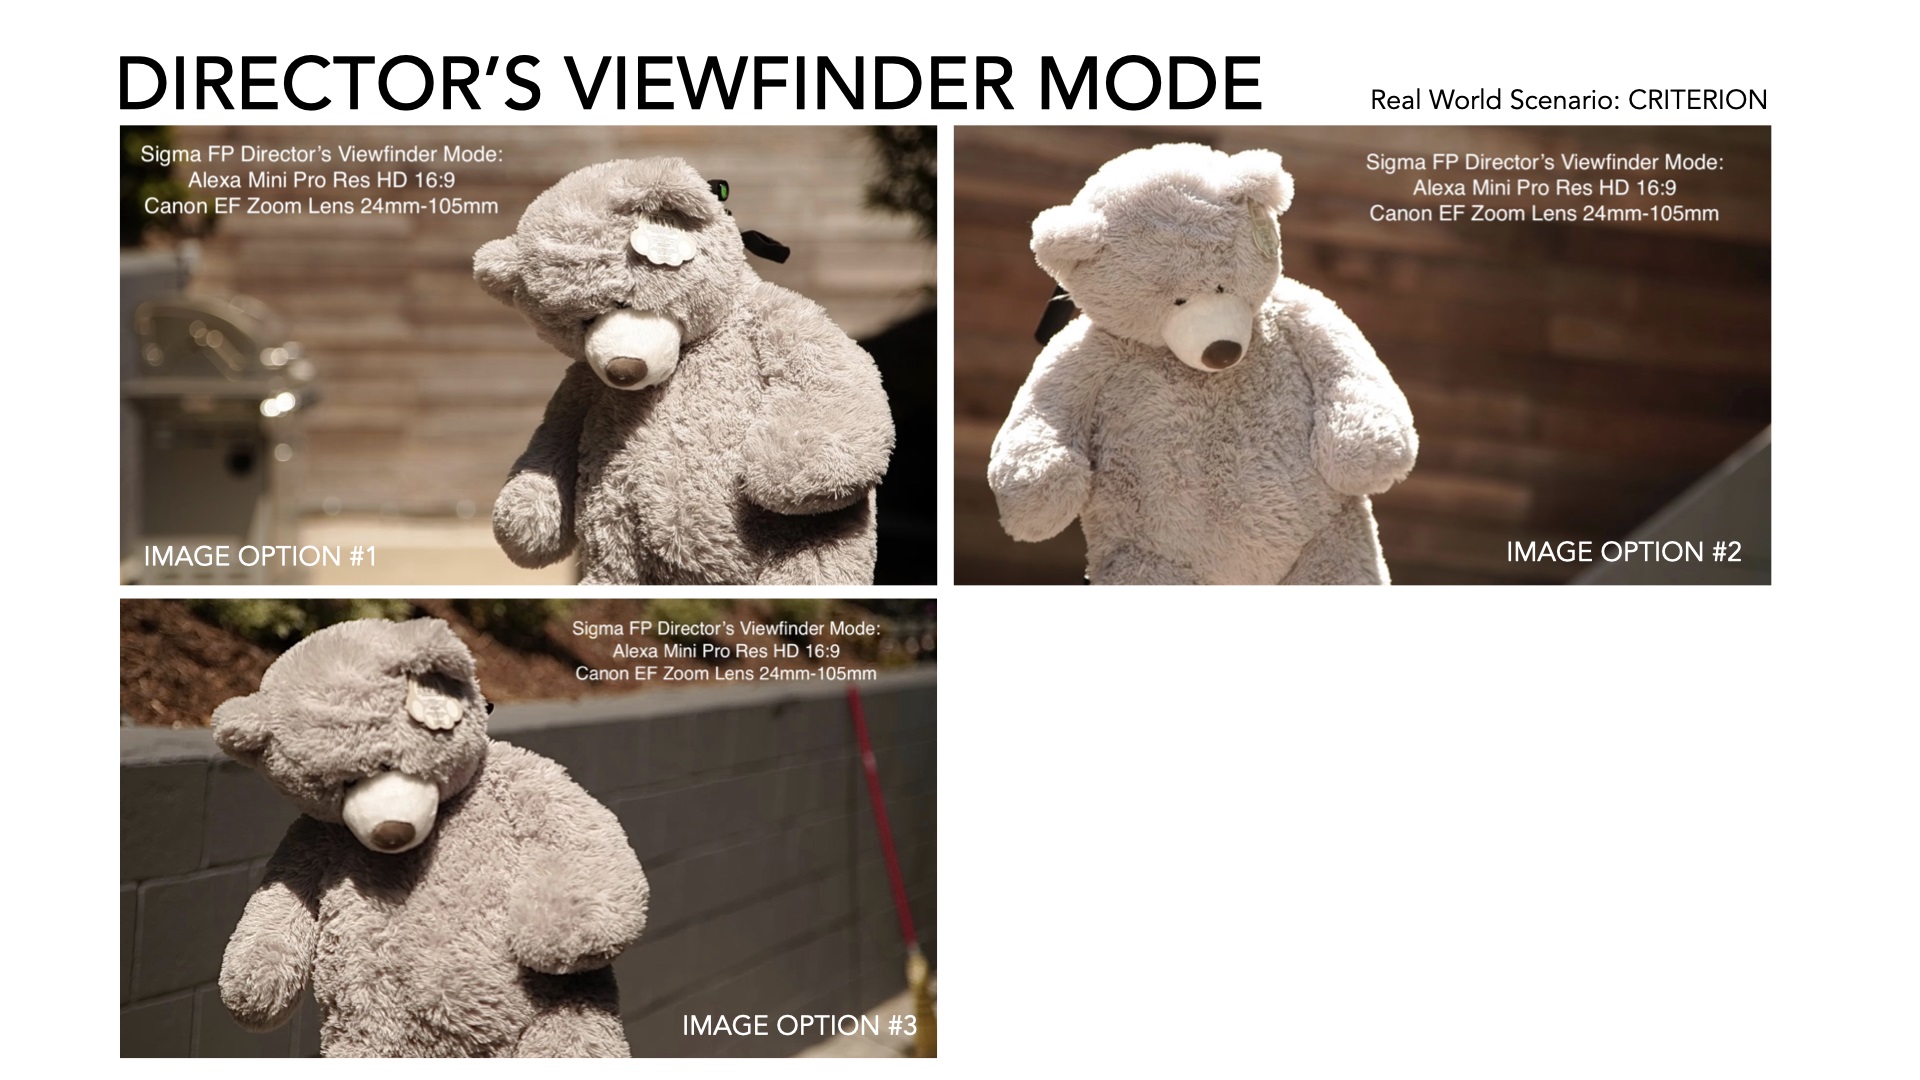
Real World Scenario With Director’s Viewfinder
I had to do a series of interviews for Criterion where myself and a sound person were the only crew members that would be in the field. The director/interviewer, who was on the East Coast would be remotely connected. When I shoot documentaries and have to do formal interview setups, I ask to scout the location to find the best possible placement for the interview. This was crucial to this interview because I had to setup the interview outside and the director would not be able to see the location themselves until the day of shooting.
So I took the SIGMA fp with me to set up a 16:9 framed shot to show the director some of my ideas. The camera that I was going to shoot the interview with was the Blackmagic Ursa Mini Pro 4.6K, which is not an option within the fp, which was disappointing. So I chose a Super 35mm 16:9 sensor camera, Alexa Mini to take images to present to the director. I presented 3 options to the remote director and they chose option #3. We were able to recreate that same image without any changes from our director.
It was a great way to communicate to all parties involved as to what we were going to do. Additionally, I was by myself and had to make sure that the decision were made ahead of time, so I knew exactly what equipment to bring, as well as being able to study the path of the sun.
Conclusions About the SIGMA fp Case Study
The portability and weight of the camera with the camera’s ability to produce high quality images is hard to beat. Being able to sling this camera across my shoulder while shooting, without weighing me down allows me to have a director’s viewfinder and a still camera at my fingertips.
Build Quality
My 6-year old daughter, who has a small interest in photography wanted to take photos with the SIGMA fp. The camera was the perfect size for her hands and she managed to use the camera with surprising ease.
The materials used to make this camera are durable and it feels like a workhorse, which is very important for cinematographers who are put in scenarios where we have to move fast and careful care may not be given to equipment. I did not stress this camera to the limits, but I did work in 90 degree heat and around water with no mishaps.
Battery life for the camera could be better. I took the camera with me on a walk, which lasted about an hour and the battery died. Having to switch batteries every hour can be cumbersome in the field when you have to move quickly.
CinemaDNG
I was not familiar with the CinemaDNG format prior to this. I’ve worked with RAW files before, but being able to deep dive into this format gave me a wonderful understanding and appreciation for the versatility of the CinemaDNG format. To have a RAW file format in such a small camera is one of the main reasons I would buy this camera.
Love how CinemaDNG handles colors and having that 12-bit bit depth gave me so much range. You see a lot of colors in what I shot. I would like to see better CinemaDNG viewing profiles or a profile that emulates or gives the user a much more accurate representation of LOG.
Menus
I find the setup menus a little hard to maneuver through. It took a lot of practice getting used to using the front dial, rear dials and OK buttons to maneuver through the menu setup. It is not intuitive for me to use both the front and rear dials.
With the above said, I loved the QUICK SET MENU and the function to quickly change settings . Making this customizable made the QS function even more appealing.
Dual Base ISO
Having dual ISOs are very helpful. Having the 100 ISO option was very helpful in scenarios that I did not have any ND filters to handle harsh day exteriors. The 3200 ISO is quite impressive. Very clean and allows for minimal lighting scenarios. Even at 102400 ISO the image has a pleasing filmic grain look when brought into color.
I found the peaking sensitivity to be better or should be scaled. With a full frame sensor, focus is critical. The small non-articulating screen made focus quite difficult. Having a more readable peaking sensitivity would be helpful.
Cinemagraphs
I was able to play around with the Cinemagraph option and found this a fun addition to the camera. However it does take someone who has a little more patience with masking than myself, but I did create a couple of Cinemagraphs that I thought were fun to show the family.
Still Functions
The CinemaDNG file format for stills allowed me a full range of options when I brought the photos into Lightroom. Subsequently having the bracketing options for Exposure, White Balance, Fill Light, Focus and Color Mode is a wonderful tool to have in the tool belt.
Webcamera
I used the SIGMA fp as my web camera and I was very happy with the results. The only setback was the auto focus was never able to catch up with me. Therefore, I had to use manual focus, which made my room to move within the frame limiting, because shallow depth of field is key to making a good video conference image.
Final Overall
In conclusion, I would use this camera in both small, low resource productions (documentary, short films, one-person branded content) and high-end productions. The reason for this is because it’s ability to shoot 4K CinemaDNG 12-bit imagery, beautiful still images and its director’s viewfinder option. The 4K CinemaDNG 12 bit file format based on my tests allows me to shoot beautiful imagery with very little resources, which is a plus in today’s shooting scenarios.
Read more about the SIGMA fp: