Shooting panoramas is an absolute blast and with Lightroom’s photo merge tool its easier than ever. You can break free from the confines of the standard format picture and show the entire picture as you see it. In addition to the artistic there also numerous practical applications for shooting panoramas like creating high megapixel images for large prints or for making your 24mm lens shoot even “wider”.
Let’s look at a few situations on why you might want to shoot a pano. Say you want to photograph an entire range of peaks but in order to get all everything in your frame you have to zoom out very wide and in the process the mountains that loom so large in your view become small and lost in the scene. Instead, try zooming into the scene and then shoot a series of overlapped images and finally merge them in the editing software of your liking.
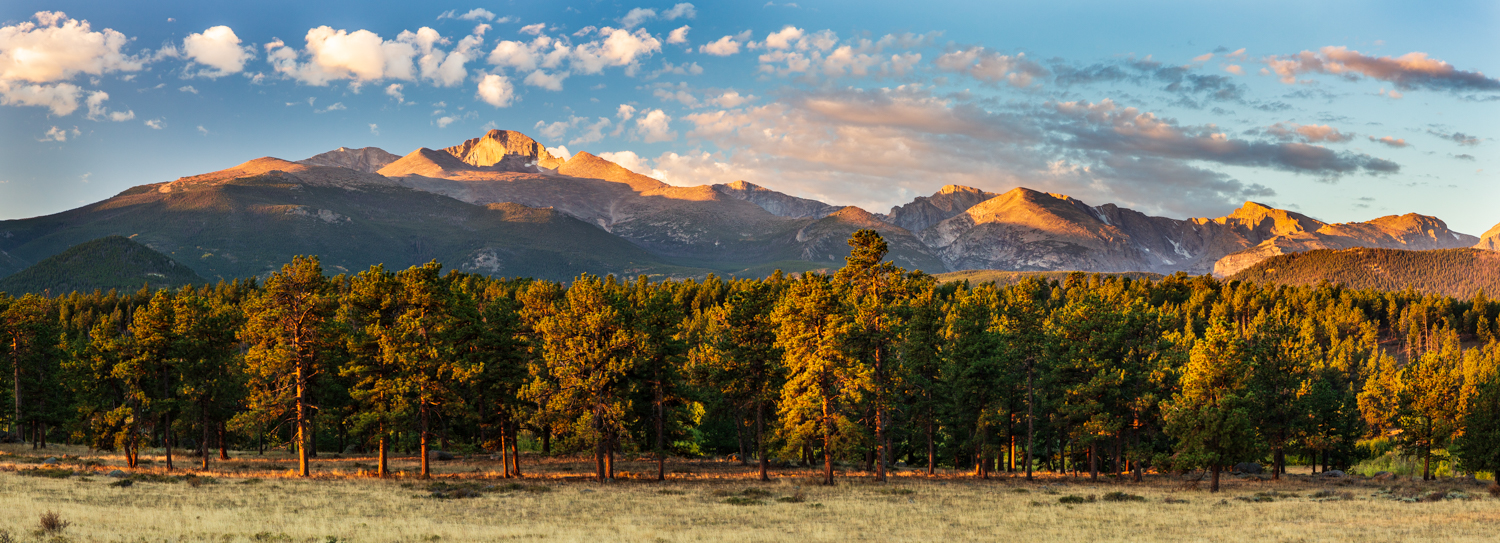

Had I shot the scene wide to get the entire scene (as I did here) I would have had to crop significantly to get the same view. Shot at 37mm.

Zooming to 70mm would not yield the entire scene as I wanted.
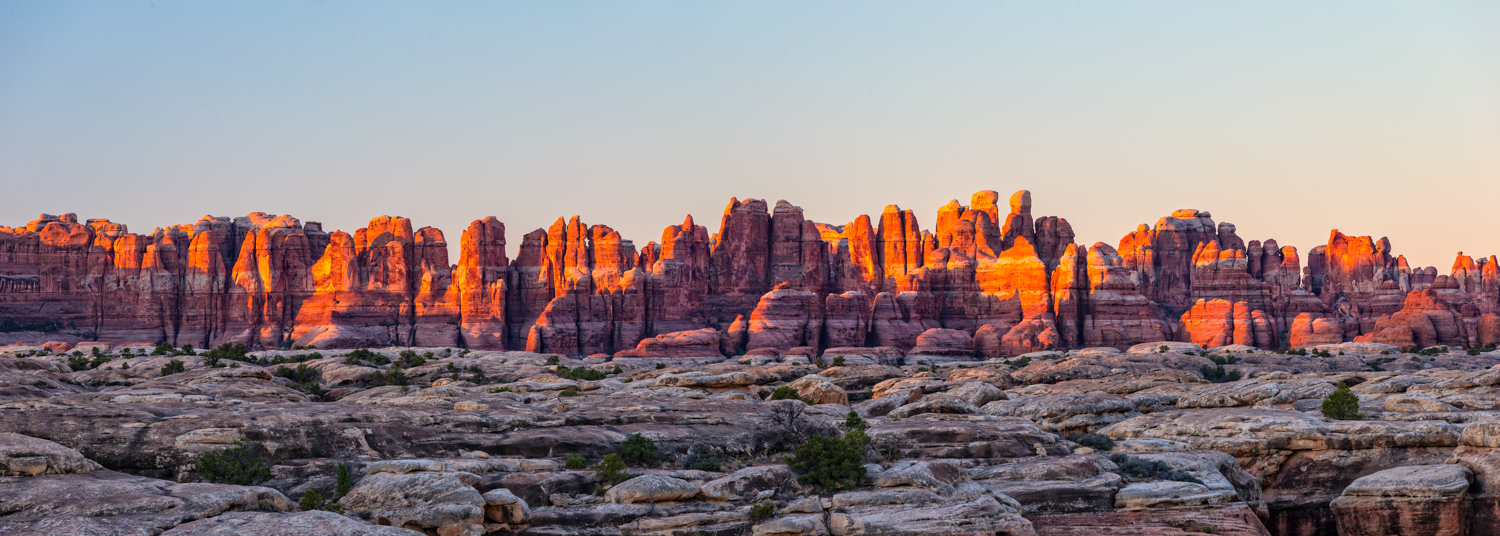
In this instance I really wanted to emphasize the geologic beauty of the Needles at sunrise. The best way to do it would be a stitched pano as it brings the needles up close to the viewer.
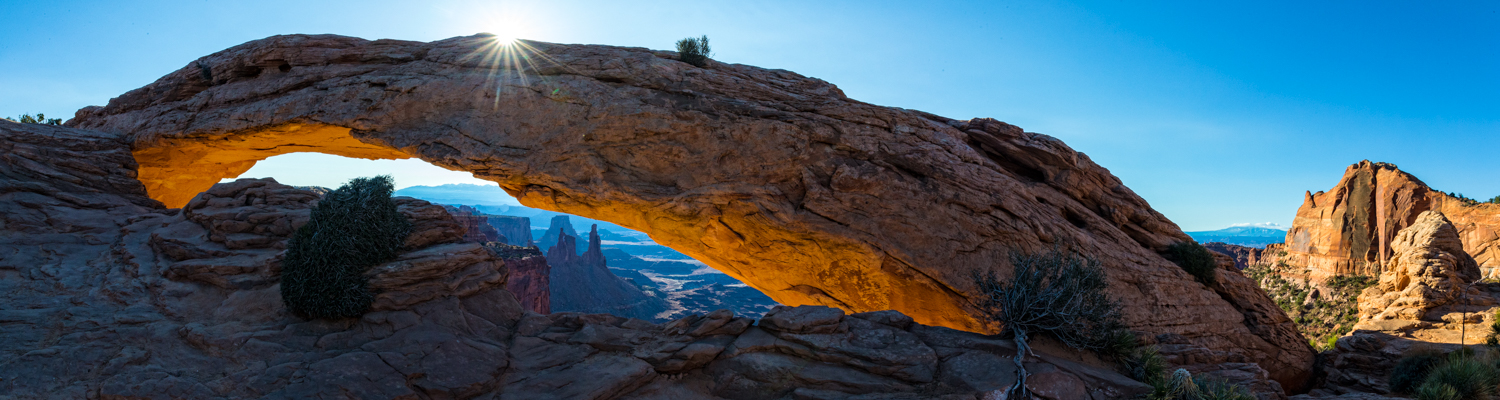
Below is another example where I could not get the entire scene in a single shot. But this time instead of left to right to make a horizontal scene I shot five overlapping images top to bottom so that the image would have the Douglas fir completely within its cavernous red rock setting.

Mesa Arch in Canyonlands is a wildly popular photo location. And for good reason…it’s an amazing sight and its super easy to get to. On this particular morning, I went a tad late after most other photographers had already left. The reason was that I wanted to get a unique shot that included a bit more of the surrounding terrain.
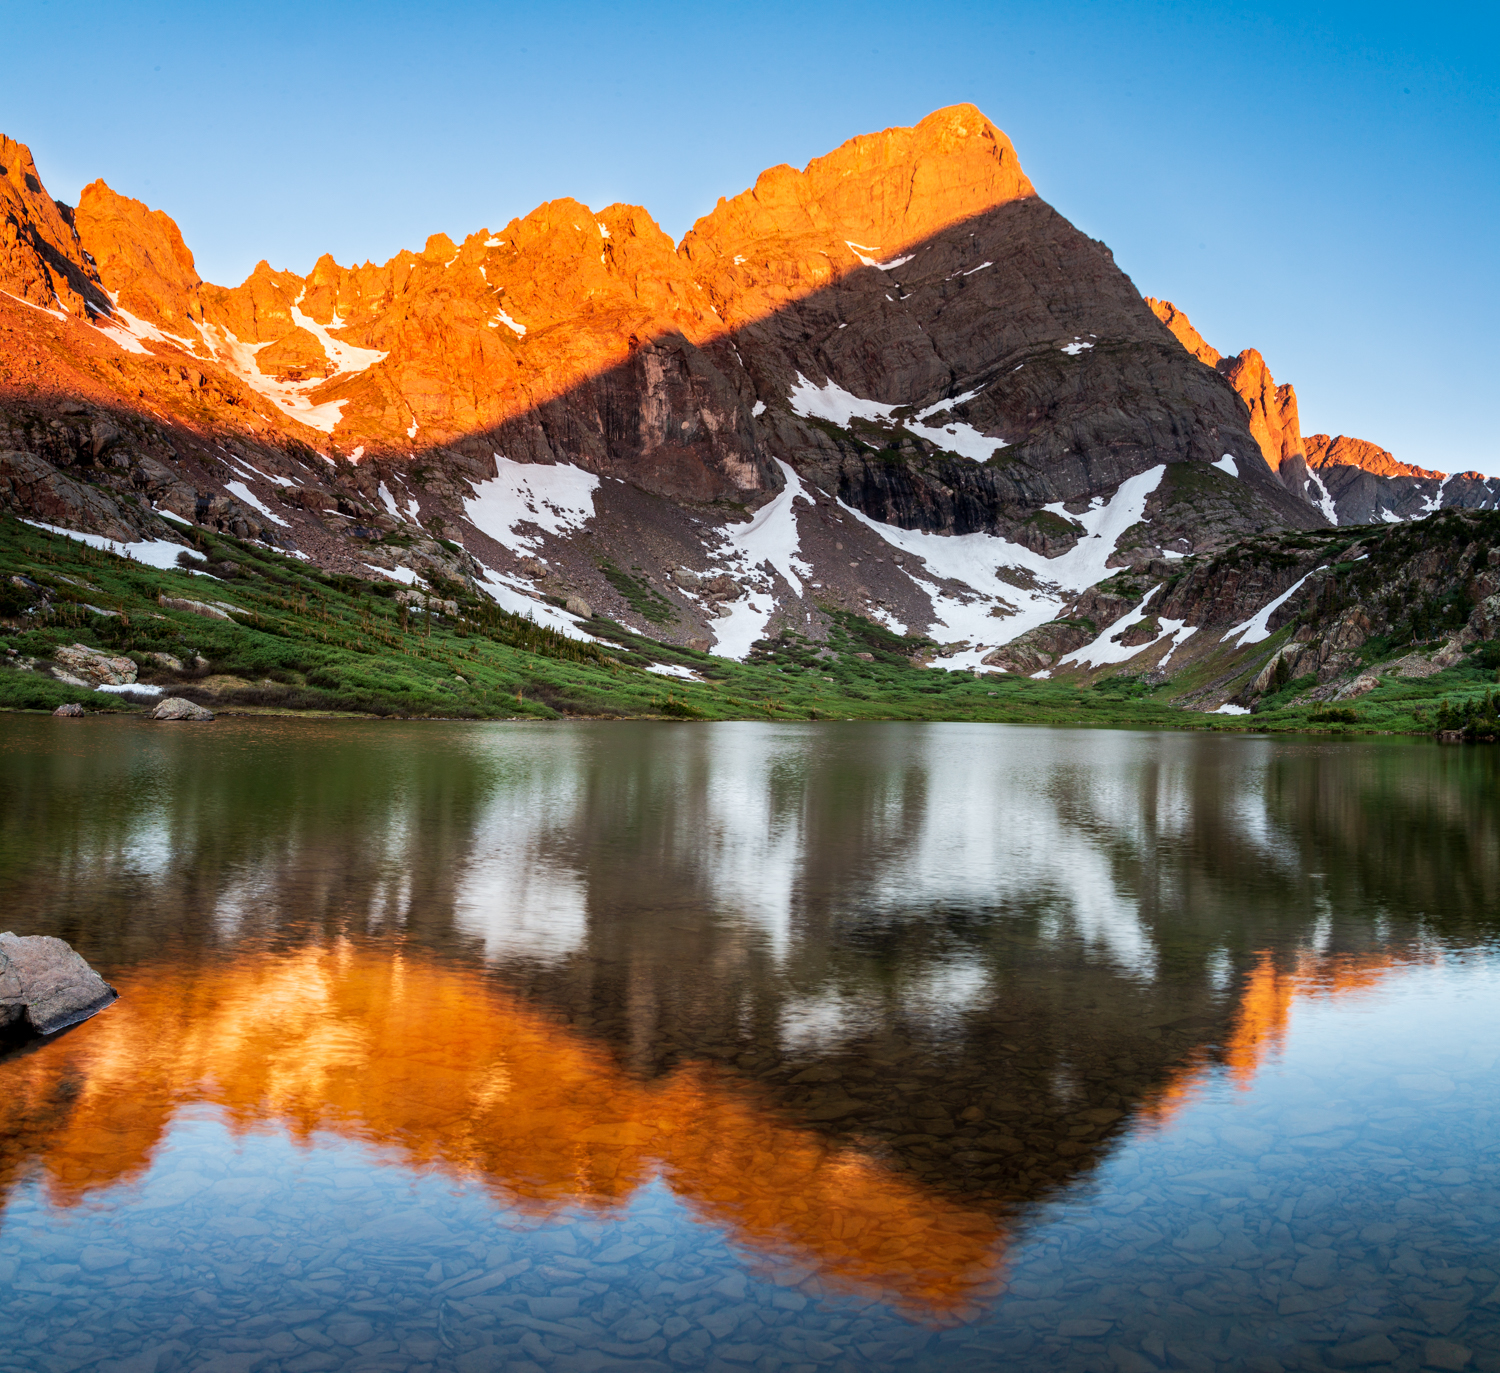
When I’m doing multi-day backcountry adventures I carry much less glass with me than I would during a normal shoot day. Sometimes my 24mm is not quite wide enough. So, what’s a focal length challenged photographer to do? Simple, I mount my camera vertically and then shoot my pano. This is a great way to cheat into a wider angle of view. For example. In the image below, I was not able to fit both the top of the Creston Needle and its reflection at 24mm. but by shooting vertically and then stitching the images together I was able to capture all the critical elements.
How to Capture images for Panoramas In the Field
Ok, so are you hooked? Do you want to give it a try? Well here are some tips to get you started. You could go out and spend money on panning bases, nodal plates and leveling dishes and other pano paraphernalia but for now, we are going to keep it simple with the gear. Your tripod and ballhead will do just fine.
- Shoot in Manual. This is important as you will need to have all your images shot at the same exposure settings.
- Level your tripod. Many tripods have level bubbles on them already so take advantage. If yours doesn’t you can also use the leveling function built into your camera.
- Set focus. Once you decide where you want to focus and are locked in, switch over to manual so that your focus does not change.
- When rotating your camera through the pano be sure to overlap your images about thirty percent.
- Horizontal or vertical shooting? Either way is fine but the yield different results. Try both ways and see the difference.
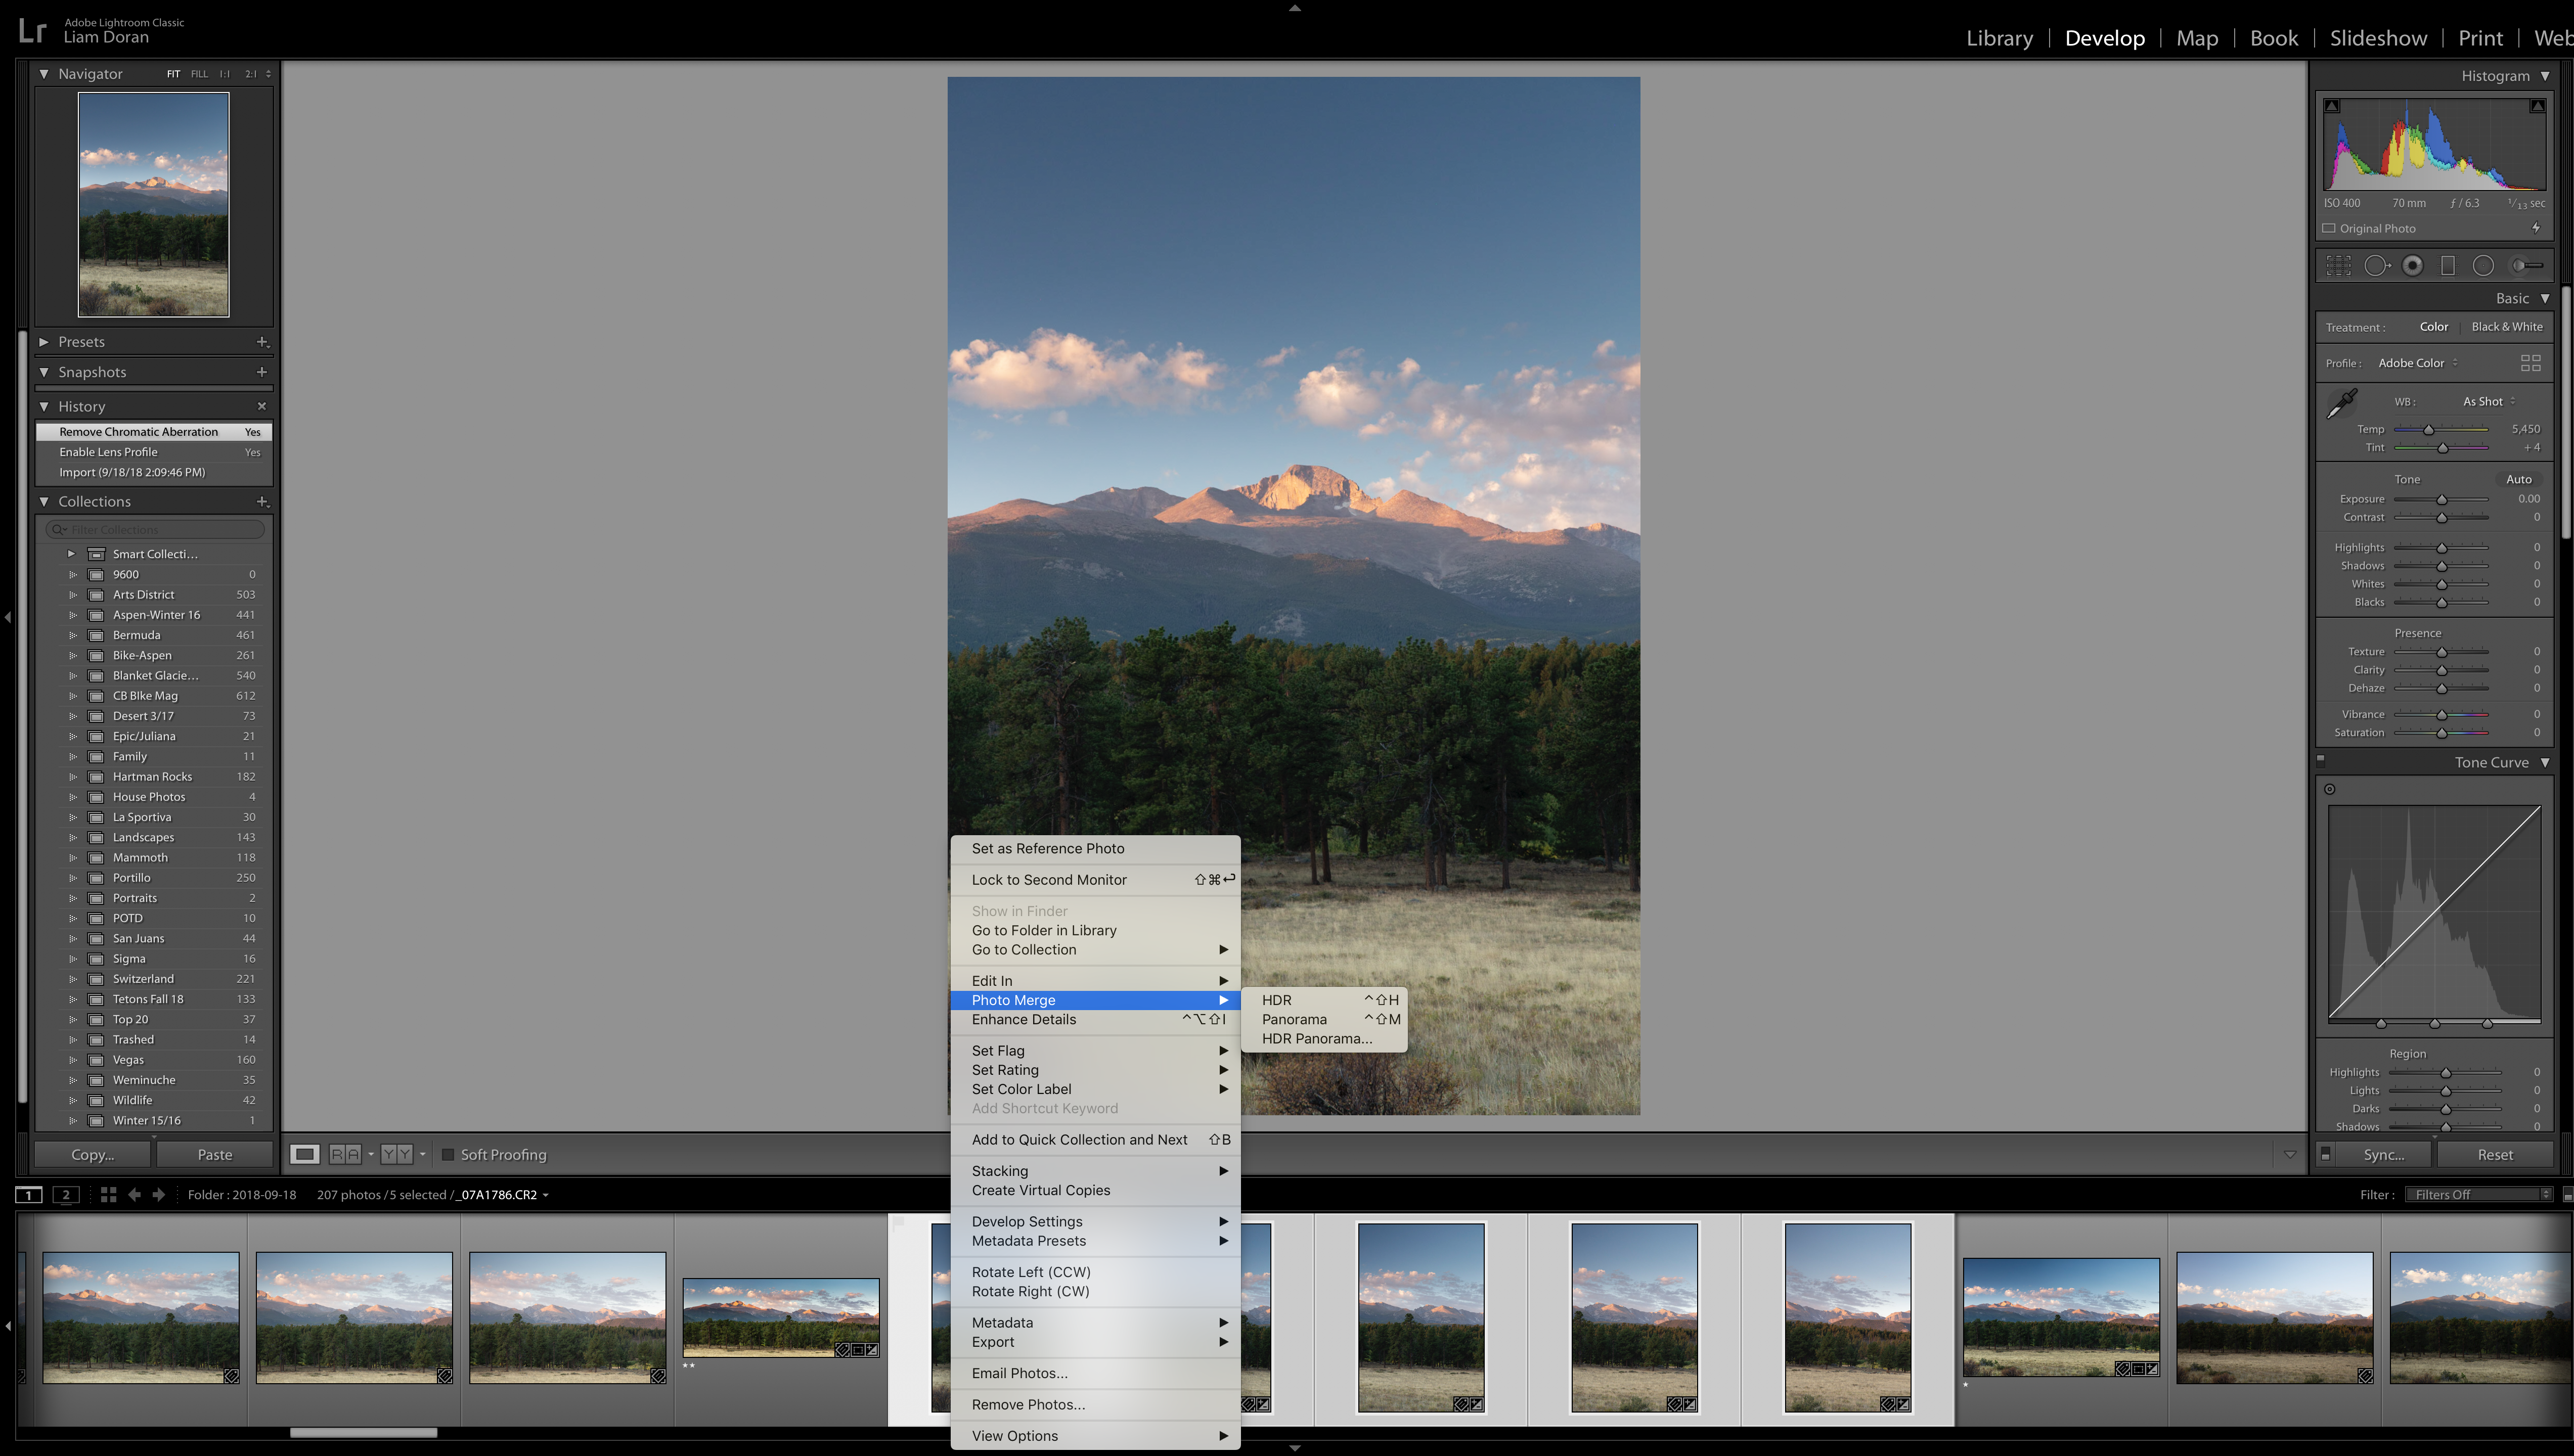
How to merge images to Panoramas in Adobe Lightroom
Once you get back to your computer it’s pretty easy to put the images together. Upload and import your photos into LR like you always do. Then go to your filmstrip in the Develop module and select the images you want to use. Go into the Lens Correction box and click the Enable Profile Corrections box. Then sync all the images. Once done, control click the selected images and then navigate to Photo Merge and click Panorama.
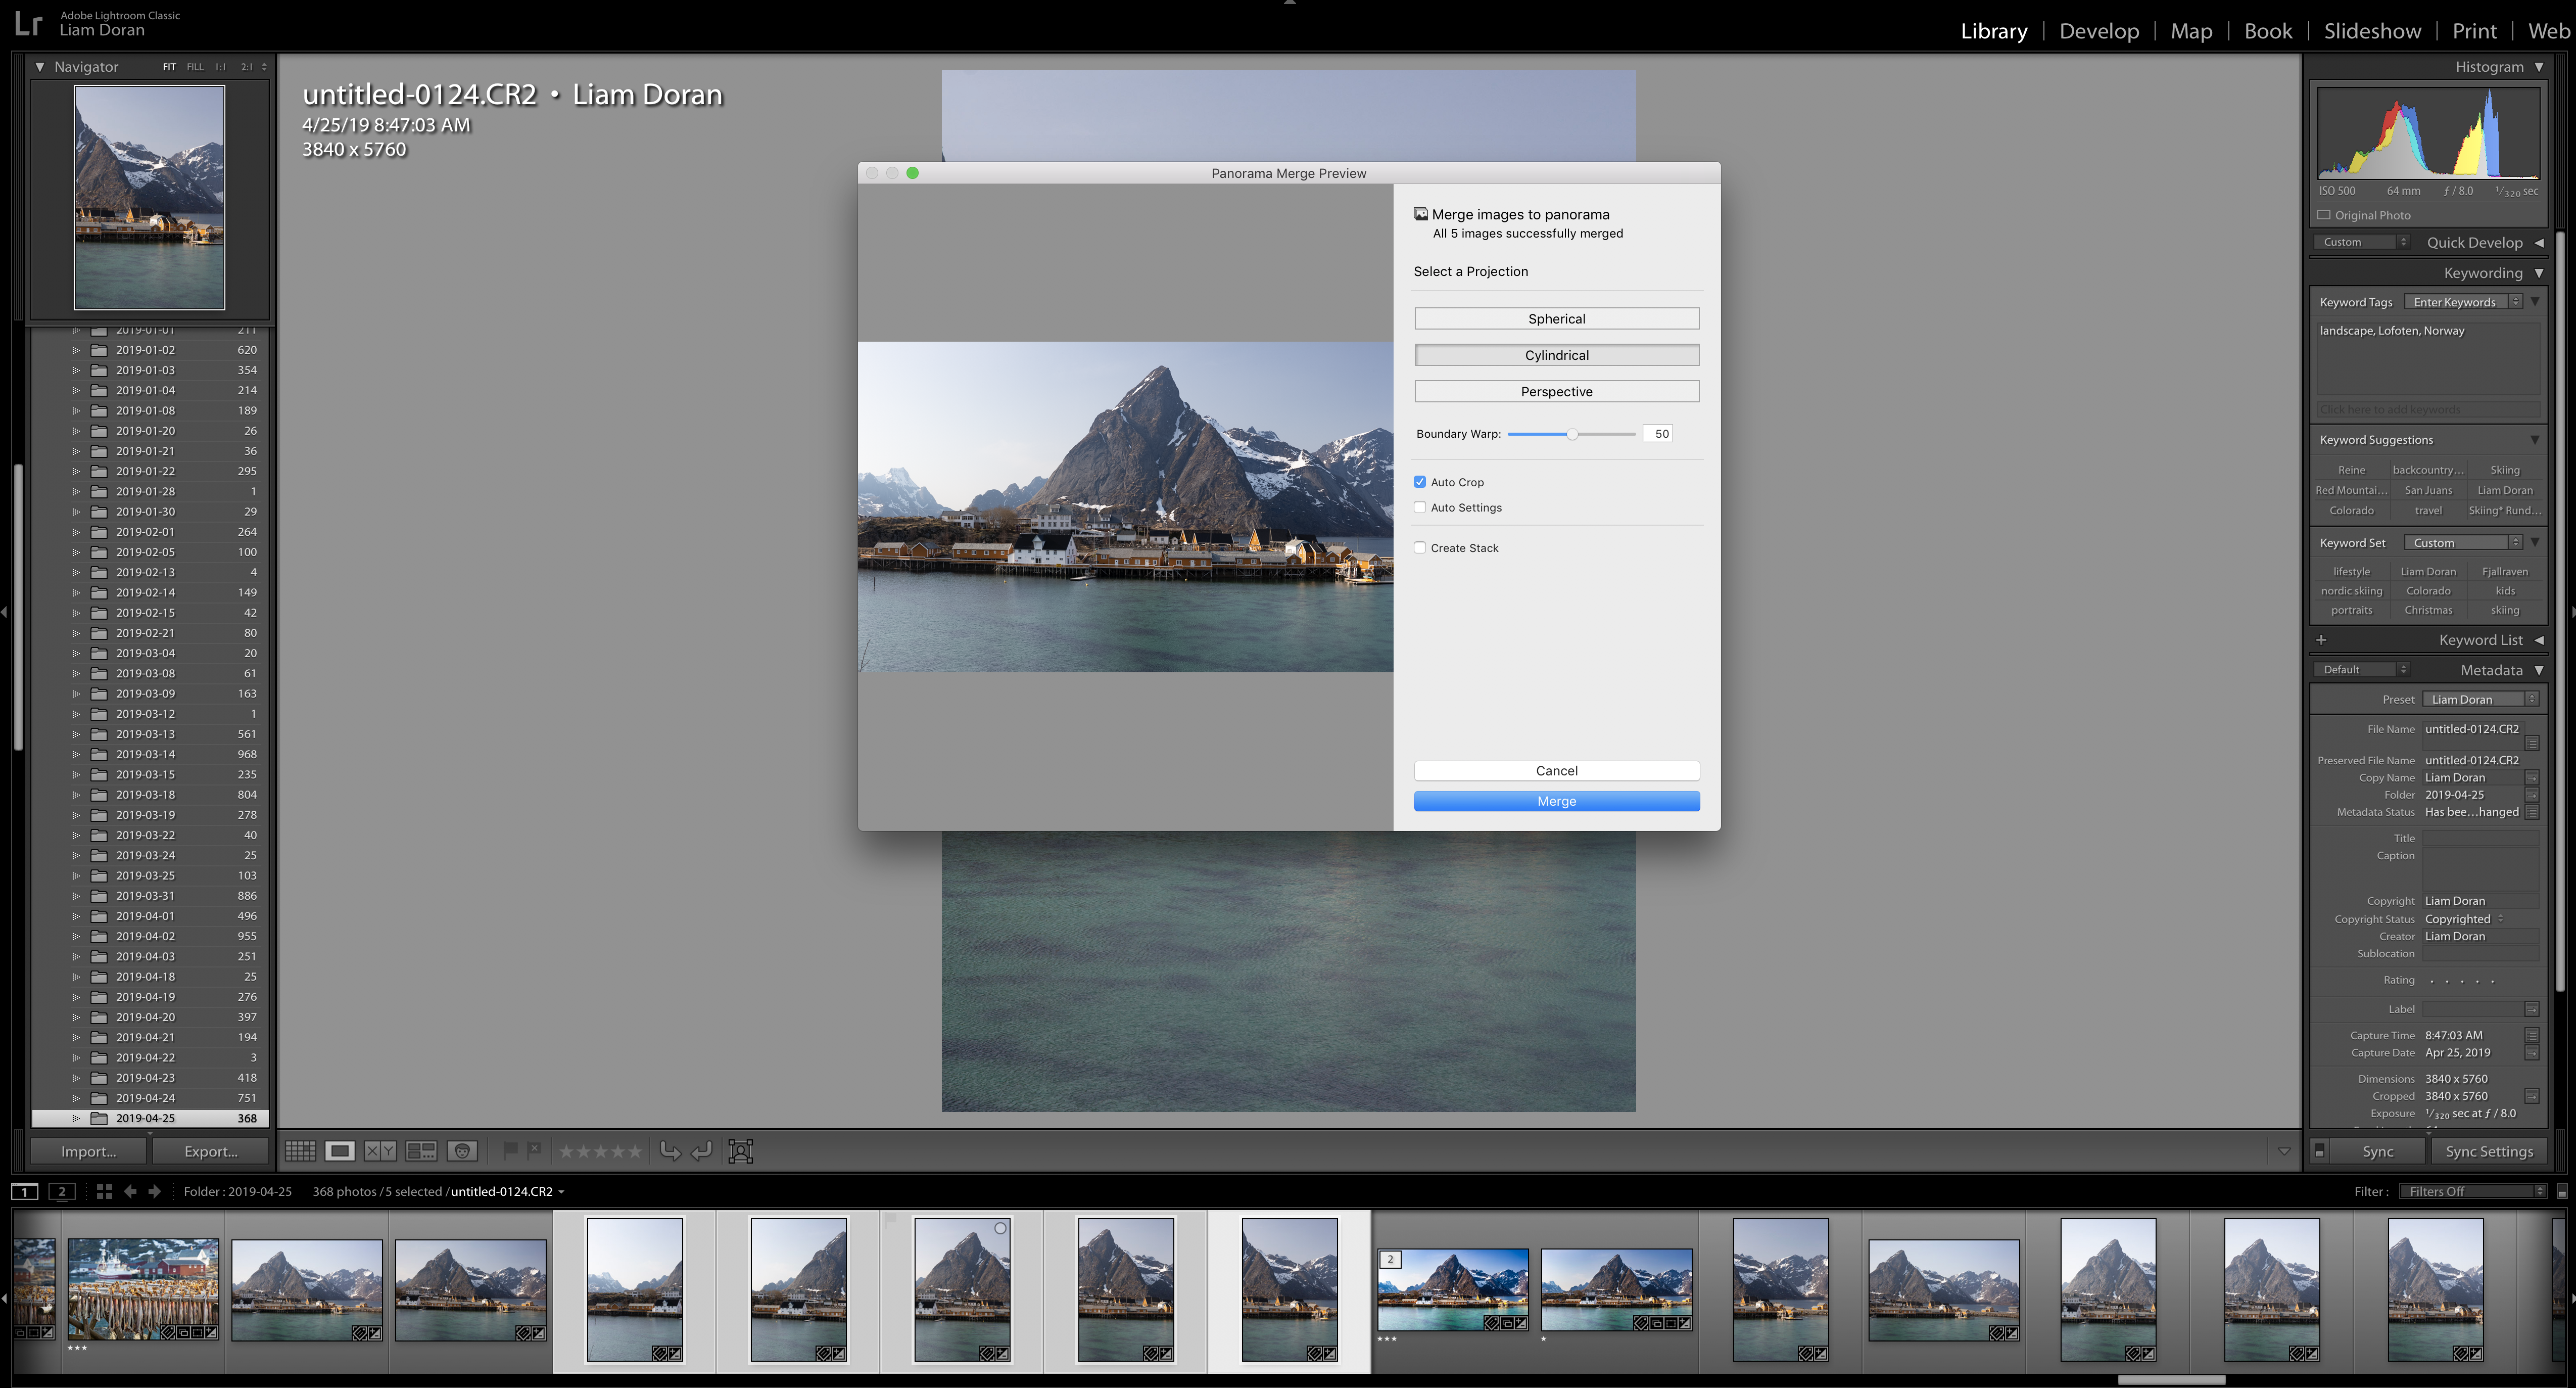
Next you will be presented with a few options for how to merge your images. All options work well for certain circumstances. Here’s how Adobe describes it.
Spherical: Aligns and transforms the images as if they were mapped to the inside of a sphere. This projection mode is great for really wide or multirow panoramas / HDR panorama.
Perspective: Projects the panorama / HDR panorama as if it were mapped to a flat surface. Since this mode keeps straight lines straight, it is great for architectural photography. Really wide panoramas may not work well with this mode due to excessive distortion near the edges of the resulting panorama.
Cylindrical: Projects the panorama / HDR panorama as if it were mapped to the inside of a cylinder. This projection mode works really well for wide panoramas, but it also keeps vertical lines straight.
All of these projection modes work equally well for both horizontal and vertical panoramas / HDR panoramas.
A few other tips:
Be sure not to do your global and/or local editing and adjustments until after the images are merged. Once the new .pano file is made you can begin your editing.
Turn off you Optical Stabilizer when the camera is tripod mounted.
You will probably want to remove your polarizing filter while shooting panos. Otherwise you will get some strange results in the sky.
A few more Panos and the stories behind them
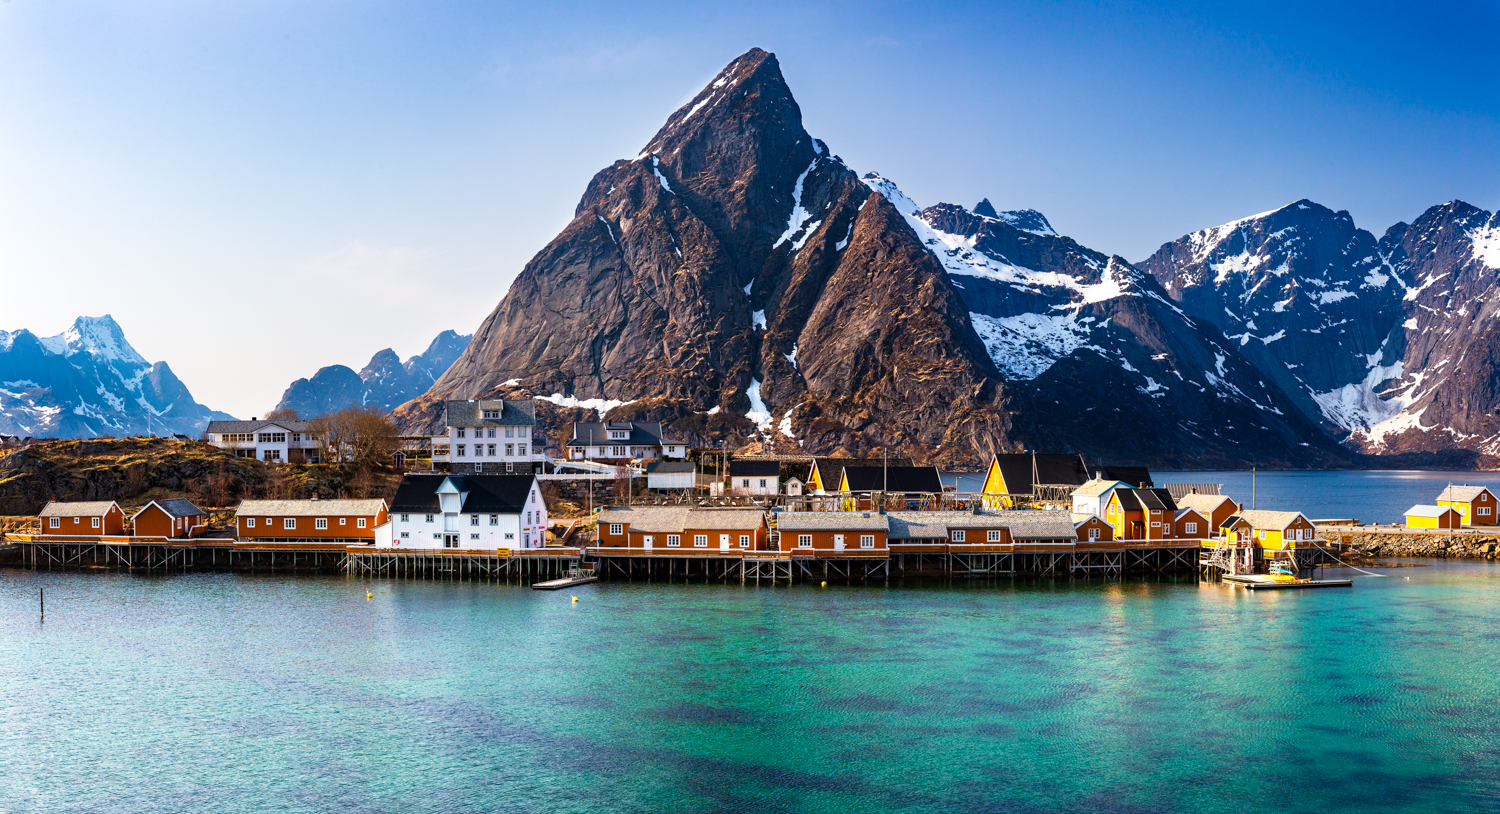
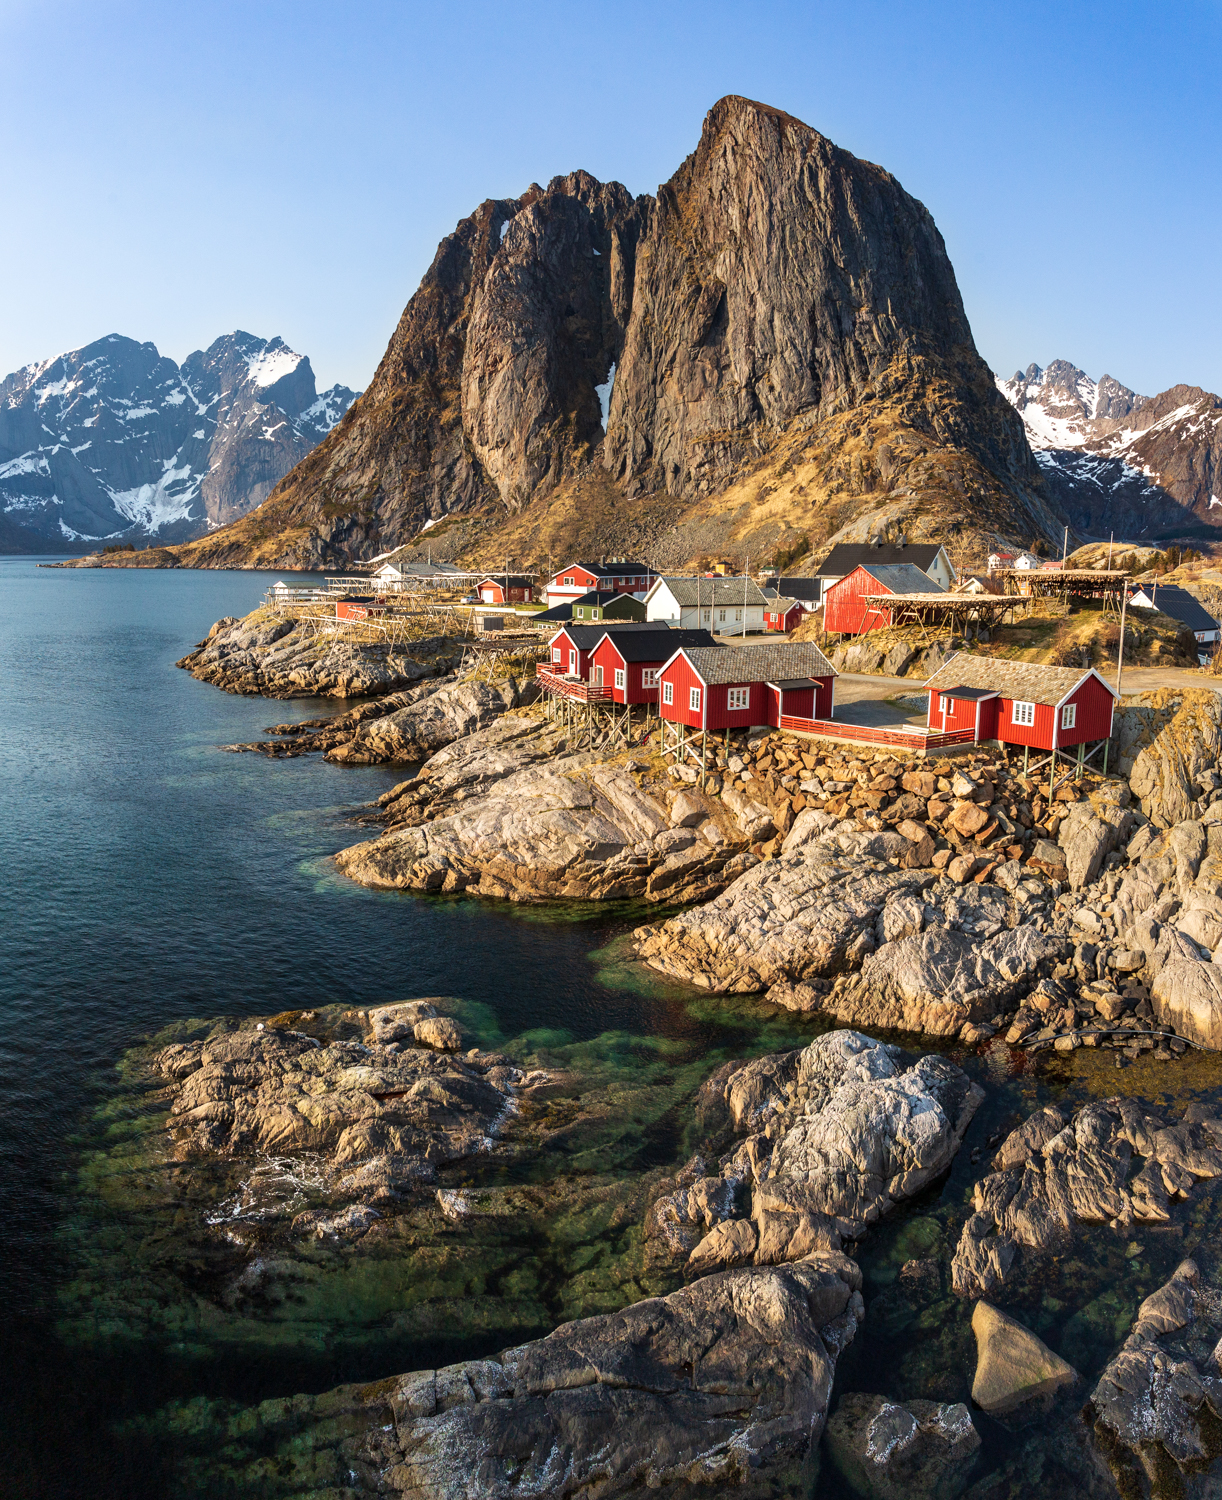
This image is from a recent trip to Norway. I really wanted to be sure to capture the width of the docks and all the buildings but of course I also need to capture the top of the peak. Again, I could have shot horizontally at a wider focal length and then cropped the image as desired, but that would have let me with a much lower resolution image. This five shot pano is 10,255 X 5567
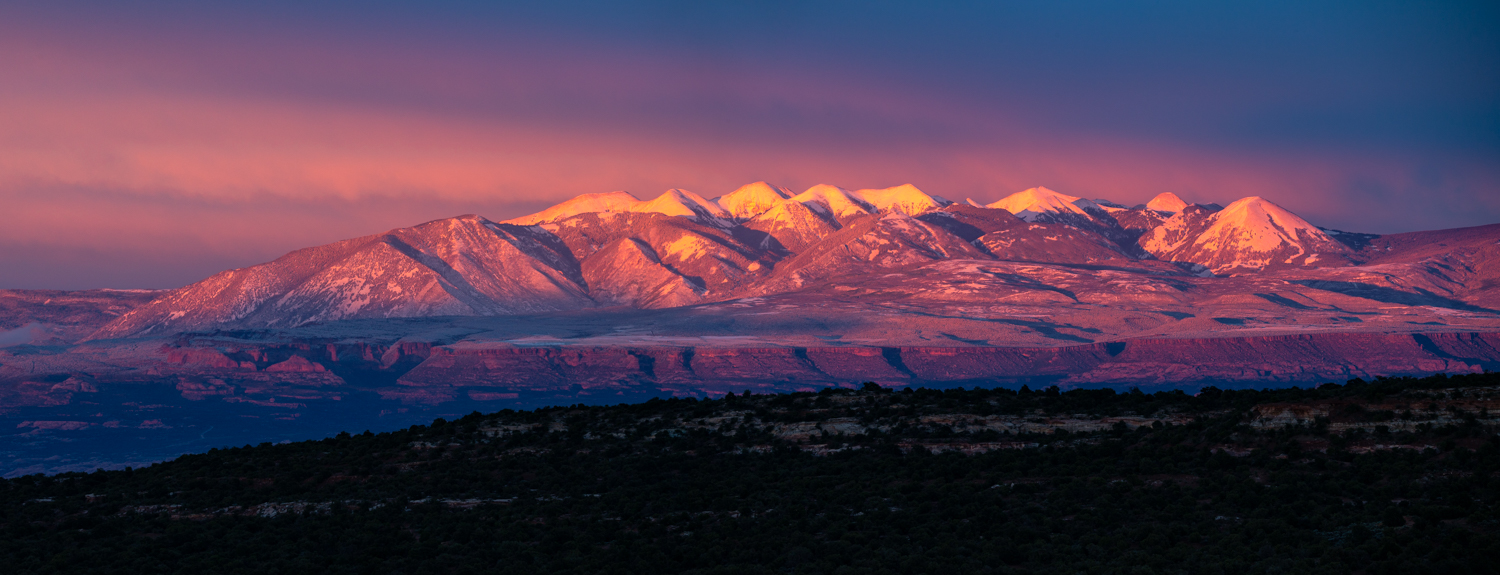
One of my favorite panos came on a stormy spring day in Canyonlands NP. It had been a snowy, rainy, foggy day in the park but I set up my camp that night in a spot that would have a great view of the La Sal mountains just in case the storm broke. These peaks face west so I knew there was potential. Sure enough the storm broke. I ran to the top of a nearby hill with my Sigma 100-400 attached to my Canon 1DX. I had shot a few tight images of the desert peaks but I wanted to capture the entire range. Shooting wide was giving me too much dark sky so I zoomed in to about 200mm and shot three overlapping images to make this shot.
Here is an instance where I should have shot a pano. There was too much sky on top and grass on the bottom of this image, so I cropped it to what I believe is a much stronger composition. But the cost is resolution which goes down to 2,961 on the short side. Had I shot this with my camera vertically oriented and stitched together a few shots I would have had the same composition but with far greater resolution.

In order to get this angle of view I shot four images in vertical orientation and then stitched them in LR. This enable me to capture the top of the mountain and also the rocks in the ocean.
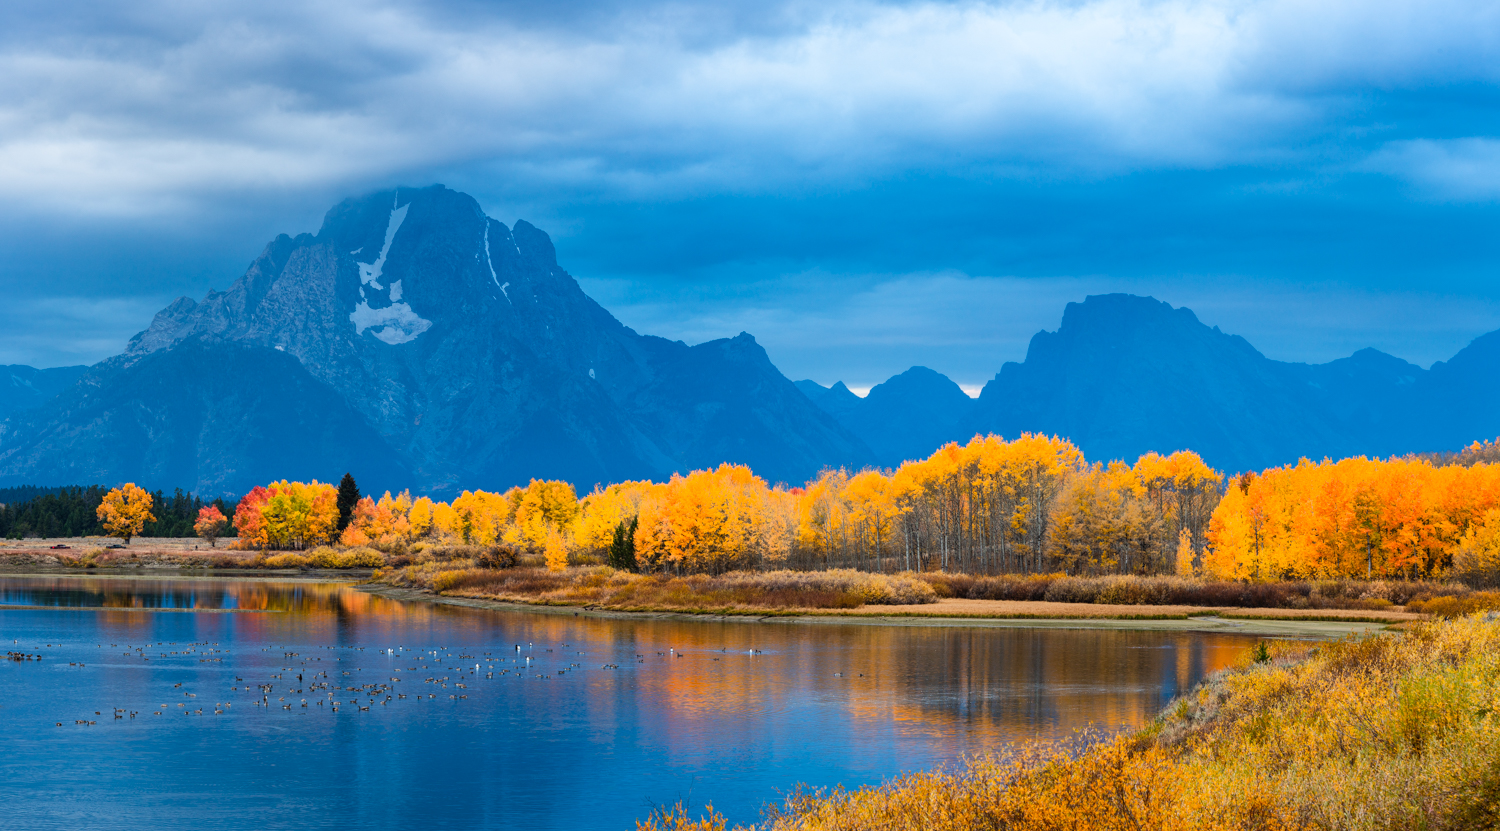
This is a classic view from GTNP. This was taken early in the morning with a thick dark cloud hanging over Mt. Moran. Of critical importance to this shot was getting all the aspen and cottonwood trees which were at peak color into the frame.
Hopefully this gets you looking into shooting some panoramas of your own. I know I’m looking forward to shooting some more this summer and fall. And seeing as I’m shooting more and more panos I might even look into getting a new pano slider and base setup.

