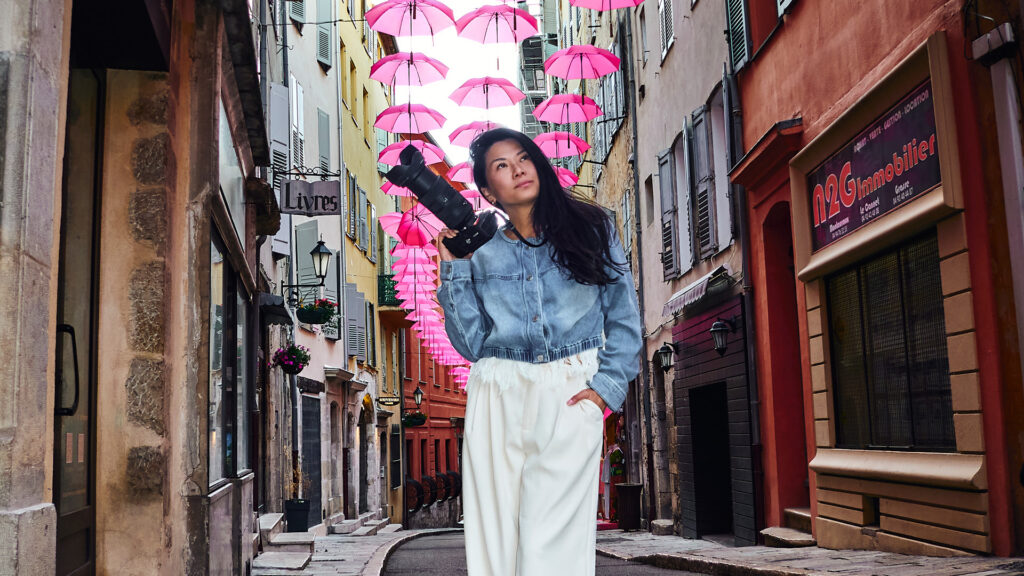
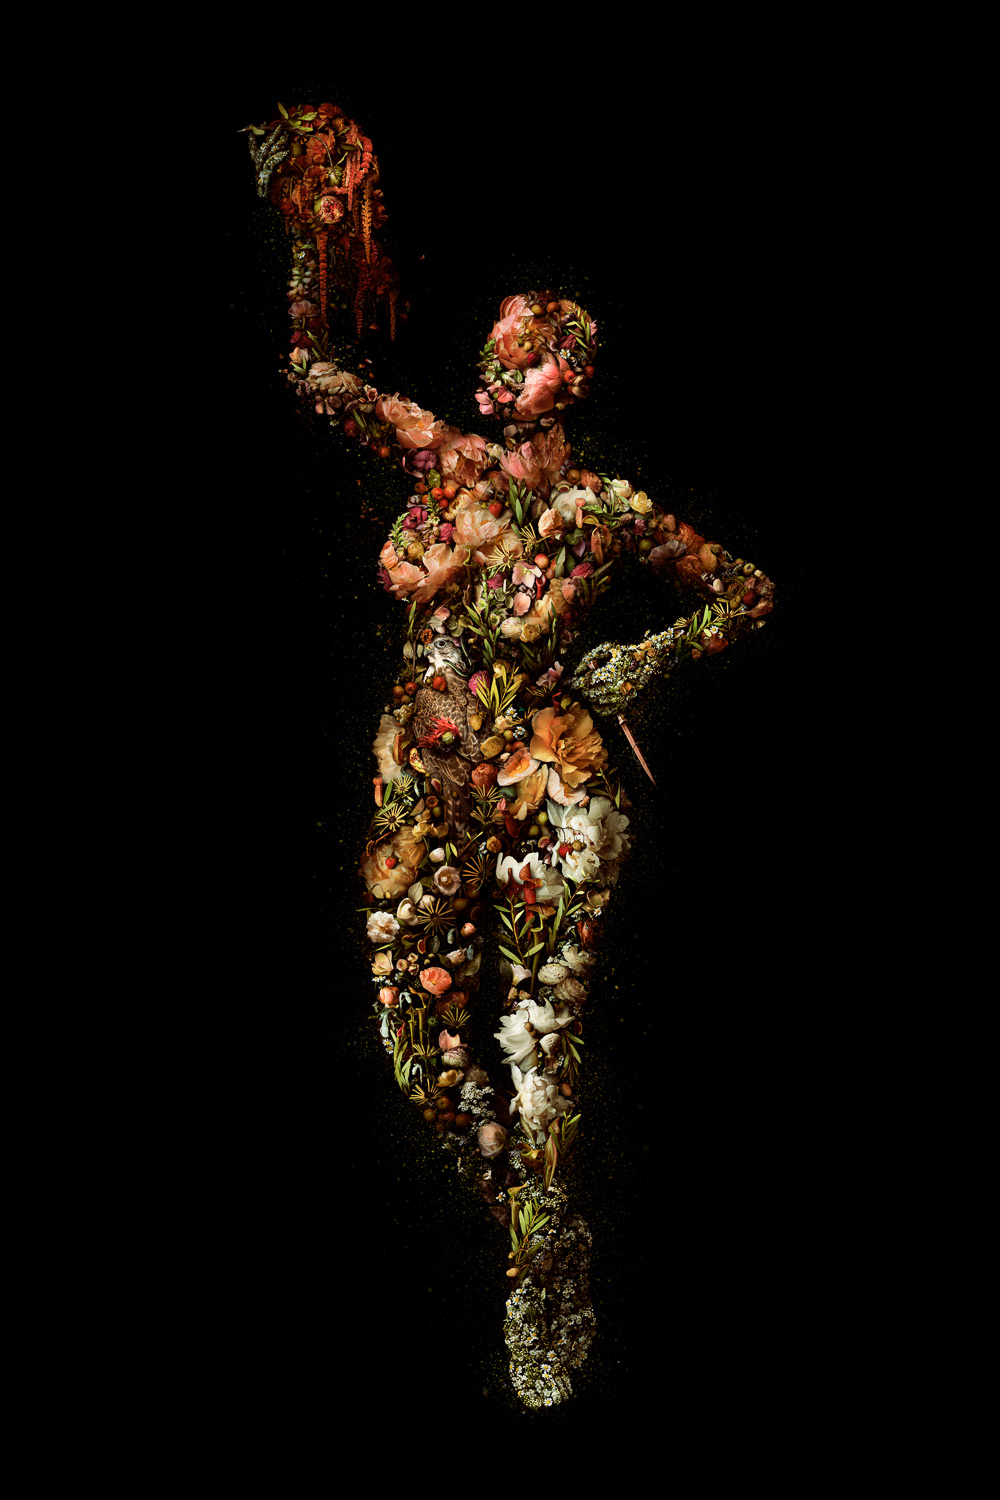
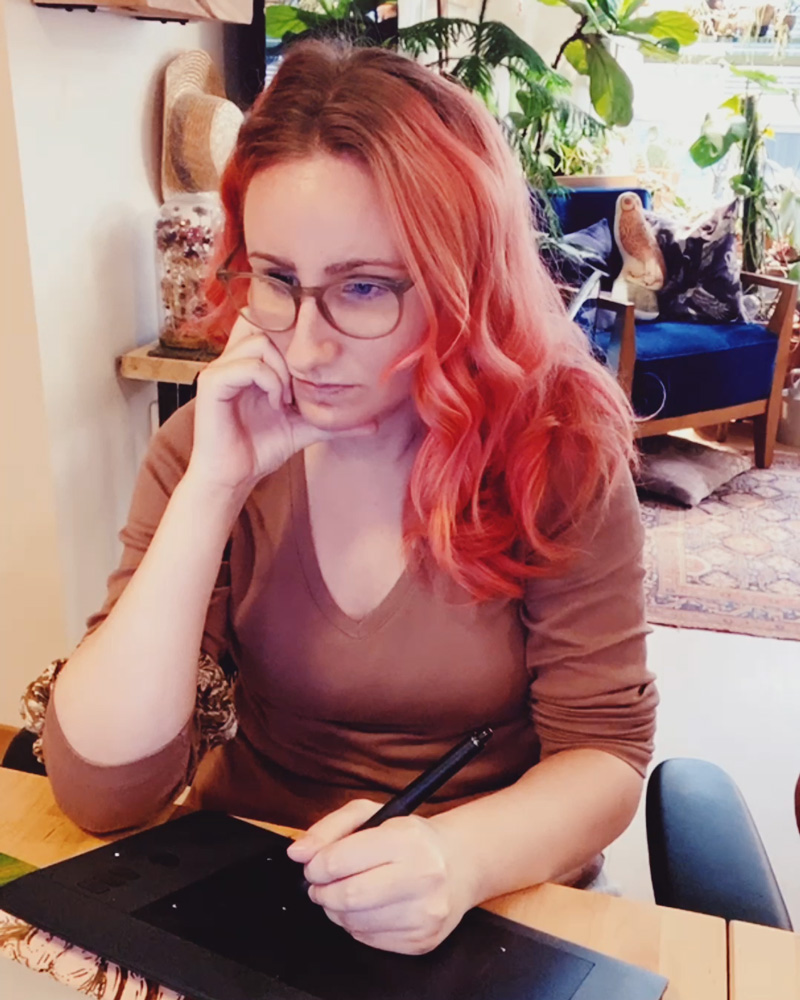
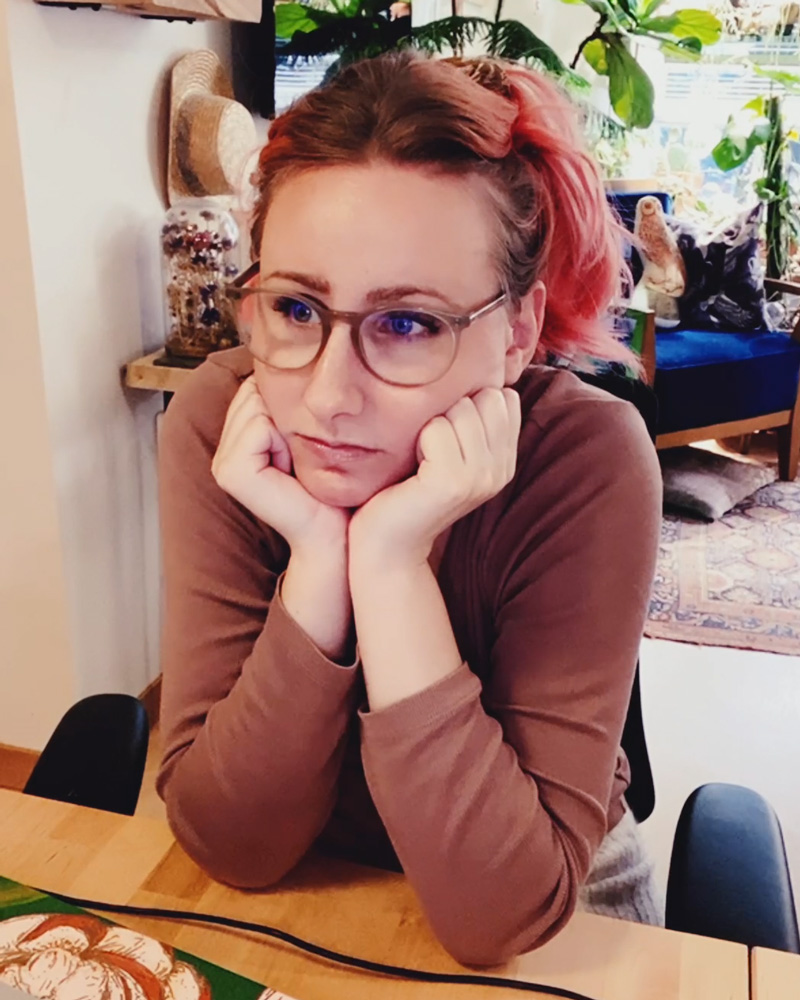
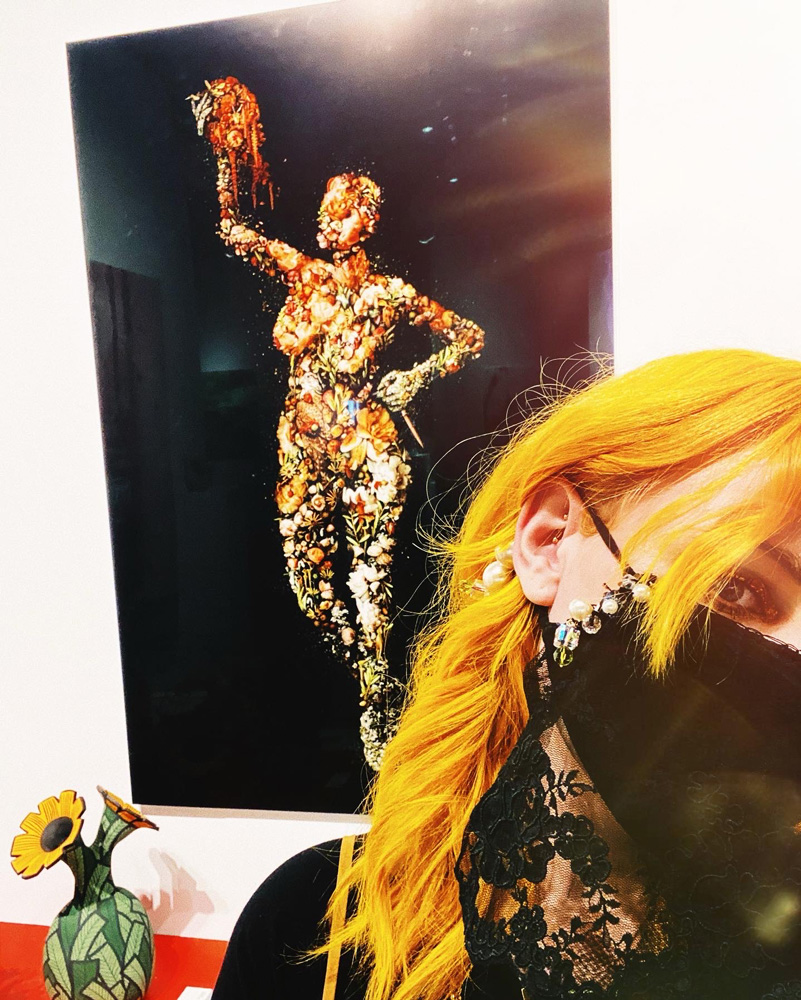
My name is Meggan Joy, and I live and work in Seattle as a professional artist, primarily making digital collages with every piece of flora, fungi, and fauna I can get in front of my camera.
The medium of digital collage is relatively new as far as the history of art is concerned. It mixes the analog photography and collage techniques we know and love with its digital successors’ approach and unrestricted means. Same idea, just digital. For me, that means I get to spend all day knee-deep in macro photography, focusing (literally) on the tiny details we can often overlook, intending to bring all those small photographs together to make something big.
How a digital collage begins
An idea can sometimes start three or four years before completion; a quick sketch of the pose, a few words describing the context for a title or a hint of a concept that I believe lines up with the medium.
That’s all it takes to get me excited; from there, I dive into my research to see what I can find. Is there a famous historical portrait people associate with this theme? Is there an old wives’ tale about a particular herb that could be tucked into the piece? Is there a seed-dispersal mechanism that is thematic to add?
Ultimately, my art practice is rooted in cultivation, beginning with the new growing season. Each year, I select plants with particular characteristics, from the fruit they produce to the shape of their flowers to their qualities to attract certain insects and birds, etc. All this is done with my artwork in mind as I tend to my garden. (I’m lucky enough to steward a community garden plot here in Seattle.) For any subjects I can’t cultivate in my garden, I either take a hike with my portable studio on my back or purchase from my local co-op flower market. Then, I mash my daydreams and realistic goals together, and photograph all these beautiful tiny things in glorious detail.


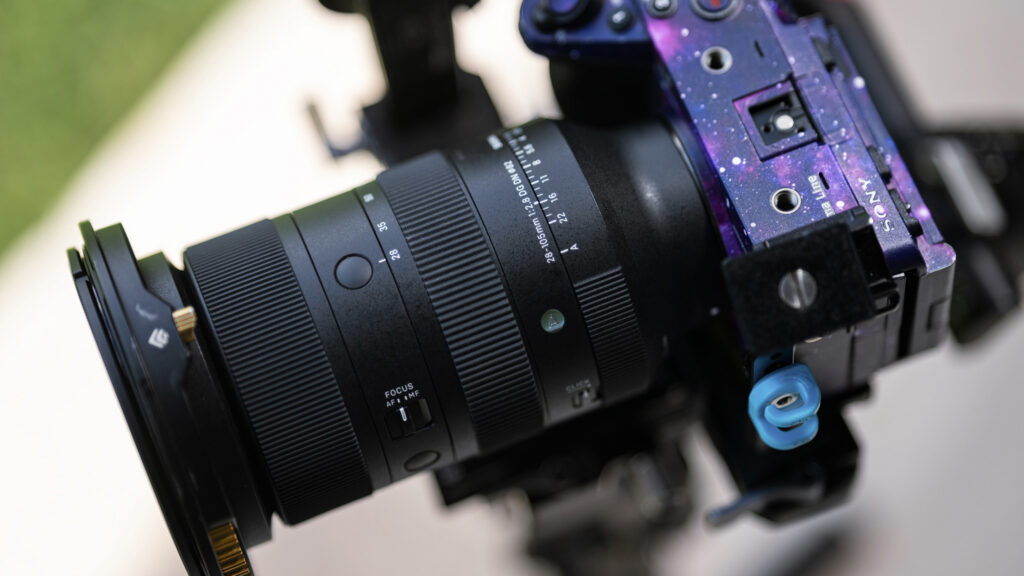
The photographic process with the SIGMA 70mm F2.8 DG Macro | Art
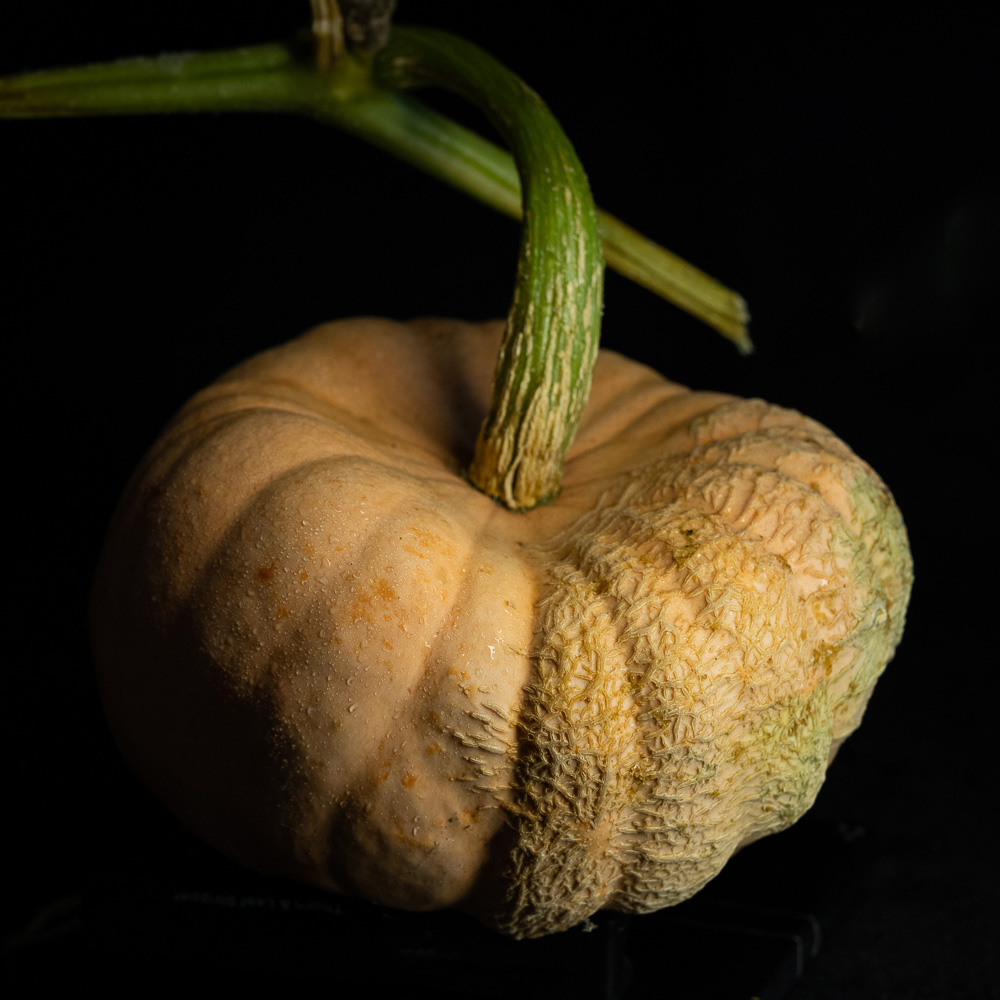
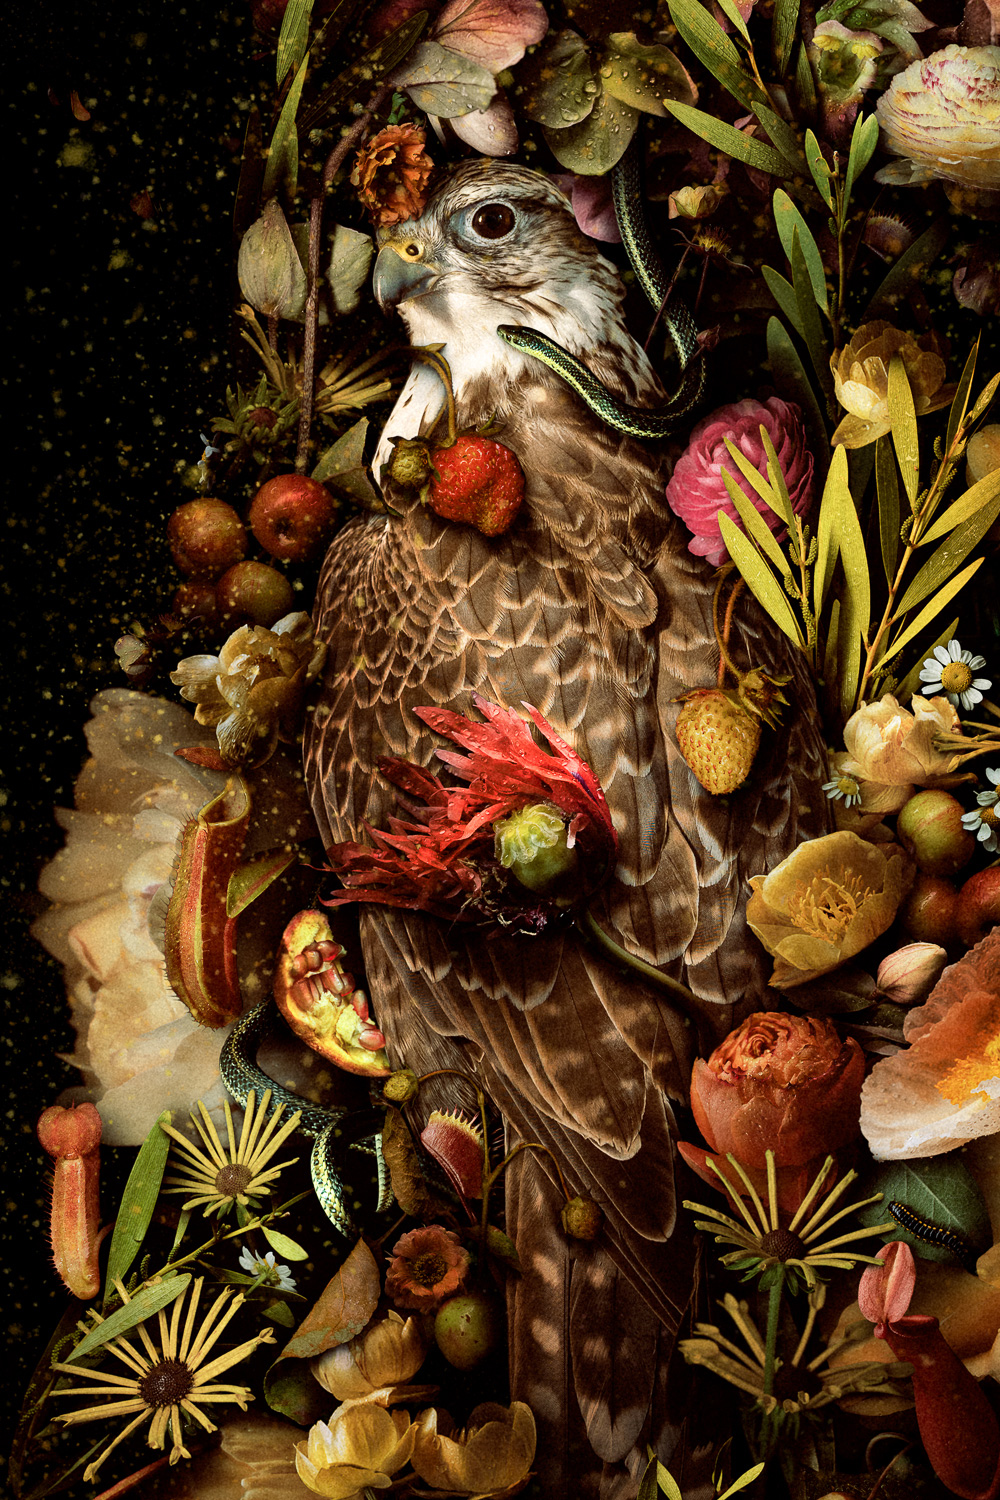
I try to photograph every aspect of the life cycle using my specialized studio setup. This primarily consists of a LED desk lamp, a spray bottle, repurposed florists and baking tools, and of course, my ride-or-die SIGMA 70mm F2.8 DG Macro | Art lens. Think of each image as a single brushstroke in a painting, but beyond just giving color and form, it provides context as well, and all of that has to be meticulously planned before I can start on a piece.
To make these large-scale collages, I first think small. My purpose in the studio is to get as much data as possible so that when I head into Photoshop, I can think unrestrictedly big. When photographing the considerable amount of material I need to do my work, I want all the details caught, and these images must be consistent.
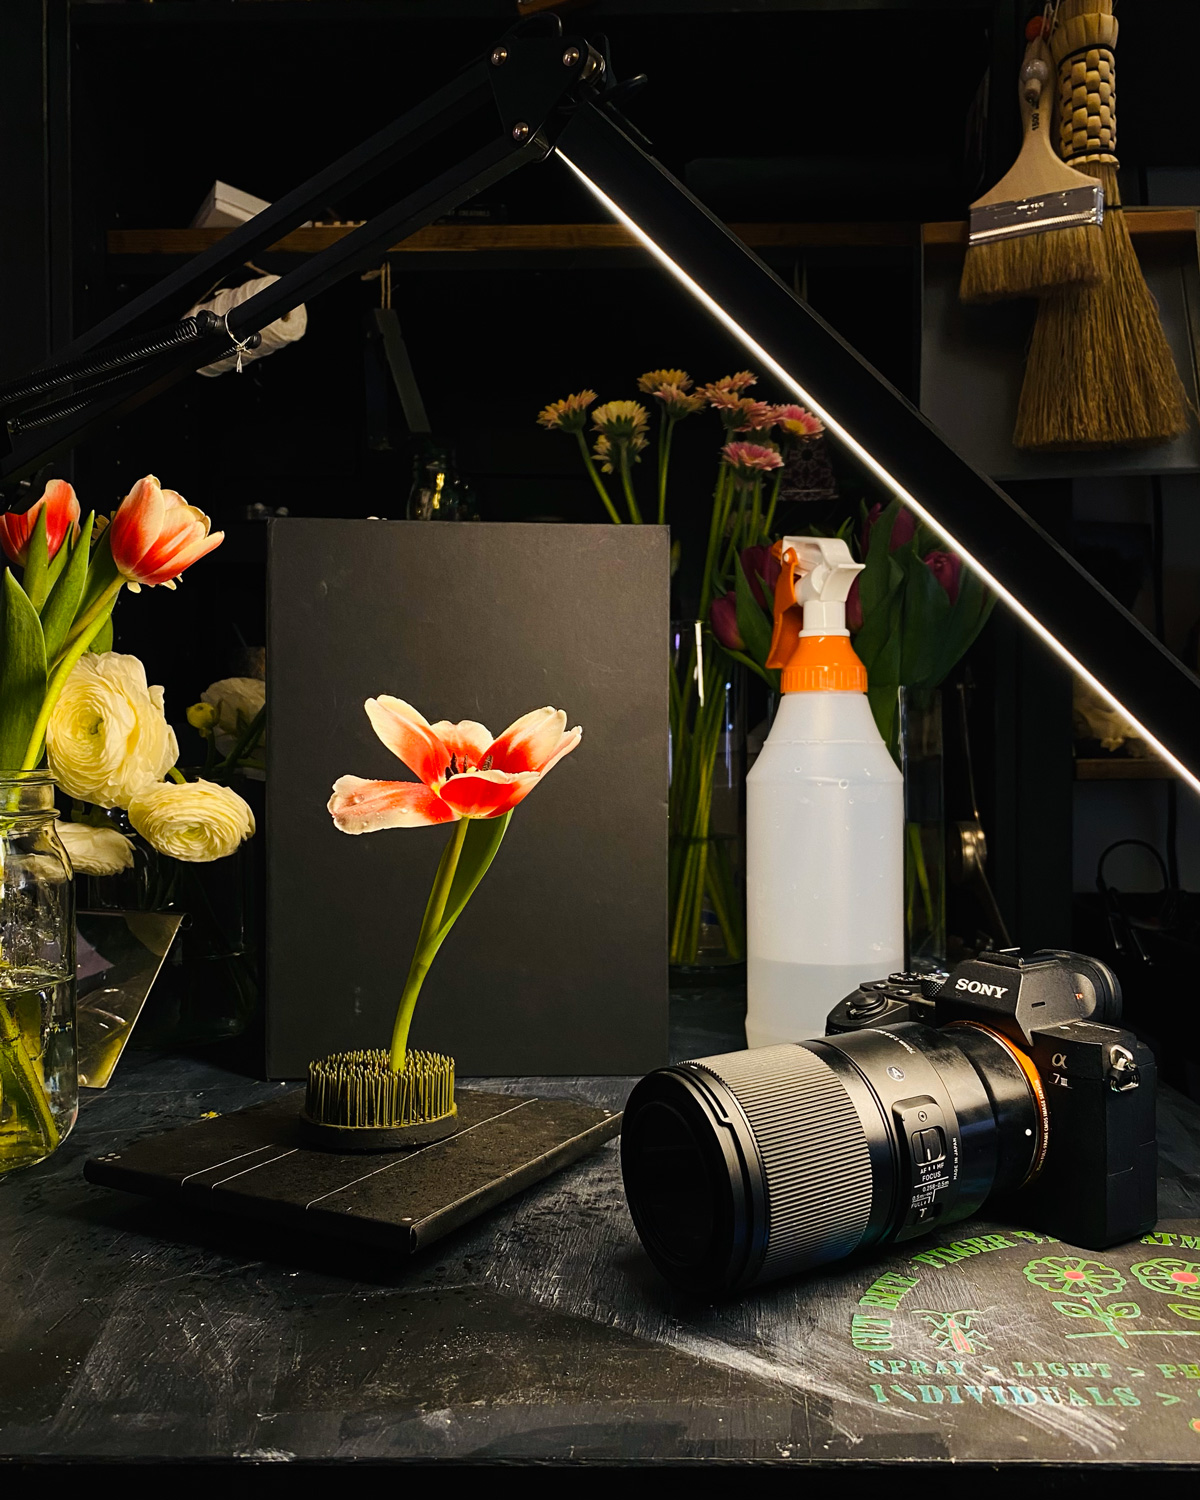
I need my shadows compatible with each other, the focal length to be roughly the same, and I need the image quality to be perfect, meaning a tiny alpine strawberry in the center of my frame needs to look crisp, but also the hairy leaves branching off to the side of my frame as well. And I want that color to be exactly as it is, as I may use strawberries photographed over many seasons in a single piece.

Using this same setup repeatedly means that each image I take will blend seamlessly with the next. After years of doing this, I know the kind of focus falloff I’m looking for, so I don’t mind changing my settings as I handhold (a lightweight lens like the 70mm F2.8 DG Macro | Art is crucial for this), so I can physically move back and forward for unique shapes outside of the norm – that said, I generally land on 1/100s, F10, ISO 600.
I’m always trying to get 90%-95% in focus, getting as close to that near and far focus limit as I can and allowing no more than about 10% fall off, as a bit of DOF helps create the illusion of cohesive depth in the collage. Sometimes, I even orchestrate some calculated movement blur that adds to the chaos I want my figures to have, as a living garden or a living person is never truly still.
If something is larger, I’ll lower my f-stop and move back; if something is waxy and more reflective, I’ll dim my desk lamp or tape some glassine around it and bump up my settings a touch; if it’s an insect that can move fast – I change just about everything including my shutter speed and say a prayer for the patience I will surely need. (I once photographed butterflies for a piece for the Pacific Science Center and have sworn off living butterflies ever since.)
Once photographed, I catalog these images using my personal methodology. Each specimen’s color, texture, shape, and qualities are noted and searchable within the metadata, along with any historical meaning, folklore, or scientific references that I want to include in my final collages.

Incorporating these elements, however inconspicuous they may seem on the surface, is important to infuse each final piece with a deeper meaning. For example, I’m currently working on a piece for my next solo show, Fever Dream at J. Rinehart Gallery in 2024. This piece requires nourishing commodities representing the final harvest’s abundance and weight.
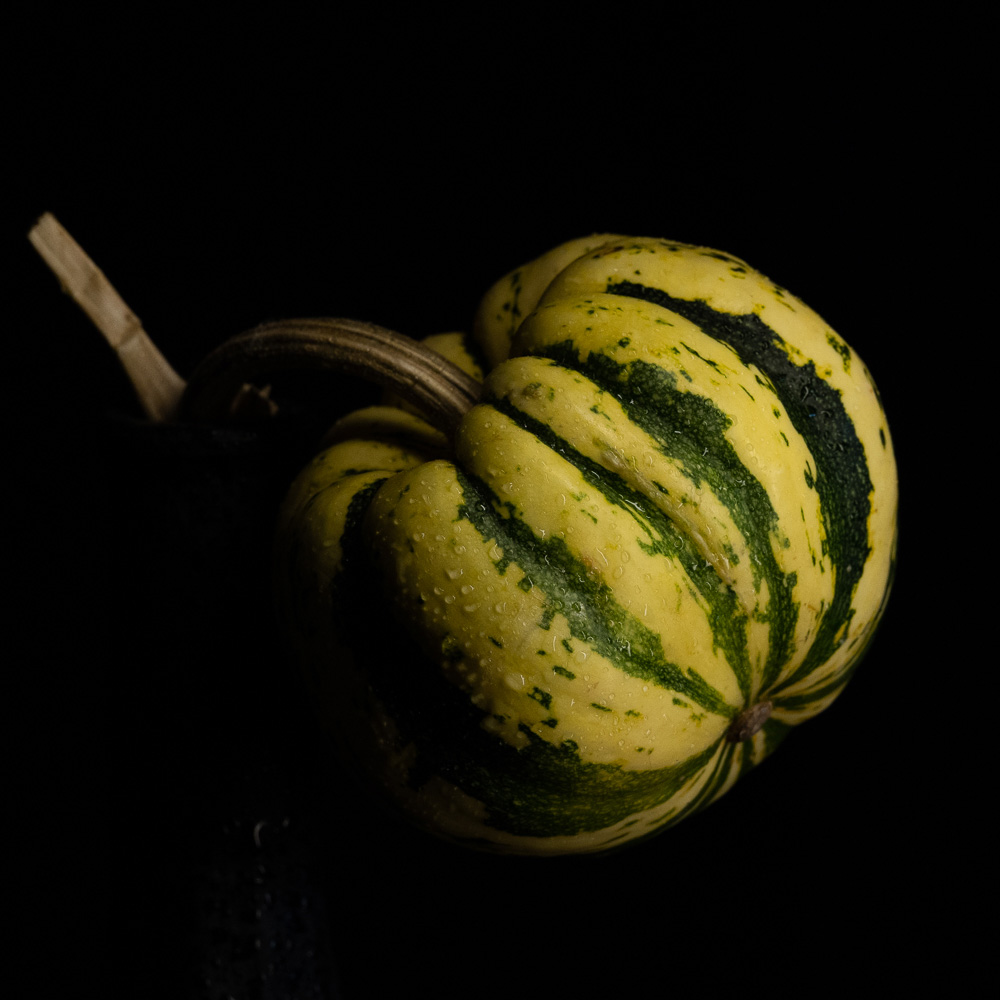
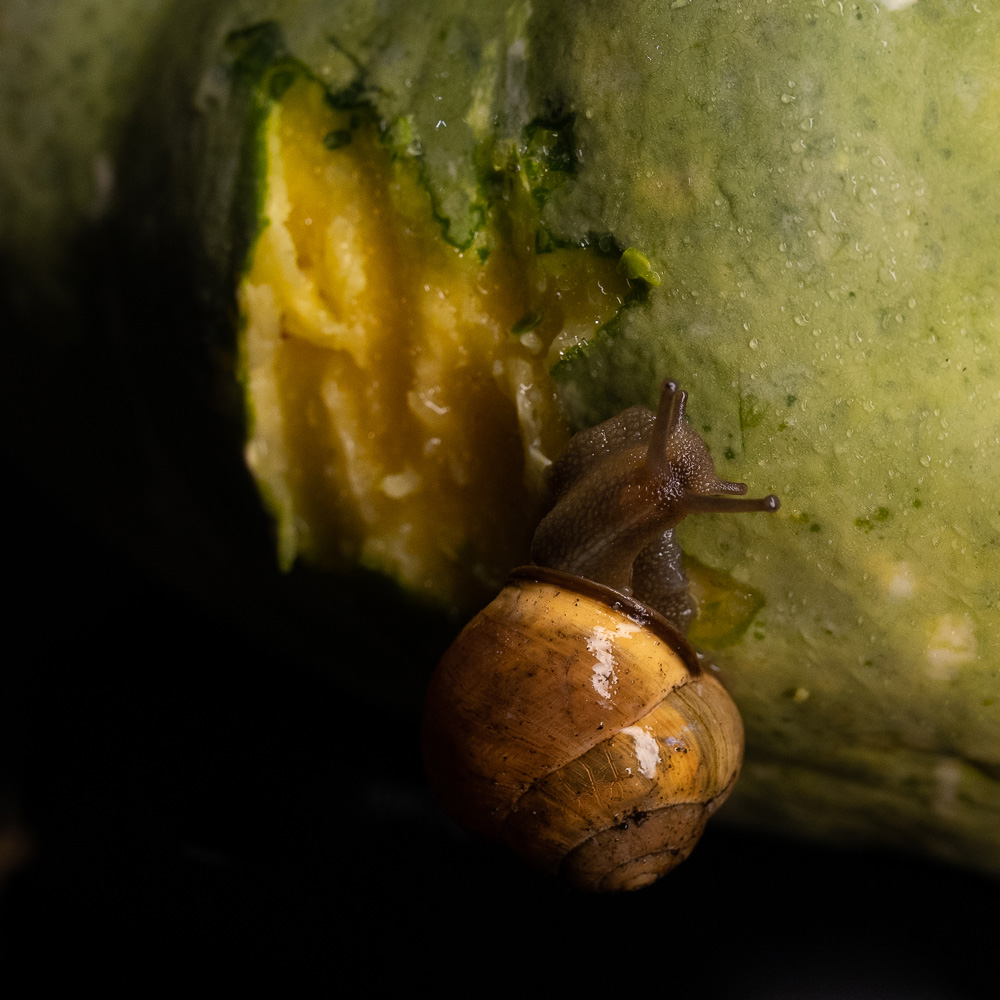
So I headed to my florist co-op and picked up some gourds, keeping my color pallet of pastel pinks, burgundy, and greens in mind and looking for unique shapes and various sizes. While photographing my haul in my simple but mighty desktop studio, I invited a few snail friends to munch on the squashes to further illustrate the narratives of overabundance.
My favorite macro photography techniques
While the photography process might sound simple, creating images that can be used to build intricate collages requires some special techniques that I have developed over time.
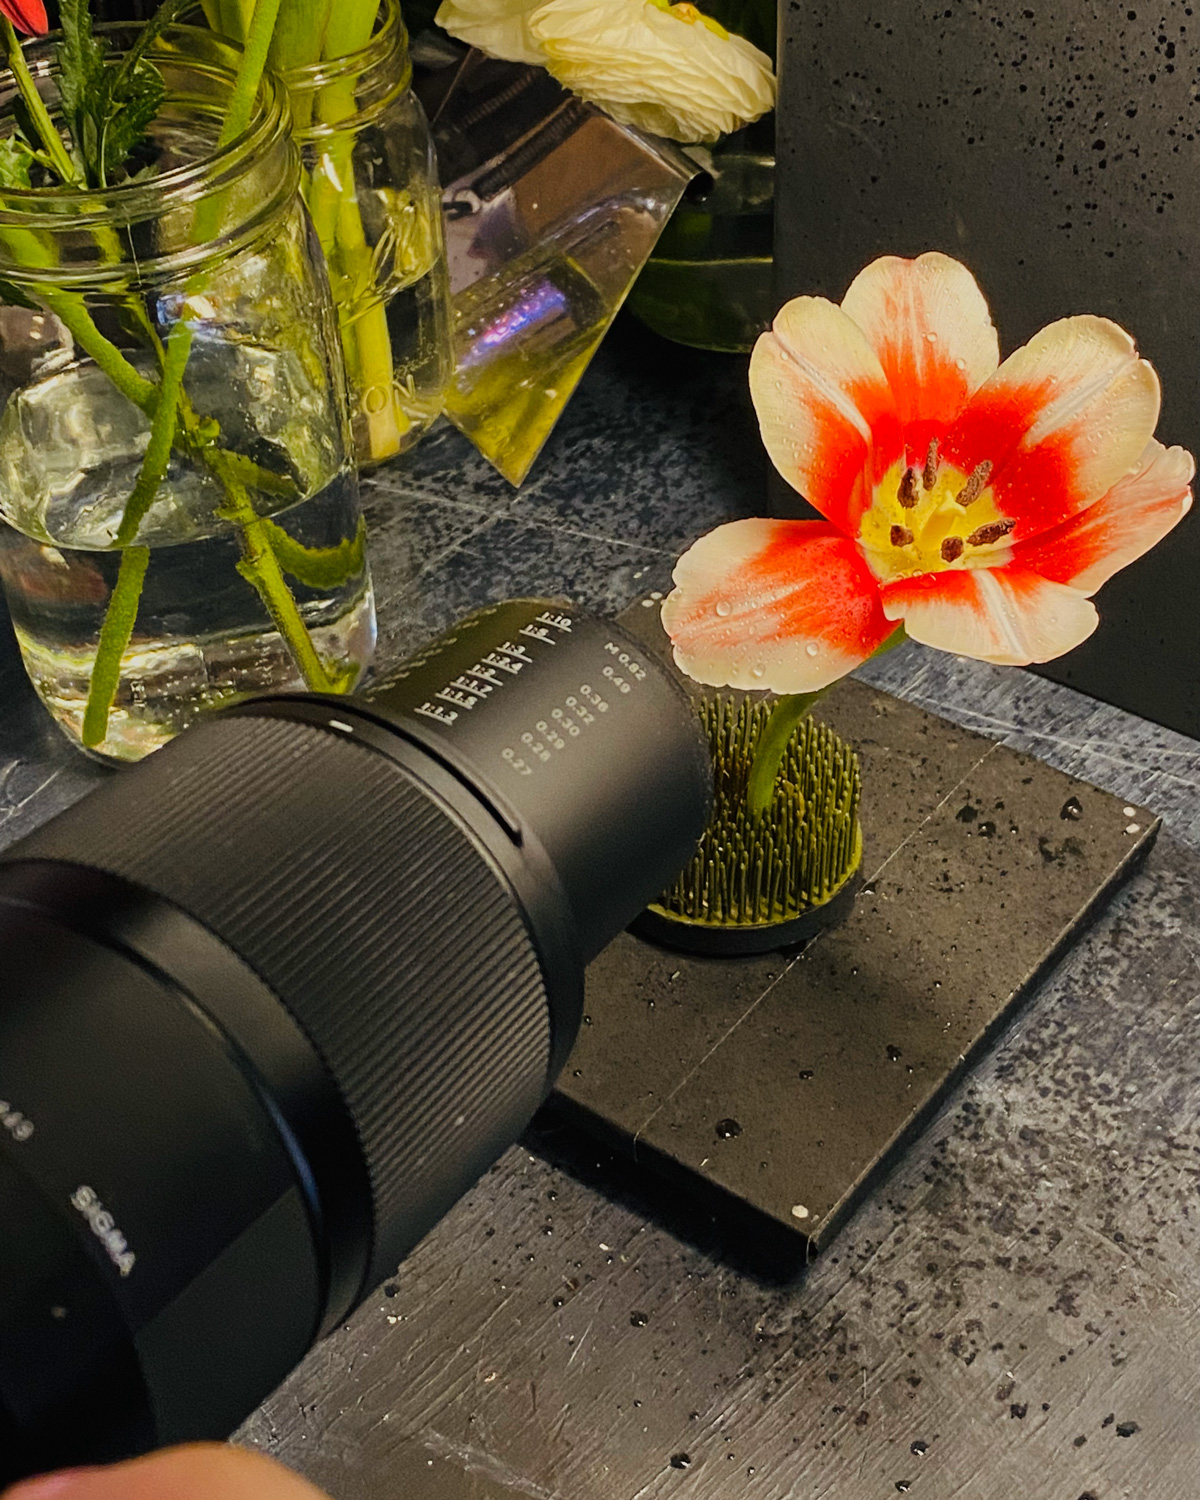
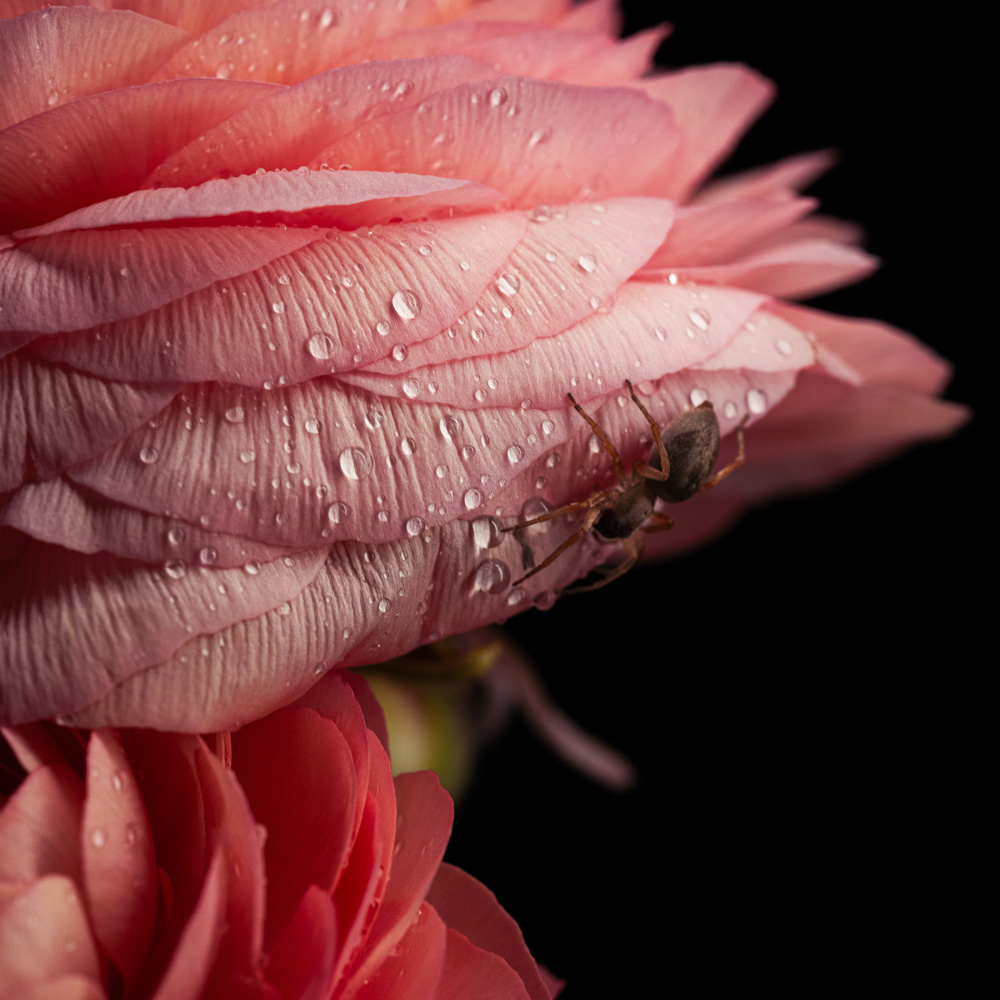
Creating dew drops for highlights
For example, I frequently mist each specimen so the “dew drops” create a scattering of glittering highlights across each subject. My SIGMA 70mm F2.8 DG Macro | Art lens captures the details of that specular highlight beautifully, adding texture and detail to the final pieces. However, it is also helpful in post-production. The angle of light can be referenced to align the light source of the many other items I photographed while I’m zoomed 600-800% while post-processing. (Zooming in and out too much slows the process considerably.) So even though they have been photographed at different times (sometimes years apart), they still will look fresh and alive next to each other, with the analogous light source harmonizing them.
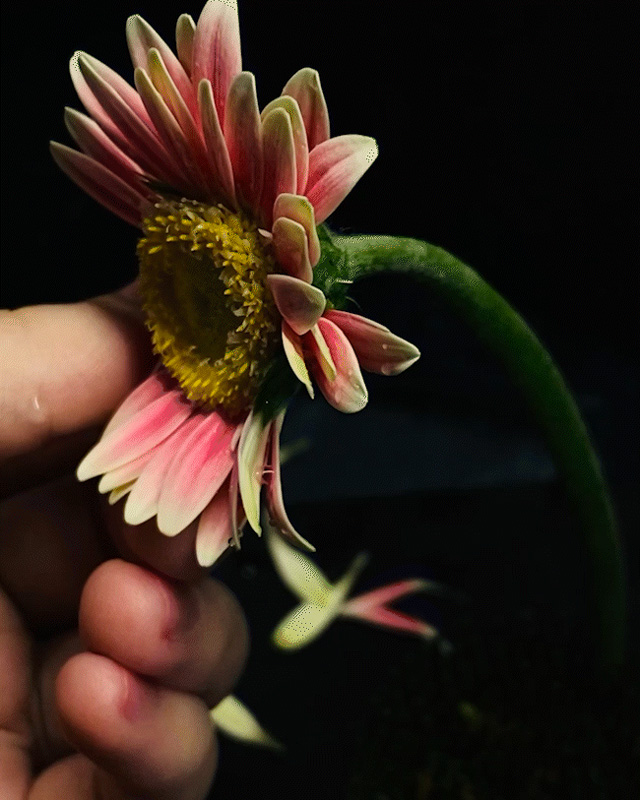
Rotate subjects to get the most out of your materials
I have to get as many images from one piece of material as possible because otherwise, it’s just too costly of a process, both time and financially. However, I also need the images to look unique, or the illusion disappears. That is where my handy little Lazy Susan comes in, wrapped in gaffer tape and a number on each corner. When I pop that flower on my tabletop, I rotate and photograph it four times to get every last bit of use. With this technique and a bunch of 24 off-season garden roses (which is costly), I would end up with at least 96 unique images.
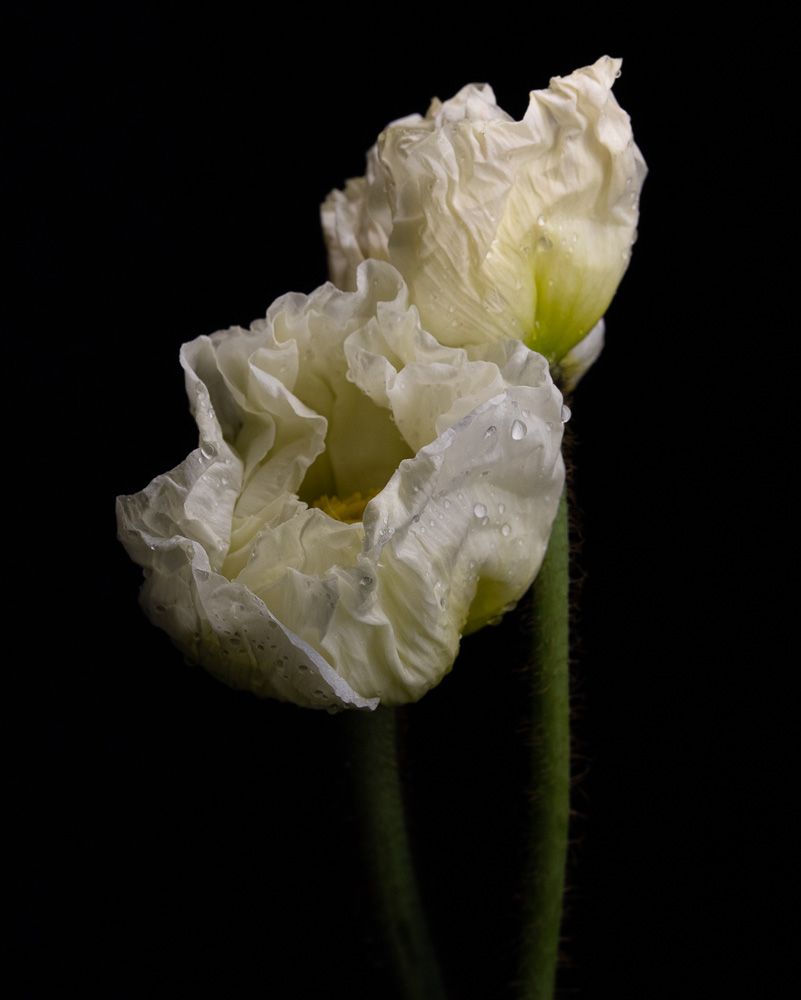

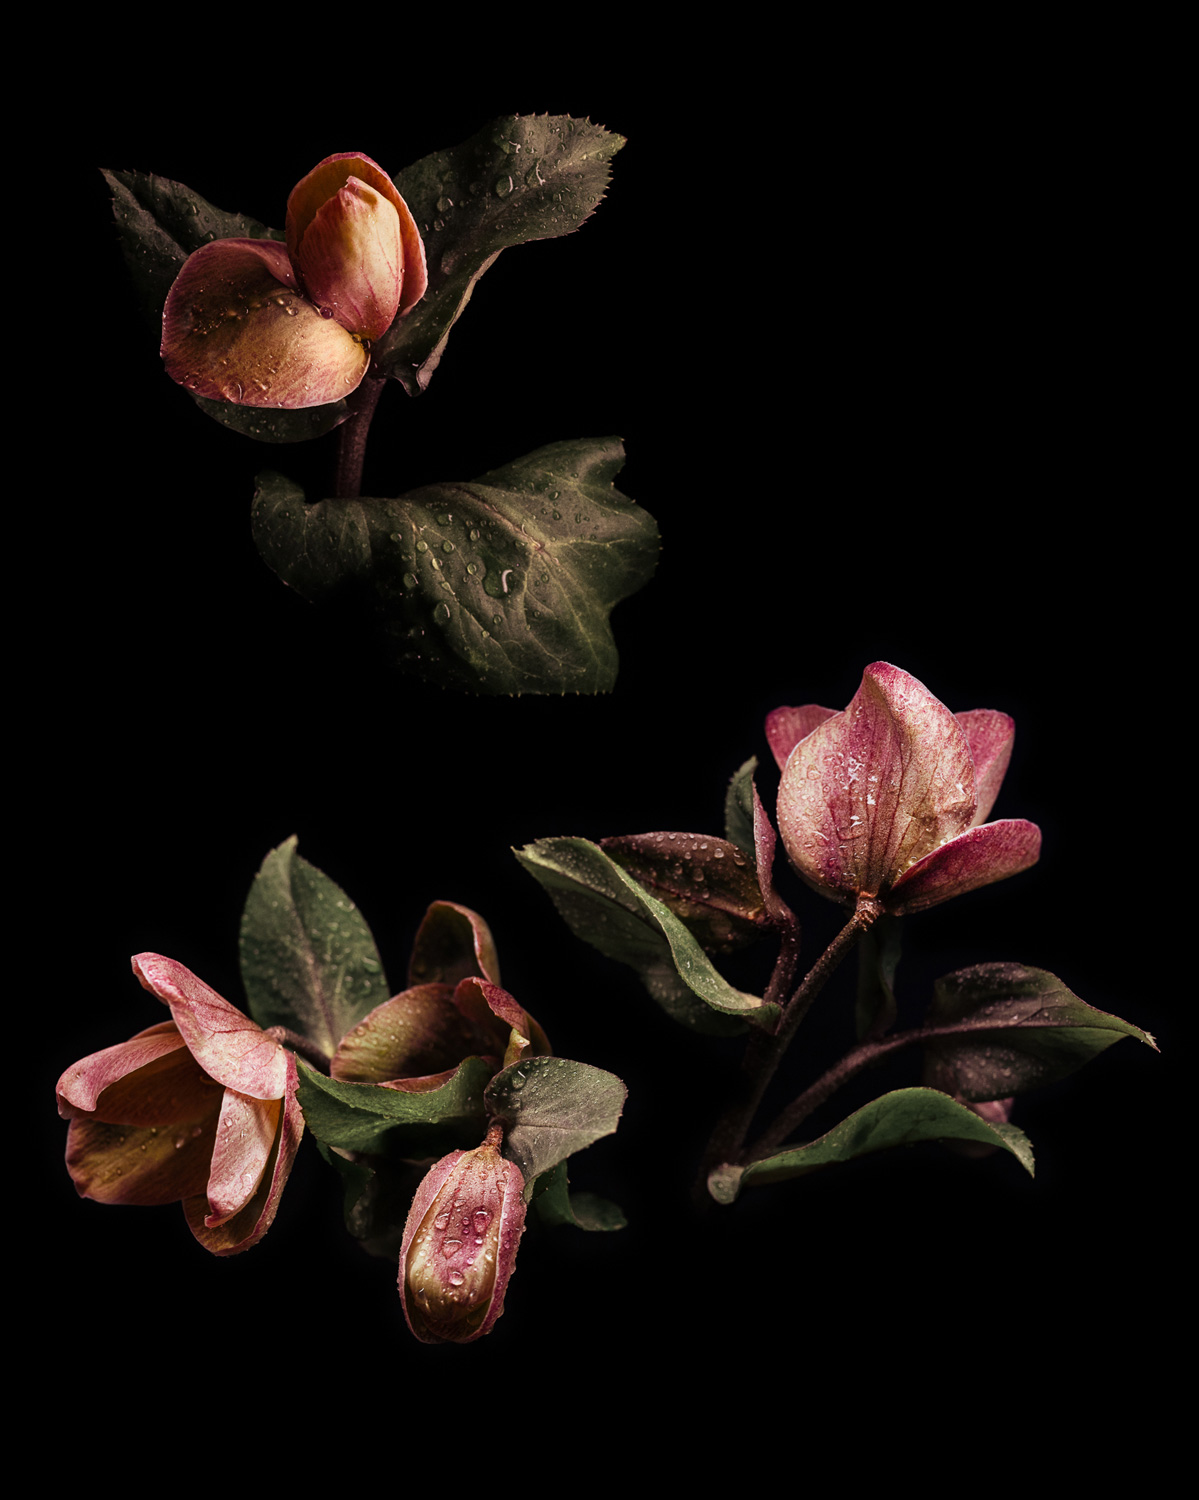
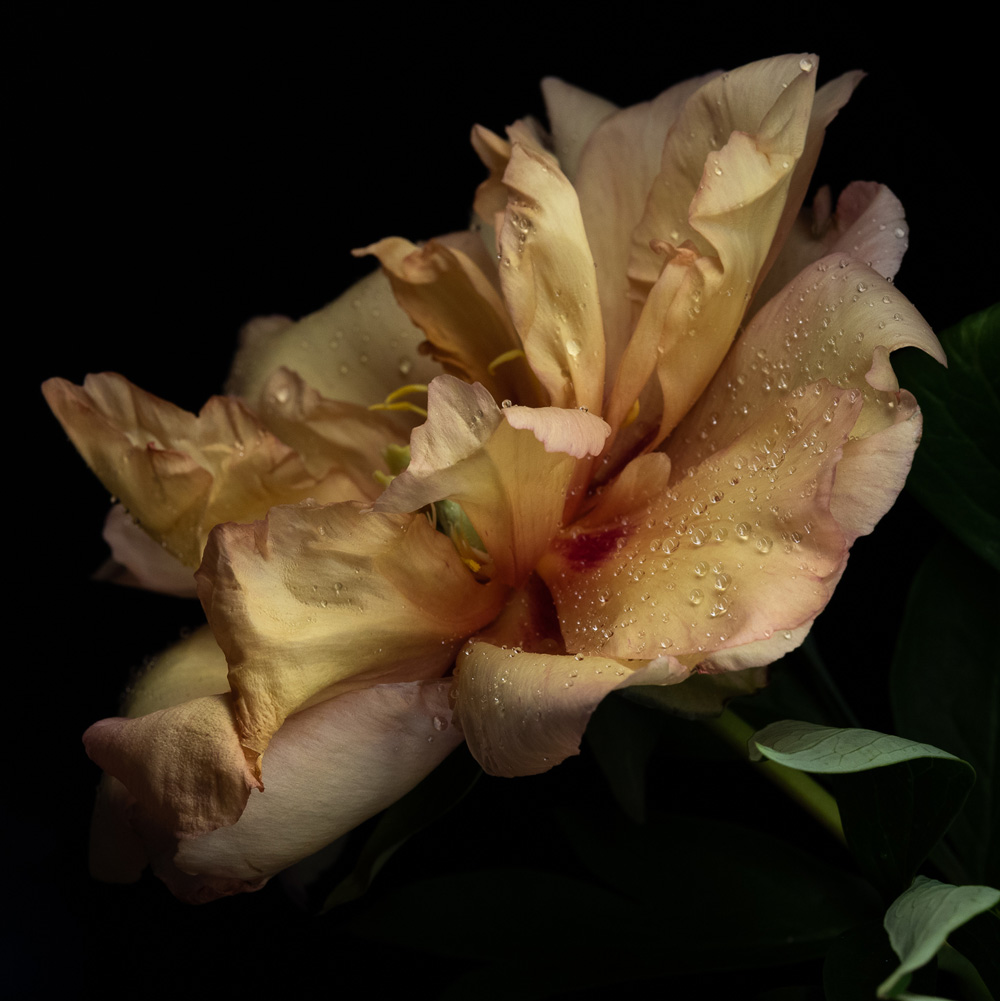
Examine the beauty in damaged, wilted, and dried plant life
For a long time, I only photographed the vibrant, unbruised florals that could be just as likely in a wedding bouquet as my art; and I was becoming bored. I would browse my catalog and feel like it was missing something that I could feel was in my garden but not the final pieces.
One day it clicked; everything I had was too perfect; you couldn’t see how beautiful it was without seeing the in-between stages or the scaffolding holding the flower. Old botany illustrations are attractive not because they aren’t flawless but because the whole is examined.
So after I finish photographing whatever is in my studio that day, I start slicing into it, tearing at it, even offering a bite to my dogs – looking for a view of the internal structures that could add storytelling to a piece. I also put some of the blooms aside, waiting another 3-5 days until they start looking past their prime or go to seed.
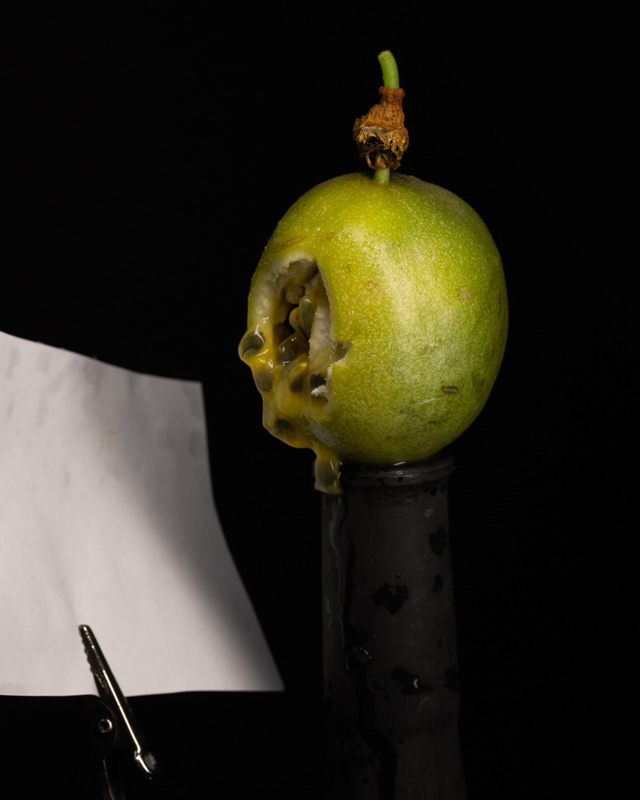
After all, a branch of fresh pomegranates is beautiful and elegant, but a sliced open pomegranate, with seeds tumbling is of an entirely different significance. More so, an aged pomegranate so past its prime that its dehydrated frame is cracking; that’s the final moment of resilience before rest. Finding a balance between what feels right to the piece and what is also interesting to look at is becoming an art in and of itself, so I always try to step back from what I have and see how I can push it. I’m attempting to document the concepts and the physical beauty that make the finished artwork richer.
Why shoot with a macro lens?
When I was little, my family had to have a tree removed from the front yard. Which meant I had to stay in the back yard. I hated being told where I could and couldn’t go, especially if something cool like a tree falling is happening, and I was livid (some things never change!). In my temper tantrum, I face planted into the ground, and when I opened my eyes, I was face-to-face with a batch of blooming clover, buzzing with bees. If you have never looked at it up close, clover is a cluster of tiny little orchid-shaped florets; the more I looked, the more I saw. I spent the rest of the afternoon going through the grass and finding more things to examine. I don’t remember the tree finally coming down, but I won’t ever forget that clover.
Many decades later, I still like to get close. And a 70mm macro lens is close enough to the human eye to feel familiar but just a bit beyond that. It makes me feel like I did when I was a kid. With this lens, you’re taking in more than what you can see with your eye, but it doesn’t feel like a microscope where you lose all sense of self. The SIGMA 70mm F2.8 DG Macro | Art delivers the sweet spot I’m looking for, and it’s like visiting a memory of when I realized the world wasn’t just big; it was that I was big to parts of my world.
Putting it all together
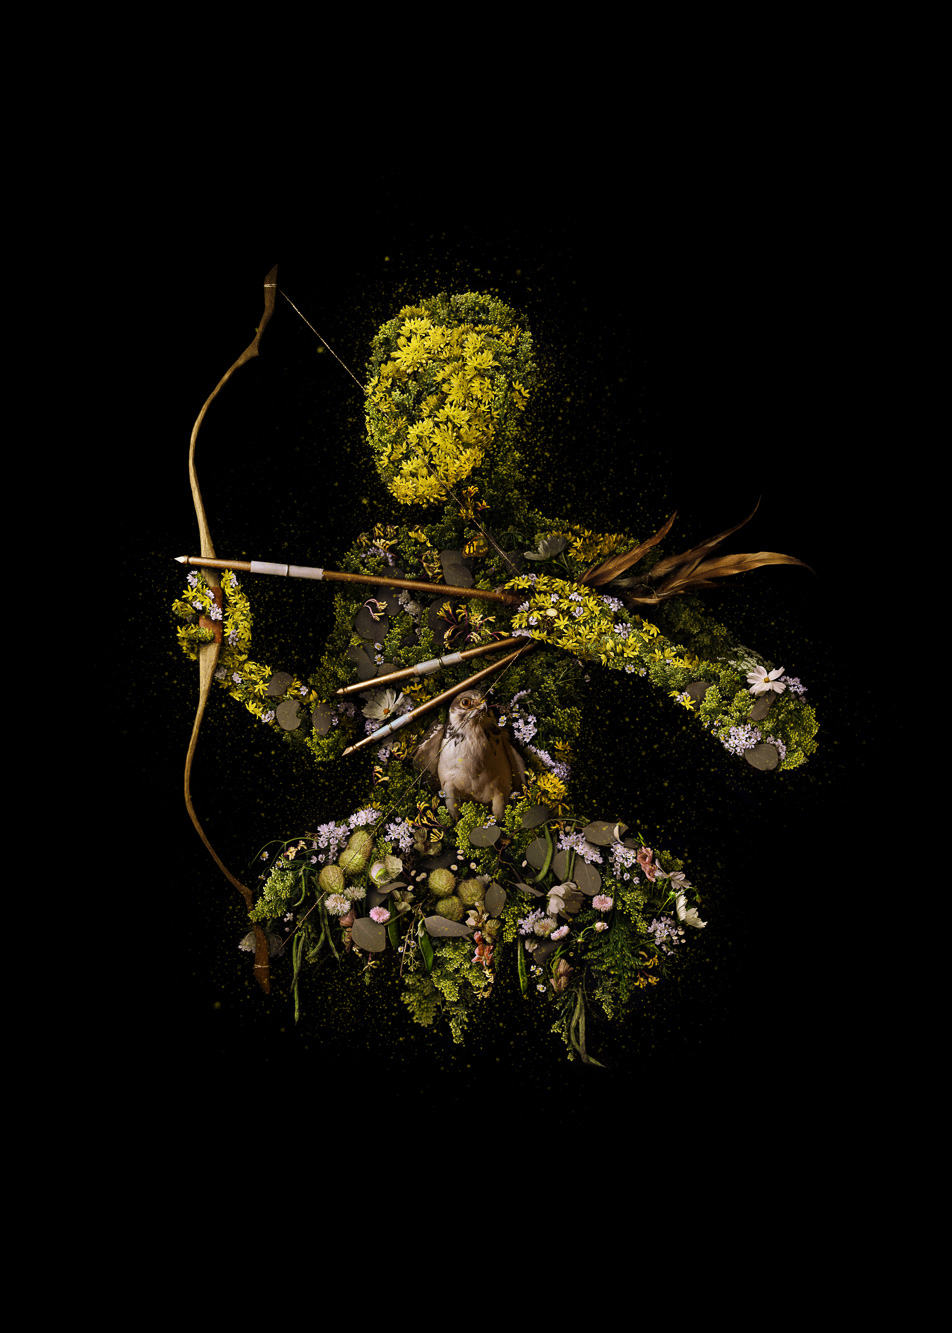
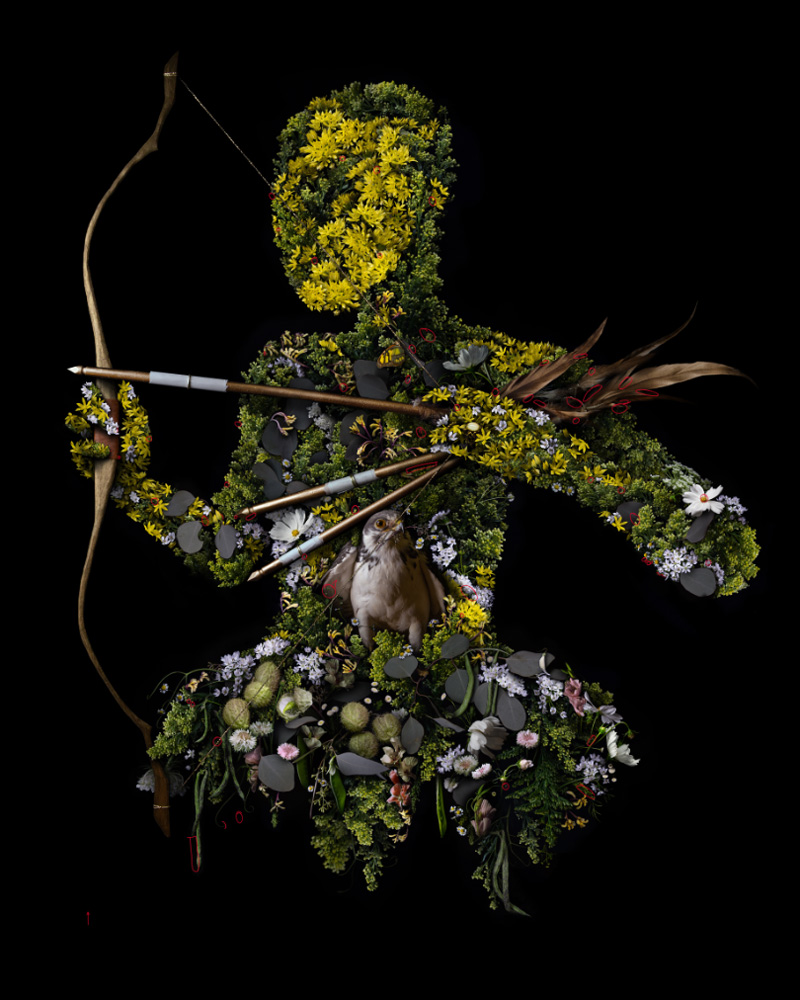
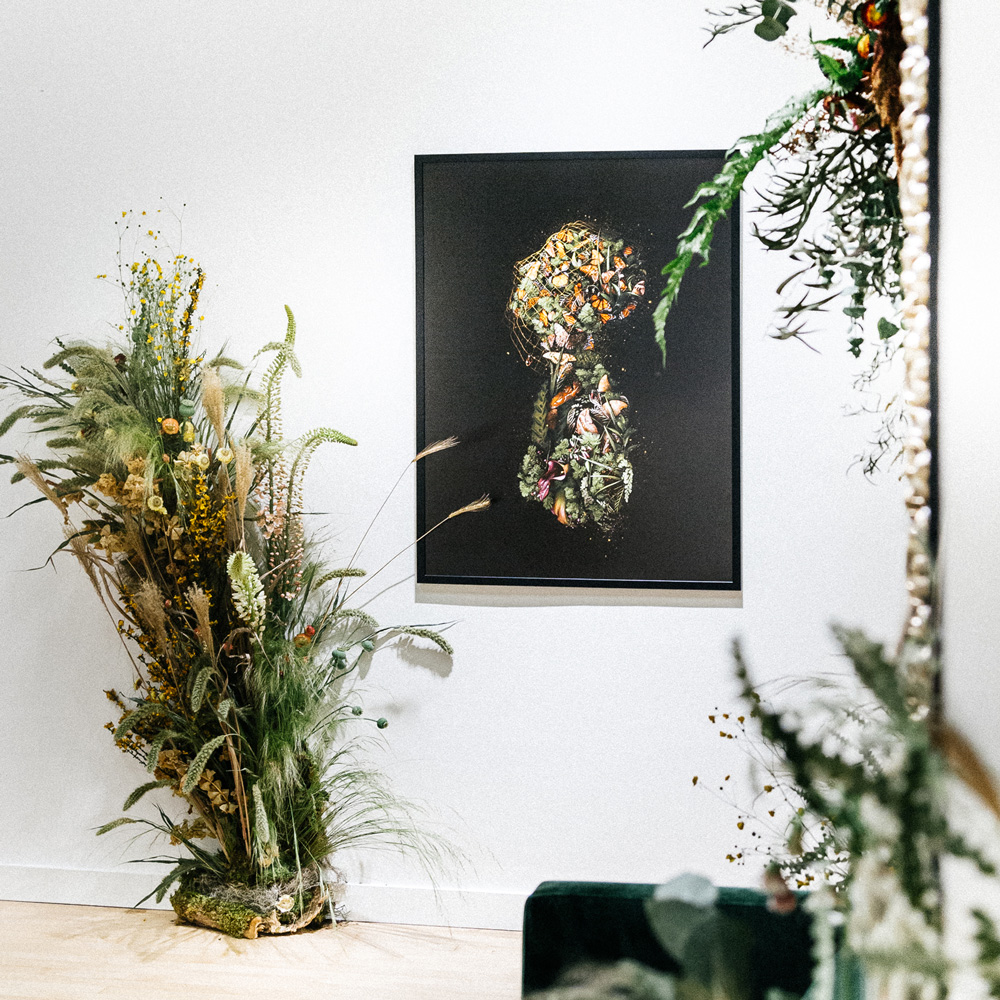
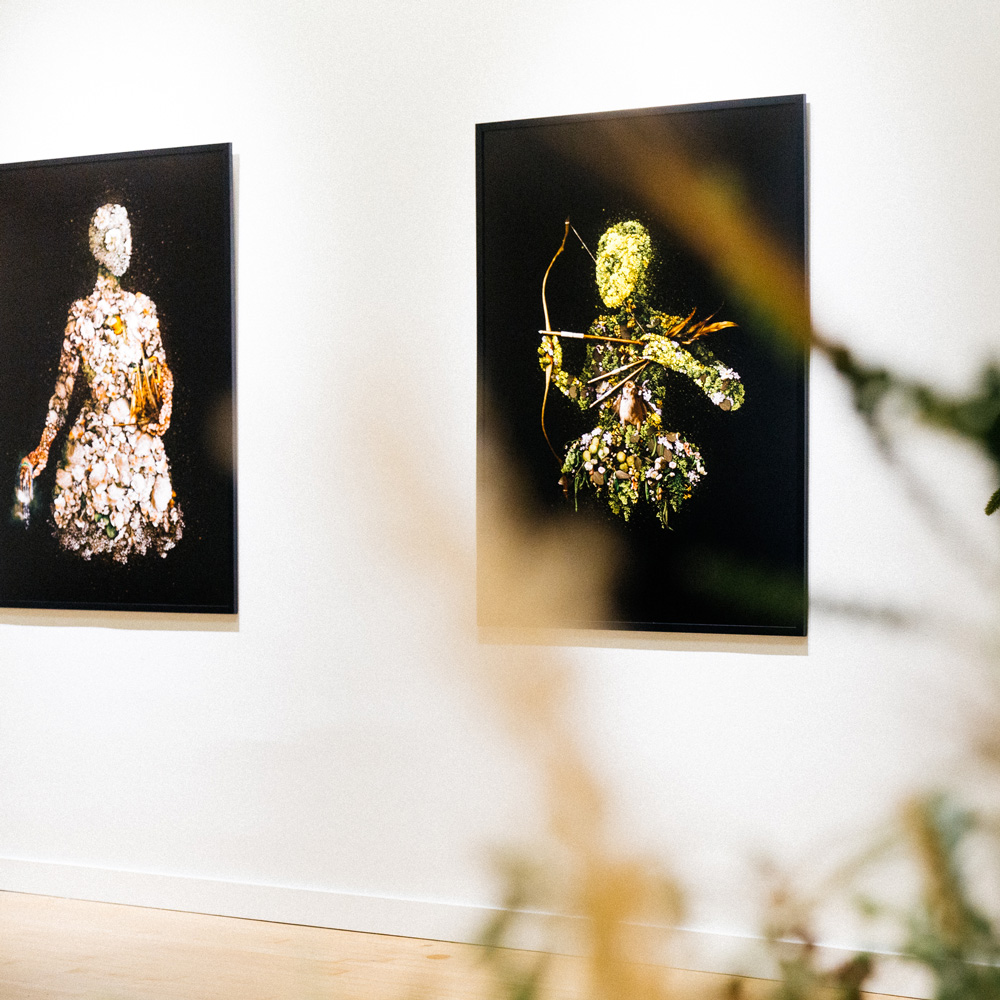
This final phase involves layering each element together until my version of a “ghost” emerges. My immortal figures are made of these once-living things, held in time eternally – due to the mechanics of photography and a bit of Photoshop magic.
I have this broken down into a system I follow, a checklist I complete before moving on to the next stage. I won’t bore you with every step, but roughly, it starts with an outline of whatever shape I’m going for, usually with notes on where to emphasize shadow and which way the light should be coming from.
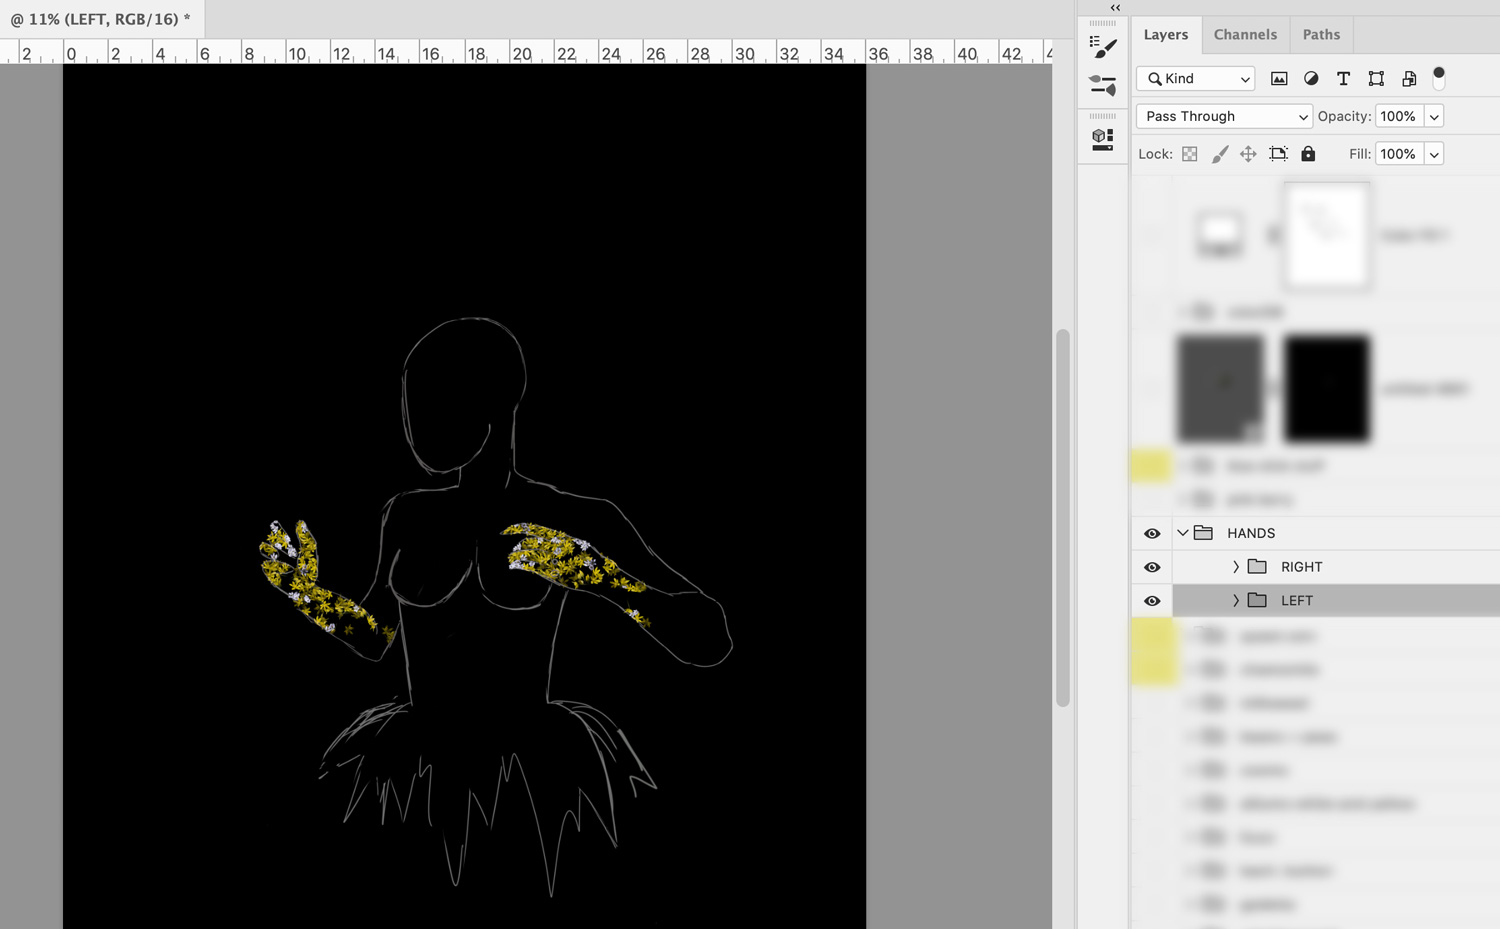
That “map” layer gets turned on and off as I work. I fill it as a puzzle, keeping shapes and movement in mind. I add as I go, keeping my groups organized by location (i.e., left hand) or by material (i.e., daisies). Once I am happy with the final layering, I systematically check and edit the entire collage with the help of a grid overlay, square by square, zoomed in as much as 800%. That way, I know that no matter how close you, the viewer, get to the physical printed piece, you won’t find any peculiar digital fragments that can pop up when thousands of images are layered together.

Once she’s done, printing is my last big job. And, of course, I’m picky about it. I have two printing options right now; smaller work gets printed on my favorite paper, Moab Juniper Baryta Rag 305 – or a similar Hahnemühle paper, but I like the tooth of the Moab a bit better; it’s just always sold out locally. These days, my work is typically printed by Sandy King of Photographic Center Northwest, who does an amazing job.
For larger works, I work with another local printing service named Bumblejax. They handle the huge prints and mount them to Dibond and Acrylic. They are a great team, and every piece they made for me exceeded my expectations.
Tedious as it all is, I love this. The longest days of my summer are spent pulling weeds in the morning, chatting with farmers and my fellow gardeners at lunch, harvesting blooms in the late afternoon, and photographing into the evening. Better yet, as my mind shifts from collecting to utilizing, I spend my winters curled up with a blanket, a dog, and Photoshop. It is the best of both worlds.
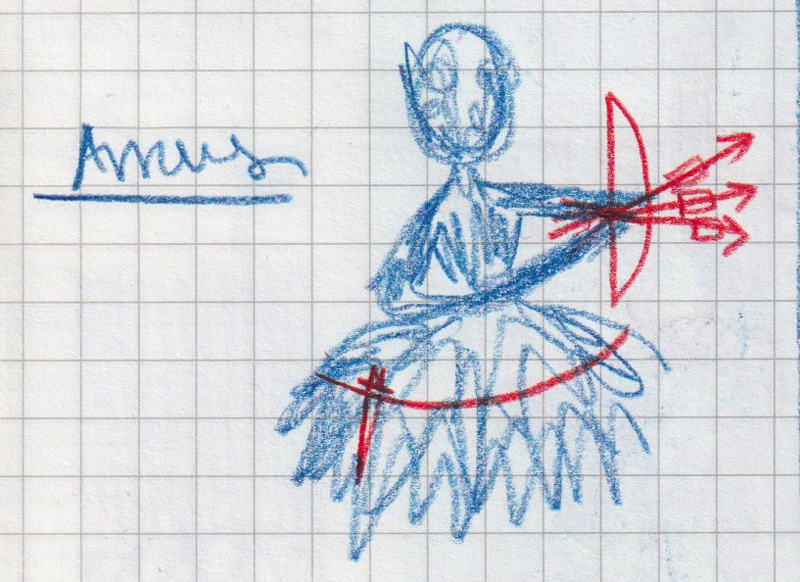
But the best part can be summed up with one interaction I will never take for granted. A few years ago, a woman bought some of my art after what she described as “a rough few years.” She wanted to celebrate her new beginning by having one of my ghosts, Armistice, watch over her as she navigates this new chapter. She later told me she had another piece, An Attempt Was Made, as her phone background for the last year or so. An Attempt Was Made refers to saving yourself, even when difficult. Armistice depicts choosing even a tenuous peace over war. I couldn’t have planned two better pieces for her at that moment.
I love that my images reach the right people when they may need them. When someone emails you and says, “I’m doing better in my life and want to celebrate with your work,” they are saying more than they simply like it; they are saying that they truly understand it.

Tips for the ambitious artist in you!
It took years to inform and create the process that serves as the foundation of the art I want to make. And through a lot of trial and error, I built this art practice that suits me so well that only I could do it.
I hope that you have found the balance between method and process for yourself. And if you haven’t yet, here is my unofficial guide – one being the easiest and five being the hardest.
- Make whatever fills you with satisfaction.
- Eliminate any tools that don’t serve you.
- Work hard enough that you outgrow what does serve you.
- Be unrelenting in finding a system to support #1, especially if it means #2 and #3 are daunting.
- Repeat. (You’ll never get it perfect, just closer to it.)
Do that a few times, and you’ll hit what my gallerist Judith Rinehart and I call that the “ooey-gooey” – when an artist dives so deep into their practice that it becomes conjoined to the part of them that makes them, them. We’ve seen a lot of talented artists with great use of a medium, but they just haven’t hit that ooey-gooey center… yet.
You deserve a creative practice, a mix of methods and processes, a formula of art-making that is so distinctive to you that you get lost within it. So if my version interests you, please, borrow from it and apply it to yourself. I, for one, want to see what you make when you do (seriously, please show me!)