Making a trick shot with the same person in the frame in different locations is a fun way to make a photo that makes people look twice. And it is actually very easy to accomplish with a little bit of gear, and any image editing program that allows for multiple layers—like all version of Adobe Photoshop and Photoshop Elements, among many others. We will walk you through the steps from capture to compositing right here.
Pick and Frame Your Scene
Indoors or out, there’s lots of opportunities, from a park bench, to a swingset, or any sort of table. What matters most is that you split the frame into two sides, and make sure there is no overlap where the subject for one side crosses over that center line. In my example, the right edge of the left frame and the Jenga stack were my dividing lines.

Use a Tripod, Lock In All Your Settings, and Fire Away
Set your camera on a tripod so all frames will be aligned. Then set your exposure, and lock that down. Wider angles work better, and stopping down F/stop to around F/8 or F/11 will give a lot of depth of field to make sure you are in focus on both sides of the frame. I used the SIGMA fp camera and the 14-24mm F2.8 DG DN Art lens, and locked in my exposure at 1/15 F9 ISO 2000 with a bounced flash for my shots in my basement game room.

If you are doing this yourself, use self-timer and put yourself in the frame on one side to test it out. Then, once you take your test shots how you want them in terms of expsosure, framing and focus, switch to manual focus, and take your left and right side images as quickly as you can manage, so that the lighting stays virtually identical in the series. Consider, as I did, a quick costume change to add to the visual intrigue.
Pick Your Right and Left Side Photos
Once the photos are loaded onto your computer, pick your right and left side photos, and quickly switch between them in image preview to make sure there’s no subject overlap—not having overlap makes these next steps so much easier!
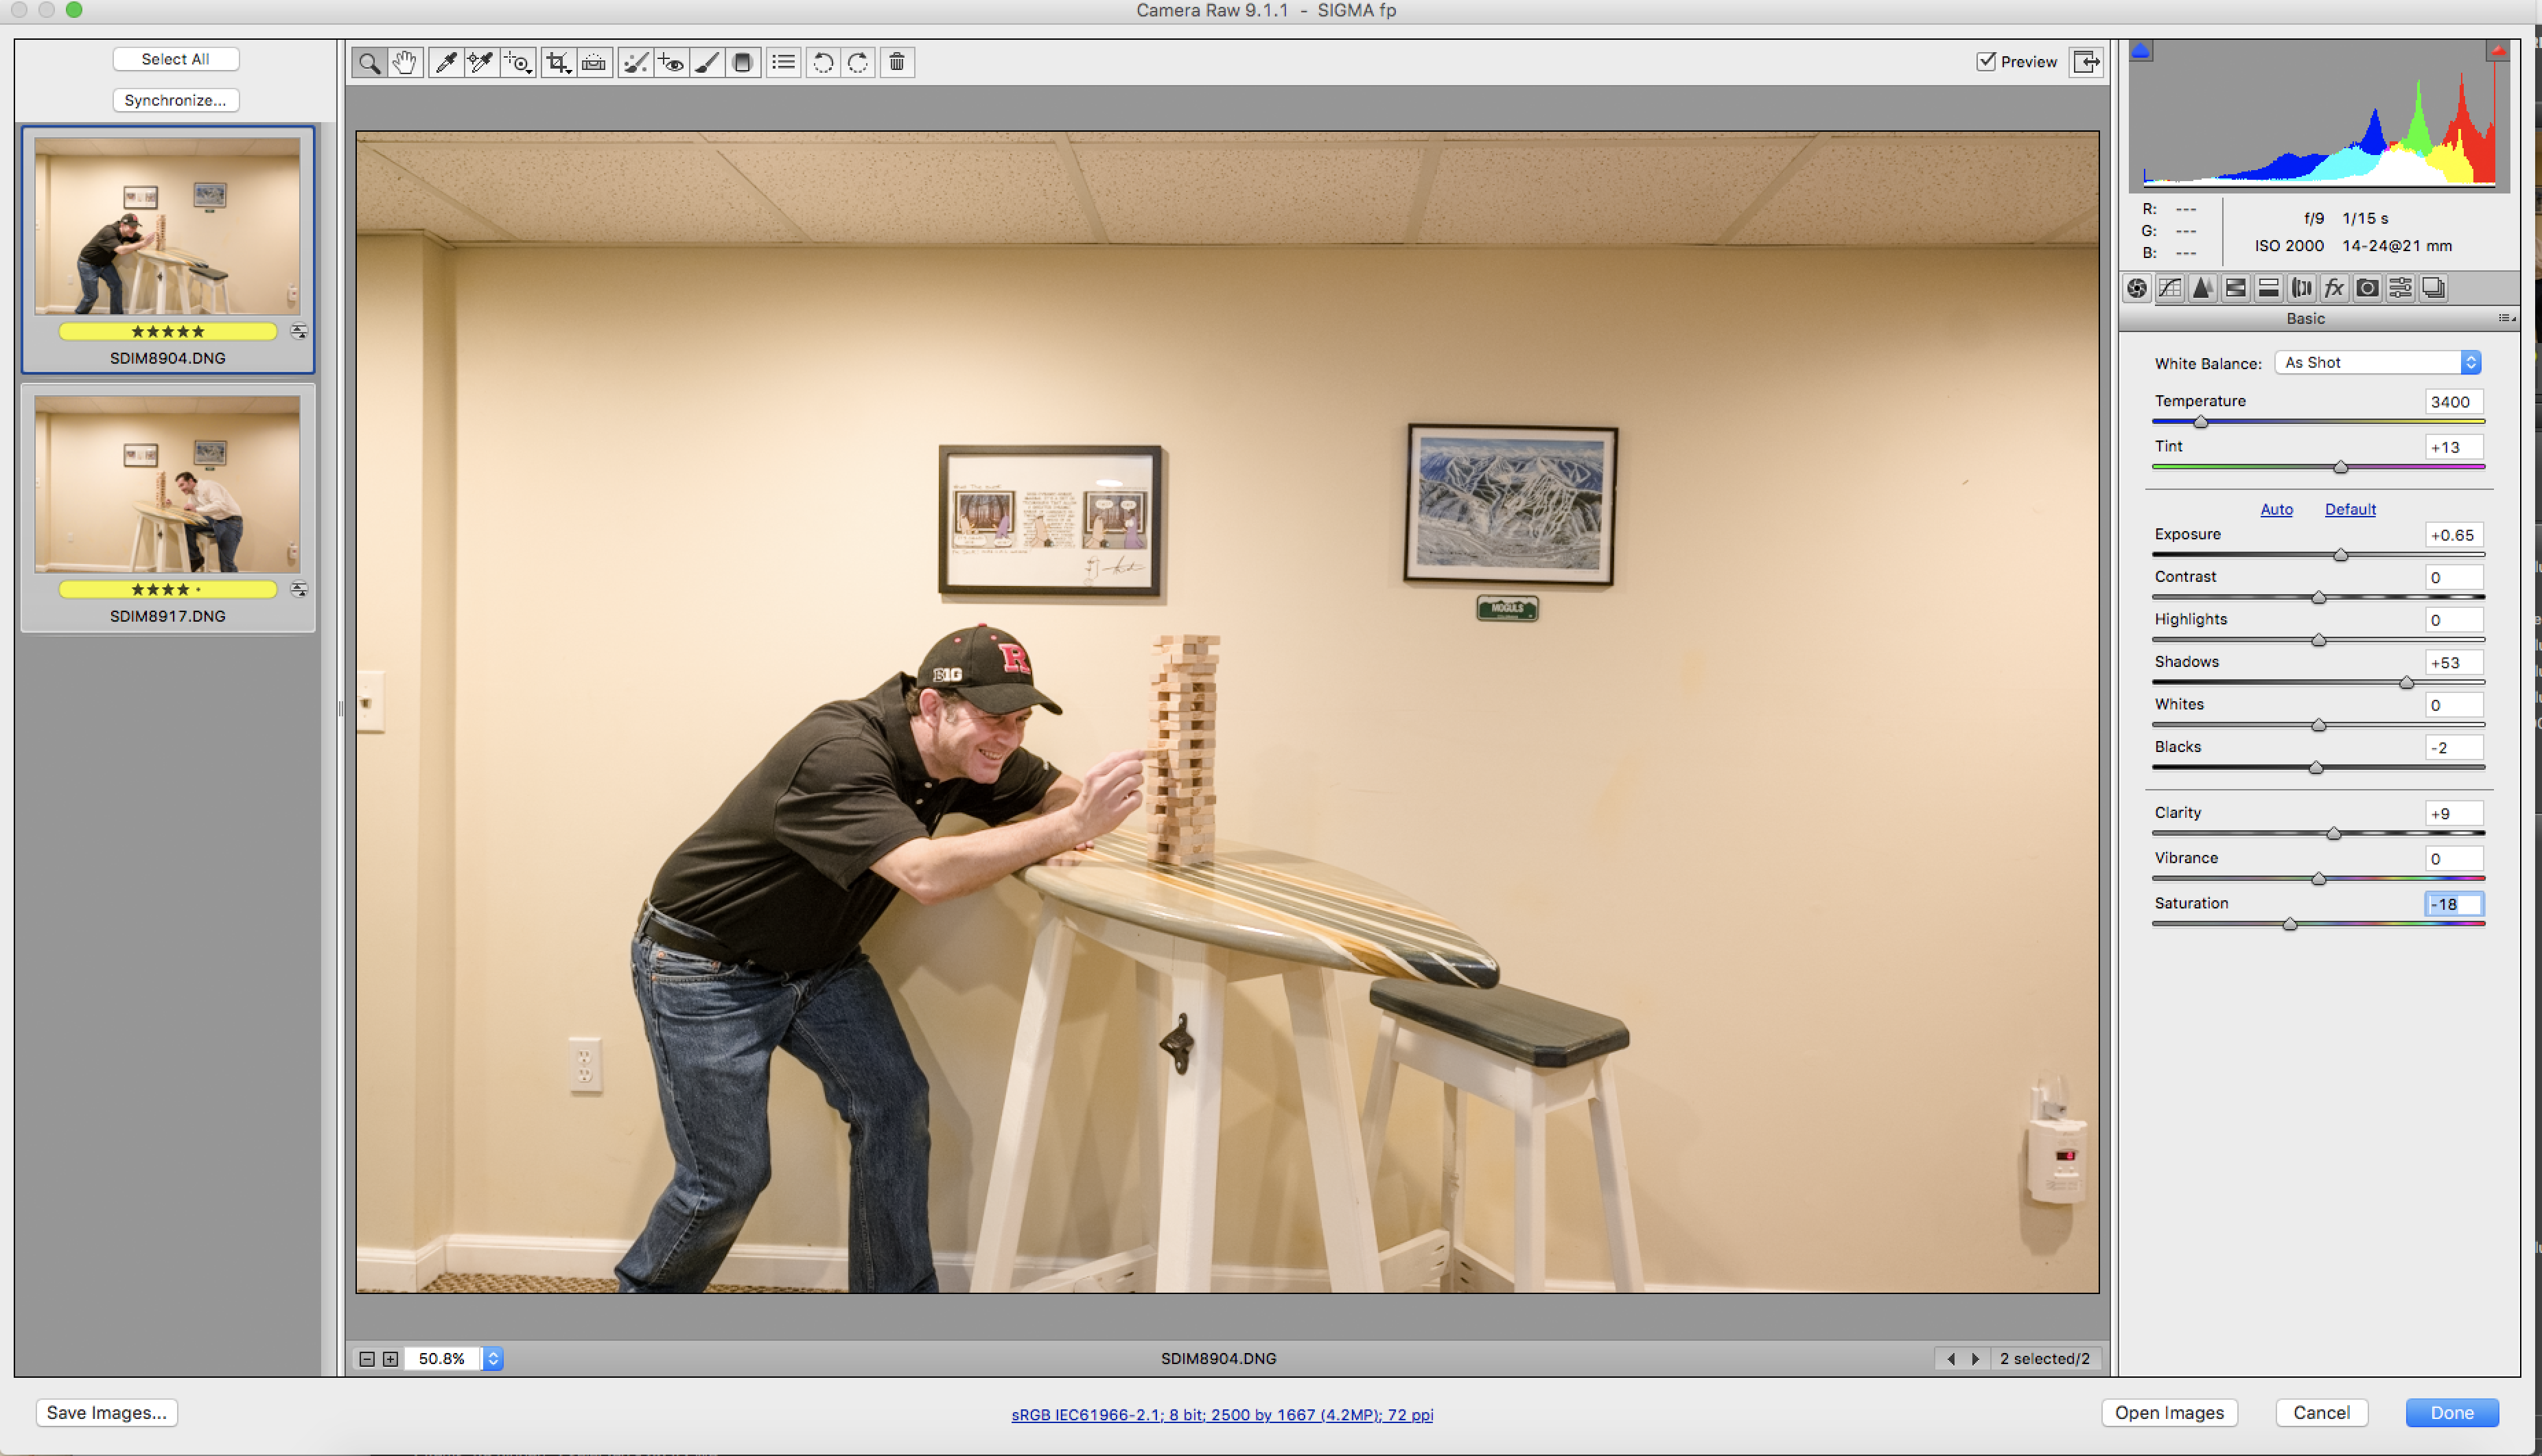
At this point, there are two choices. You can do some light toning and adjustments in your Raw Converter, or you can pull the straight-from-camera images into your Photo Editor that supports layers and then tone and adjust the final image. If you choose to make your global adjustments at this point, make sure you are toning both your left and right side image with the exact same settings.
Open Both Images in Photoshop and Work Some Imaging Magic
Open both images into Photoshop. Pick one that’s going to be the “base layer”. Then click over to the other image and Select All, and then Copy the entire image. Click back over to the “base layer” image and click Paste.
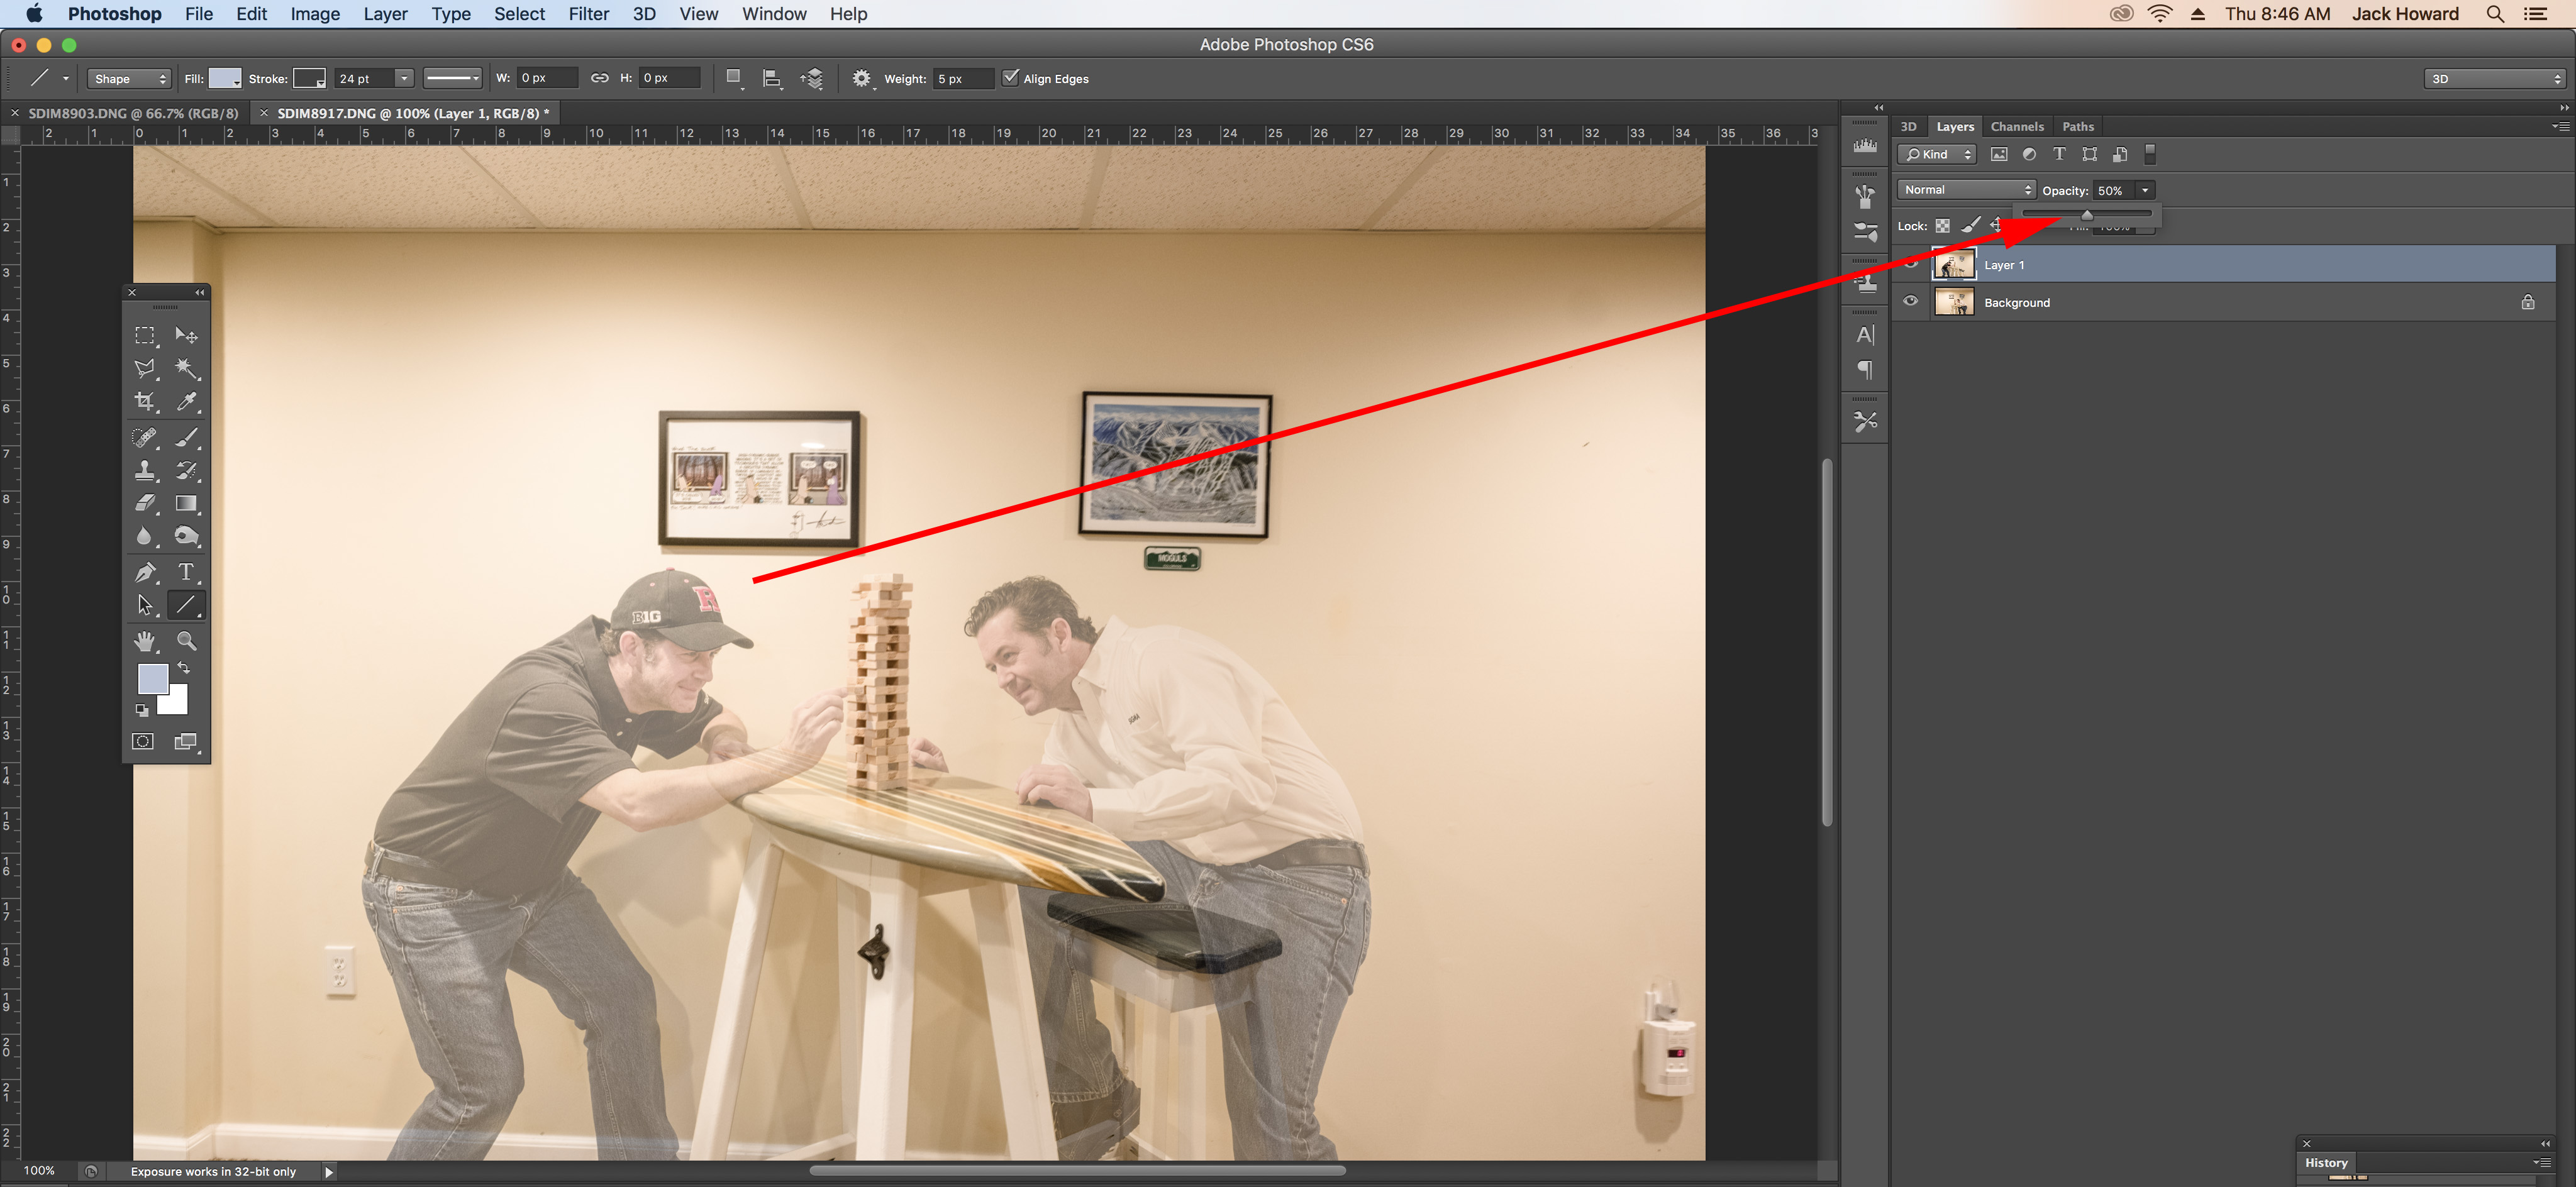
Next, in the Layers Palette, drop the opacity of the top layer to 50% so you can see the base layer ghosted through. Click on the Eraser tool, and set the brush size to a pretty large radius.
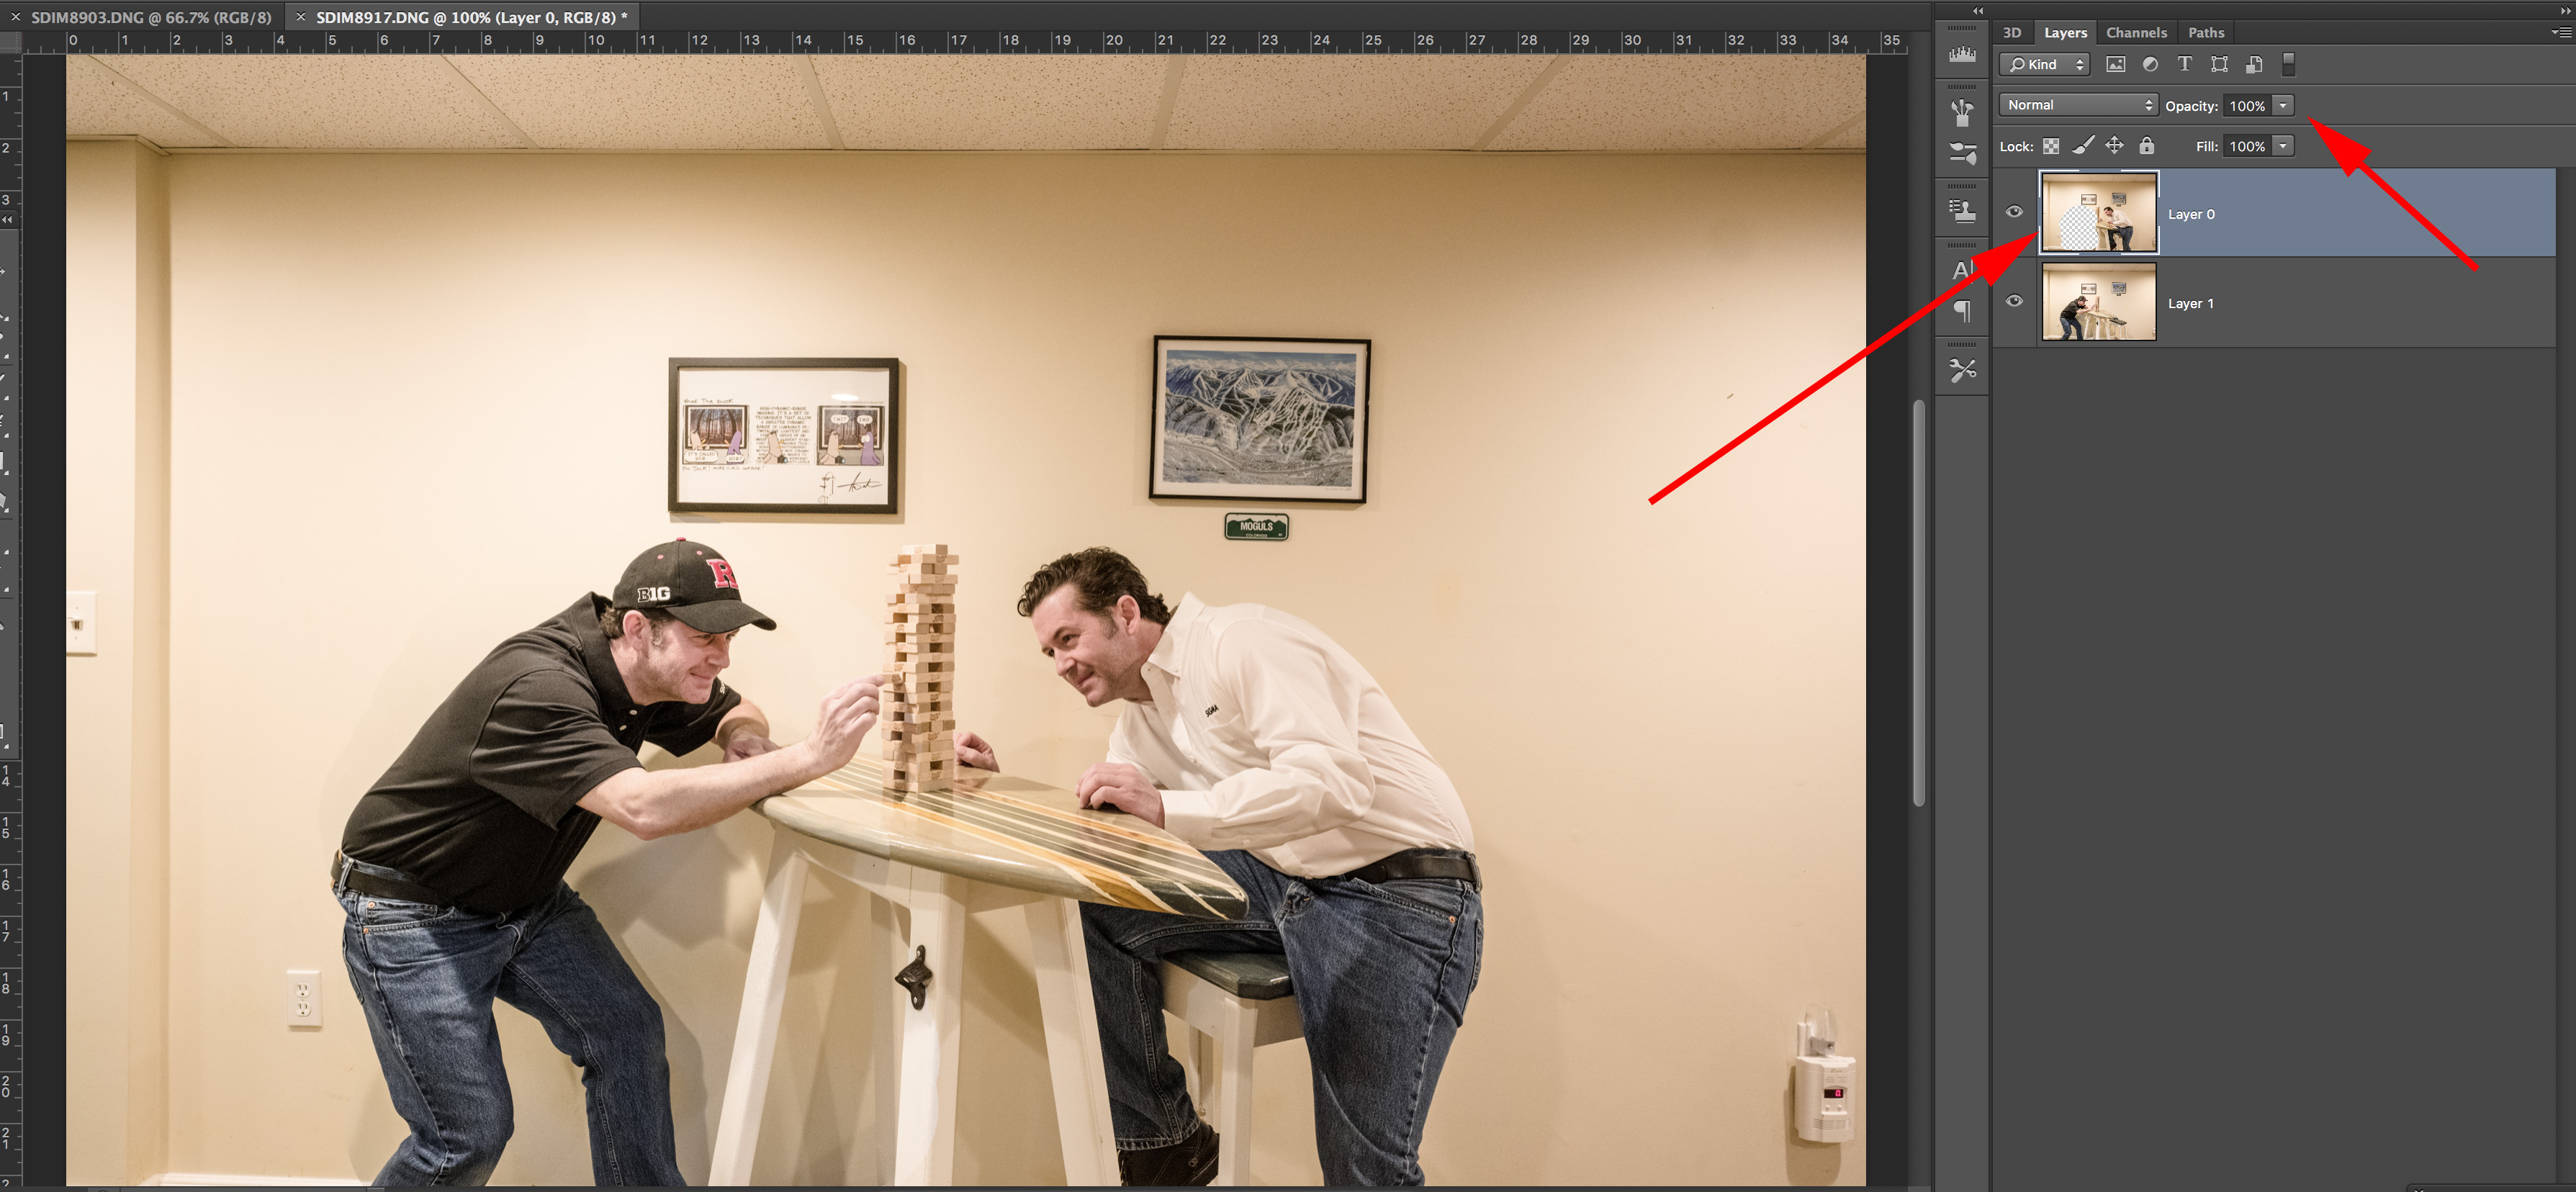
For my full-resolution image, I choose 279 for my radius, with a softened edge. Click on the Layers palette to select the top layer. Then with a couple of strokes, simply gently glide the eraser over the area of the image where you want to pull in the person from the background layer (don’t forget about the shadows, too!).
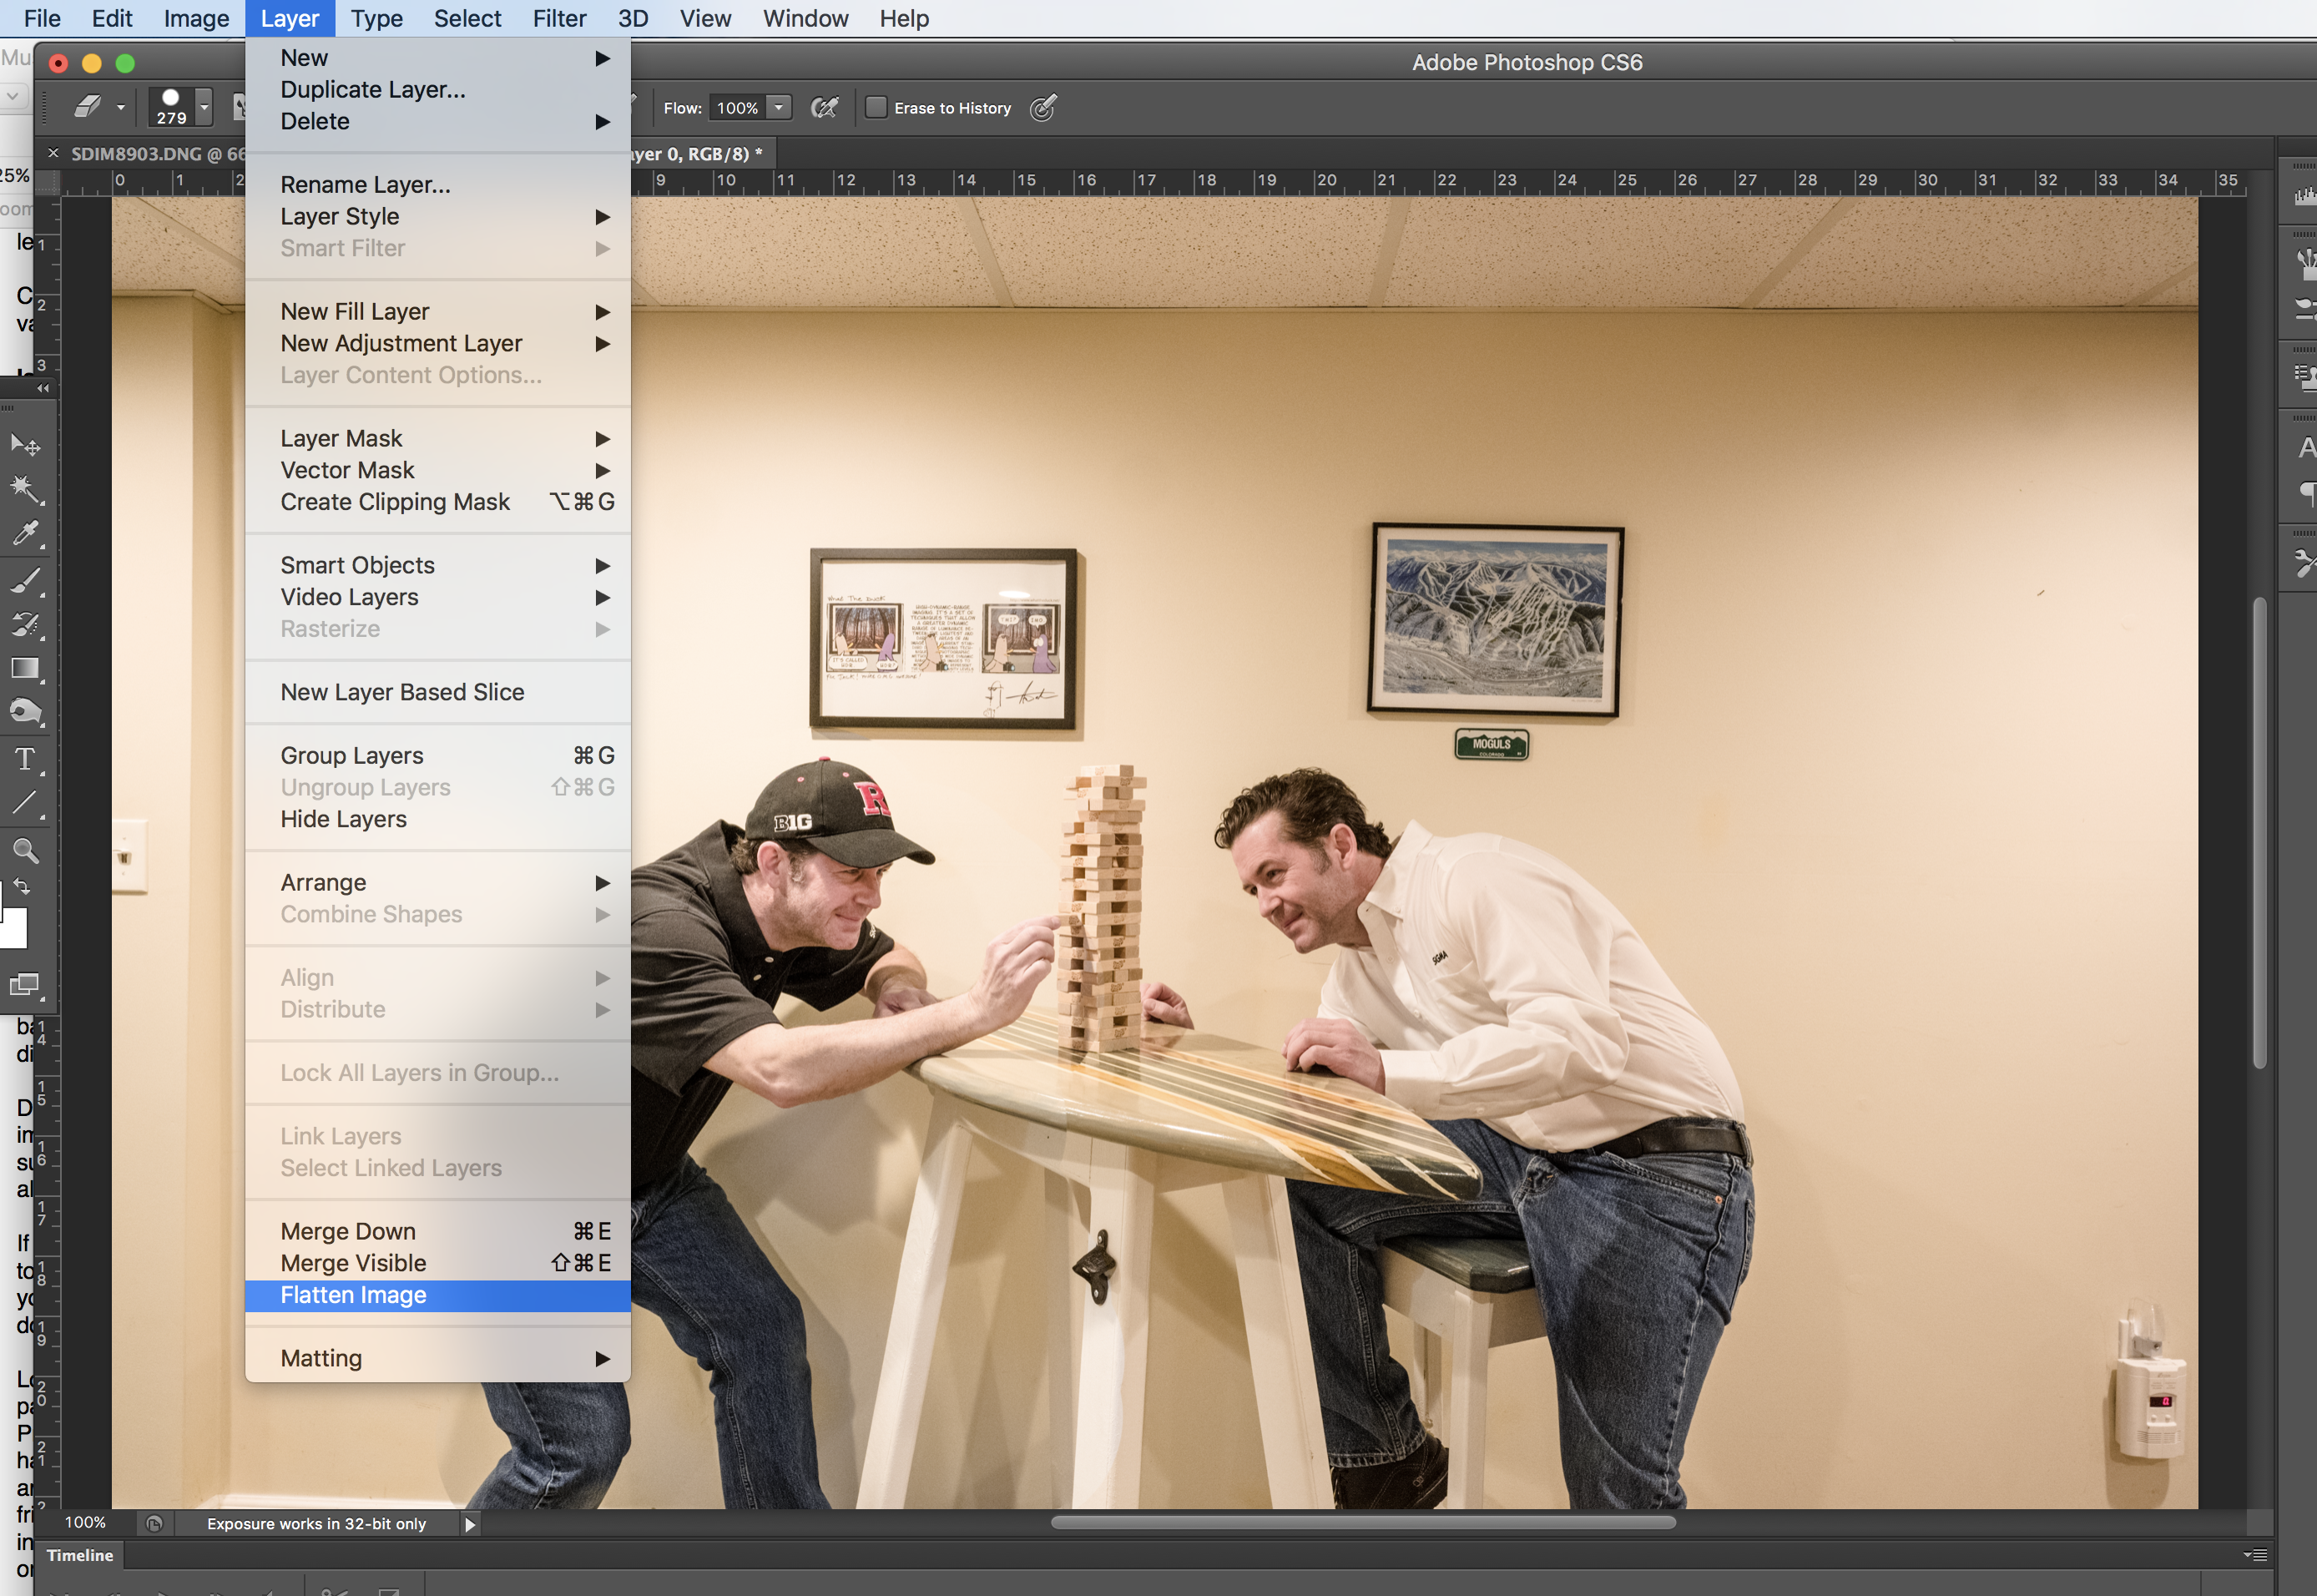
Once you’ve blended the subject in, simply flatten the image, save and share it with your friends!
A Couple More Ideas on Creative Ways to Use This Easy Photo Composite Trick!
- Divide the frame into three equal parts and hold up three signs that say “I” “Miss” “You” or “Thinking” “Of” “You”. Repeat the steps above, but with three layers!
- Have a game of catch with yourself!
- Tag! Be both the “It” and the runners being chased—kids love this!
- Be both bartender and patron in your game room bar.
- Sit on the couch, and the chair, and the ottoman to document your epic binge-watch session.
- Be a solo dance troupe or cheer squad!
Good info