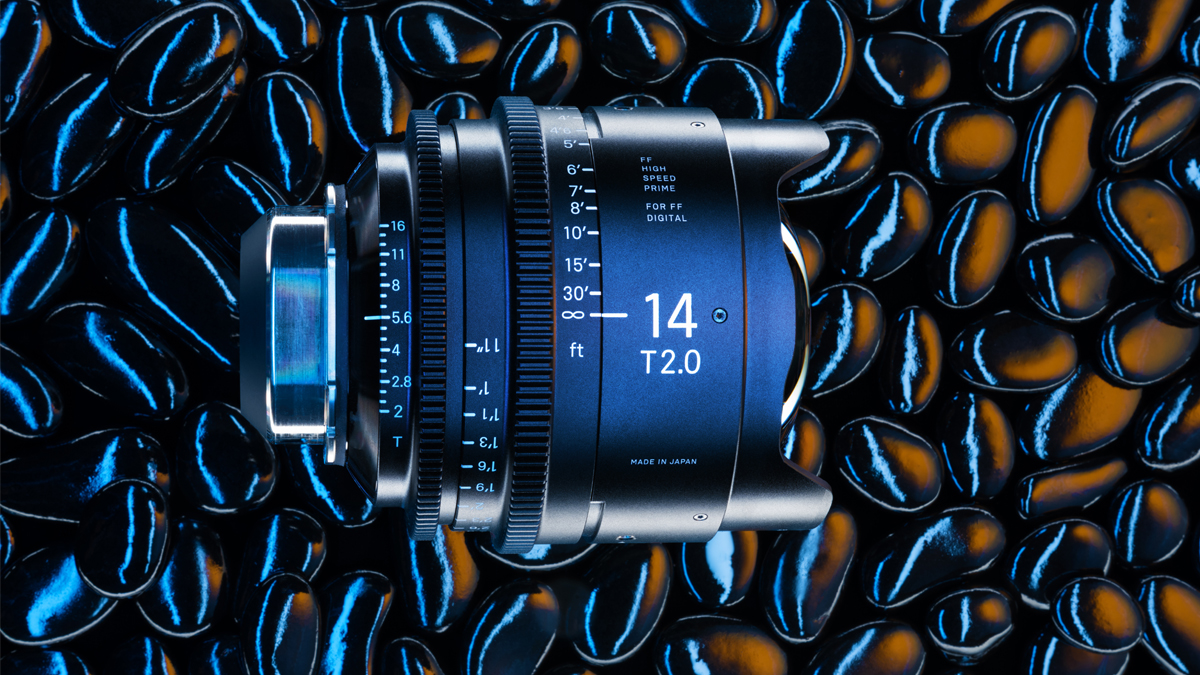
When SIGMA asked me to do a breakdown of the process of making a product photography tabletop shoot, I figured why not make it about my favorite lenses themselves. The SIGMA Cine full frame primes, they are quite good looking after all. I chose the prettiest of the bunch in my opinion, the 14mm T2.0 Cine Prime. It has the one feature that you can see, its massive nearly spherical front optic. From the typical head on product photography position, lending me more freedom for composition and style.
The Aesthetics of the Shot
I got to thinking about that ball of glass. I wanted its set design to be like the ball of glass. All about reflection and bending light. The deep matte black paint on the lenses and white markings gives them a stark look. Unlike Cooke’s/Arri yellow markings, Angeniuex’s red accents and logo or Leica’s grey bodies with splashes of colors, the Sigma Cine are pure monochrome. Just black paint and white markings is a very modern aesthetic. I think they are one of the more attractive looking lenses just from an aesthetic design point of view. Mechanical, yet the textures of the paint feel almost like stone to me.
I started thinking about stones and how I could use them. Initially experimenting with some slate as a background, but it just didn’t feel right. Later, I found some commercially polished stones in bulk, and they had a black shiny glass like appearance. On camera, they just looked like marbles. They had no texture, just highlight and jet black.
Soon I discovered that wet river stones had the combination of aesthetics I was searching for. A rich shine, and still enough texture to pick up light. Trouble is, unless submerged, they just dry to a matte black. Then I had the idea to oil them. Ideally, it wouldn’t dry, and would give it the gloss look that almost resembles high end metallic auto paint. I sorted through 18 pounds of stones, and picked out only the most perfect “camera caliber” individuals. I felt funny, sitting there passing judgement on individual rocks. Almost a “hot or not” type process.
I used a jewelers velvet backdrop, the blackest black surface you can get. And on top of that I lifted the lens up on a glass block to get some separation from the stones. I didn’t want them totally in focus. At this point I started lighting. I used Vibesta Peragos RGBWW Tube lights to give long thin reflections in the Lens and stones. The main Key was a Rayzr7 300W Daylight fresnel with 2 layers of Amber gel pushing through a 4×4 of white milk glass P95 plastic. This was to create a warm amber glow that would reflect in the stones and give a splash of color to the set.
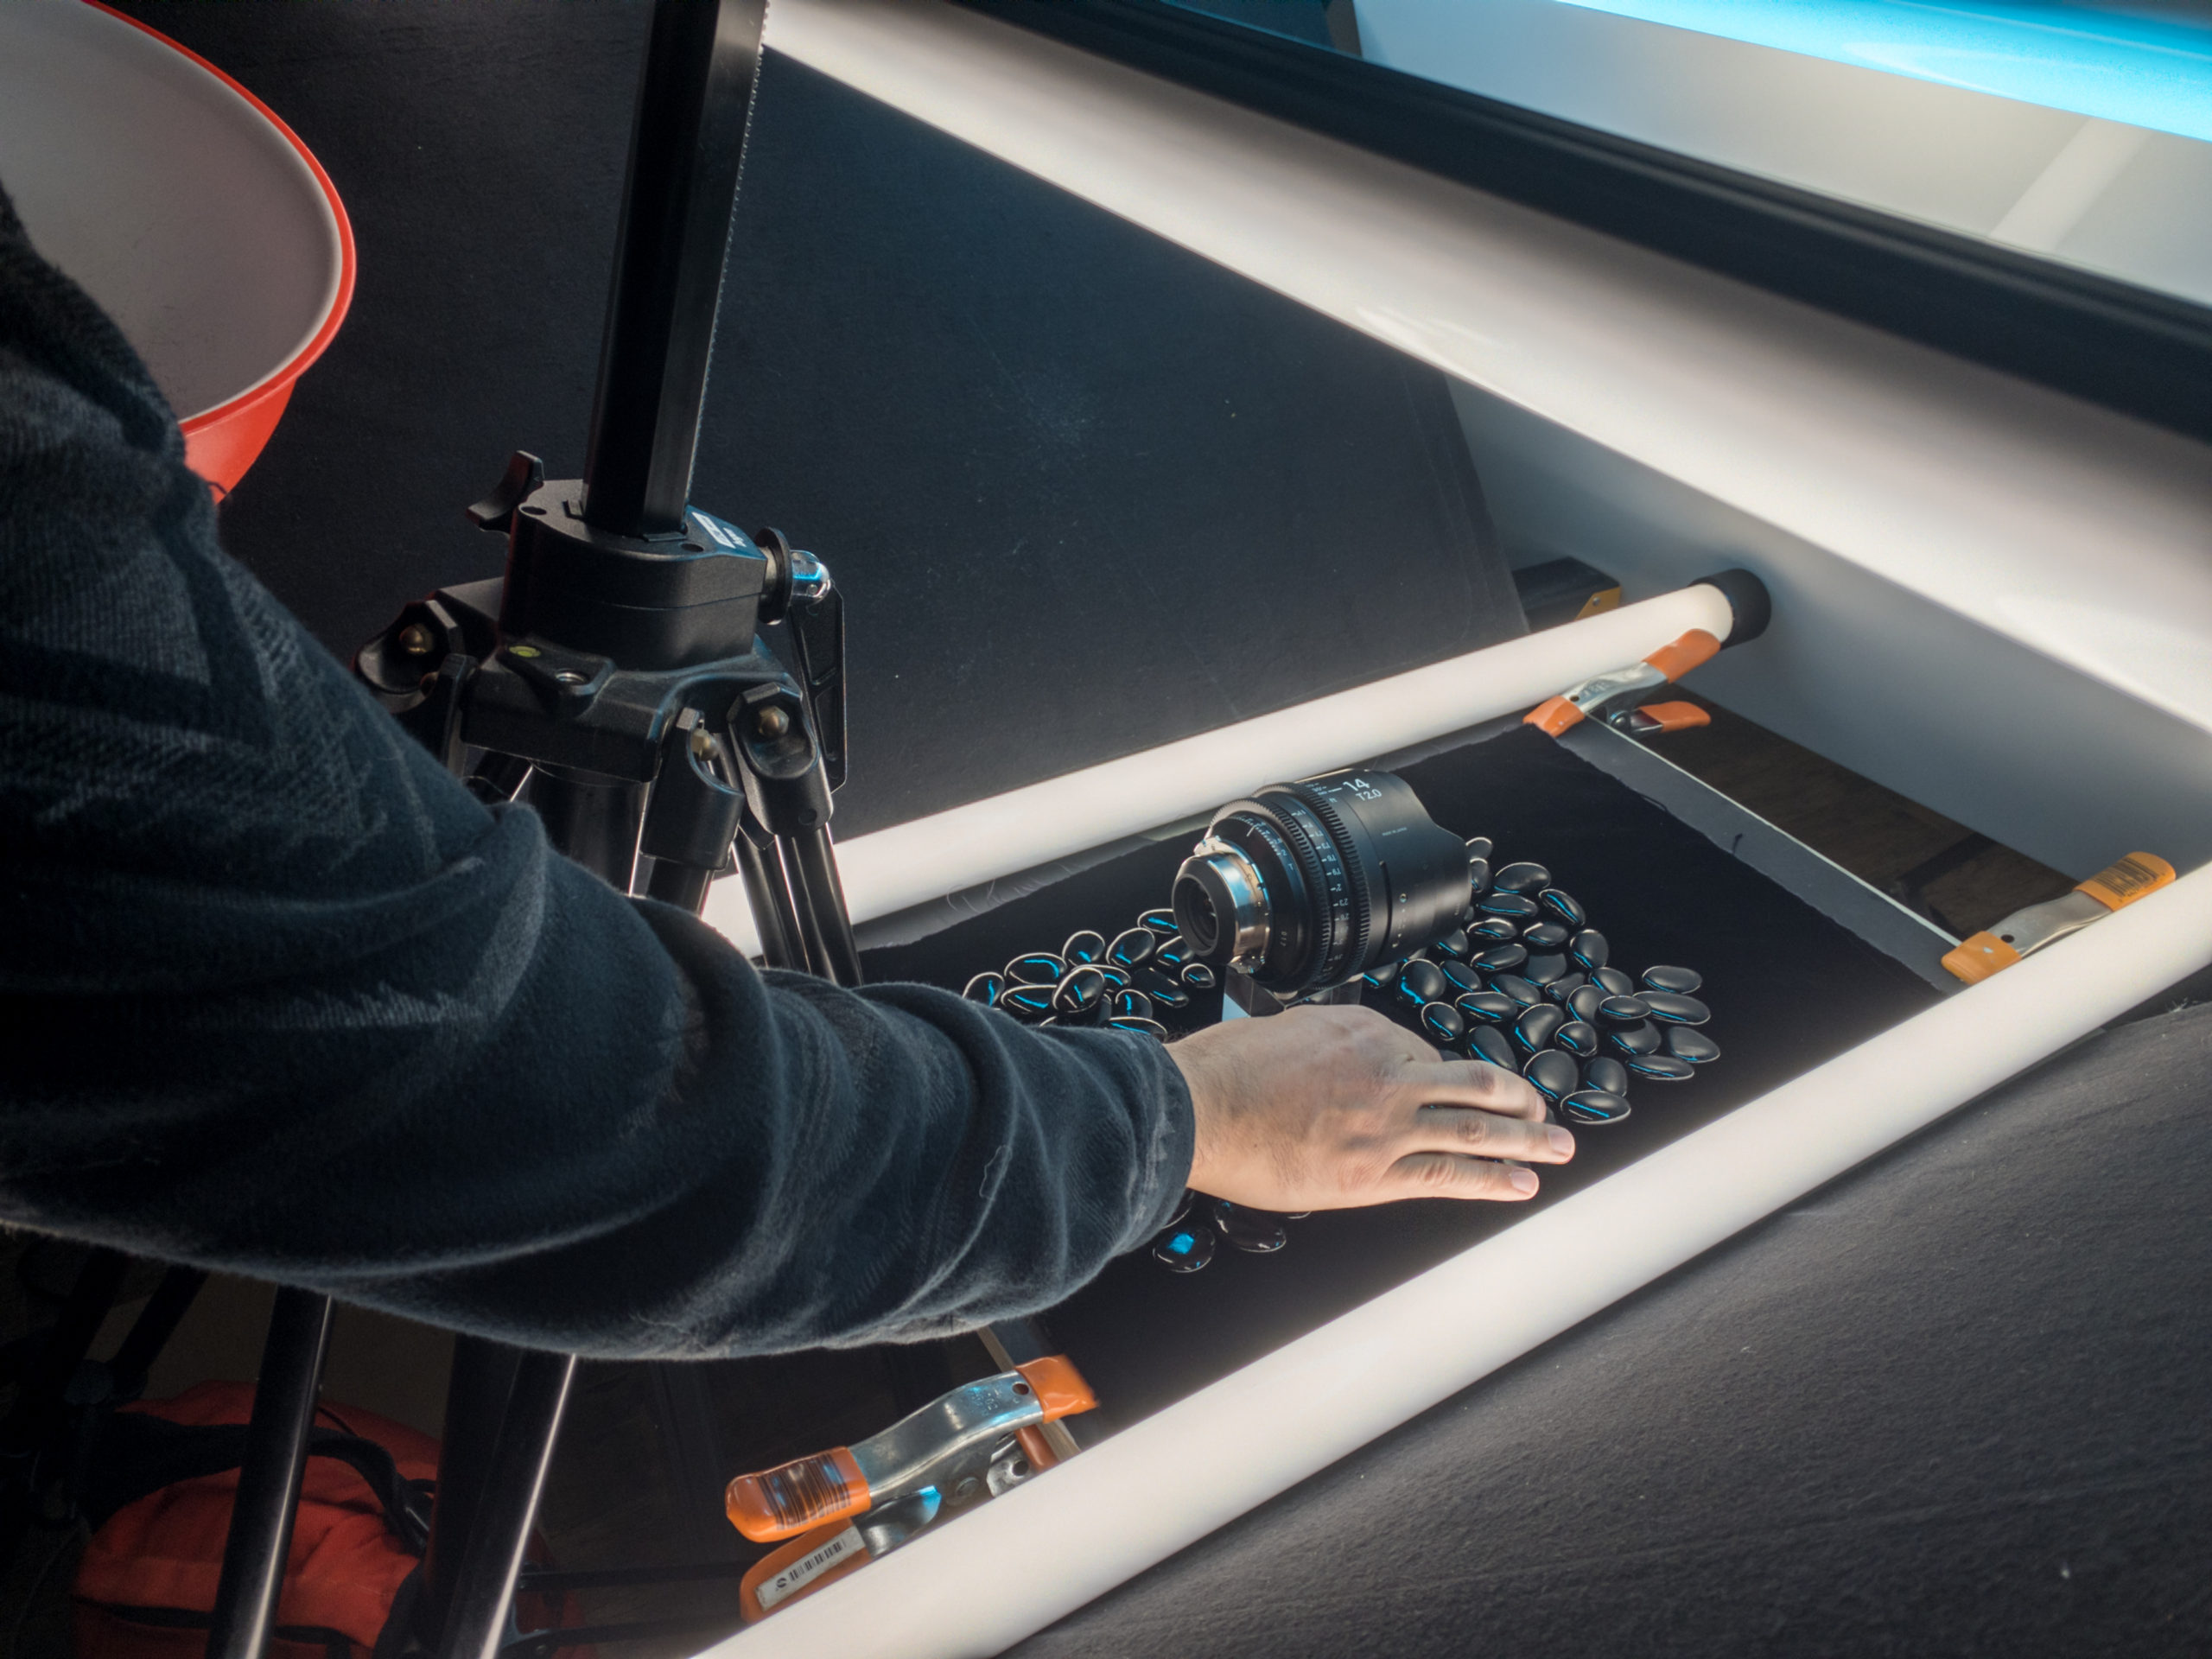
The Lighting Setup
Two light tubes ran vertical up and down the set on the table surface, just out of frame. Most importantly, they provided the edge light to the lens, and highlighted the “glass sphere” front element, as well as long thin highlights on the oiled stones. With two more running perpendicular next to the lens. With careful placement of the tubes, and camera angle, I was able to make the colors from the tube lights affect different parts of the image, without too much contamination on the subject. Furthermore, I did want some hint of color reflecting in the center sheen of the lens body, but it was subtle and for the most part contained. Just by sliding the tube near the lens forward or back, I was able to control how much of that spill colored the body of the lens.
The Camera and Lens
I shot this on the SIGMA fp with the L mount 24-70 F2.8 ART zoom lens. I did a pass of focus stacking, the technique where you compile small incremental focus changes into one “all in focus” image. This is critical for still life photography as even at F16 that I shot at, there was only about 1/2″ of depth of field at 70mm with the subject so close to the lens.
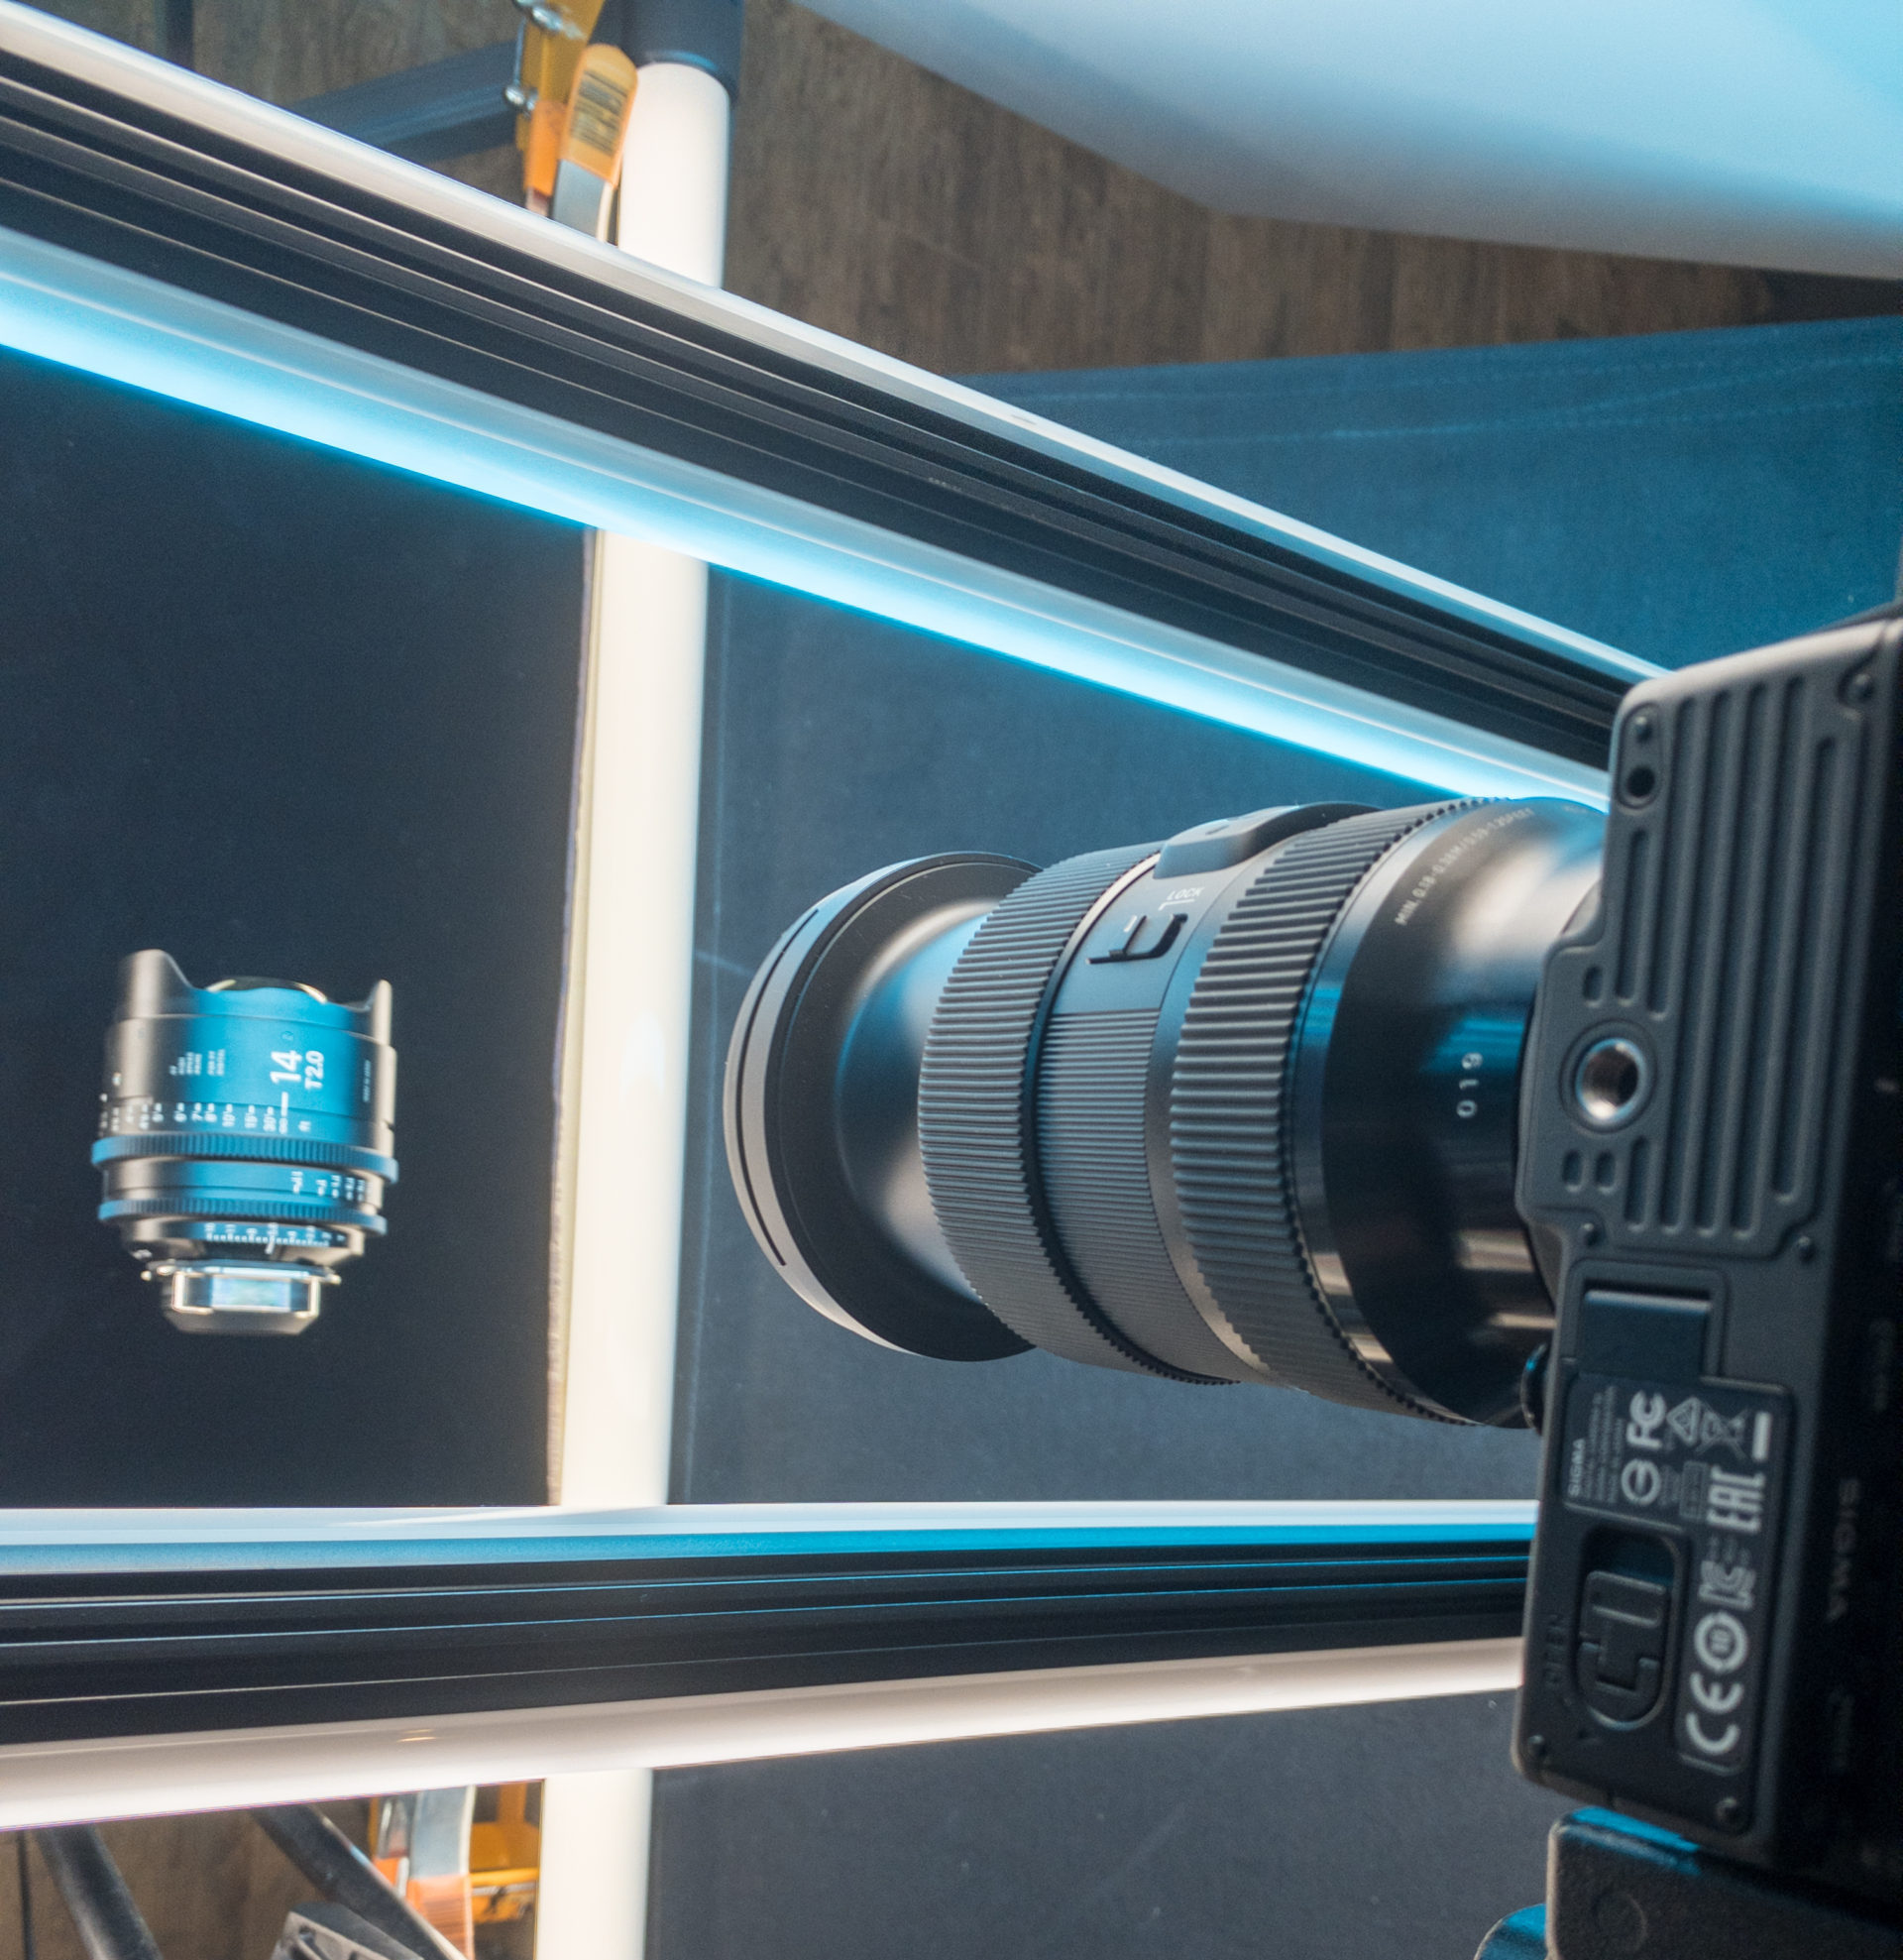
I used Helicon Software to perform the focus stack. Its quite amazing. works like magic. So long as you take enough images to give it information to work with. I shot about 10 images, and incrementally focused from the front of the lens barrel to the center of the lens barrel the furthest visible part of the body of the lens. Since I raised the lens off the surface, I was able to retain some shallow depth of field despite the focus stacking with regards to the set surface.
Finally, other than focus stacking, basic RAW development and dust elimination, there is very little post work on this, and no composites.
The Final Product Shot
Here is the final lighting and camera set up along with the final image of the product. I hope this insight into my working process was as interesting for you as it was for me.

Read more from SIGMA Cine Ambassador Timur Civan:
very nice shot and the set up is outstanding congratulations and God bless.