Each aviation photographer has their individual passion. Air show. Warbirds. Airliners. But I think in almost every aviation photographer is the common passion to want to shoot an airplane air to air. Maybe it’s the ultimate expression of vision and equipment in the ultimate aviation environment. And it’s achievable with your mind on safety, technique, and the right equipment.
Note that safety comes before technique and equipment with air to air photography. It’s one thing to ride in an airplane and take photos of the ground below. It’s another thing to have an airplane 50 feet off your left wing going 120 miles per hour. Safety of both airplanes and all people involved comes first before any photograph. So step one is to find a photo plane pilot and a subject pilot that are qualified in formation flying. Here are a few bullet points on setting up an air to air photo mission:
- Pre-flight briefing- both pilots must sit down and talk over what they are going to be doing. Again, safety is priority. Then come the photos.
- Communications- both pilots must be in radio communications with each other. I have always found it best to be in radio communication with my photo pilot, who then relays my instructions to the other photo subject pilot. Find a radio frequency that is not busy and approved for your communication.
- Clear view- it’s essential to shoot from an open window in the photo plane. Even better is if the plane has been approved to have a baggage door removed for the flight. Photos taken through airplane windows will not look exceptionally sharp or clear.
- Safety harness- essential if a baggage door is removed.
- Best time for the photo mission- dawn is a perfect time for air to air photos. The light is beautiful and the air is calm. An hour or two before sunset is also a good time. Again, beautiful light and usually calm air. Try to avoid high-noon because of overhead harsh light and usually bumpy air.
- Slow maneuvers- I usually give instructions like “five feet right and 10 feet forward” to my pilot to relay to the subject pilot when I want the subject plane in a different position. The distances are more relative than exact. The smaller the number, the smaller I want the plane to move in that direction.
- Safety pilot- I always have a second pilot in the photo plane to keep a watch for other aircraft in the area. Also keep an eye on your airspace so you don’t find yourself where you shouldn’t be.
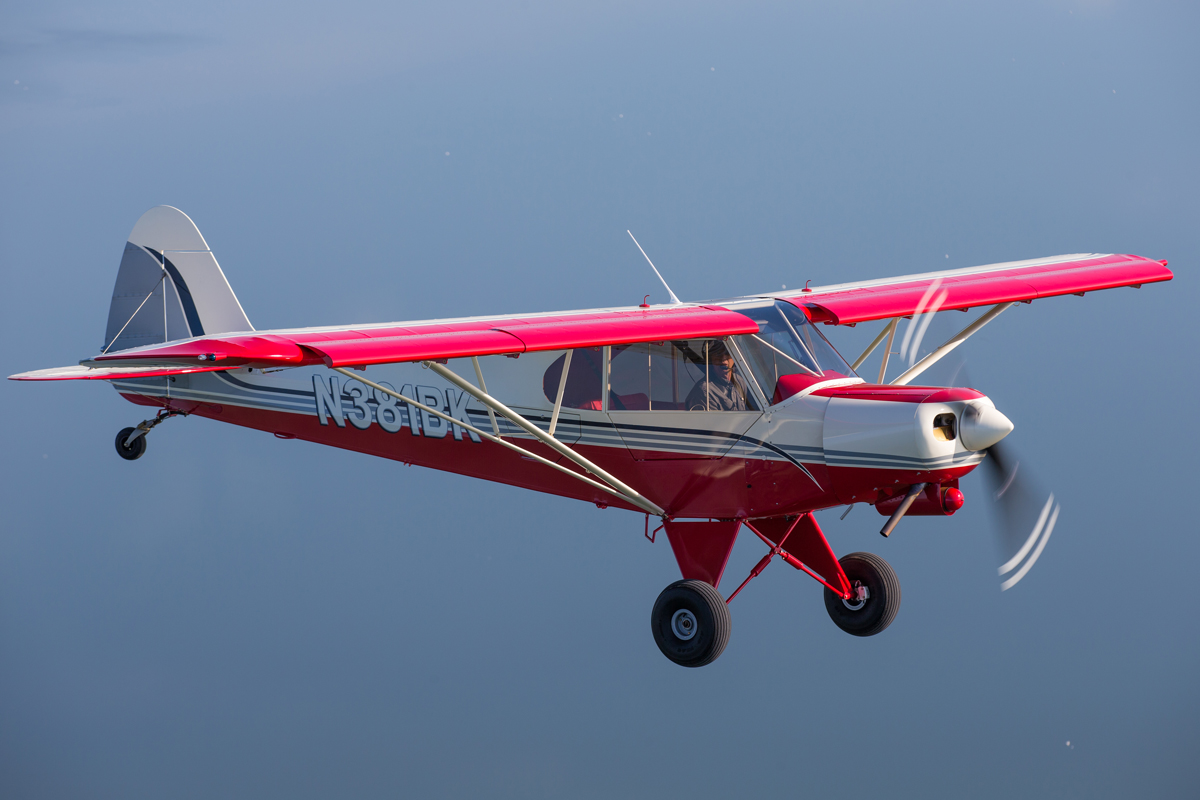
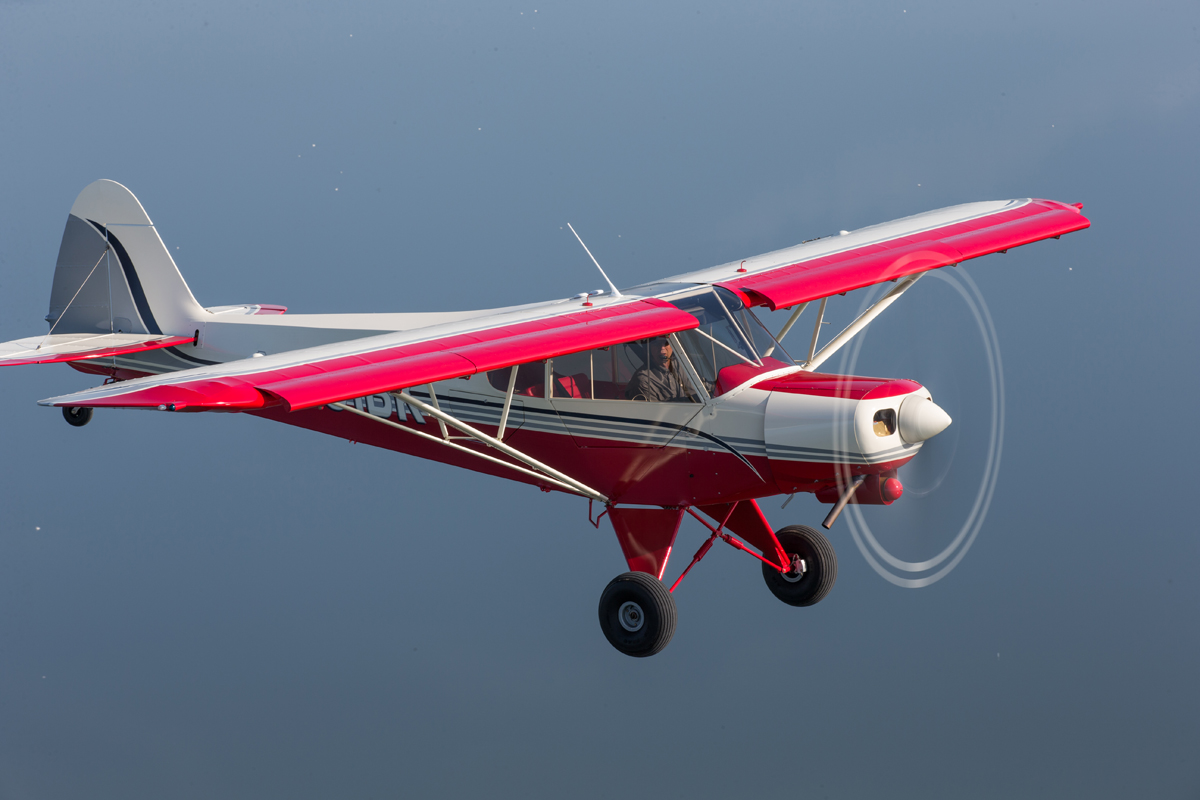
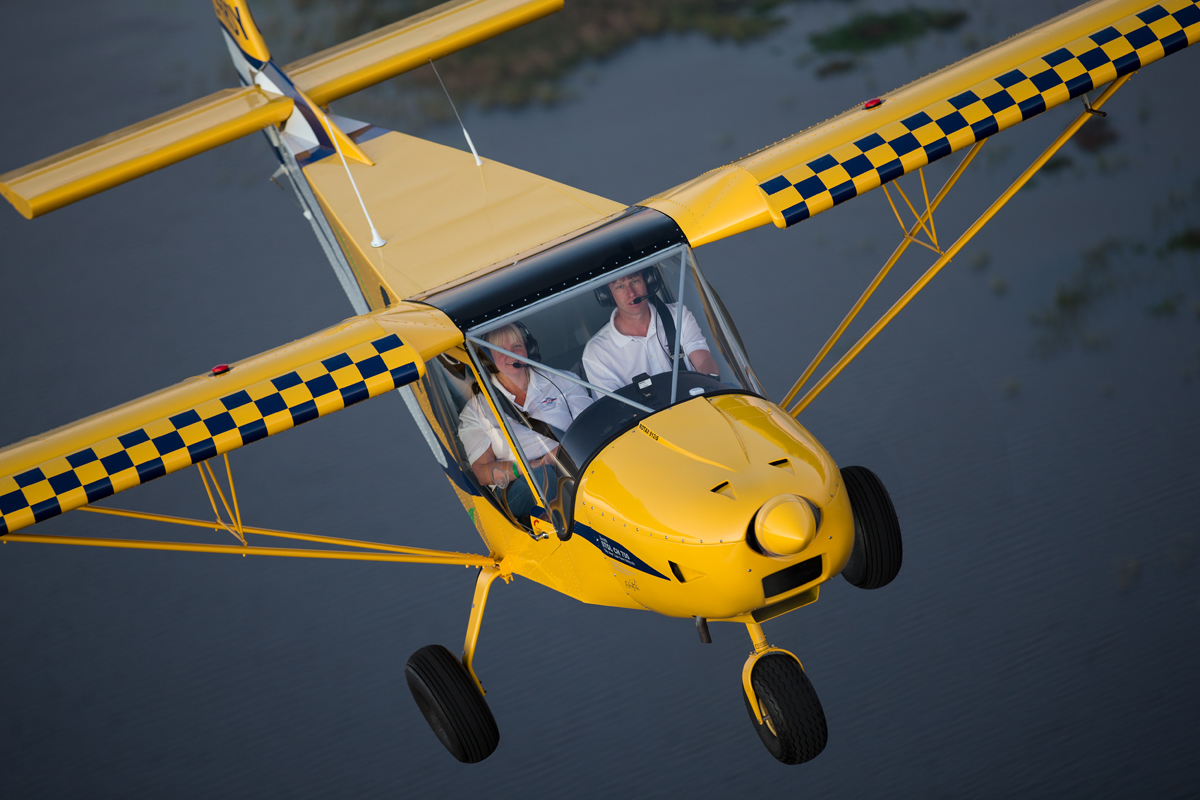
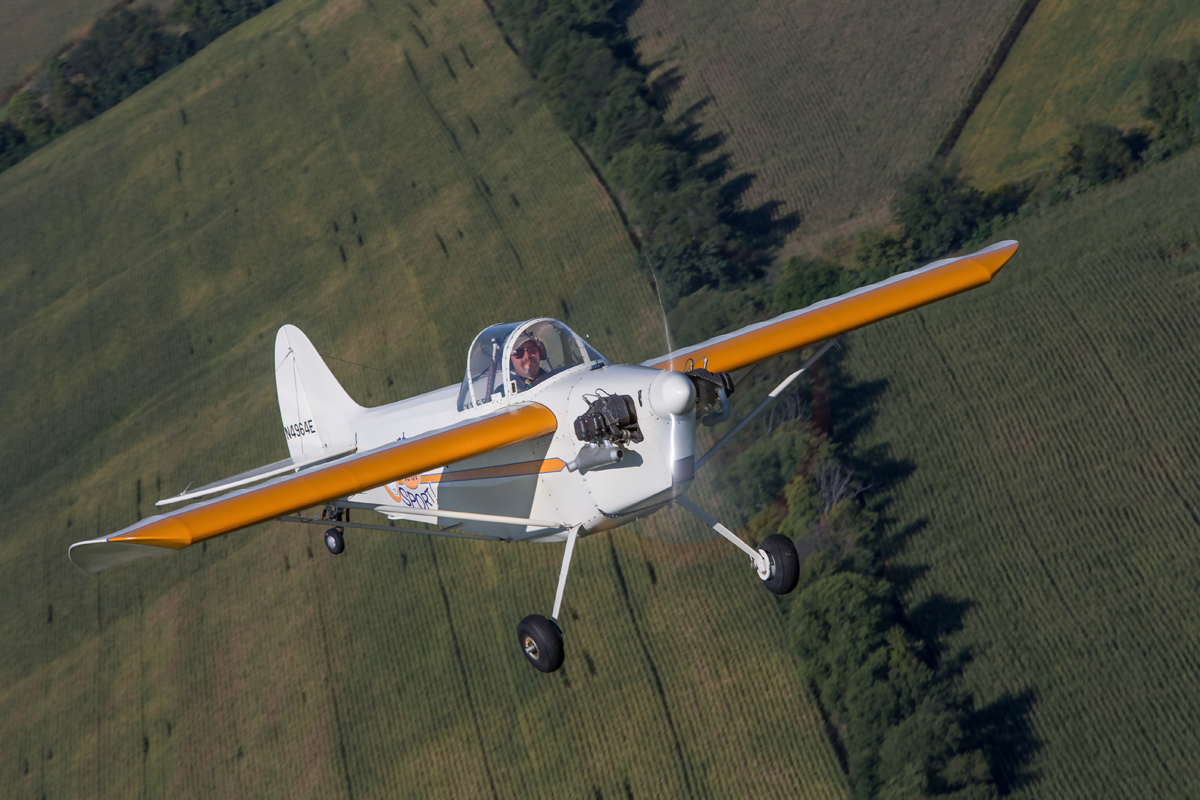
- Altitude- This varies with your location and the terrain. From a safety standpoint, make sure the mission is being flown at an altitude high enough that each pilot feels safe if they had to make an emergency landing. From a creative standpoint, a lower altitude, such a 1500-2000 feet, allows lakes or farm fields to become part of your composition. I like that when shooting smaller vintage planes. If the air starts to get bumpy at the altitude you are flying at, start climbing until you feel it smooth out. If there are clouds in the area, you might want to take the flight above them for more consistent light and the beauty of puffy clouds as your background.
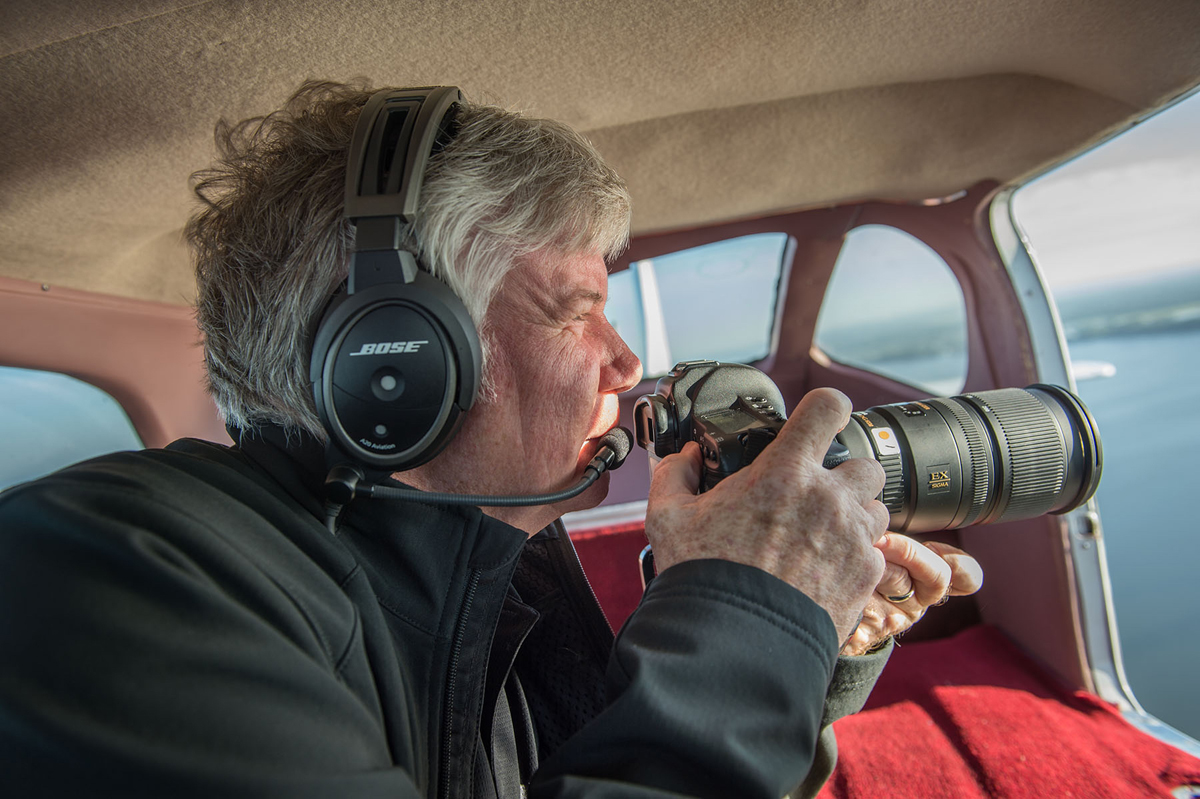
Which lens to use for a photo mission? The SIGMA 70-200mm f/2.8 EX DG APO OS HSM is my first choice. This is the perfect zoom range to keep the aircraft at a safe distance while getting tightly composed photos. The lens is sharp, and the Optical Stabilization is definitely a plus when trying to shoot with slower shutter speeds.
That, of course, doesn’t mean Sigma doesn’t have some other great options out there too. I used the SIGMA 18-300mm f/3.5-6.3 DC MACRO OS HSM | Contemporary at a recent fly-in and got great results on air to air missions. The incredible zoom range of this lens is able to capture really tight images of your subject aircraft…or with a quick zoom out, also capture the feeling of the clouds and background with the aircraft.
I’m also intrigued by the new SIGMA 50-100mm f/1.8 DC HSM | Art lens. All reviews point to it being incredibly sharp. I can’t wait to try it on an early morning shoot where I might need the wider aperture and want to zoom out for a little more background.

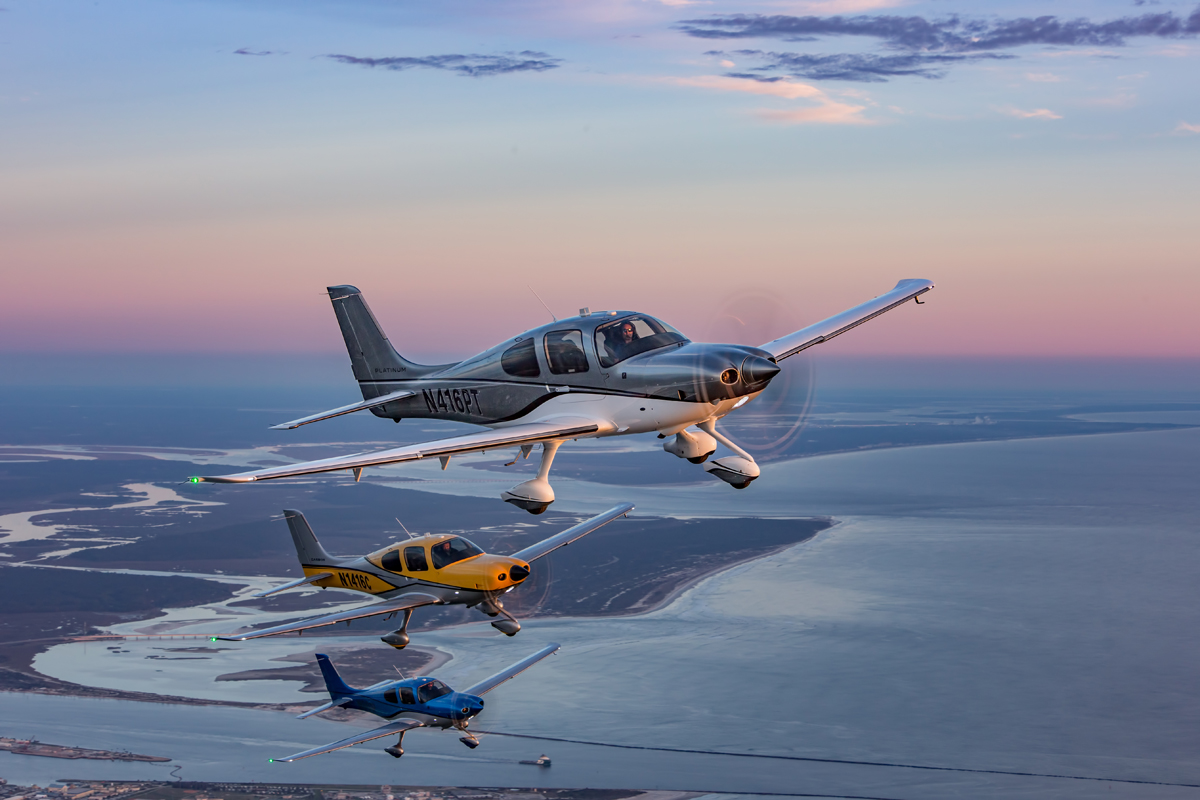
If there is one thing to stress, it’s that you should never change lenses while flying, especially with a window open or door off. I have found the hard way that it is the easiest way to have your camera sensor peppered with dust and dirt. So one camera body for each lens you want to shoot with. I often take along a SIGMA 24-105mm f/4 DG OS HSM | Art lens on a second camera in case I want to shoot wider environmental shots, or if there will be a formation of aircraft to photograph.
Your initial camera settings include:
- Continuous autofocus
- Back button focus
- Shutter priority- starting out at 1/250 of a second
- ISO 100 (this can go a bit higher at dawn and sunset)
- OS on and in mode 1
With the basic preparations taken care of, it’s time for take-off!
Flying is an exhilarating experience, but even more so if you are staring out the open side of an airplane with another airplane flying in formation with you. Your first thought is to start shooting. But slow down for a minute and pay attention to the how the sun is illuminating the subject airplane. Is it backlit? Where is the horizon? These are the first two questions that come to my mind.
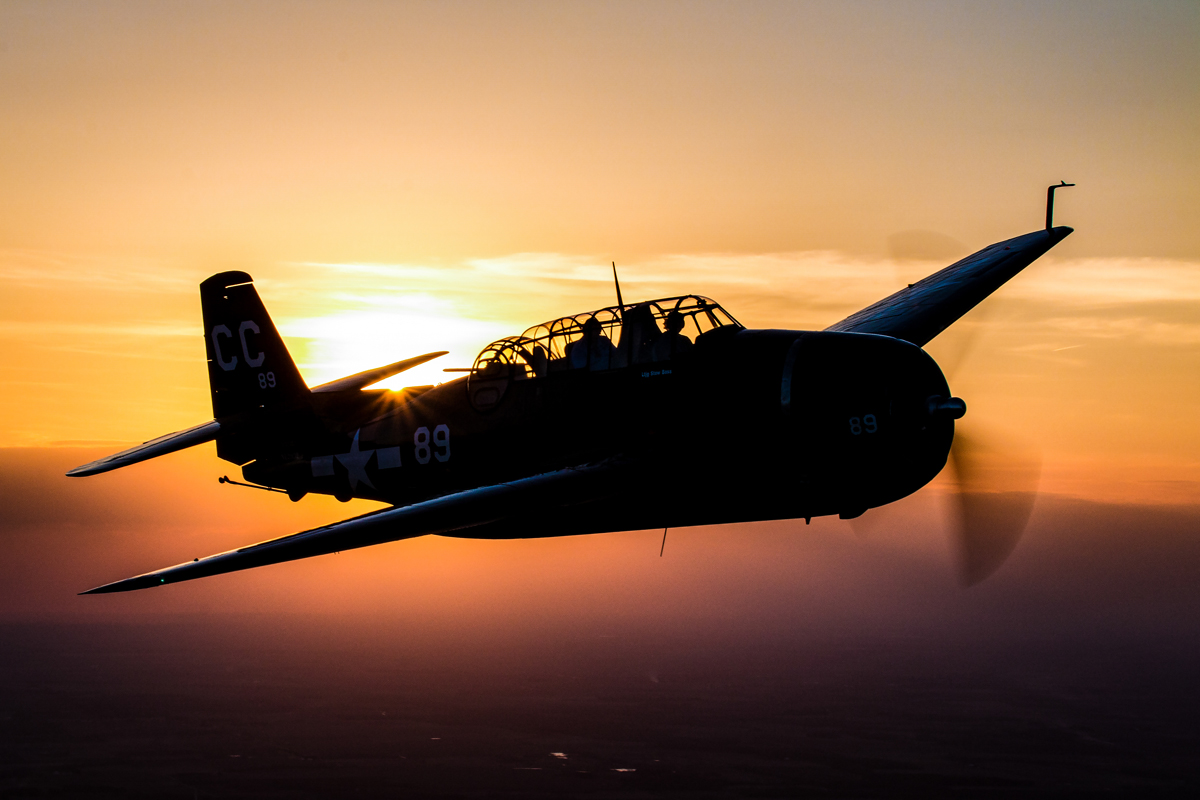
Although sometimes side and backlighting can result in some very artistic photos of an airplane, it’s always good to start with the old rule of sunlight coming over your shoulder to illuminate your subject.
Why is the horizon important? If you look at my photographs, very few will show the horizon line. I like the cleaner look of placing the subject aircraft above or below the horizon line. And doing so will also reduce the subject aircraft getting lost in ground clutter and haze.
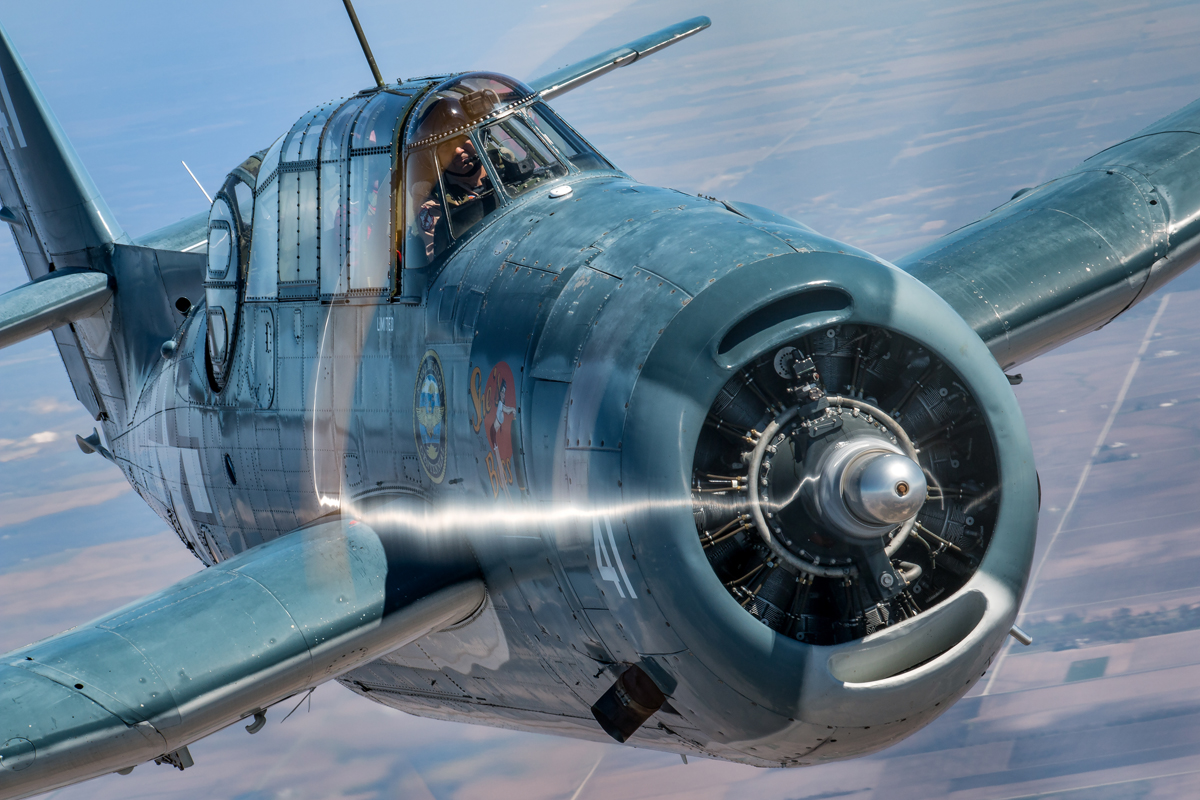
So relay where you want the subject aircraft to your pilot, who will relay it to the subject pilot. Slowly move the plane into position. As a guide, set your SIGMA 70-200mm F2.8 EX DG OS HSM lens at about 135mm and position the plane as well as you can to fill the frame. This focal length will also give you room to zoom our or zoom in as needed for better composition. Turn on your OS. Start with 1/250 of a second shutter speed, and start shooting.
Depending on the position I want the aircraft in the frame, I move my focus point around a lot. I also use an expanded focus point rather than just the single point just in case the single point ends up on a portion of the front cowl that has no detail for the focus to lock onto.
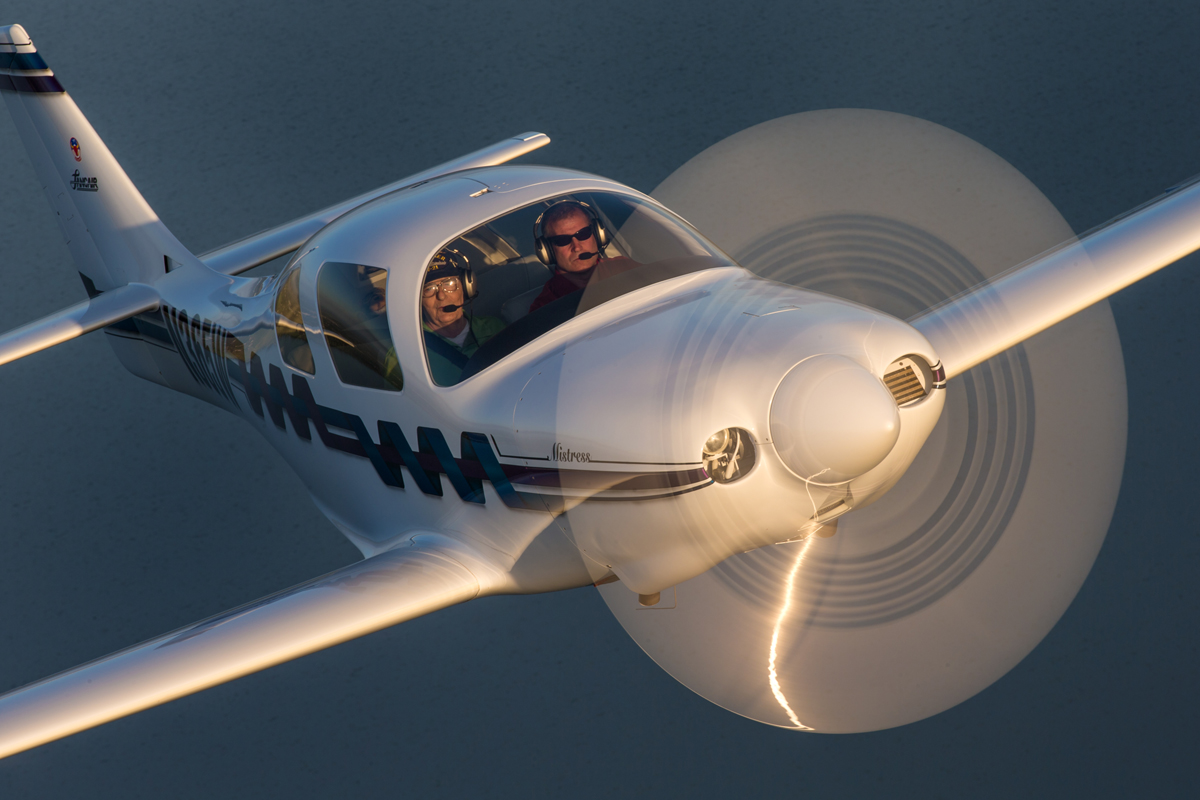
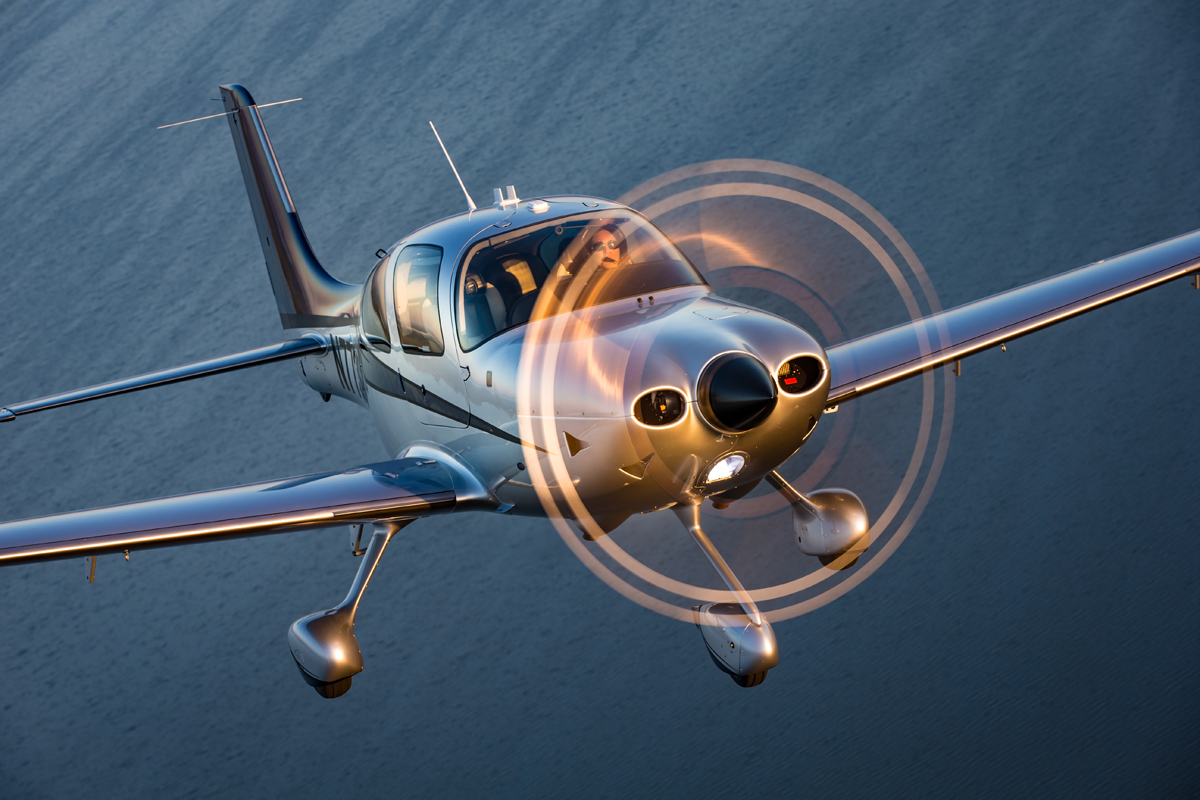
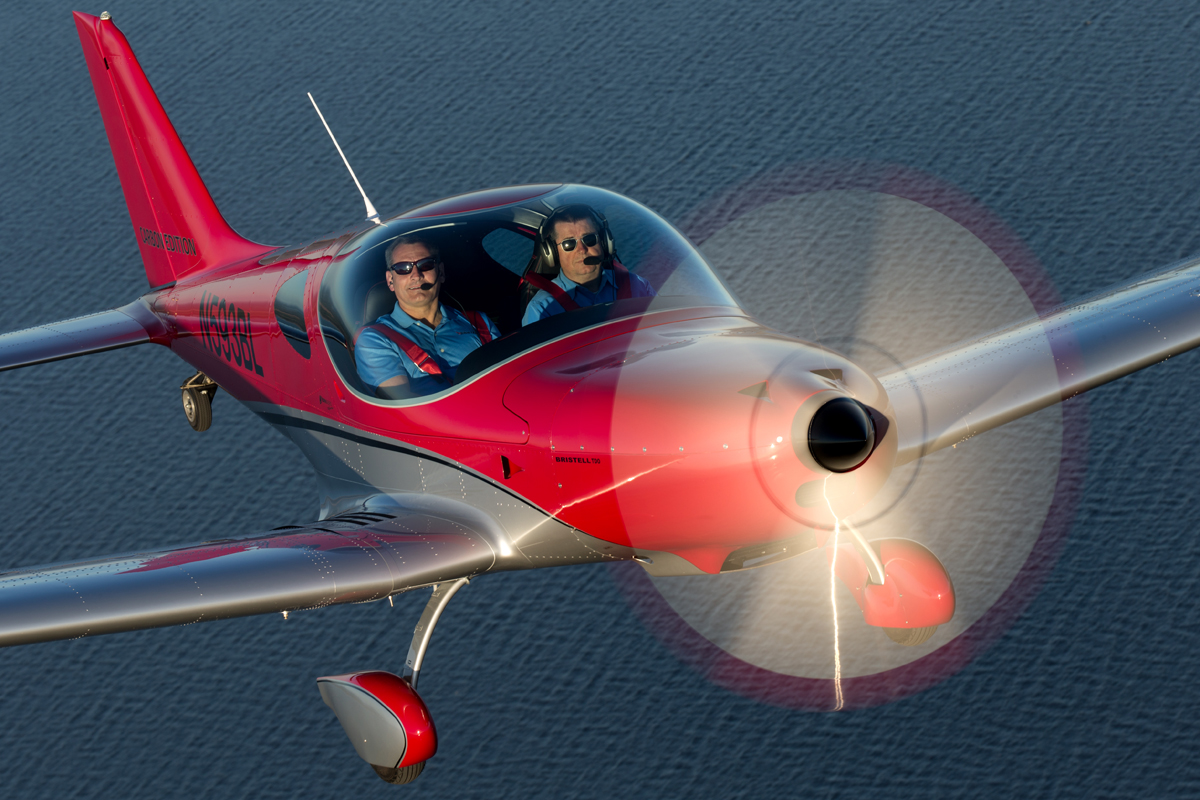
Check your shots on the rear LCD. Zoom in. Make sure most are looking in focus. If they are, and if the air is smooth, start moving your shutter speed down to 1/60th of a second. Smooth air and your Sigma Optical Stabilization will give you a good percentage of photos in focus. And at 1/60th of a second shutter speed, you should be getting the coveted full prop circle desired by most air to air photographers. Depending on the aircraft you are photographing, you may find you can get a full prop circle at 1/80th of a second. I check the LCD on the back of the camera to make sure I have that coveted full prop circle.
The full prop circle has become somewhat of a standard for aviation photographers to achieve. Too fast of a shutter speed will freeze the propeller and it loses that feeling of speed and beauty. A full propeller circle emphasizes speed. There is more to capturing the full circle of the propeller than just a low shutter speed. The background and the sun angle play an equal role in producing a great photograph. A darker background, such as a lake or dark green field will contrast a propeller lit up by the sunlight. Some experimentation is required to find the correct sun angle. I will have my pilot fly in a circle and I’ll watch the subject aircraft as the lighting changes. As the sun moves into the correct angle to reflect off of the propeller blades, you’ll see the full circle. That’s the time to start shooting. Often we’ll change our heading to fly on that sun line and be able to photograph longer with the full prop circle visible.
Once you’re comfortable with the process, have the subject aircraft move to different positions. Also keep an eye on upcoming terrain that will make good backgrounds. I try to not include roads, houses and other visual distractions in the frame.
There are a lot of variables involved in an air to air photography mission… the lighting, finding smooth air, finding clean backgrounds… but the one thing I can always trust is my SIGMA 70-200mm F2.8 EX DG APO OS HSM lens.
Fin fevrier, je vais faire des photos, Cesna to Cesna et avec la 70-200. Lorsque vous parlez de distance sécurité, ca pourrais etre environ combien ? 250 pieds ? 300 pieds ? Merci votre article est passionnant.