Of the three main variables relating to creative and artistic control on DSLR and compact interchangeable cameras–aperture, shutter speed and ISO–aperture control, is for many beginners, the most difficult to grasp. Have no fear, we’re here to help! Learning how and when to select a wide or narrow aperture unleashes the creative and expressive potential of your camera’s lenses, and puts the control firmly in your hands.
Comparing Aperture
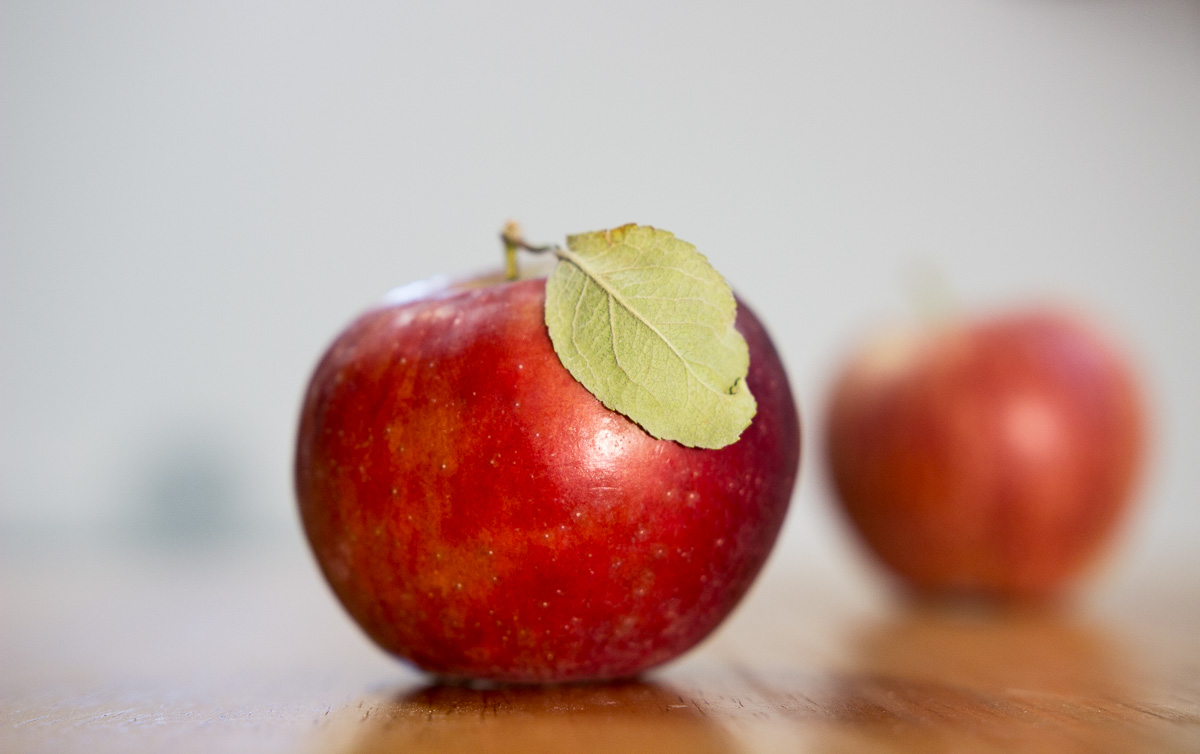
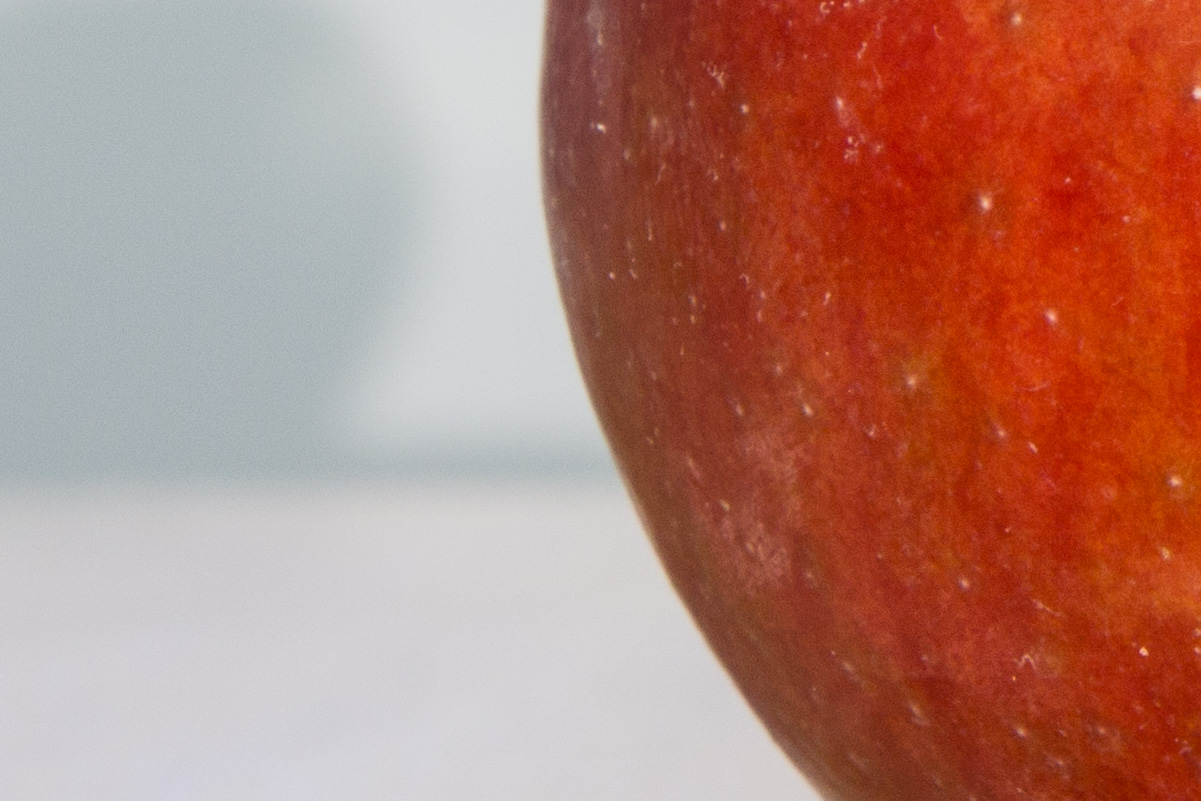
These two apples were photographed with the SIGMA 18-35mm F1.8 DC HSM | A lens zoomed to 35mm with an F2.8 aperture for shallow depth of field. Notice how just a sliver of the leaf and near apple is on the focal plane. The front apple is about a foot from the lens, with the farther apple nine inches behind. The back wall with the very soft shadow is ten feet from the camera.

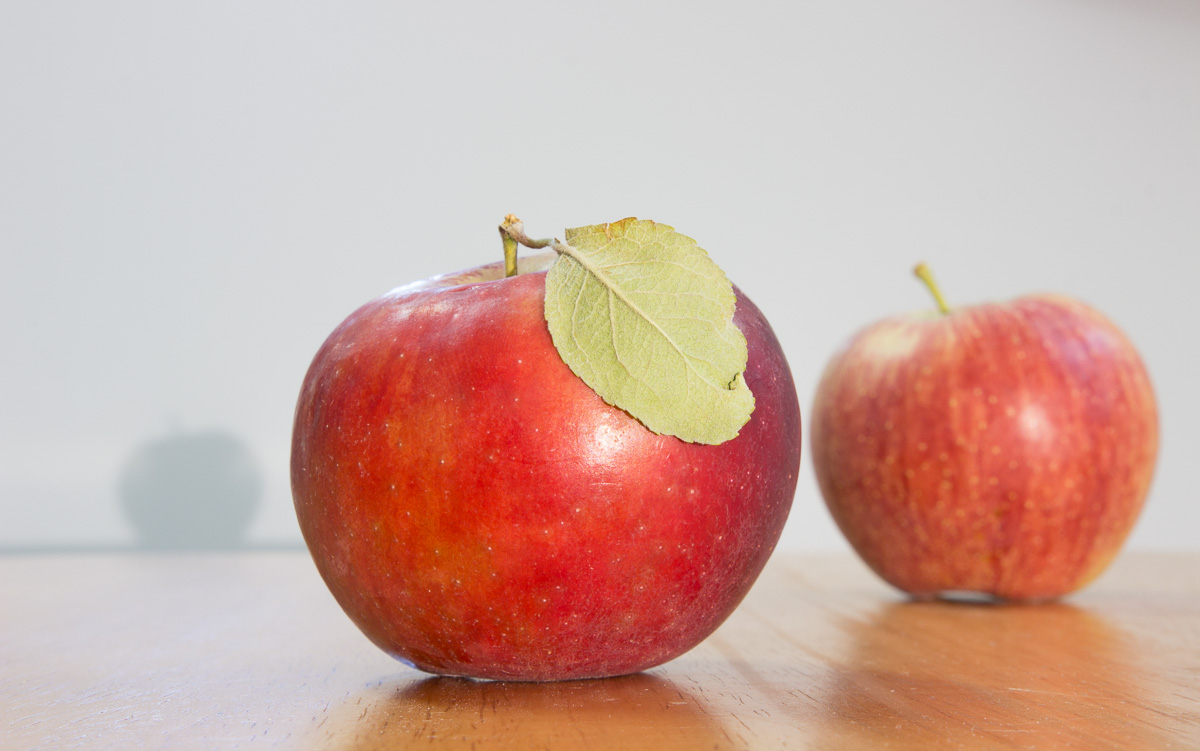
And here is the same image captured at F/16, a much smaller aperture, with the focus again exactly on the leaf of the front apple. The area of the aperture circle is much smaller, so a longer exposure time of 8/10 second is necessary to give an equivalent exposure. Notice how much harder the edges are on both the far apple and the shadow on the wall with the smaller F/Stop.
Quite simply, the lens aperture (also known as the F/Stop) controls the size of the opening inside the lens that light will be passing through during image capture. At a given focal length and focal distance a wider aperture will have a shallower zone of sharp focus than a smaller aperture.

But as the aperture controls the amount of light passing through the lens, adjustments must be made to one or both of the other light control systems of your camera: shutter speed and ISO, to ensure that that total amount of light hitting the sensor remains the same in order to avoid over- and under-exposure as the F/Stops change.
Learning the Lingo of Aperture
There are two things about aperture control that may be confusing to new photographers. First is the naming convention of the full F/Stops, for example, F1.4, F2, F2.8, F4, F5.6, F8, F11, F16, F22. The second is: why as the numbers appear to climb higher, does the size of the opening inside the lens diminish?
Here’s why: the F in F/stop stands for Focal Length, and that slash is actually a mathematical operator, so what we’re looking at is the focal length over the area of the circular (or near-circular) opening of the diaphragm blades inside the lens as the image is captured. So, for example, in nice round numbers, the area of the aperture opening on a 100mm lens at F/4 is 25mms. Make sense, right? One hundred (F) divided by (/) four (STOP) equals an area of 25mm.
As for the naming convention for the F/Stops, that’s based on the square root of 2: 1.41414…. x 1.41414….

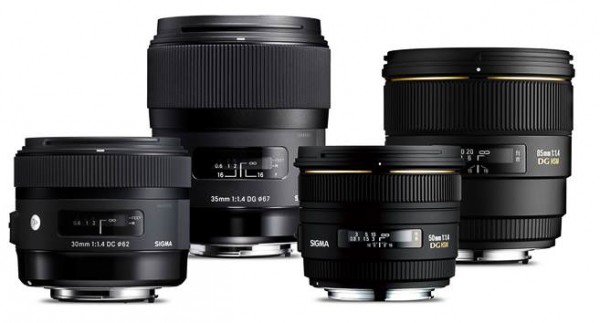
An F1.4 aperture on a lens is actually an opening through the lens that has an area that is the square root of 2 in relation to the focal distance. This means the physical area of the aperture is dependent on focal length. So, for example, the area of the F1.4 circle in the 30mm F1.4 DC HSM | A, 50mm F1.4 DG HSM | Art, and 85mm F1.4 EX DG HSM lenses is not the same, with the 85mm being the biggest of the three. Anyways, that’s the story behind the numbers.
The important thing to commit to memory is that each full stop change, for example F4 to F5.6, doubles or halves the amount of light passing through the lens. So to have the same amount of light hit the sensor for a chosen scene, you’ve got to either adjust the shutter speed or ISO to ensure an equivalent exposure. For example, if a scene is metered at 1/50 at F5.6, an equivalent exposure would be 1/100 at F4—There is twice as much area for light to pass through, so the time value is halved.
Another way to accomplish this is to adjust the ISO a full stop. For example, 1/50 F4 at ISO 100 is equivalent to 1/50 F5.6 at ISO 200. Don’t worry, with a little hands-on practice, it all begins to make sense. (And Remember, ISO doubles or halves in each full stops: 100, 200, 400, 800, 1600, 3200…)
Here are several inter-related reasons to choose the widest/fastest apertures available on your lenses
- Sports and wildlife action. The wider the aperture, the faster the shutter speed will be for freezing motion.

- Powerful portraits. Shallow depth of field and background separation make the subject the primary focus.
- Leading the viewer’s eye to your focus point in the frame. Selective focus informs the viewer of exactly what you chose to illuminate within the frame.
- Available light interiors and exteriors. Again, the wider the aperture, the faster the shutter speed for minimizing undesired camera shake during capture in low-light situations.

- Softened or abstract background rendering. Depending on focal length, focal distance and distance to the background, the background may be a recognizable, but decidedly softened version of the elements, or it may be an abstract impression of its colors and shapes.

Here are several interrelated reasons to choose a slower/smaller aperture on your lenses
- More depth of field to keep an entire subject or focal point sharp. The middle apertures on a lens offer a greater range of sharp focus in front of and behind the exact focus point.
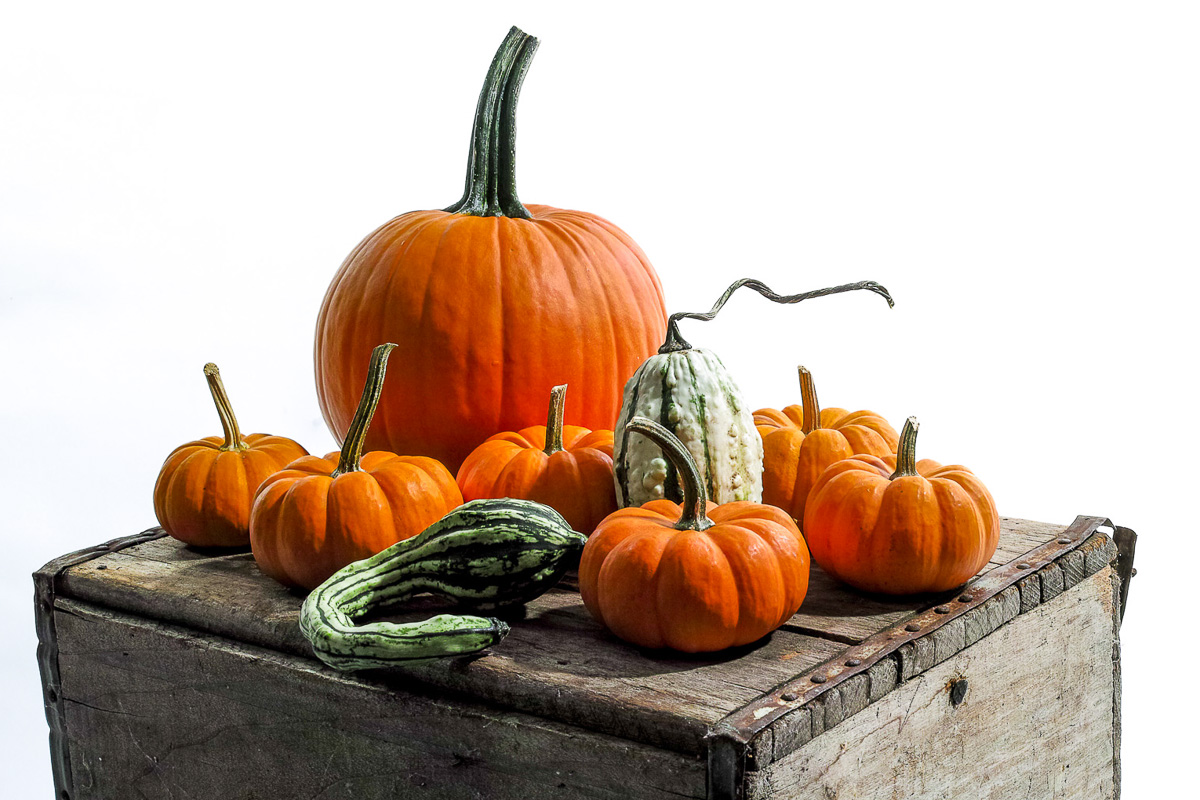
F/11 was chosen as the aperture to keep the entire subject in sharp focus in this fall still life captured with the SIGMA DP2 Merrill. Remember, stopping down a lens increases the sharpest zone both in front of, and behind, the focus point, so in this image, I was focused on the stem of the fourth small pumpkin on the left; not the front corner of the crate.
- Telephoto compression effect. Stopping down longer focal lengths (200mm-300mm and upwards) can make near and distant object appear much closer in the frame than normal human visual perception.
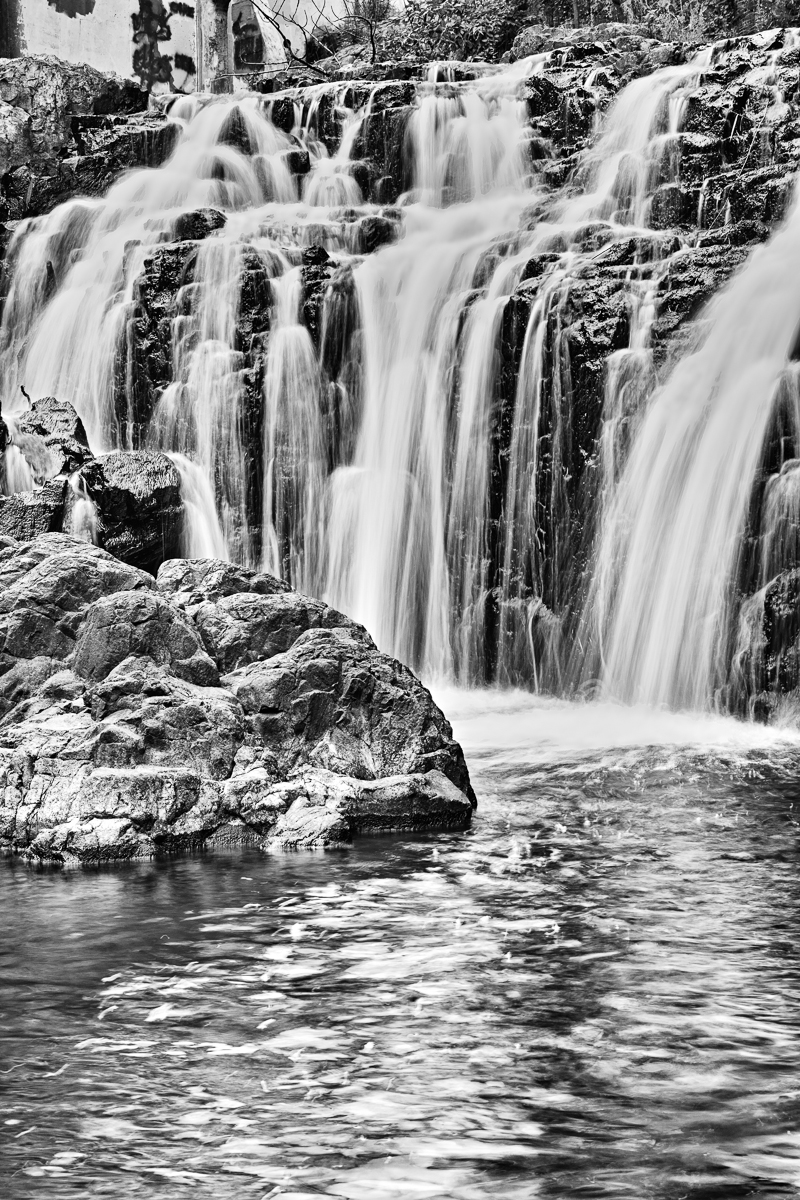
- To highlight motion. Slower apertures require more time to make a proper exposure, so this can emphasize motion in a frame, moving water, cars, etc. (this style of photography often requires a tripod or optical stabilizer.)
- Peak sharpness. The laws of optical physics dictate that a lens will be its absolute sharpest stopped down a little bit.
- Wiggle room for missing exact focus during fast-paced action. In bright outdoor lighting, you can stop down a little with continuous Autofocus for sports, wildlife, and kids running around the backyard to help increase your rate of keepers to misses.
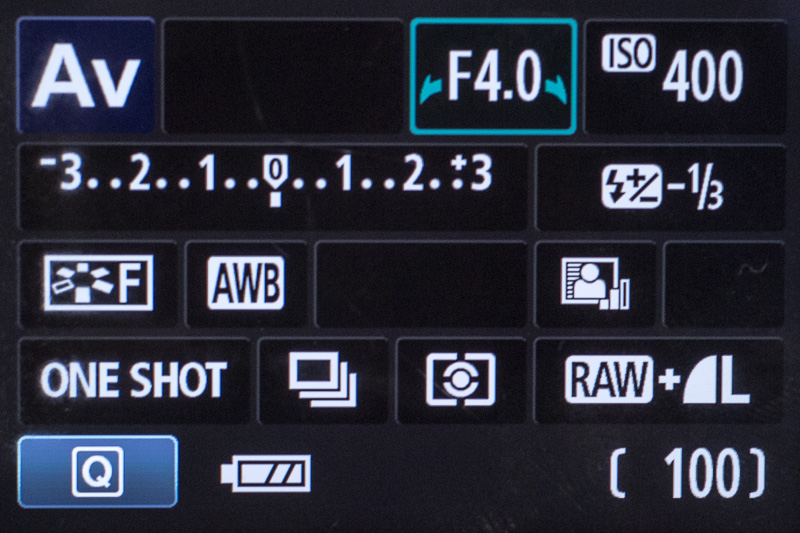
The easiest way to start experimenting with the feel and effect aperture changes has on your photos is to switch your camera to Aperture-Priority Program mode, usually marked with an A or Av on the camera dial or menu. This meters the scene and determines the proper exposure, but allows you to set the aperture and then it determines the proper shutter speed and sometimes the ISO to make the shot sharp. And every time you personally adjust the aperture, it will instantly make an adjustment to the shutter speed to ensure the same exposure. Give it a try. Shoot the same scene at your maximum aperture, then stop down and reshoot, and again, and again. Notice how the overall feel of the image can change subtly or dramatically based just on the overall depth of field in the final image.
Do remember that when looking through the optical viewfinder of a DSLR, the lens is at maximum aperture to offer the brightest view through the lens, both for you, and for the camera’s autofocus and metering system. From a focus and sharpness perspective, what you see is what you get (so long as the exposure is set properly). Even when you stop down the aperture setting, you are still looking through the lens at its widest aperture at that focal length until the moment of capture.
When you press the shutter button, the diaphragm blades contract to the chosen aperture for capture. And the resulting photo will have more depth of field than you saw through the viewfinder while composing. Depending on the model of camera, there’s either a physical Depth of Field Preview button, or you can simply snap a frame and do a quick review of the shot to check the depth of field and adjust as necessary. With time and practice with your favorite lenses, you’ll get to a point where you know pretty much exactly how the images will look while framing the viewfinder at a variety of apertures.

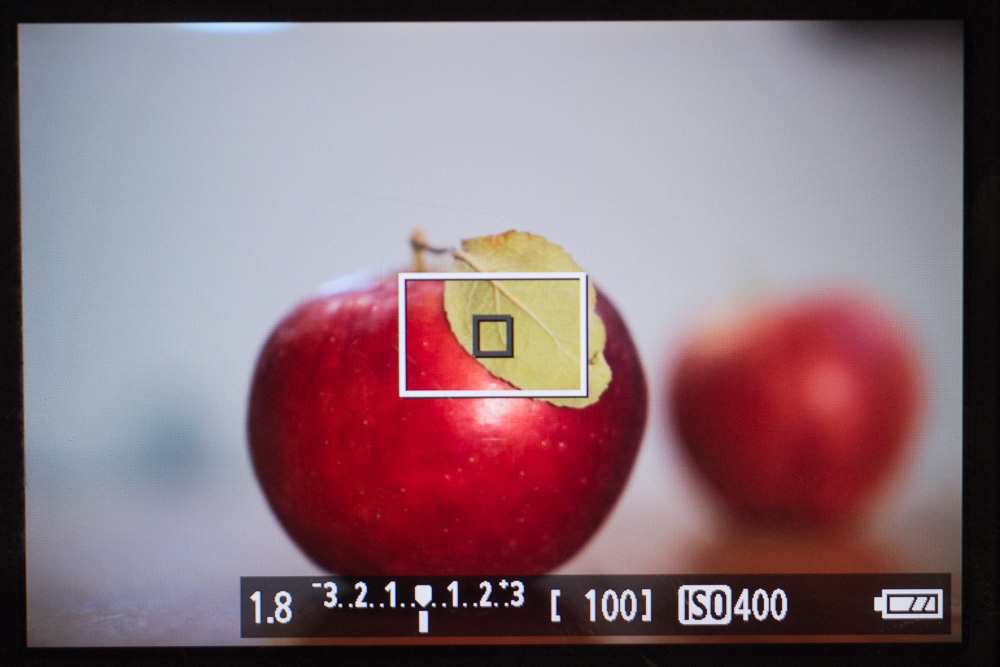
And of course, many of today’s DSLRs and all compact interchangeable lens cameras offer live view, and very often, Live View modes or video capture mode can offer a real-time preview of the expected image, including depth of field at the selected aperture (check your manual!). This can be very helpful in the creative decision-making process. Test, explore, practice and try different aperture and shutter combinations to get the right combination of depth of field and shutter speed in your images based on what you decide is most important for you.
Deciphering the maximum aperture in a lens name
This short video explains the differences between a prime and zoom lens, and how to determine the constant maximum aperture or variable maximum apertures in a zoom lens when looking at a lens name.
Got any questions for Jack on aperture control? Post a comment below!
For football action shots,what would a good aperture setting be? I will be using Sigma DG 70-300mm Lens.
this is so useful information, thanks sir for making me understand
I am confused about the statement, “So, an F1.4 aperture on a lens is actually an opening through the lens that has an area that is the square root of 2 in relation to the focal distance. ” I know that the f/stop is related to the size of the opening and the focal length of the lens. I always thought that it was the relationship between the f/stop numbers on a given lens that used the square root of 2. Since the area of a circle is pi (3.14159…) times the radius squared, in order to double the area you would need to multiply the radius by 1.414.. (square root of 2). The amount of light is proportional to the area of the aperture opening. And of course, there is an inverse relationship in that bigger opening = more light = smaller f/stop number. So, to get twice as much light reaching the sensor or film at f/8, you need to divide 8 by the square root of 2 which gives you approximately 5.6. So f/5.6 is one stop faster (double the light) of f/8.