Rectilinear ultrawide zooms like the Sigma 8-16mm f4.5-5.6 DC HSM can bring a whole new dimension of creative expression to photographers working with APS-C chipped DSLRs.
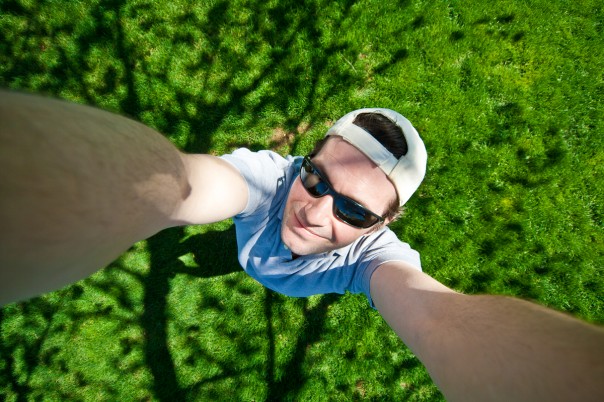
Unlike fisheye lenses, rectilinear ultrawide lenses keep straight lines straight from frame edge to frame edge but still take in sweeping angles of coverage.
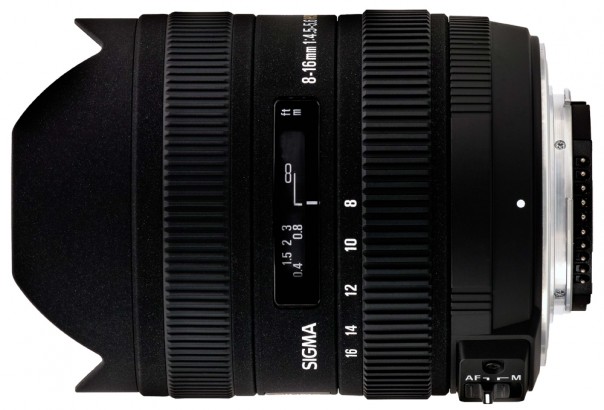
The Sigma 8-16mm f4.5-5.6 DC HSM takes in an impressive angle of coverage ranging from 114.5º at the wide end to 75.7º fully zoomed when paired with a 1.6x APS-C DSLR, like the Canon EOS Rebel XTi we used to make the photos to illustrate this piece. (This matches up pretty much exactly with the feel and field of view of a full-frame 12-24mm ultrawide lens on a full-frame camera.)
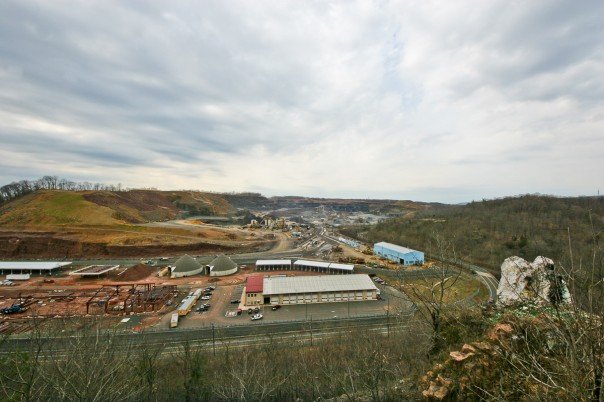
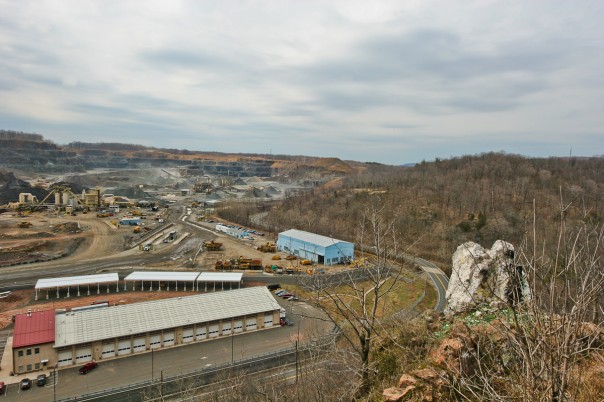
These two shots from the same vantage point show the widest 114.5º, and the most zoomed 75.7º angle of coverage of the Sigma 8-16mm f4.5-5.6 DC HSM . I recomposed the scene slightly between frames to keep the rocky point framed in the lower right foreground. At f14 and focused at infinity, everything in the frame is sharply captured in both images.
Like a full frame fish, the Sigma 8-16mm f4.5-5.6 DC HSM is capable of very close focusing (9.4 inches, to be exact), which can be used to dramatically emphasize foreground elements and exaggerate perspective while taking in sweeping expanses of real estate. (And also keep in mind that stopping down the aperture while close-focused at 9.4 inches can give you foreground sharpness even closer than the minimum focusing distance.)
You can read all about the cool technical features and functions of this lens, including its FLD glass, Super Multi-Layer Coating and aspherical elements that help you make sharp, crisp images with well-controlled flare here.
Ultrawides, like all lenses, have their own personalities, based on the optical physics behind the breed. Here’s some real-world tips and advice for making your ultrawide shots as strong as they can be for people, places, and things.
Built-in Flash? No way!
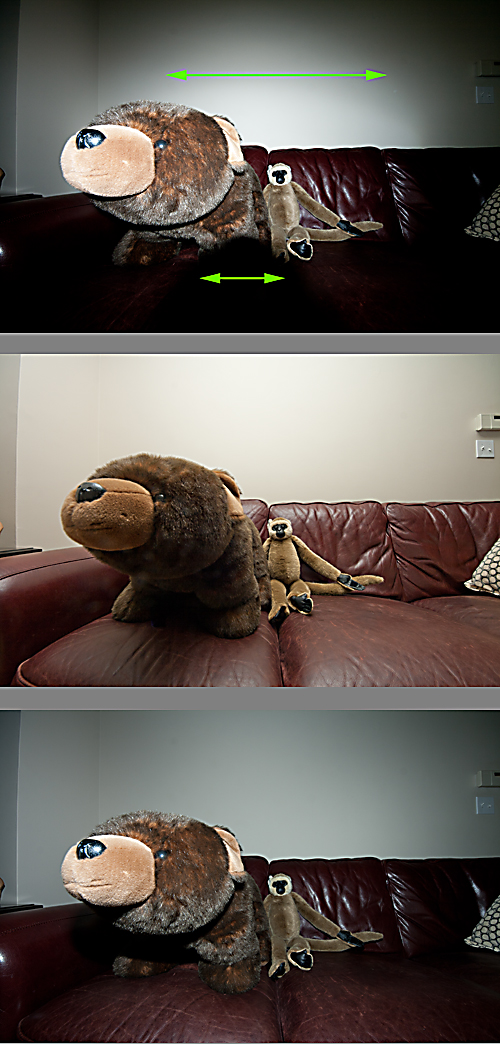
The pop-up flash on your DSLR might be good for certain things, but when it comes to working with the ultrawide Sigma 8-16mm f4.5-5.6 DC HSM forget about it! As you can see in the top image of these stuffed animals on a couch, there are two issues with using the pop-up flash on my DSLR: the total angle of coverage, and lens barrel shadow, (shown with green arrows).
If you are indoors, and have a shoe-mount flash available, this is a better option. You can either bounce your strobe off the ceiling as we show in the middle image, (I suggest cranking up your flash output at least ⅔ EV when bouncing off a ceiling–experiment), or if your strobe has a built-in wide-angle diffusion panel, you can pop this in front of the strobe and fire away, as we show in the bottom image. Under different circumstances, either the bounce or the diffusion panel method may be more pleasing. My suggestion: try both, and see which one works better for you and the moment in front of the camera.
Outdoors, most of the time for fill light, you don’t have anything to bounce the strobe off, so you’ve got to go with the diffusion panel for fill when using a shoe-mount flash.
Another option for outdoors fill-light is to use an off-camera strobe, triggered either wirelessly or via a shoe-cord, to give directional light to the foreground subject, as I did for the outdoor portrait for my intro blog post for Sigma. For these shots, I’ve got a corded off-camera strobe pointed at the front element of the camera and my face, dialed back to -⅔ EV. Again, experimentation is the key.
Perspective Shots
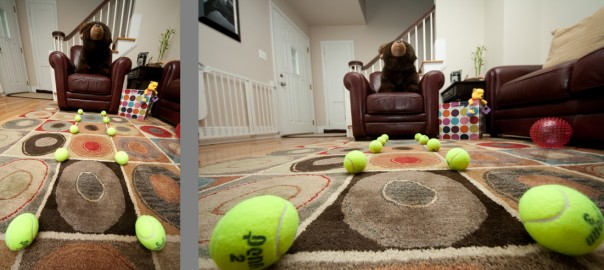
Which of these two interior shots is less unsettling to your eye?
I’d wager that the greater majority of viewers will answer that the right image is less unsettling. The reason for this is simple: the chair and banister posts at center of frame are much closer to parallel with the edges of the frame. In the left image, no set of parallel lines is plumb or anchored to anything, which creates a sense of disorientation with architectural shots. (With natural scenes that do not feature much, if anything, of simple geometry, this is much less noticeable–compare these with the two vistas earlier in the article.)
Here’s the takeaway: Indoors or out, when shooting manmade scenes with lots of right angles, make sure that at least one set of lines in the composition is parallel to an edge of the frame to both anchor the viewer’s eyes and lead them into and around the frame.
Moving the camera around even slightly can give dramatically different results when shooting with an ultrawide lens. Low to the ground and parallel with the far wall gives a very different sense of perspective than shooting from a slightly higher position at a downward angle, as you’ll be able to see in the next section. Again, experimentation is the key to see which feel is best and most effective for your chosen scene.
(And yes, the right image would be even less unsettling were the lines emphasized by the tennis balls perfectly parallel with the bottom and top edge of the frame, too.)
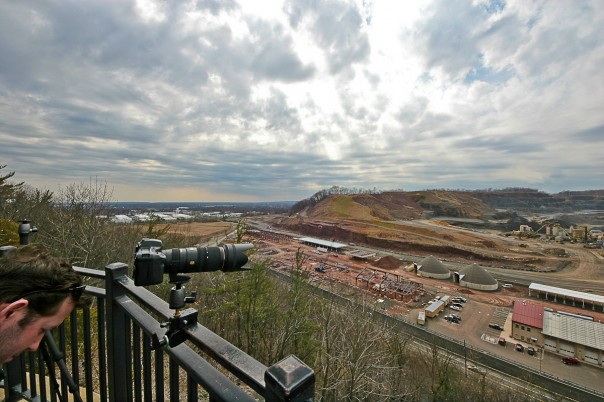
Now, here’s an outdoors “behind-the-scenes” shot from this same vantage point while I was working on this time lapse video. Notice the railings and the camera are at right angles to the bottom of the frame: this, along with the horizon line helps anchor this image that has both manmade and natural features.
Groups of people, portraits, and forced perspective
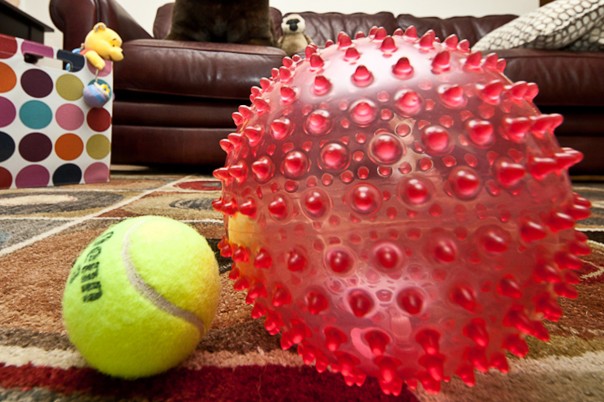
Here is a really boring image of two balls, lined up next to each other to give an accurate representation of the size and volume of each sphere.
As you can see, the red spiky ball is much larger in diameter and volume than the yellow tennis ball in terms of absolute geometry.
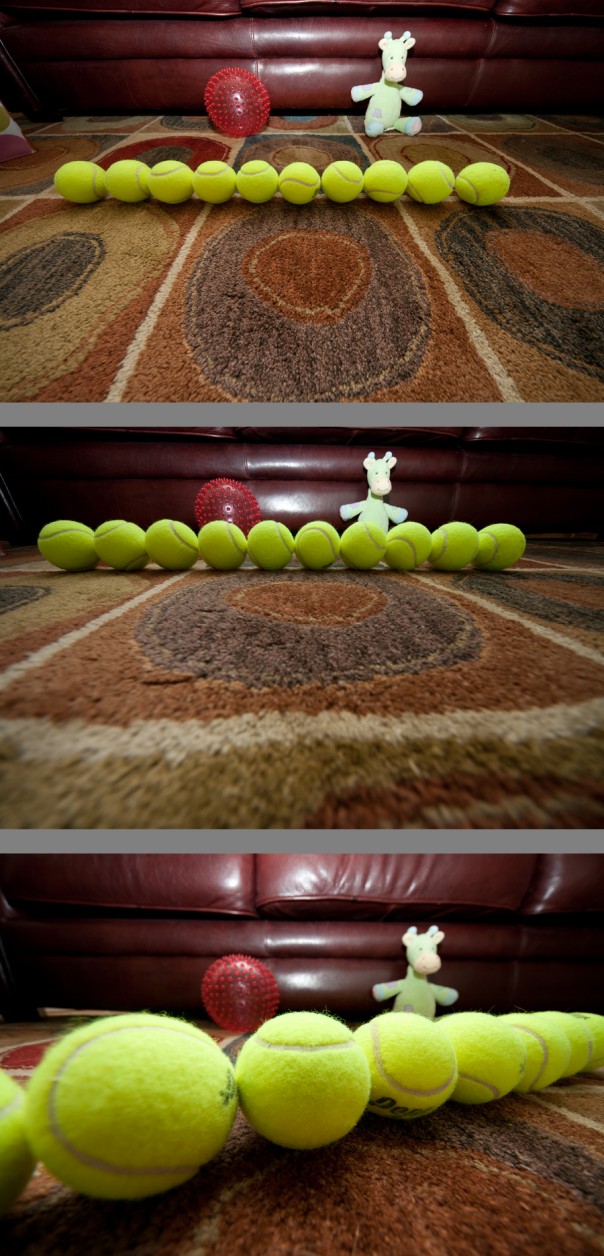
Now, here are three different compositions featuring this red ball and a whole group of tennis balls lined up in a row (and George the Green Giraffe, too!)
Now, imagine for a moment, that these yellow spheres aren’t really tennis balls. Maybe it’s a wedding party, or folks at a family reunion, but whatever scenario you choose, think of these tennis balls as people (and perhaps your paying clients?) for the next few moments.
Of these three compositions, which would be least likely to please the subjects? The greatest majority of people would answer with the bottom image because the apparent size of the tennis balls shifts dramatically from left to right in the frame, so the “people” who are closer to the camera will have much bigger heads than those to the right of the frame. True, human dimensions vary from person to person, but it’s not usually a good idea to amplify or exaggerate the effect in a formal or staged portrait!
Now, as for the top and the middle image, both of these keep the line of tennis balls parallel to the sensor’s capturing plane, but there are some differences between the two that are worth a few minutes of contemplation.
The top image is shot at a slightly downward angle, which makes the foreground fall away a bit more than in the middle image. Shooting a group of people from a slightly elevated perspective can very often be flattering, so long as you don’t skew the angle to fun house perspectives.
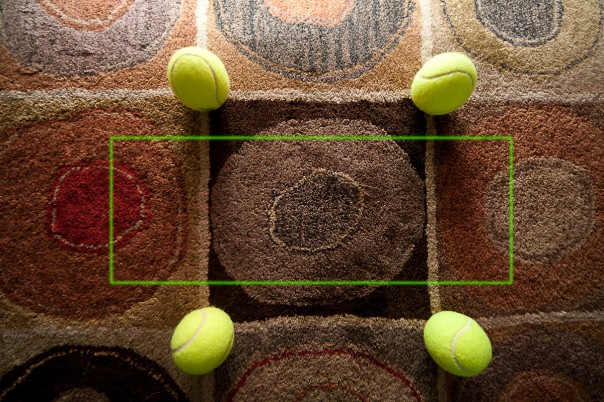
See the highlighted green rectangle in this image? This central area of the frame has the flattest field and least perspective amplification–meaning, a group of people standing shoulder-to-shoulder, parallel to the sensor plane, will appear in your image virtually as they appear in real life. Moral of the story: if you can, fit your group near the center of the image, and include lot of the ambience of the location when you want true person-to-person scale in your ultrawide shots.
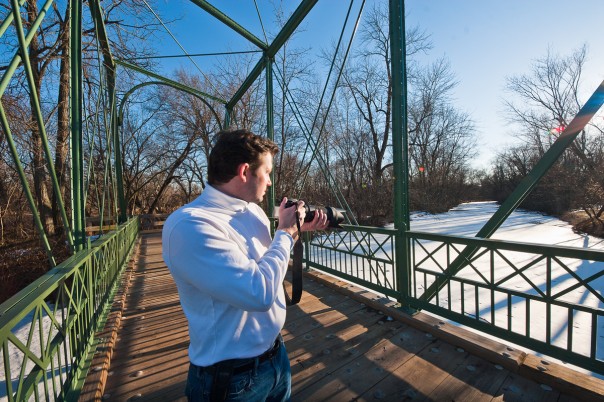
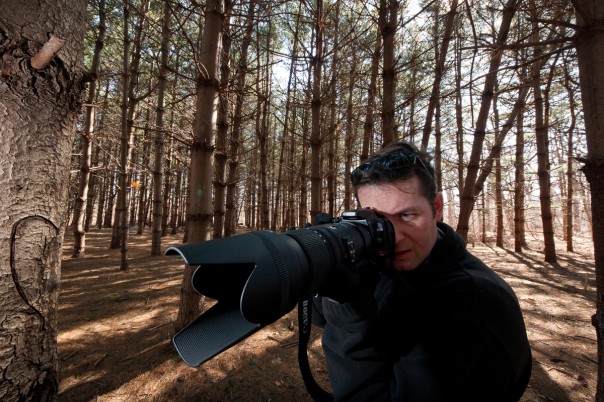
Now, check out these two very similar outdoor self-portraits, both shot at 8mm with this lens. Both shots feature me, outdoors, near the edge of that green zone I illustrate above. In both shots I’m holding a camera with the Sigma APO 70-200mm F2.8 EX DG OS HSM attached. Both shots feature strong vertical elements to frame the space around me. Both shots show degrees of perspective exaggeration. (And both shots didn’t make the final edit for our front-page campaign.)
In the bridge shot, the white shirt really amplifies the perspective exaggeration. My shoulder and upper arm appears bigger than my head! And pay attention to the size of the camera and lens when it is twisted farther away from the sensor plane. (And also note the perfectly parallel vertical lines of the bridge, which anchor the image.)
Now, let’s examine the shot in the woods. Here we’ve got an off-camera strobe pointed straight up the lens barrel to give foreground fill since we are shooting into a backlit scene which really emphasizes the lens on this camera for cool effect. True, there is a bit of a big-shoulder situation in this frame, too, but the black jacket and deeper shadows hide that very well. The trees are mostly perpendicular to the earth, save for the natural variations in the tree growth. Personally, I prefer my representation in the second image, and I would reckon most subjects would probably feel similar.
There are times when the size amplification treatment can be used for very cool and fitting purposes: imagine a martial arts teacher in a high-kick pose with her foot just inches from the camera, a boxer extending a glove, or a low angle shot up a skateboarder in mid-trick to make much of the frame board and feet in mid-flip with a very fallaway perspective up at the sky. Just be sure you know when and where you are pushing the envelope.
Very Wide Angles–where/how do you measure/meter?
The field of view captured by an ultrawide lens takes in sweeping expanses of real estate, both indoors and out, and this can present some challenges for metering properly. Look at any of the outdoor images in this story so far. How and where you meter in these scenes can give you very different exposure settings.
Setting your camera to Partial/spot, average, or evaluative metering may or may not result in the best exposure, depending on the situation and what you want to emphasize. If you meter for the sky, you might push the shaded landscape into deep shadow. And exposing on the shaded landscape may significantly blow out the sky.
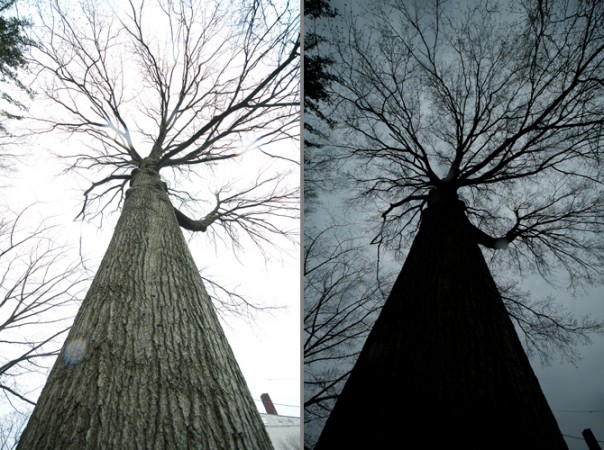
Partial metering for the shady side of a big tree and metering for a dramatic sky results in two images with very different exposure times, and overall image feel. And oftentimes, metering for the extremes in the scene isn’t what you’re after at all!
All metering modes look at some or all of the range of tonal values in the frame to determine a good exposure. And when there is a very wide field of view, there is very frequently a very wide dynamic range in the scene.
If you are going with Average or Evaluative metering, having the sun in the frame is going to seriously challenge your meter and can result in seriously underexposed frames. If you want to use these metering styles when the sun is in or near the frame, I suggest metering a similar slice of the landscape and sky without the sun, locking in that exposure, and re-composing.
I personally usually go with spot/partial metering and look for a gray-card proxy somewhere in the frame: green grass, wet sidewalk, slate stones, faded asphalt, etc, and use this as a baseline, check my in-camera histogram, and adjust my exposure up or down based on the test shot(s), which is how I chose my exposures for all the outdoor shots we’ve looked at so far.
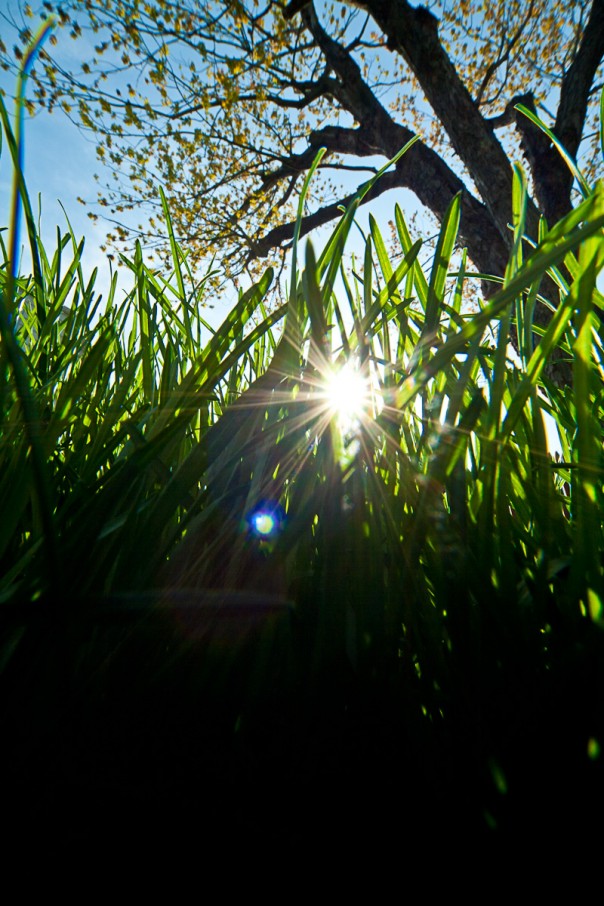
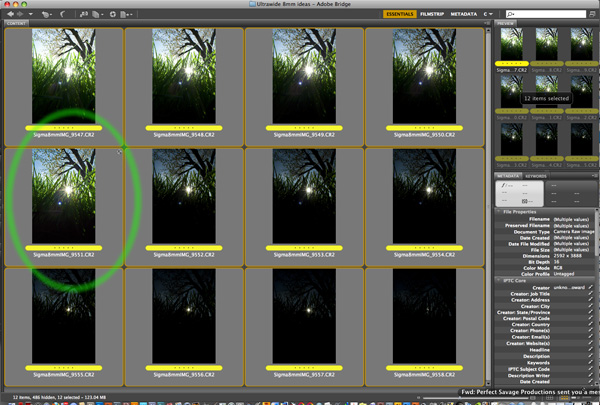
Here’s a shot straight into the sun, through tall, young, blowing grass. There was a light wind, and the grass was swaying between each frame, making it very, very challenging to try to lock in an automatic exposure. I close-focused, stopped down to f14 to allow for virtually on-the-lens depth of field, and cranked the exposures from 1/4000 to 1/15 second in ⅔ stop increments to see which exposure would give the most pleasing balance of backlit grass, blue sky, and sun diffraction.
The winning frame? 1/125 sec @ f14 at ISO 100–pretty darned close to the classic “Sunny 16” rule, in other words!
If you’ve got any additional pointers for shooting with this lens, please share them! And if you’ve got any more questions for about the Sigma 8-16mm f4.5-5.6 DC HSM please ask away!

Amazing lens! outstanding results. I have mentally framed so many subjects with different perspectives and angles to capture with 8-16mm lens on my Canon 7D body! I am using 16-35mm L II USM lens for architectural and landscape photography which falls short of that ‘true’ WA feel on a APS- sensor. Must own it . now!!